The Wrapping text feature around the image gives readers a strong visual clue about your text. And it aids you in creating a custom mail template for the receiver. That’s why Outlook has a system to wrap text around pictures to make them look the way you want.
This article will guide you through wrapping text around pictures, with which you can create your custom email body in Outlook. So without wasting further, let’s jump in.
Follow our guide to add border around text in Outlook.
How to Wrap Text Around Images in Outlook Desktop App
To align text around images in the Outlook desktop version, you need to insert the image in your email body, click on the picture and go to the Wrap Text button. Then select your desired wrapping text option. You can also auto-wrap text around images using the Editor Options from Options.
This part will show you the quickest way of wrapping text around images so you can position your images more significantly.
Check out the easiest way for automatically add signature in Outlook.
Here are the steps to wrap text around images in the Outlook desktop app:
- Open the Outlook application and Create a new mail.
- Insert the Picture in the email body after wiring the email.
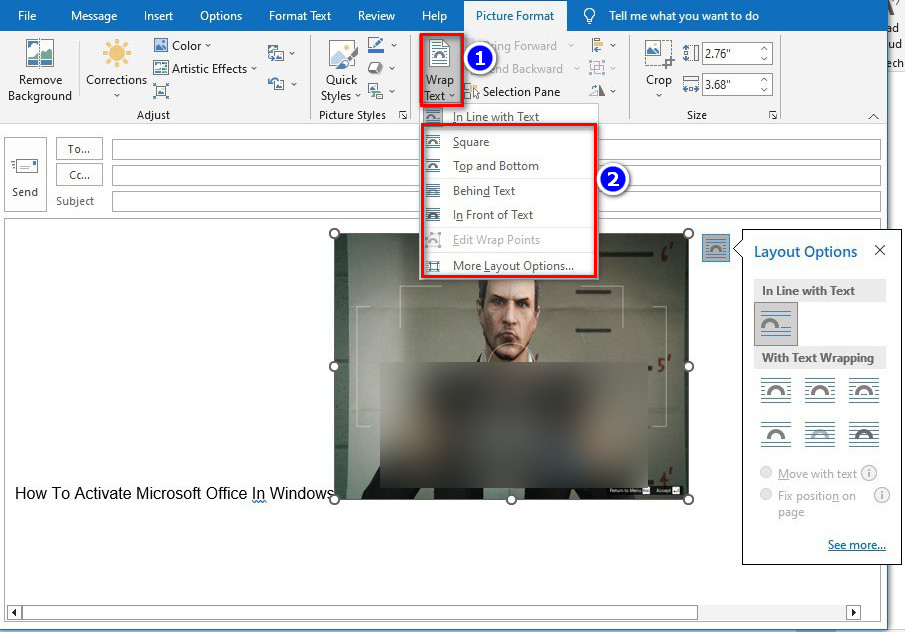
- Click on the Picture and go to the Picture format tab(Format tab, for Outlook 2013 or older).
- Select the Wrap Text button and choose your desired option from the list.
- In Line with Text.
- Square.
- Tight.
- Through.
- Top and Bottom.
- Behind Text.
- In Front of Text.
After clicking the option, you will see your picture is aligned as per your choice. If you use the same picture wrapping style in every email, you can also use auto-wrapping. Jump below to set up auto-wrapping in Outlook.
Go through our epic guide on create a shared calendar in Outlook.
Here are the steps to add auto-wrap text around all pictures/images in Outlook:
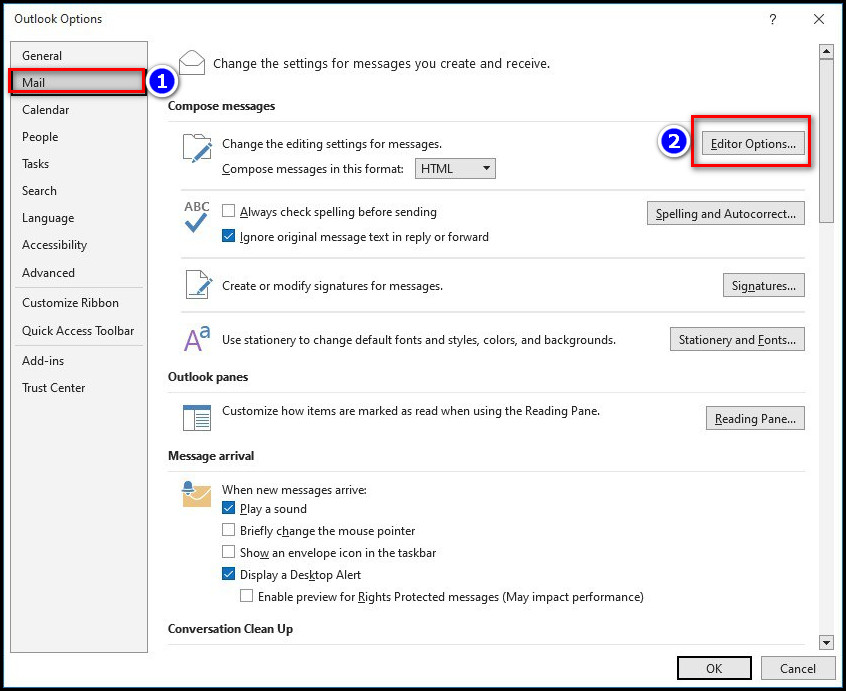
- Open the Outlook application on your desktop and go to the File tab.
- Select Mail from the left and click the Editor Options button.
- Go to the Advanced option from the Editor Options dialog box.
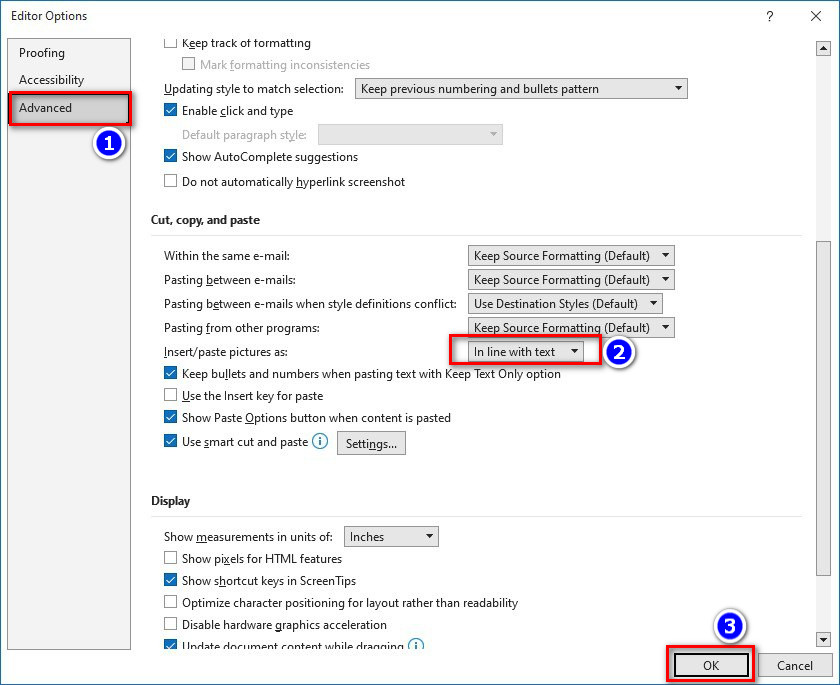
- Click the down arrow next to the Insert/paste picture.
- Select any wrapping style from the drop-down list and press the Ok button.
After completing the steps perfectly, the picture will auto-wrap whenever you insert any new one.
However, aligning text around images sometimes isn’t enough to create a custom mail format. You need to be creative. In that case, change the font, align bullet points in Outlook to make your email more reachable.
How to Wrap Text Around Pictures in Outlook for Mac
The Outlook application for Mac also lets you wrap text around pictures. But the process is different from the steps of the Windows counterpart.
But no need to worry. In this part, I will show how you can wrap text around pictures in the Outlook Mac version. Let’s see how to do it.
Check out the easiest way for how to customize ribbon group policy in Outlook?
Here are the steps to wrap text around pictures in Outlook for Mac:
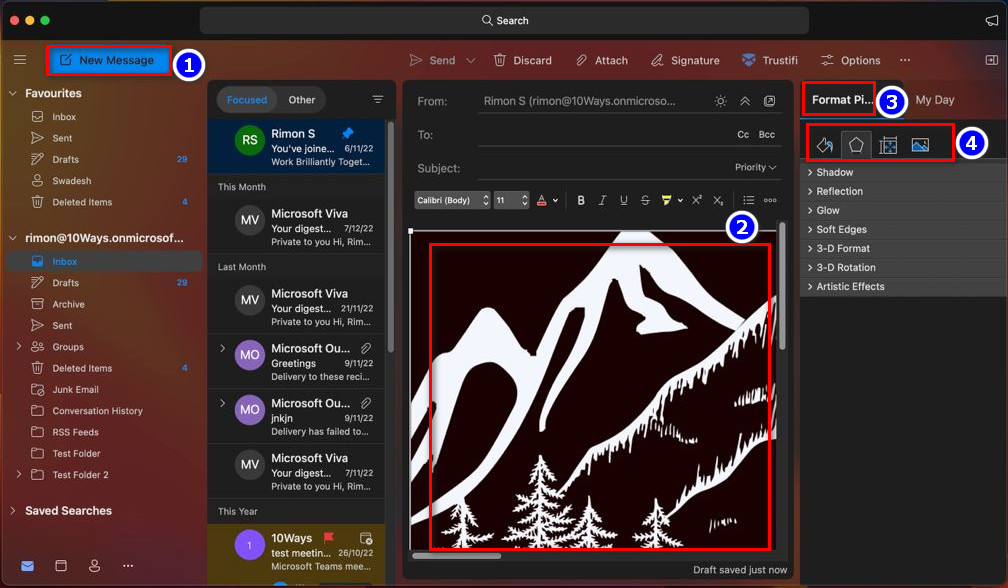
- Open your Outlook application and Create a New email.
- Write your message in the email body and select the picture you want to insert.
- Drag and Drop the image into the email body.
- Click on the image again, and select the text box from the Format pictures option.
After completing the steps, you can wrap the text of your choice. But you can’t wrap text around all pictures; you will see the wrap text blurred out for those pictures.
You can also wrap text around photos in Outlook signatures. However, many users have faced images not showing in the Outlook signature after adding the pictures. You can follow the guide to solve your issue once and for all.
You can also read fix Outlook could not create the work file to solve the file creation issue.
FAQs
Can You Wrap Text Around Photos in Outlook 365 Or Outlook Web?
No, you can’t wrap text around photos in Outlook 365 Or Outlook Web. The option is only available in the Outlook application for Windows and Mac.
How do I make an Outlook signature look pretty?
You can make any Outlook signature look pretty by wrapping text around pictures in the signature section.
Conclusion
In short, the wrap text feature around the image helps customize your emails which can catch your receiver’s utmost concentration. This feature can make your message carry more weight and adjust the character number for the line.
After reading the article, I’m sure you now know the steps to wrap text around your photos in the Outlook application for both Windows and Mac. Comment if you face any problems while applying the steps.
And for everything else, stick with 10 Scopes.