A shared calendar helps you ease up project planning, blocking off non-working time and so on.
Also, it helps organize schedules even in working remotely.
Microsoft had this shared calendar feature since Outlook 2007, but a lot has changed in terms of creating, sharing and implementing it.
But no worries, this article will guide you through creating a shared calendar that everyone can view. So without delay, let’s jump in.
Check out our separate post on how to disable top results from Outlook search?
To make a shared calendar in Outlook, you need to create a new one and then share it with others. You can share the Outlook calendar with others by inserting their email addresses and allowing access. Also, you can send Outlook’s calendar share invite via mail.
Here are the steps to create shared calendars in Microsoft Outlook:
1. Create A New Calendar
Before sharing the calendar, you need to create a new calendar. Follow the steps below to make a new calendar in Outlook quickly.
Here is the process to create a new blank calendar in Outlook:
- Open the Outlook app on your Windows PC.
- Select the Calendar icon from the bottom navigation bar.

- Click on the Home ribbon and choose Open Calendar.
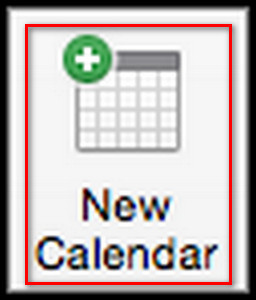
- Select the Create New Blank Calendar option from the list.
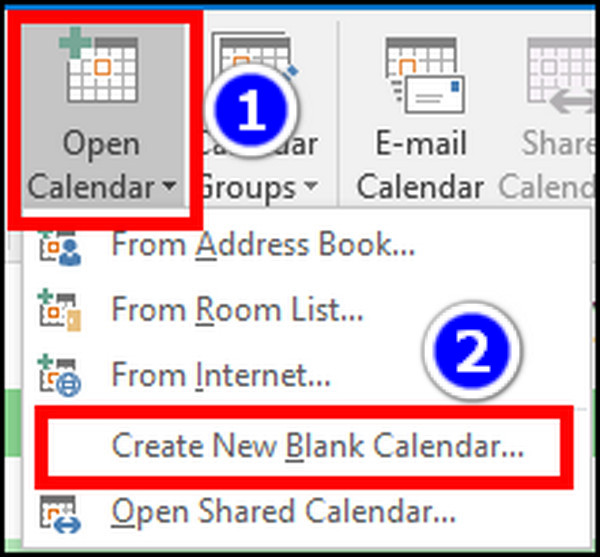
- Type a Calendar name and press OK.

After creating a new calendar, you can start sharing it with other users. You can follow these same steps for outlook 2016, outlook 365 and also other versions of Outlook.
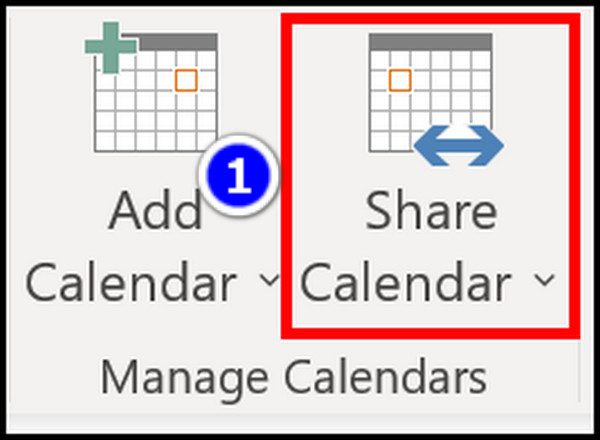
Click the Share Calendar option from the Home ribbon to share a calendar with others. From there, you need to select that specific calendar from the list and input the Person’s name or email address in the Permission window. Then press the Ok button.
In this section, I’ll demonstrate how to share a calendar in Microsoft Outlook. Let’s see how to do it.
Here is the method to share a new calendar in Microsoft Outlook(Windows app):
- Open the Outlook app on your Windows PC.
- Select the Calendar icon from the bottom navigation bar.
- Click on the Home ribbon and select the Share Calendar button.
- Choose that new calendar from the list.
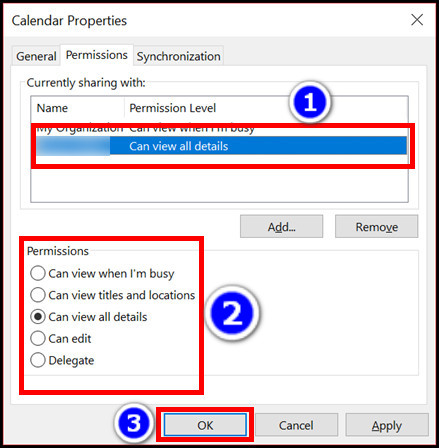
- Go to Properties and press the Add button.
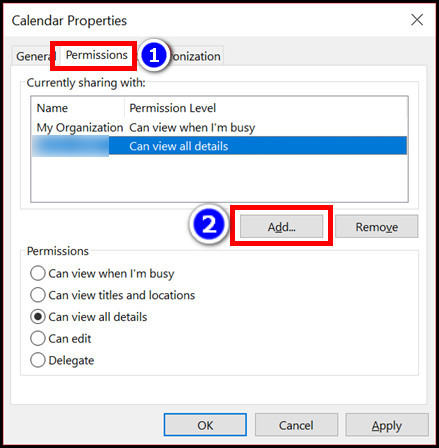
- Select the person from Outlook Address Book.
- Click on the user’s name or email in the Permission tab.
- Choose the permission levels as you see fit.
- Select OK to save changes.
From the permission level, you can share the calendar in outlook that everyone can edit.
Check out the easiest way about convert Outlook meetings to Teams meetings.
Users can add other persons to a shared calendar by inserting that person’s email address or name in Calendar Permissions in Outlook for Mac. But you need to create a new calendar for this process.
However, the process is different from the windows verson. Follow this part for a step-by-step guide to adding a shared calendar in Outlook for Mac.
Here are the steps to set up a shared calendar in Outlook for Mac:
1. Create a blank calendar on Mac
- Open the Outlook app on your MacBook.

- Select the Calendar icon from the bottom toolbar.
- Go to the Organize tab and select the New Calendar option.
- Input the calendar name.
- Press the Return key on your keyboard.
- Open Outlook for Mac and select the Calendar icon from the bottom toolbar.
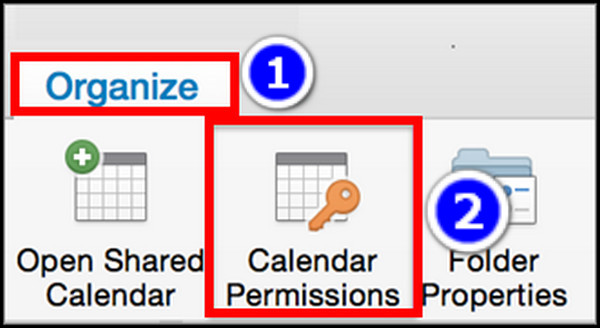
- Select your calendar and click the Organize tab from the top.
- Choose the Calendar Permissions button.
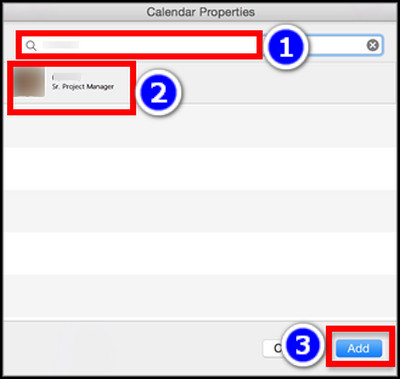
- Go to the Permissions window and select Add User.
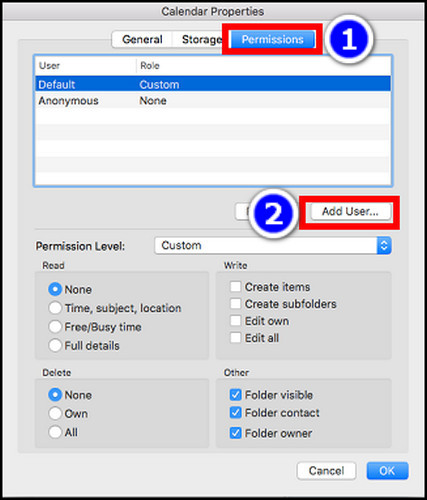
- Search for the person’s email address and click the Add option.
- Click on the individual’s name in Calendar Properties and choose the Permission level from the drop-down list.
- Click OK to start sharing the calendar.
You can use this method to add a shared calendar in Outlook for mac that everyone can edit.
Follow our guide to fix Microsoft Teams not integrating with Outlook.
You can also create and share a calendar in Outlook web; the steps are quite easy to apply. Just create a new calendar and share it by inserting the recipient name/mail in the Sharing and permissions section.
Here are the steps to share a calendar in Outlook Web:
1. Create A Blank Calendar In Outlook Web
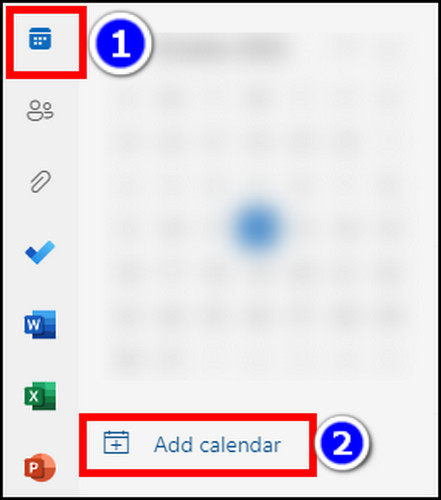
- Visit Outlook Web using a browser and sign in to your account.
- Open the Calendar from the left collum and select Add calendar.
- Choose the Create blank calendar option and input the calendar name.
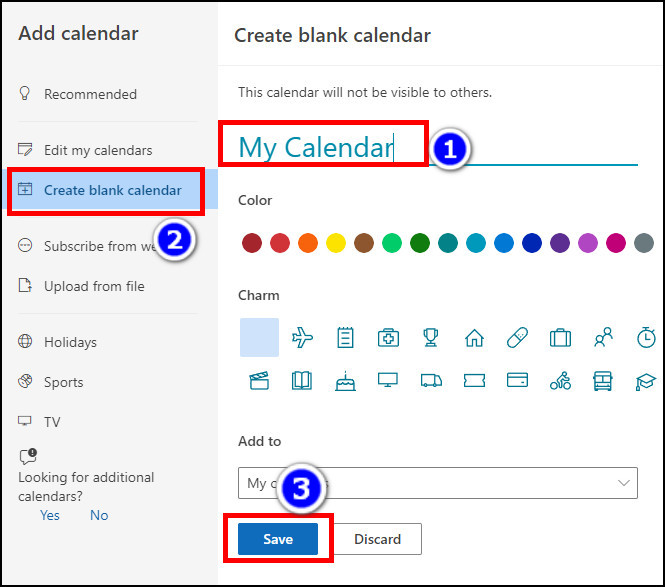
- Click on the Save button to create a blank calendar.
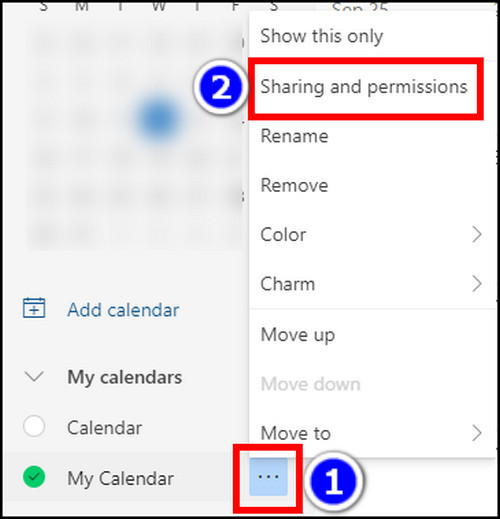
- Open Outlook Web again and go to the Calendar section.
- Click on the 3 dots icon next to your selected calendar name.
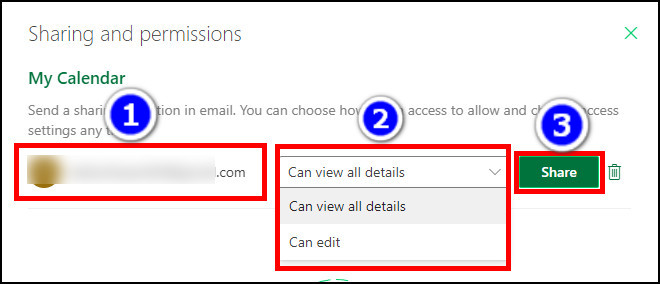
- Select Sharing and permissions option.
- Input the recipient’s email address in the box and click the recipient icon.
- Select the necessary permission form drop-down menu.
- Select Share to give access.
Related contents you should read about Outlook: your mailbox is over its size limit message, how to recall an email in Outlook.
FAQs
What’s the difference between a shared calendar and a group calendar?
Usually, the shared calendar is used for managing one’s assignments, and the team leader uses the group calendar to coordinate meetings and other tasks.
Can 2 people share the same calendar in Outlook?
No, only one person can share one calendar from outlook. But multiple people can view the same calendar if they get access.
How can you add a shared calendar on Outlook for multiple users?
To a shared calendar for multiple people, you need to navigate to Calendar > Share Calendar, Select the Calendar, add multiple persons, and press the OK button.
Conclusion
In short, to create Outlook’s shared calendar, you need to open a new calendar, add the user’s mail address to the book, and give the necessary permission. You can always manage the shared calendar permission to stay one step ahead of other users.
After reading this article, I’m sure you now know the steps to create shared calendars in the Outlook application. Comment if you face any issues while applying the steps.
Peace!