A ribbon is a set of graphical control elements in the form of toolbars situated on multiple tabs. The ribbon composition includes various large and tabbed toolbars, graphical buttons, and other graphical control elements. All the elements are grouped by their functionality.

Outlook offers a practical set of toolbars as a ribbon to assist users effectively. Besides all the great features, Outlook gives the ability to modify the ribbon as the user needs. You can easily customize the ribbon group policy for best usage.
Under the Customize Ribbon pane, users can create a new custom group, change the group order, rename a group, or remove a group. Keep reading till the end to customize your ribbon group in Outlook.
What are ribbon display Options in Outlook?
The ribbon is a set of toolbars at the top of the Outlook application to assist the user in finding and performing any complicated task. There are three ribbon display options in Outlook to help the user. They are auto-hide ribbons, show tabs, and show tabs and commands.
Here is the list of the ribbon display options in Outlook:
Auto-hide Ribbons
When the auto-hide feature is turned on, all the available ribbons in Outlook hide and provide a larger space for the application windows, people use this feature for better space management.
Show Tabs
In the Show Tabs mode, users can only see the available ribbons tabs. However, users can not see the detailed commands in the Show Tabs mode.
Show Tabs and Commands
This is the default setting for ribbon in Outlook. In this mode, users can easily see all the Tabs and the commands with details.
Read more on how to Disable Top Results from Outlook Search.
How to Customize Group Ribbon Policy?
Using the ribbon in Outlook can increase your working speed and save valuable time. There are several groups of ribbons to assist the user in improving efficiency. Customizing the ribbon according to the user’s needs can be very handy.
You can create a new custom ribbon group, change the group order, rename a group, remove a group, and even replace a default group with a custom group. Follow the below instructions to customize your ribbon groups.
Here are the steps to customize the group ribbon policy:
1. Create a New Custom Group
You can create a custom group effortlessly in a new or default tab. When you are focused on a specific task and need a ribbon with the most related features, you can simply create a group by following the below methods.
Here are the methods to create a new custom group:
- Open any Office application.
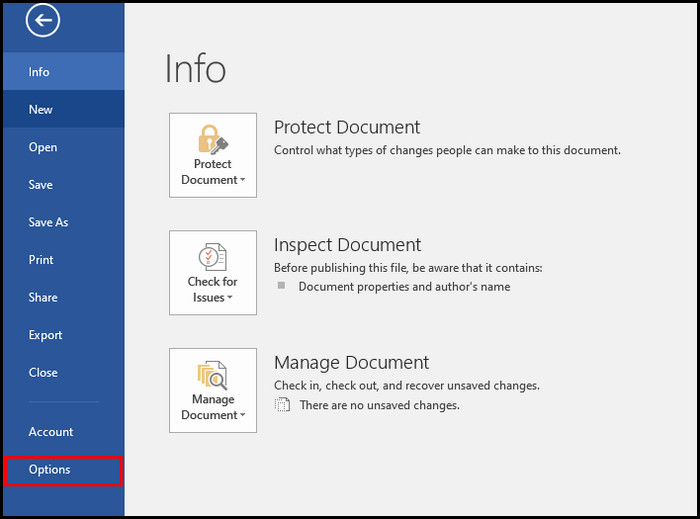
- Click on Files and select Options from the left-bottom corner.
- Go to Customize Ribbon from the left pane.
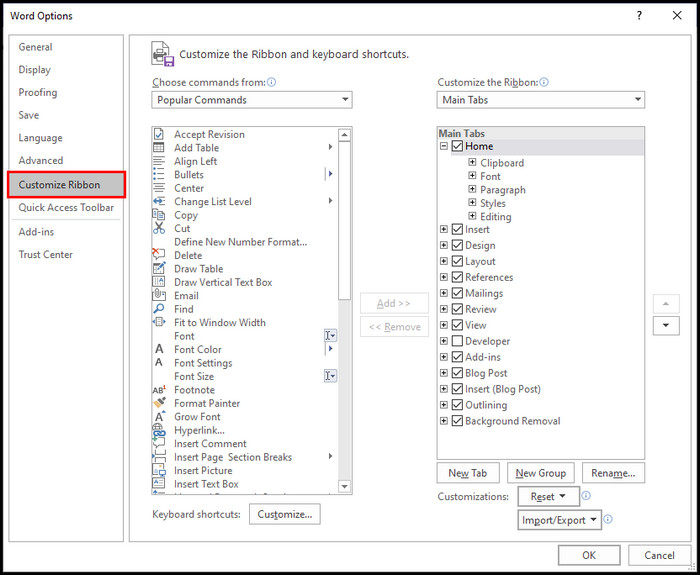
- Select the tab that you want to create a group under Customize the Ribbon section.
- Click on the New Group.
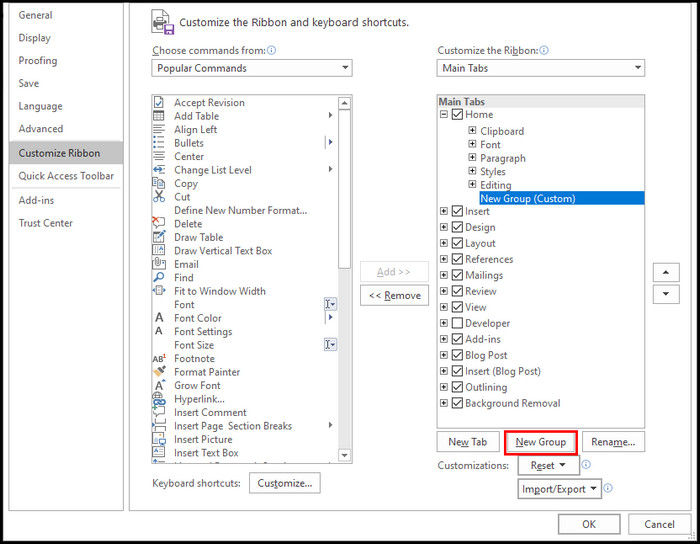
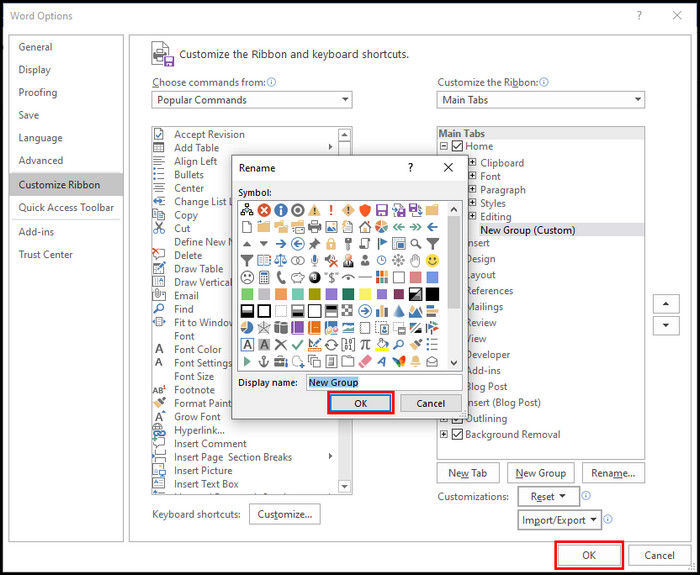
- Right-click on the New Group.
- Select Rename.
- Add a new name and logo for the New Group.
- Save the changes by clicking OK.
- Click OK again.
You have successfully created a new group under the Customize Ribbon section. You can follow the same methods whenever you need to add a new group.
Follow our guide on how to Add Yahoo Mail in Outlook.
2. Interchange the Group Order
Sometimes, adding a new group ribbon is not enough. You may need to change the group order for better visibility. You can quickly change the group order by following the subsequent methods.
Here are the ways to interchange the group order:
- Launch any Office application.
- Select Files and go to Options from the left-bottom corner.
- Navigate to Customize Ribbon from the left pane.
- Expand the group tab under Customize the Ribbon section.
- Click on the group name that you want to change the order.
- Use the Move Up or the Move Down arrow until you get your desired order.
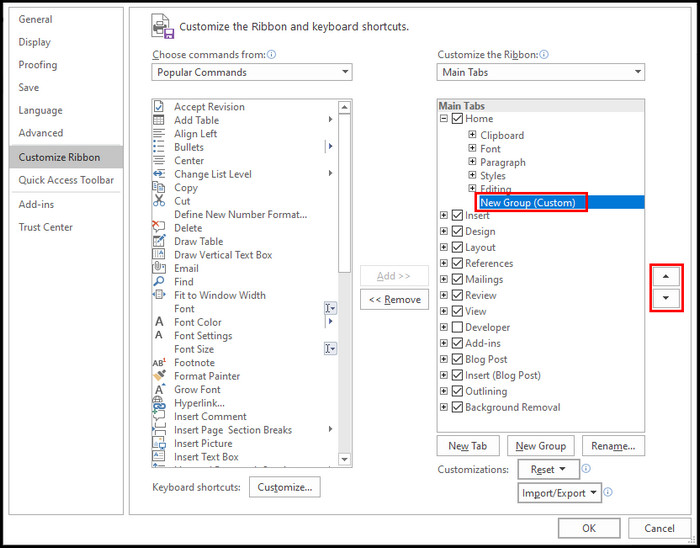
- Click OK to save the changes.
You can efficiently move a group within the tab. Additionally, you also can move a group to another tab when needed.
Check out our separate post: Outlook Rules not Moving Emails to Folder.
3. Rename a Group
When you need to change a group name for better understanding, you can rename a group quickly from the Customize Ribbon settings. Go through the below methods to rename a group.
Here are the steps to rename a group:
- Start any Office app.
- Click Files and go to Options.
- Switch to Customize Ribbon pane.
- Select the group that you want to rename under Customize the Ribbon section.
- Click on the Rename button.
- Set a new name (You can also add a new logo).
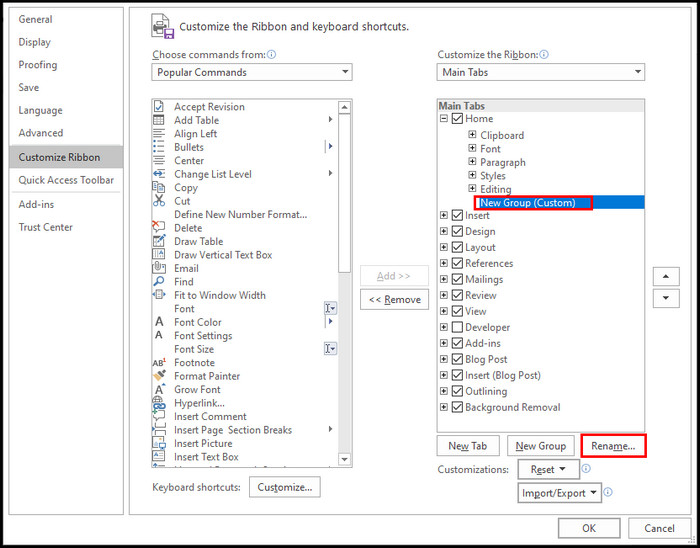
- Select OK to confirm the new name.
- Click on OK to save the changes.
You can easily change a group name by following the above steps. There is no limitation on changing the group name. So keep changing the name until you find a perfect one.
4. Remove a Group
After creating a group by mistake or a group that does not apply to you anymore, you may need to change the group content or eradicate the group. Try removing the group by following the next steps.
Here are the methods to remove a group:
- Launch any Office program.
- Select Files and click on Options.
- Navigate to Customize Ribbon pane.
- Select the group under the Customize the Ribbon section.
- Select Remove or right-click on the group name and click on Remove.
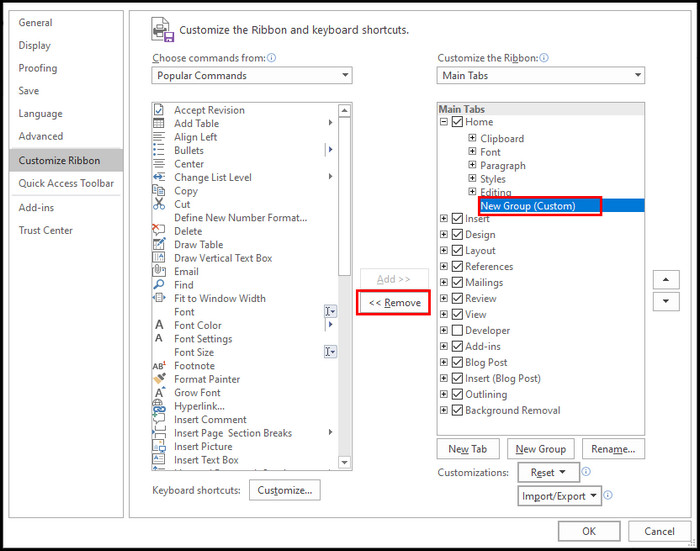
- Click OK to keep the changes.
Before removing any group, ensure you want to remove the group because you can’t undo the process.
Read more on the new post How Do I Know If My Email Was Recalled in Outlook.
5. Replace a Group
Microsoft doesn’t allow users to remove a command from a build-in group. However, you can create a custom group and set any comment inside the group. Follow the below instructions to replace a default group with a custom group.
Here are the ways to replace a default group with a custom group:
- Open any Office application.
- Select Files and click on Options.
- Switch to the Custom Ribbon pane.
- Locate and select the custom group under the Customize the Ribbon section.
- Select Main Tabs from the Choose Commands from the list.
- Expand the default tab that includes the group that you want to customize.
- Expand the default group.
- Select the command you want to add to the custom group.
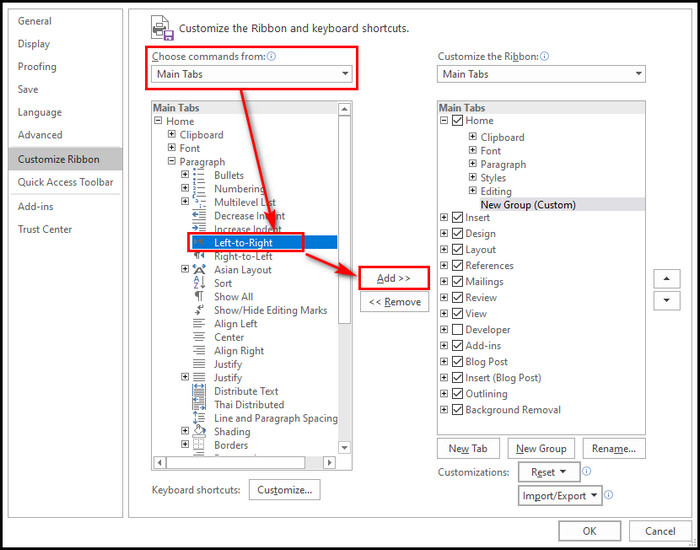
- Click on Add.
- Select OK to save the changes.
Following the above steps, you can effortlessly replace a default group with a custom group.
Frequently Asked Questions
How do you customize the ribbon in Outlook?
You can customize the ribbon in Outlook by clicking on the Files > Options > Customize Ribbon. Under Customize the Ribbon, select a new tab or group to add a new tab or group. Also, you can select remove to delete a tab or group.
How do I change the group policy in Outlook?
To change the group policy in Outlook, press the Windows+R key, type control in the textbox, and hit Enter to open the Control Panel. Navigate to Control panel > Administrative Tools > Group Policy Management.
How do I remove items from Outlook ribbon?
Navigate to Customize Ribbon, select the Main tab option under Customize the Ribbon, click on the tab and then the group, right-click on the command, and choose the Remove icon to delete items from Outlook Ribbon.
Final Thoughts
Using ribbon in Outlook can help you to improve productivity and save valuable time. Ribbon organizes all the essential features in one place that you couldn’t access without diving into the deep settings.
The customization of ribbon in Outlook is super efficient. You can easily modify the ribbon according to your daily needs. Fortunately, you can choose any default group commands in your custom group.
In this article, I have focused on every possible customization of the Outlook ribbon group. Do you have any additional queries? Mention them in the comment below.