It is common knowledge that all the files and data are saved on your HDD(hard disk drive) or SSD(Solid State Drive). You can label the partitions in your HDD or SSD.
Just like you, many others have the same questions as to how they can label partitions on Windows 11. It is very easy to do this and this post tells you how you can do that in great detail.
I label my partitions to keep my files and folders separated in an ordered manner. I am pretty sure many users keep their movies, games and similar types of files in one drive and work-related files in another drive.
Why label partition name on Windows 11?
If you are confused about how to label apportion or rename one, look no further as I have conducted thorough research and written the best methods you can follow to label or rename a partition on windows 11.
Read the full post to know more details.
How to Label Partition Names in Windows 11 | Explained
There are many procedures that you can follow to label or rename a partition on Windows 11. I have written the best methods that I could find in the simplest manner for your understanding.
Just go through the methods and I guarantee you that you will be successful in labeling or renaming a partition on your Windows 11 device.
Here are the methods to label or rename a partition on Windows 11:
The Settings menu has been in every version of Windows. Everything must have a Settings menu to change and customize some settings.
You use the Settings menu on Windows 11 to label or rename the partitions on your PC.
Thankfully, it is very easy to access the settings menu and to label the partitions from there.
There is no reason to be tensed as the process is straightforward and you can do this in no time. Just follow the steps below and you will be able to rename r label a partition on your PC.
Here are the steps to label a partition on Windows 11 using the settings menu:
- Press the Windows and I keys on your keyboard at the same time to open the Settings menu.
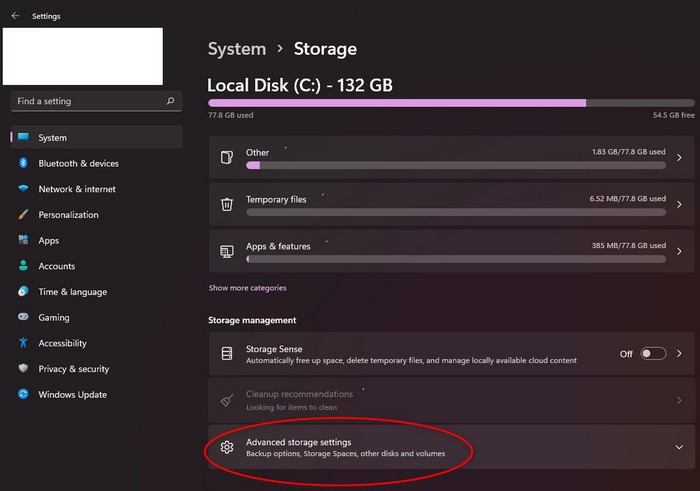
- Click on System and go to Storage.
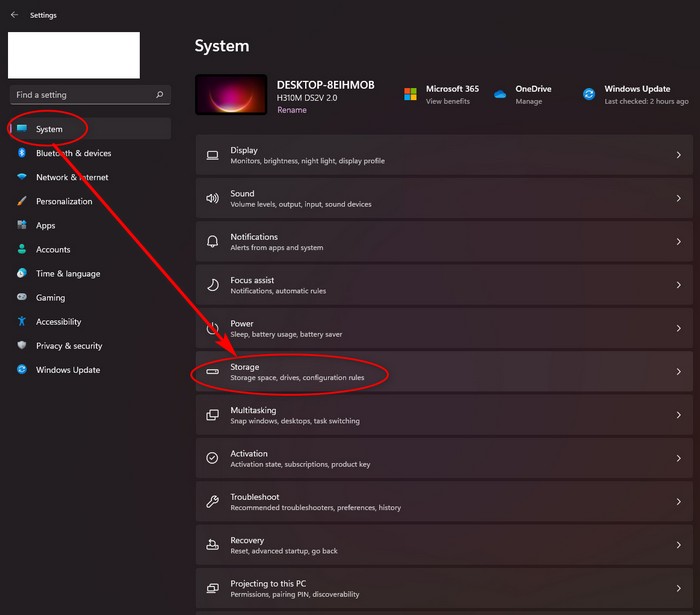
- Click on Advanced Storage Settings.
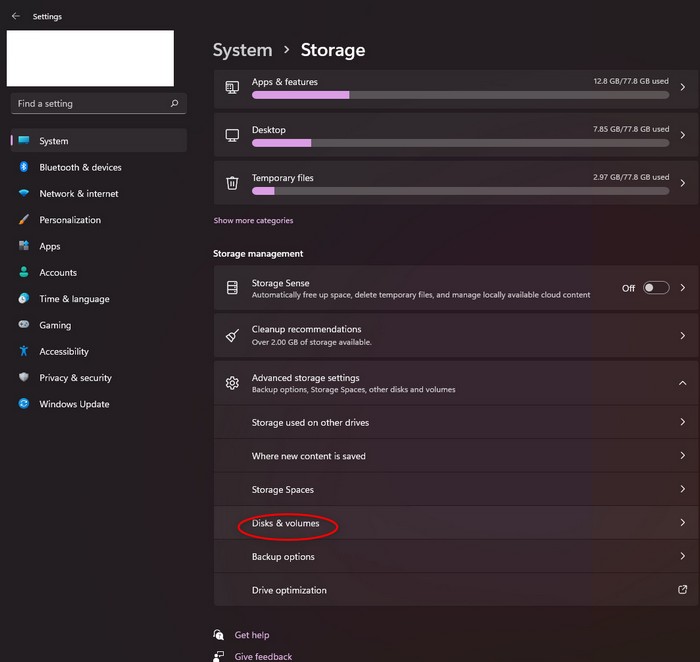
- Select Disk and Volumes.
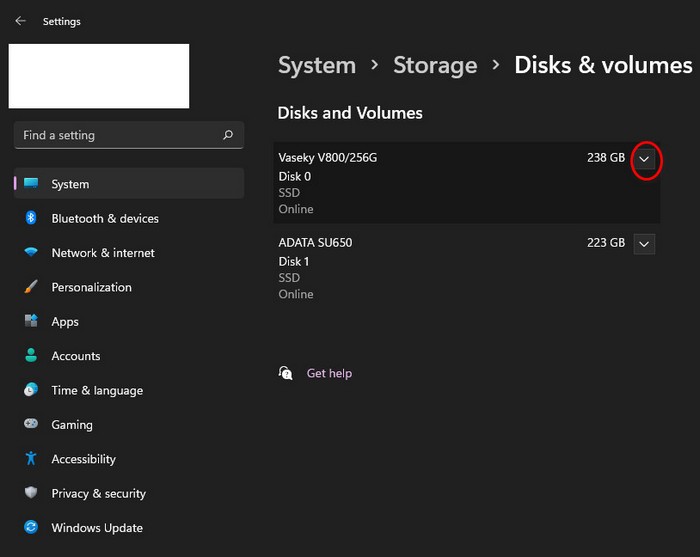
- Navigate to the drive you want to label or rename and click on the arrow beside it.
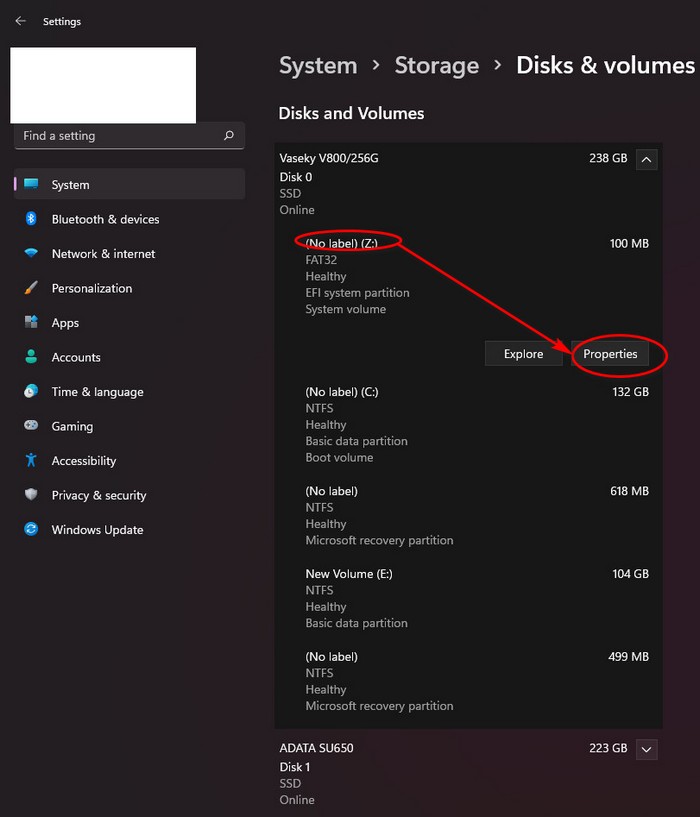
- Select the volume and click on Properties.
- Click on Change Label.
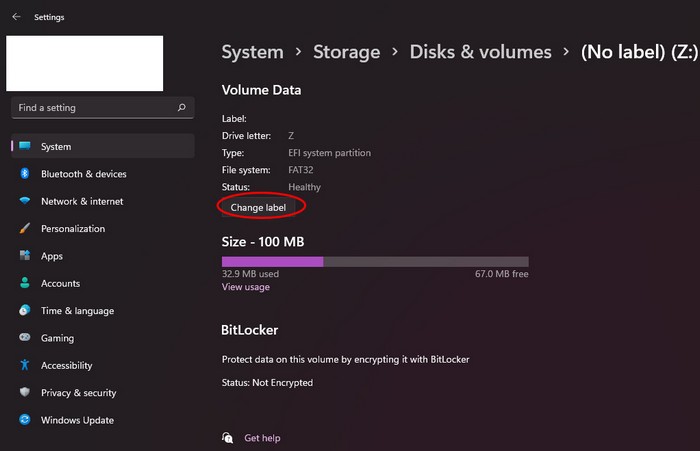
- Type in a name and click on Apply.
If you followed the steps correctly, then you must have been successful in renaming or labeling a partition on your Windows 11 device.
If not, kindly follow the other methods given below in this post.
Check out how to disable SuperFetch on Windows 11.
2. Rename, Label or Change Partition Name Using Disk Management
You can use the Disk management tool to rename or label your partitions on Windows 11. Like the previous method mentioned above, this method is also very easy to understand and follow.
So let us not waste any time and dive into how we can use the Disk Management tool to rename or label a partition on Windows 11. The simple steps are given below.
Here are the steps to rename or label a partition on Windows 11 using the Disk management tool:
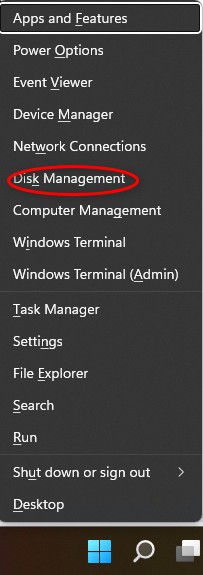
- Press the Windows and X keys at the same time and click on Disk management.
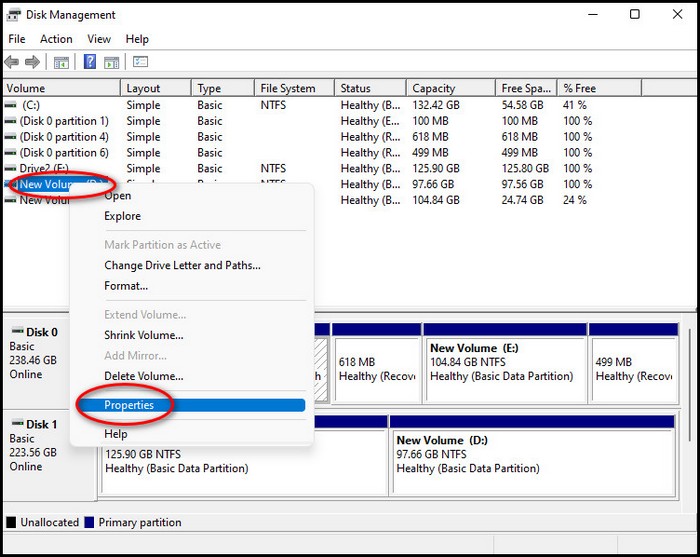
- Right-click on the volume or partition you want to rename or label and click on Properties.
- Go to the General tab and click on the text field at the top of the window to put in the name of the partition or volume.
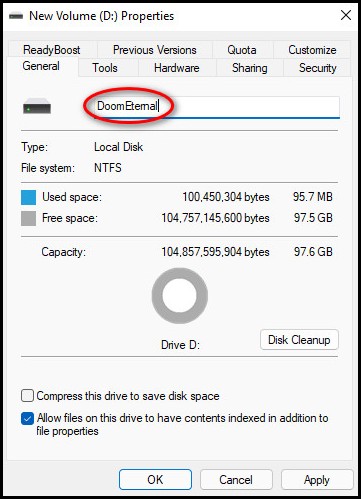
- Click on Apply, then OK.
If you could follow the steps properly, the volume or partition must have been labeled without any issue.
If this method was too hard for you to follow or it did not work for you for some reason, then please follow the other methods given below.
Also, check our exclusive tutorial on how to Fix Blue Screen on Windows 11.
3. Use Windows File Explorer to Label or Rename Partition
You are able to go to different files and folders thanks to the Windows File Explorer. Windows File Explorer can also change the name of a volume or partition on Windows 11. It is very easy to use so you will not have a hard time.
The steps in this procedure are straightforward, so there is n reason to doubt yourself or be anxious.
Here are the steps to label or rename a partition on Windows 11 using Fie Explorer:
- Navigate to the folder icon at the bottom and click on it.
![]()
- Click on This PC from the left pane.
- Right-click on the Volume or partition you want to rename or change and click on Rename.
If this process was too complex for you to understand or it did not work for you, then kindly follow the other methods given in this post.
Follow our guide on how to Boot to Safe Mode in Windows 11.
4. Rename or Label using Command Prompt
The Command Prompt is a fantastic tool provided by Windows 11 by default. You can use it to do many important tasks including changing the name of a partition or volume.
Although it might seem a bit confusing at first, I can guarantee you that it is not and you should not be worried or tensed.
The steps are simple and I have written them below. Keep calm, you got this!
Here are the steps to rename or change partition label using Command Prompt on Windows 11:
- Press the Windows and R keys at the same time on your keyboard. You will see the Run box pop up.
- Type in cmd and press the Enter key on your keyboard.
- Paste label X: Name, where X is the drive letter and Name is the drive’s name. For example, label C: Windows or label E: New drive.
- Press the Enter key on your keyboard to rename the volume or drive or partition.
- Check whether the drive got renamed or not.
If you successfully completed the steps mentioned above, then you were able to rename or change the drive you selected.
If this method did not help you, do not worry or be sad as the other methods are given below.
You may also like to read: Stop Apps Running in Background Windows 11.
5. Use Windows PowerShell to Rename or Label the Partition
Windows PowerShell is very similar to the Command Prompt in many ways. So, it can also be used to change or label the partition name on Windows 11:
Here are the steps to label partition name using Windows PowerShell on Windows 11:
- Go to the search bar and enter Windows PowerShell as an administrator. Just right-click on Windows PowerShell and select Run as Administrator.

- Paste Set-Volume -DriveLetter # -NewFileSystemLabel “NAME” where you will replace # with the existing drive letter and NAME with a new name.
- Press the Enter key on your keyboard.
- Check whether the drive got renamed or not.
Check out our expert-recommended guide on how to Enable Telnet On Windows 11.
Conclusion
I hope you were able to rename your desired drive on your PC. I have done this before when I needed to transfer my work files in a separate drive, which I renamed.