A slideshow is a presentation of multiple still images in a prearranged sequence. It can be projected on a projection screen or electronic display device.
Users can control the slideshow manually or set the transitions automatically. Sometimes you may want to create a random slideshow of your favorite pictures to have a great time while watching the slideshow.
This comprehensive and well-researched article has covered all possible methods to create a randomized slideshow with the default and third-party Windows applications.
This article aims to inform you on how to create a randomized slideshow in Windows 10.
So, without further ado, let’s get started!
How to Create a Randomized Slideshow in Windows 10
When you need to create a shuffle slideshow with randomized photos in a folder, you can use third-party applications or Windows as a tool for randomized slideshow more effectively.
Here are the ways to create a randomized slideshow in Windows:
1. Use Windows File Explorer
File explorer is the default tool to view and manage photos and files in Windows. Along with numerous great features, it also offers a unique feature known as Slide Show. To create a randomized slideshow with file explorer, follow the next instructions.
Here are the steps to create a randomized slideshow with file explorer:
- Put all photos in one folder.
- Select the images you want in the slideshow from the folder.
- Click on the Picture Tools under Manage from the top menu bar.
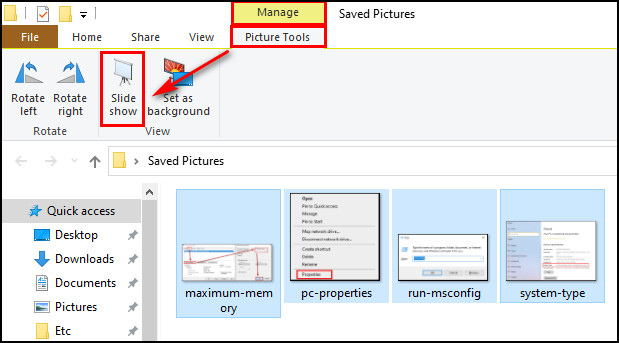
- Select the Slideshow from the ribbon.
- Right-click on the image and select Shuffle.
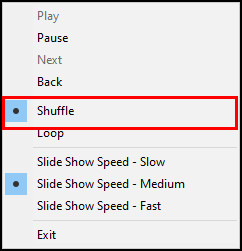
This process will start playing your photos randomly. Additionally, you can also set the slide show speed to slow, medium and fast.
Also related to this guide how to Get Windows 10 Free for Students.
2. Use Windows Photo Viewer
Microsoft introduced the Windows photo viewer as the default photo viewing application in Windows XP. Though Windows now uses the Photos app as its default image viewer, you can effortlessly switch to the Windows photo viewer.
Go through the instructions below to create a randomized slideshow with Windows photo viewer.
Here are the methods to create a randomized slideshow with Windows photo viewer:
- Go to the folder that contains your photos.
- Select the image you want to open.
- Right-click on the desired photo.
- Navigate to Open With > Windows Photo Viewer.
- Click on the Play Slide Show button from the bottom center of the page or press the F11 key.
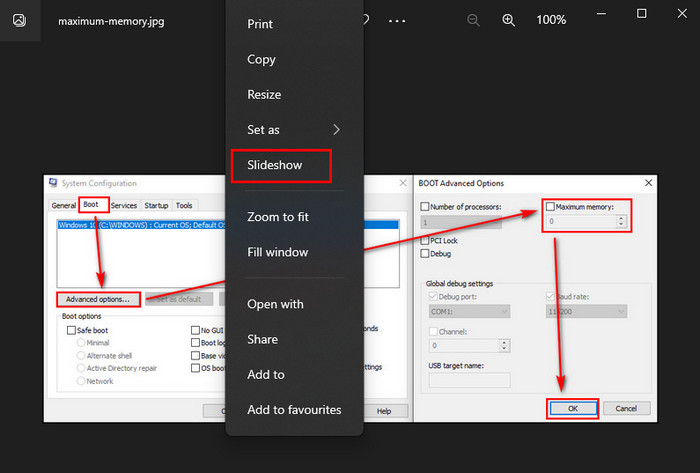
- Right-click on the picture and select Shuffle.
Your photos will now start playing slide show using Windows photo viewer.
For Windows users, it is also straightforward to create a desktop slideshow shuffle. Keep reading to create a a desktop slideshow shuffle in Windows 10.
Follow our guide on how to adjust page file in Windows 10.
How to Create a Desktop Slideshow Shuffle in Windows 10
Creating a randomized image slideshow in Windows is straightforward. Now let’s go through another method to make a desktop slideshow shuffle for your Windows wallpaper. Following these instructions, you can shuffle your desktop wallpaper images effortlessly.
Here are the steps to create a desktop slideshow shuffle in Windows:
- Put all your photos in a folder.
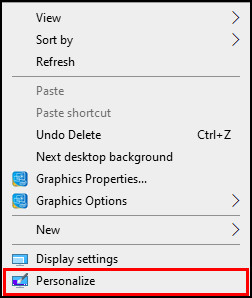
- Right-click on your desktop’s free space and select Personalize from the menu.
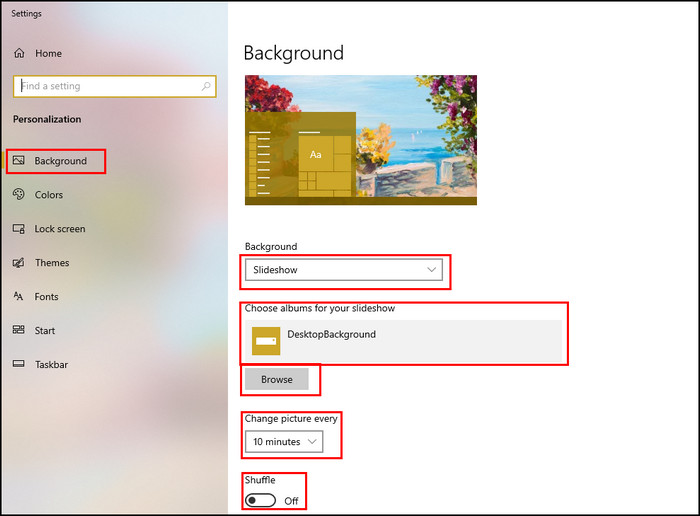
- Click on the drop-down menu under Background.
- Choose Slideshow from the drop-down menu.
- Click on the Browse button under the Choose albums for your slideshow option.
- Go to your desired folder location and select the folder.
- Click on Choose this folder.
- Choose the shuffle time under the Change picture every option.
- Toggle on the Shuffle button.
You have successfully turned on the desktop slideshow shuffle features for your desktop wallpapers. The desktop background image will change after a particular time, and the photos will shuffle randomly.
There also have other ways to create a slideshow in Windows or Mac. You can create a desktop slideshow shuffle for your desktop wallpapers. To learn more, keep reading the subsequent guides.
Here’s a complete guide on 5 effective ways to uninstall IE11 Windows 10.
How to Create a Randomized Slideshow Using Apps in Windows 10
Slideshow Maker is a free application from Icecream Apps Ltd compatible with Windows 10, 8, 7 and XP. Creating a professional-looking video slideshow is just one click away from using this great application.
You can effortlessly create a slideshow even if you are not a tech-savvy guy. Most importantly, you can choose to randomize your photos while creating a slideshow using the Slideshow Maker.
The Slideshow Maker application is full of numerous exclusive features. To learn more, go through the list of the features available on the application.
Here is the feature list available on Slideshow Maker:
You can:
- Set duration and transition for an individual photo.
- Make a slideshow with music.
- Add custom text to the slideshow.
- Add a wide variety of transition effects.
- Preview your slideshow before creating.
- Rearrange photo slideshow by filename or randomly.
- Create 4K slideshows.
- Save your photo slideshow in different video formats.
The slideshow-making process is forthright with Slideshow Maker. You can effortlessly create a video presentation using your images. Keep reading the below instructions to create a slideshow using Slideshow Maker.
Check out our separate post on Enable Remote Desktop RDP in Windows 10 Home Edition.
Here are the ways to create a randomized slideshow using Slideshow Maker:
- Download and install Slideshow Maker.
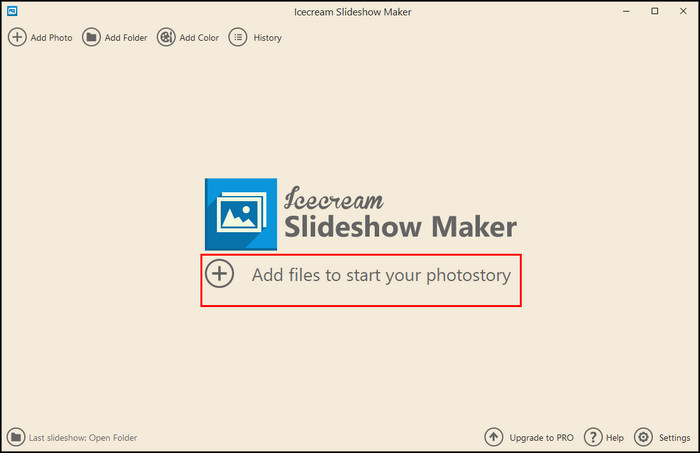
- Launch the application.
- Click on Add Photo.
- Browse to the folder that contains your images.
- Select your preferred photos and open them.
- Tweak your Time, Transition, and Text for each picture.
- Change the File name and Format according to your needs.
- Add Audio and modify audio file settings.
- Set Resolution, Scale to Fit, Transition duration.
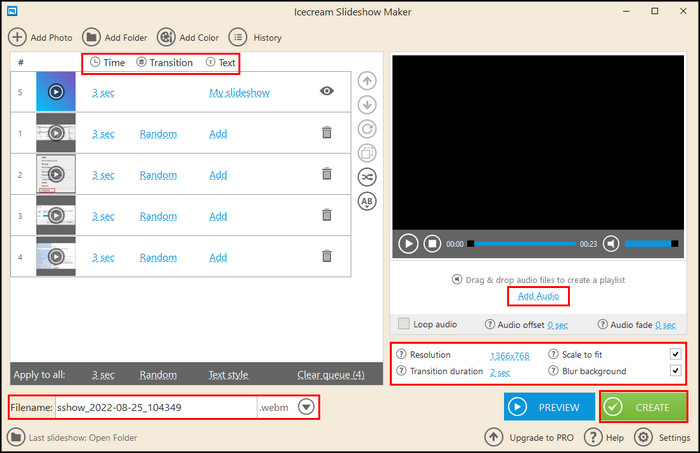
- Click on Create and wait until the process finishes.
When the process finishes, you will see several options to share your slideshow directly on social media platforms, including YouTube, DropBox, and Google Drive.
You will also find an option to Burn the slideshow into CD/DVD. Mac users also have some third-party programs to create a slideshow effortlessly. Continue to the next part of this article to create a randomized slideshow.
How to Randomize Photos in a Folder in Windows 10
There are different ways to randomize photos. You can use the Windows file explorer or third-party programs to randomize images. Let’s see how you can quickly randomize pictures from any folder.
Here are the ways to randomize photos in a folder:
1. Use Windows File Explorer
File explorer doesn’t have any default feature to randomize photos. However, you can sort photos in file explorer using a feature. Go through the below instructions to randomize your pictures in a folder using file explorer.
Here are the steps to randomize photos using Windows file explorer:
- Open File Explorer by pressing the Windows + E keys together.
- Open the folder where you stored the images.
- Select the View tab from the top menu bar.
- Click on the Sort By from the top ribbon.
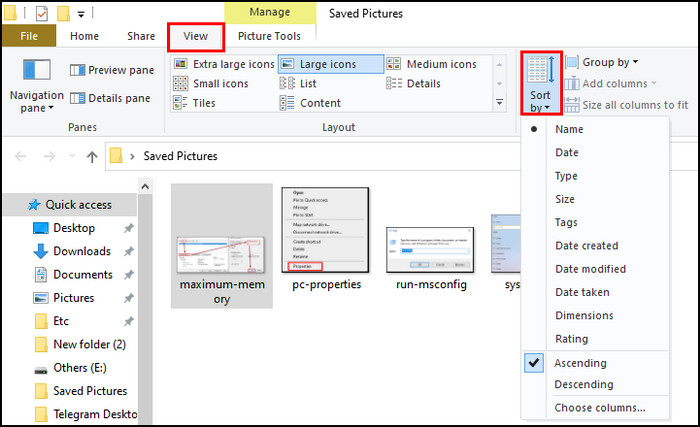
- Select any option depending on your necessity.
You can choose any option from the drop-down menu, including Name, Date, Type, Size, Tags, Date Created, Date Modified, Date Taken, Dimensions, and Rating.
If you select the Name option, your photos will shuffle according to their name. The other options will do the same and sort your images differently.
In case you are dealing with only a few pictures, you can rename the photos with any random numbers. That will also randomize your images in a folder.
2. Use Command Prompt
You can also set random names for your photos by using the command prompt feature of Windows. Follow the subsequent steps to randomize pictures in a folder.
Here are the ways to randomize photos in a folder using Command Prompt:
- Copy all your images to a folder.
- Place the folder on the desktop.
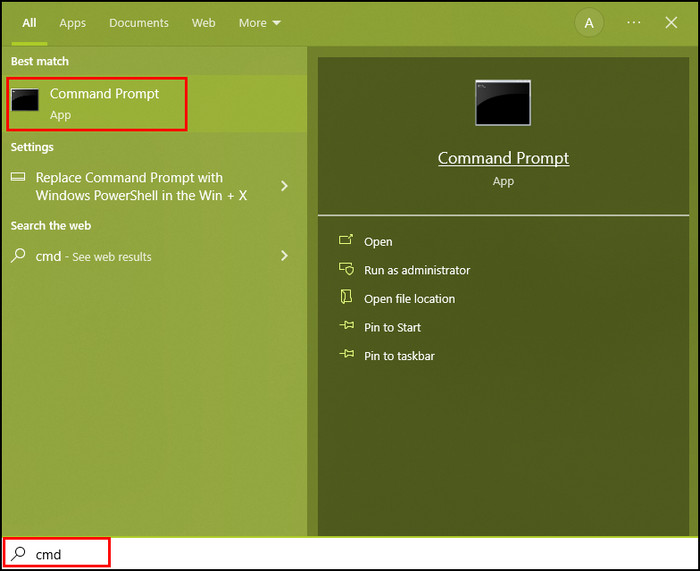
- Type cmd in the Windows search bar to open Command Prompt.
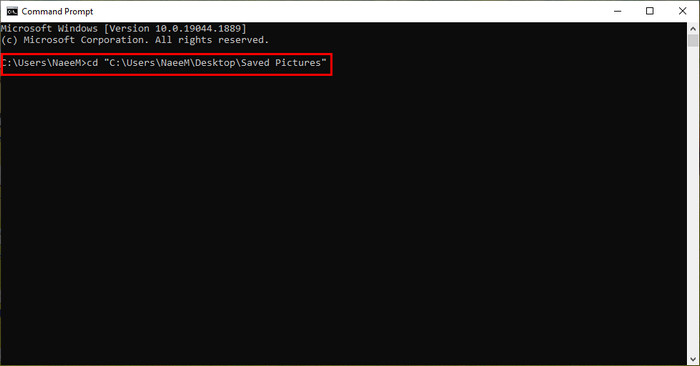
- Type cd next to C:\Users\UserName> and ensure there’s a space after the cd.
- Drag and drop the photo folder into the Command Prompt.
- Copy the following code and paste it into the Command Prompt:
- for i in *.jpg; do mv $i $RANDOM.jpg; done.
- Open the folder where you stored your photos previously.
- Click on the View tab and select Sort by.
- Select the Names from the drop-down list.
Using this process, you have successfully randomized your photos. If you find this process a little complex or didn’t work on your device, move on to the following method.
You may also like the 10 Best Free Widgets and Gadgets on Windows 11.
3. Use RandomNames
RandomNames is a code developed by How to Geek. Using this code, you can quickly randomize your photos along with other files.
This code works effortlessly, renaming any file within a folder with random numbers. Follow the steps below to use RandomNames correctly.
Here are the methods to randomize photos using RandomNames:
- Store all your images in a single folder.
- Make a copy of the folder on a different drive.
- Rename the folder to Randomized Photos.
- Download RandomNames.
- Extract the zip folder.
- Copy the RandomNames.bat file from the folder.
- Paste the .bat file into the Randomized Photos folder.
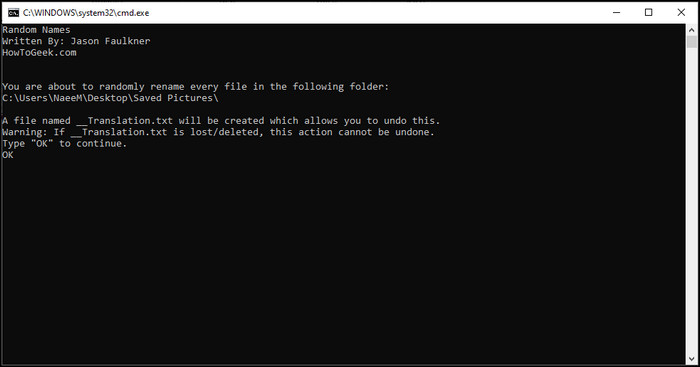
- Double-click on the .bat file and a command prompt window will open.
- Type OK after seeing the following message: You are about to randomly rename every file in the following folder.
- Open the Randomized Photos folder and check if the process changed the photo’s name.
- Select the View from the top menu bar and clock on the Sort by.
- Choose Names from the drop-down menu that will sort your photos by their name.
This process is very efficient in randomly changing the name of your photos or files. Don’t forget to copy your images into a different folder before performing this process.
4. Use Bulk Rename Utility
Bulk Rename Utility is another tool for renaming and randomizing photos in a folder. This utility is compatible with almost every version of Windows. Keep going through the below process to randomize your images using Bulk Rename Utility.
Here are the steps to randomize your photos using Bulk Rename Utility:
- Download and install the Bulk Rename Utility.
- Put all your pictures in a single folder.
- Select the folder using Bulk Rename Utility.
- Tweak the rename settings from different fields.
- Select the Numbering field and choose the Suffix mode from the drop-down menu.
- Click on the Rename to change the names randomly.
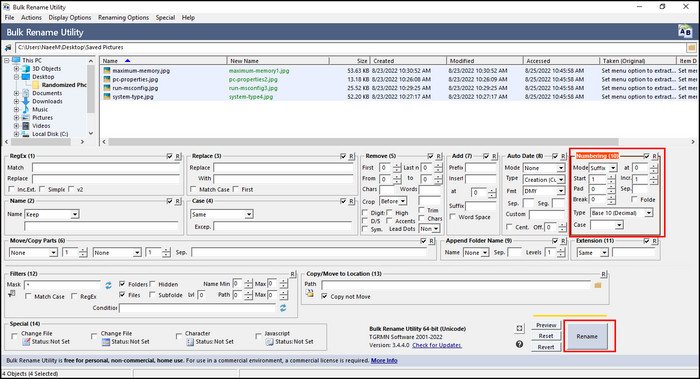
- Click on the View tab and select Sort by.
- Select the Names from the drop-down list.
With Bulk Rename Utility you can also add, remove, and replace any name properties without any hassle. Feel free to tweak the settings until you get the proper outcome.
5. Disable Auto Arrange
Windows 10 users can easily arrange files in the order they prefer in Windows file explorer. Though in the older version of Windows, there was an option to disable auto arrange, Windows 10 don’t have any option to disable this feature.
However, you can use third-party tools to disable this feature and arrange the files as you want. I will show you the perfect way to disable auto arrange in the steps below.
Here are the methods to disable auto arrange:
- Press the Windows + R keys together to open the Run dialog box.
- Type regedit in the dialog box and hit Enter.
- Navigate to HKEY_CURRENT_USER\SOFTWARE\Classes\Local Settings\Software\Microsoft\Windows\Shell\Bags
- Right-click on the Bags and select Delete.
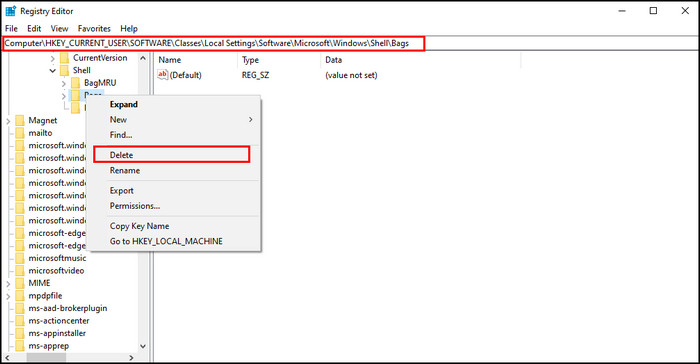
Successfully deleting the Bags is the first step of the process. From the registry editor, navigate to Software > Microsoft > Windows > ShellNoRoam by following the same path.
Now Expand the ShellNoRoam, find the bugs subkey, and delete it like the previous one. After deleting the subkey, restart your computer.
Open your photo folder and click on the View tab. You will find the option of auto arrange to disable.
How to Create a Randomized Slideshow on Mac
Photos were introduced on Mac with a ton of great and dynamic features. This feature includes better photo editing, photo memories, a sync option, third-party project extensions, and, most importantly randomized slideshow.
In Photos version 3, Apple first added a feature when a user plays a slideshow; the Photos app randomly picks an image for a slideshow. To create a randomized slideshow in Mac, follow the instructions below.
Here are the ways to create a randomized slideshow on Mac:
- Open the folder that contains your photos.
- Select the images you want to make a slide show with.
- Click on View from the top menu.
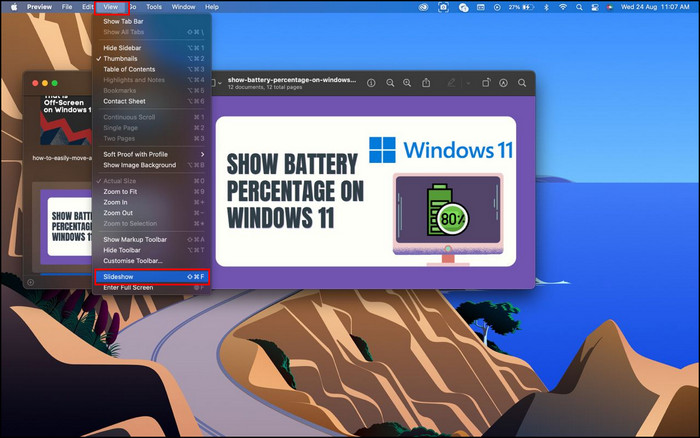
- Select Slideshow or press Shift + Command + F keys together.
Your photos will start to display in a slideshow, and the Photos app will randomly pick the pictures.
It is also convenient for the Mac user to create a random wallpaper slideshow. If you are a Mac user, go on to the following guides to make a slideshow of your favorite images.
How to Create a Desktop Slideshow Shuffle on Mac
For Mac users, the ways of creating a desktop background slideshow shuffle are very easygoing. Follow the below guidelines to make a desktop background slideshow shuffle in the simplest ways.
Here are the methods to create a desktop slideshow shuffle on Mac:
- Click on the Apple logo and open System Preference.
- Select Desktop & Screensaver.
- Choose the animation from the left-side menu.
- Click on the drop-down pointer next to Source and choose the Photo Libary.
- Select the desired photos for the slideshow.
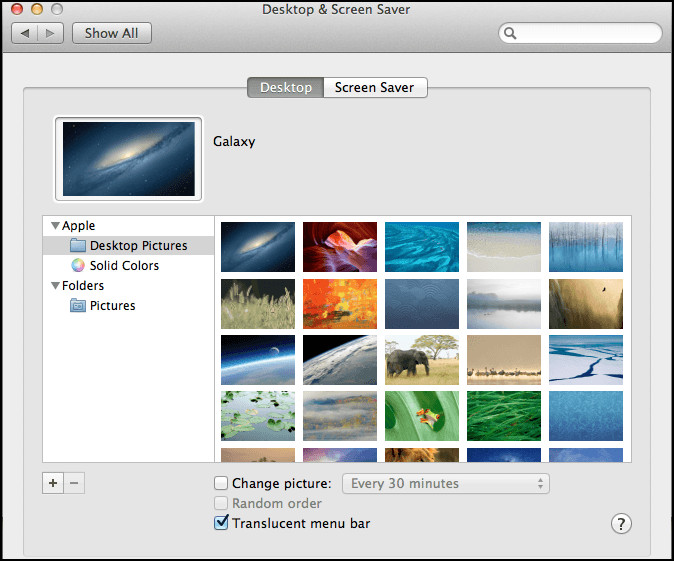
- Tick the box at the side of the Shuffle slide order.
You have successfully turned on the desktop background slideshow shuffle by following the directions. Your mac wallpaper will change periodically in a random way.
Moreover, you can create a randomized slideshow for Mac using a third-party application. In the subsequent guides, you will learn more about this topic.
How to Create a Randomized Slideshow Using Apps on Mac
Though there are numerous applications for Mac to create a randomized slideshow, I have found that iPicture is the most easy-to-use application. You can use this application to create a slideshow directly from iPhoto.
In conjunction with diverse exclusive features, you will find a random display option that shuffles the images in the slideshow.
There are also some additional features in iPicture that can be handy while creating a slideshow. In the next part, you will find a list of other features offered by iPicture.
Here is the list of advanced features of iPicture:
- Use the Smart Frame feature to resize the slideshow.
- Apply Fullscreen mode for presentations.
- Add transition effects from the enormous library of transition.
- Use prebuild Zoom options.
- Set a different duration for each photo.
Using this great application, you can create different slideshows in a randomized way. Though there is also some other application for Mac, iPitcure is still one the best in term of service and performance.
Frequently Asked Questions
How do you make a random slideshow in Windows 10?
To make a random slideshow in Windows 10, put all your photos in a folder and select the desired images. Then navigate to Manage > Picture Tools > Slide Show. While the slideshow is running, right-click on the screen and choose Shuffle from the menu.
Does Windows 10 have a slideshow?
Yes, Windows 10 have a built-in slideshow feature. To turn on a slideshow in Windows 10, select the images you want to make a slideshow and navigate to Pictures Tools > Slideshow. Once you click on the Slideshow, Windows 10 will start to play your photos as a slideshow.
How do I shuffle my desktop background in Windows 10?
You can shuffle your desktop background in Windows 10 by right-clicking on the desktop and selecting Properties. Under Choose albums for your slideshow, browse and select your photos and finally, toggle on the Shuffle button.
Does Windows 10 have a free slideshow maker?
Windows 10 have multiple free slideshow maker, including Free Slideshow Maker & Video Editor. It is a great slideshow maker along with different video editing features. You can easily add multiple images, background sounds, and transition between slides.
Bottom Line
Creating a slideshow with your favorite photos makes the demonstration more enjoyable and unforgettable. Additionally, the ability to add music, transition, subtitles, and captions push it to another level.
For all social media users, it is a great way to express their fond memories in a slideshow with a relevant soundtrack. Creating a slideshow with appropriate pictures can be very handy for the students or office workers.
After completing the entire article, you now know how to create a randomized slideshow for different purposes in Windows 10.
Which methods did you find more effective for you? Let us know in the below comment section.