Do you want to use Telnet and look for an ultimate step-by-step guide to enable or install the Telnet on your Windows 11 computer?
If you look for an ultimate step-by-step guide, you are in the right place then.
As a tech specialist, I will show you some proven methods to install or enable the Telnet client on your Windows 11 computer that I tested personally.
Keep reading the whole post and apply the steps carefully on your Windows 11 computer to enable the Telnet.
Let’s look at how to enable or install Telnet on your Windows 11 computer.
Check out our separate post: Enable or Disable Startup Programs in Windows 11
Why Use Telnet?
Telnet is a network communication protocol used on the internet or a local area network. Its primary purpose is to make it simple to operate other computers, and it allows users to access remote devices and servers by sending text commands.
Telecommunication Network is the acronym for Telnet. It is a network communication protocol, and it allows you to connect your computer to other computers over the internet.
Telnet is an application layer protocol similar to HTTP and FTP. It uses to create communication between two computers on local area networks, and it is a network protocol for connecting to a remote host’s command-line interface.
The Telnet Client is an excellent tool for managing and testing network access for developers and administrators. It is a program that connects to another computer via the Internet using the standard TCP/IP protocol.
In some cases, such as testing remote SQL connections and firewall connectivity, you’ll still need to use Windows Telnet. Telnet is a program used to connect to computers located on the other side of the world, and it connects a local computer to a network server.
Telnet replace by the more secure SSH protocol in modern computer technology. Even though Telnet is no longer supported by Windows 11, it is still available, and you can still use Telnet for some specific purpose.
How To Enable Telnet On Windows 11
By default, Telnet is disabled, but it is still available on Windows 11 system. The Telnet technology is old, and the protocol is not secure same as the modern secure protocol technology, for example, SSH protocol.
You’ll still need to use Windows Telnet, such as testing remote SQL connections and firewall connectivity. Telnet is a program that connects a local computer to a network server on the other side of the world.
Telnet is not dead. You can use Telnet to test connectivity if you work in a test environment.
There are three practical and tested ways to enable the Telnet on your Windows 11 computer. Also, you can disable the Telnet when you finish your work.
So, let’s look at the various methods for enabling Telnet on Windows 11.
Check our latest post on how PC won’t go to sleep mode in Windows 11
Here are the steps to enable Telnet on Windows 11:
1. Use Control Panel
The Control Panel is a Windows feature that allows you to change your system’s settings. But it may be tough to identify specific settings among the numerous options. As a result, it’s a popular choice among users who want to tweak system settings and functionality.
In Windows 11, by default, Telnet is disabled. So, you need to enable the Telnet manually. If you want to enable the Telnet, you can easily do it by navigating the Windows control panel.
Follow these steps to enable the Telnet on Windows 11 using the control panel:
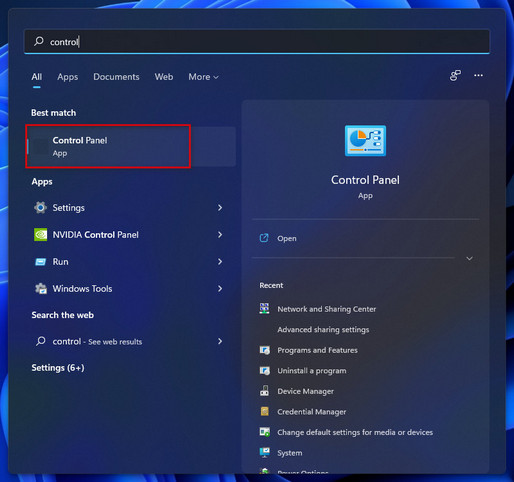
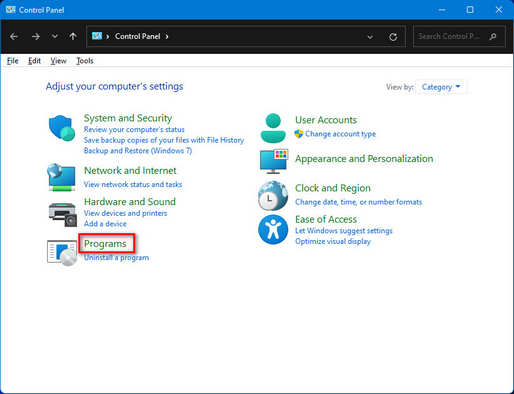
- Type control panel into the Windows Search bar and hit the Enter button to open the Control Panel.
- Click on the Programs category. Make sure your Control Panel view by Category.
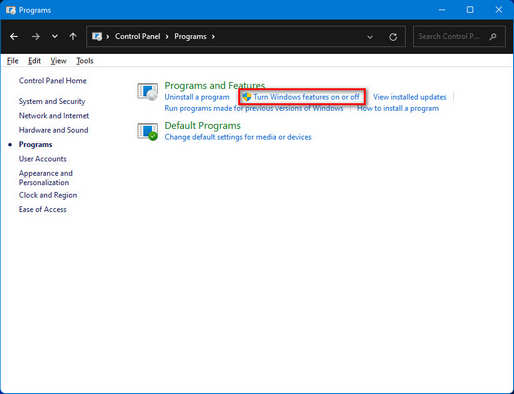
- Click on Turn Windows features on or off under the Programs and Features section.
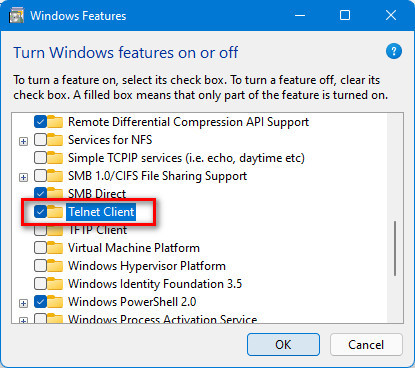
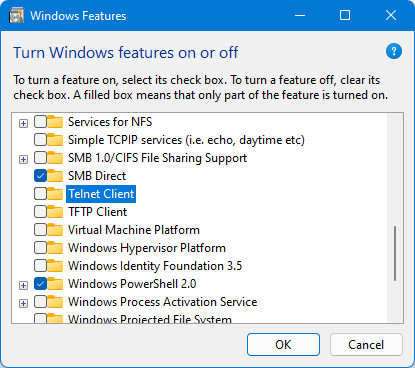
- Scroll down and find the Telnet Client check box under the Windows features list.
- Mark the Telnet Client check box to enable the Telnet and click on the Ok button to save the changes.
- Wait a few seconds to apply the changes.
- Click on the Close button to exit the Windows Features window after successfully enabling the Telnet.
Also, check out our separate post on disable SuperFetch in Windows 11.
2. Use Command Line
Most Windows operating systems have a command-line interpreter application to do operations. You’ll need to know a bit of technical computer knowledge to use the command line.
You can easily enable the Telnet Client on your Windows 11 system using the command line prompt.
To enable the Telnet using the command line, follow the steps below:
- Press Windows Key on your keyboard to open the Start menu.
- Type cmd into the Windows Search bar.
- Right-click on and select Run as administrator to open the Command Prompt with administrator privilege.
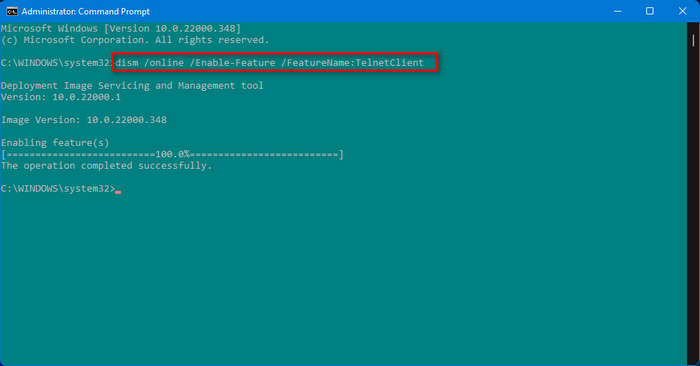
- Type dism /online /Enable-Feature /FeatureName:TelnetClient and press Enter button to enable the Telnet. Or,
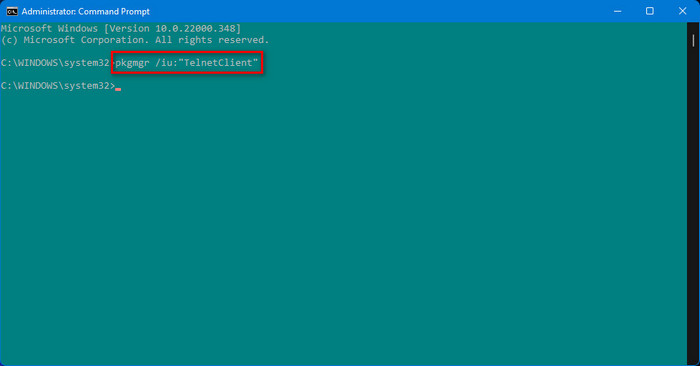
- Type pkgmgr /iu:”TelnetClient” and hit the Enter button to enable the Telnet.
3. Use PowerShell
Another way is to enable the Telnet on your Windows 11 is to use Windows PowerShell. This method is effective and easy.
To enable the Telnet using the PowerShell, follow the steps below:
- Press Windows Key on your keyboard to open the Start menu.
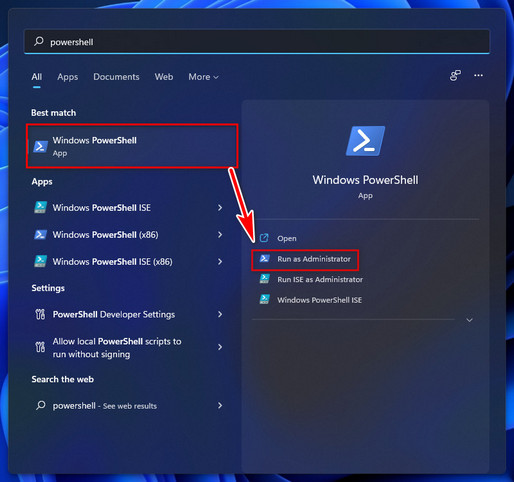
- Type powershell into the search bar.
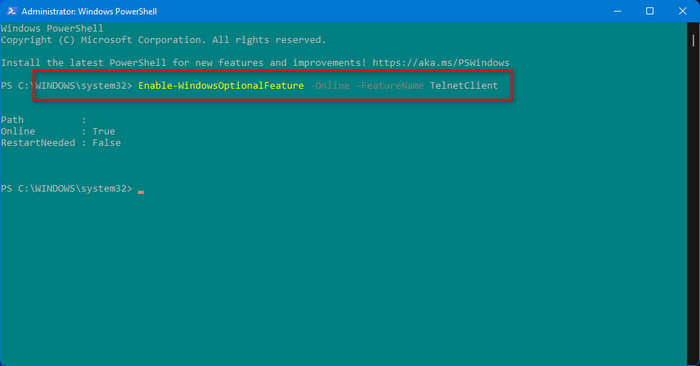
- Right-click on and select Run as administrator to open the PowerShell with administrator privilege.
- Type Enable-WindowsOptionalFeature -Online -FeatureName TelnetClient and press Enter button to enable the Telnet.
After restarting the computer, your Telnet is enabled successfully on your Windows 11 computer. Now, you can use Telnet for your work.
Also read, Bluetooth Toggle Missing On Windows 11.
How To Verify Telnet Is Enabled On Windows 11
In Windows 11, you can also easily verify whether the Telnet is enabled.
To verify the Telnet is enabled, follow the steps below:
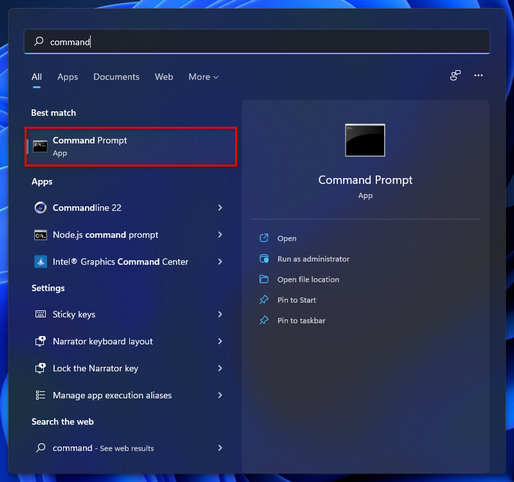
- Press Windows Key on your keyboard to open the Start menu.
- Type command prompt into the Windows Search bar.
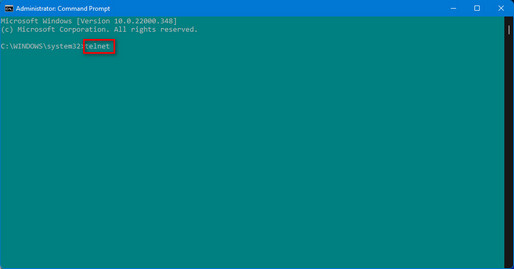
- Right-click on and select Run as administrator to open the Command Prompt with administrator privilege.
- Type telnet and press Enter button to verify and access the Telnet Client enabled.
- New Telnet CMD window is open, which means Telnet is enabled.
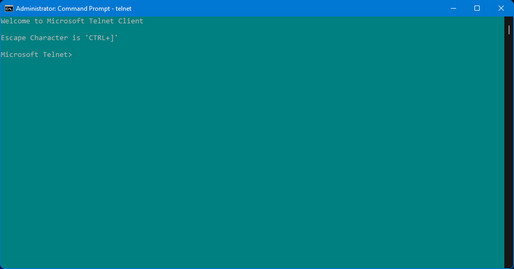
- Type help press Enter button to see the supported Telnet commands.
How To Enable Telnet Server On Windows 11
After enabling the Telnet, you may need to enable the Telnet server. A telnet server is may needed when you connect your computer with another computer using a local area network, testing remote SQL connections, or firewall connectivity.
Follow the steps below to enable the Telnet Server easily:
- Press Windows Key on your keyboard to open the Start menu.
- Type command prompt into the Windows Search bar.
- Right-click on and select Run as administrator to open the Command Prompt with administrator privilege.
- Type pkgmgr /iu:”TelnetServer” and press Enter button to enable the Telnet server.

How To Disable Telnet On Windows 11
After you finish using Telnet, you can also disable it. To disable the Telnet, you need to follow some simple steps.
Follow these steps to disable the Telnet on Windows 11 using the control panel:
- Type control panel into the Windows Search bar and hit the Enter button to open the Control Panel.
- Click on the Programs category. Make sure your Control Panel view by Category.
- Click on Turn Windows features on or off under the Programs and Features section.
- Scroll down and find the Telnet Client check box under the Windows features list.
- Uncheck the Telnet Client box to disable the Telnet and click on the Ok button to save the changes.
- Wait a few seconds to apply the changes.
- Click on the Close button to exit the Windows Features window after successfully disabling the Telnet.
Using the command line prompt, you may easily disable the Telnet Client on your Windows 11 PC
Follow our guide on How to Boot to Safe Mode in Windows 11
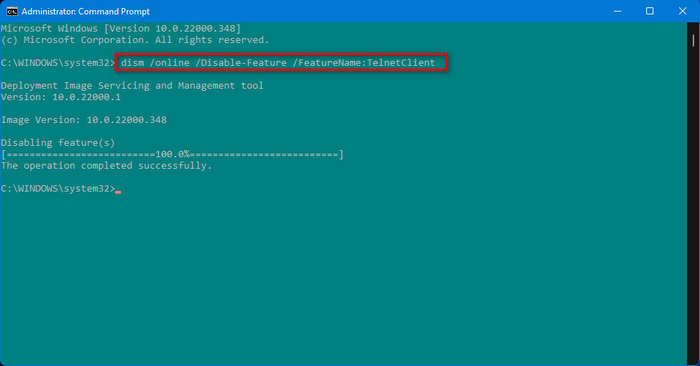
To disable the Telnet using the command line, follow the steps below:
- Press Windows Key on your keyboard to open the Start menu.
- Type cmd into the Windows Search bar.
- Right-click on and select Run as administrator to open the Command Prompt with administrator privilege.
- Type dism /online /Disable-Feature /FeatureName:TelnetClient and press Enter button to disable the Telnet.
Another way is to disable the Telnet on your Windows 11 is to use Windows PowerShell.
Follow the steps below to disable the Telnet using the PowerShell:
- Press Windows Key on your keyboard to open the Start menu.
- Type powershell into the search bar.
- Right-click on and select Run as administrator to open the PowerShell with administrator privilege.
- Type Disable-WindowsOptionalFeature -Online -FeatureName TelnetClient and press Enter button to disable the Telnet.
Final Thoughts
Telnet is a network communication protocol used on the internet or a local area network. It is an excellent tool for managing and testing network access for developers and administrators, and it uses to test remote SQL connections and firewall connectivity.
In this post, I describe the three proven methods to enable the Telnet and the method you check whether Telnet is enabled, and the method of enabling the Telnet server. I will also discuss three methods to disable the Telnet on your Windows 11 system.
I hope you found this article to be informative. Please feel free to forward this article to anyone who may be experiencing the same issue.