Microsoft launched the next generation, Windows 11, which is more powerful, faster, and user-friendly than the previous generation of Windows 10.
Users now need a recent-generation processor, more RAM, storage, TPM 2.0, and other hardware requirements to be compatible with Windows 11. Without meeting the Windows 11 minimum system requirements, your PC is not compatible with installing Windows 11.
However, some Windows users reported that when they tried to install or upgrade to Windows 11 on a Windows 10 PC, they could not do this. If you encounter the same issue, you are in the right place.
In this post, I will share with you some proven and tested methods to resolve your Windows 11 installation problem on your PC. Sounds great, right?
Let’s get started without further delay.
Why Won’t Windows 11 Install on my PC?
Windows 11 is not installed on your PC because your PC doesn’t meet the minimum system requirements for installing Windows 11. If your PC is not compatible with Windows 11, you can’t install Windows 11. Also, faulty installation media is another reason Windows 11 won’t install on your PC.
There are some reasons for Windows 11 not installing on a PC that I mentioned earlier. Now, I will describe these reasons shortly to understand the issue. Let’s see.
Here are the two reasons for Windows 11 not installing on your PC:
Compatibility Issue
Compatibility issues are the first major reason Windows 11 is not installed on a PC. If your PC doesn’t meet Windows 11 minimum hardware and system requirements, there is no way to install Windows 11.
Faulty Installation Media
Another reason Windows 11 does not install on a PC is faulty installation media. If your installation media is faulty or corrupted, you can’t install Windows 11.
Follow our guide on how to Fix Windows 11 Install Error 0x800f0922.
How to Fix it When Windows 11 Won’t Install
If you cannot install Windows 11 on your PC, check out the following effective steps to fix your problem. Fixing a problem is not a big deal. Just apply the following solutions step-by-step to eliminate the issue.
Here are the steps to fix when Windows 11 won’t install on your Windows PC:
1. Check System Requirements for Windows 11
First and foremost, check your system requirements to see whether they meet Windows 11 minimum hardware requirements. You must be compatible with the Windows 11 minimum hardware requirements to run Windows 11 on your PC.
Sadly Microsoft removes the PC Health Check app due to some bugs and glitches that provide incorrect results. So, now you need to verify your system requirements manually.
Microsoft determines some minimum system requirements to install or upgrade to Windows 11. Check the following system requirements to your PC specifications to ensure your system is compatible with Windows 11.
| Processor | 1 gigahertz (GHz) or faster with 2 or more cores on a compatible 64-bit processor or System on a Chip (SoC) |
| RAM | 4 gigabytes (GB) |
| Storage | 64 GB or larger |
| System firmware | UEFI, Secure Boot capable |
| TPM | Trusted Platform Module (TPM) version 2.0 |
| Graphics card | DirectX 12 or later with WDDM 2.0 driver |
| Display | High definition (720p) display that is greater than 9” diagonally, 8 bits per color channel |
Check out our separate post: Install Amazon Appstore on Windows 11.
2. Enable UEFI Secure Boot
You must enable the UEFI Secure Boot to install Windows 11 on your PC. So, ensure your Secure Boot is turned on in your system. If not, then enable the Secure Boot feature.
Follow the steps below to verify the Secure Boot current status on your system to ensure whether it is enabled or disabled.
Here are the steps to verify the Secure Boot current status on your system:
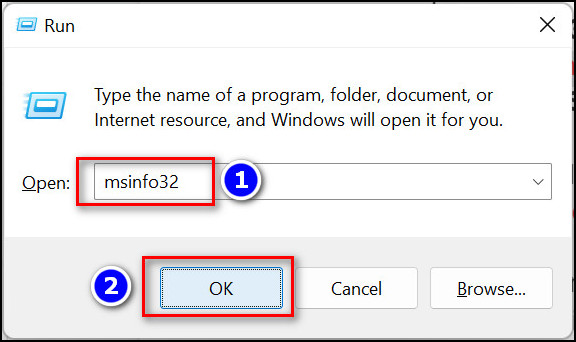
- Open the Windows Run program by pressing the Windows+R keys.
- Type msinfo32, hit the Enter key, or click OK to open the System Information window.
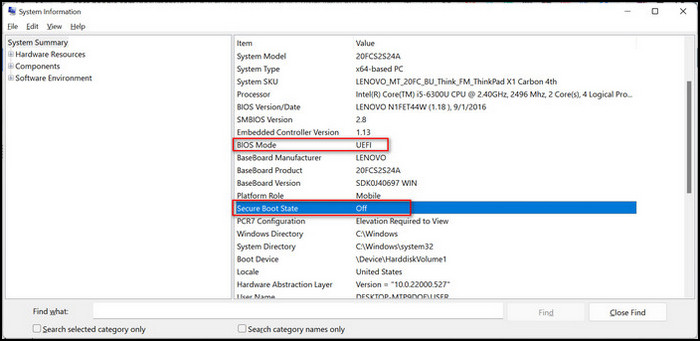
- Find the BIOS Mode and Secure Boot State under the Items column on the left-side screen.
- If the BIOS Mode is UEFI and Secure Boot State is Off, your Secure Boot is disabled.
Now, you need to enable the Secure Boot Mode on your system. After enabling the Secure Boot Mode, you can install or upgrade to Windows 11.
Here are the steps to enable the Secure Boot Mode on your Windows 10:
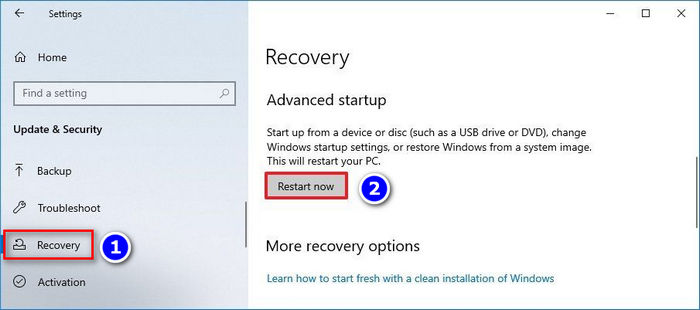
- Go to Settings > Update & Security > Recovery.
- Click on Restart now under the Advanced Startup.
- Wait a few seconds to open the Advanced Startup window.
- Navigate to Troubleshoot > Advanced Options > UEFI Firmware Settings.
- Click on Restart to open the UEFI Firmware Settings on your BIOS.
- Go to the Boot or Security settings page. The UEFI settings vary by model and manufacturer. Check your manufacturer support website for more specific details to find the settings.
- Select and open the Secure Boot option.
- Enable the Secure Boot option and press Enter.
- Exit the UEFI settings page, click on Save and Exit to save the changes and reboot your computer.
- After completing your system rebooting, try to install Windows 11 to see whether your problem is solved.
You may also like to read: Enable or Disable Startup Programs in Windows 11.
3. Enable TPM 2.0
A Trusted Platform Module (TPM) is one of the core requirements for installing or upgrading to Windows 11 on your system. You must enable the TPM 2.0 on your system to install Windows 11. Without TPM, Windows 11 can’t install on your PC.
So, check the TPM state and version on your system to ensure your system has TPM 2.0 enabled.
Here are the steps to check the TPM 2.0 state on your Windows 10 PC:
Use Windows Security App
Here are the steps to check TPM 2.0 using the Windows Security App:
- Open the Windows Settings Go to the Update & Security > Windows Security.
- Select Device Security on the left side panel.
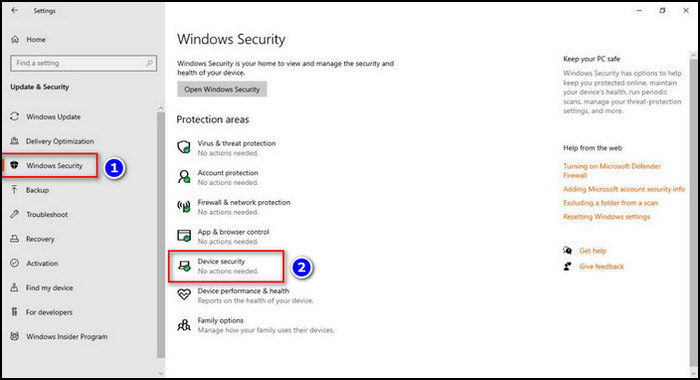
- If you don’t see the Security processor section on the current window, your TPM is disabled. So, you need to enable the TPM.
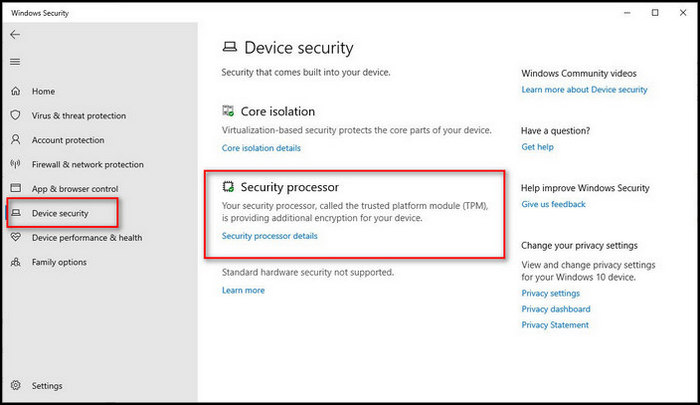
- The Security processor section is shown on this screen if the TPM is enabled.
- Click on the Security processor details to view the TPM version on your device. You can find the TPM version next to the Specification version under the Specifications.
- Verify that your TPM version is 0. If the TPM version is not matched, your system does not meet the Windows 11 minimum system requirements.
Also read, Schedule Windows 11 to Wake from Sleep Automatically.
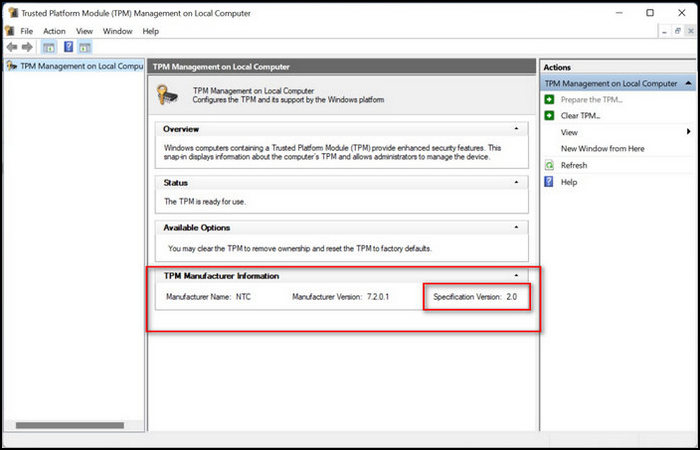
Use TPM Management System
Here are the steps to check TPM 2.0 using the TPM Management system:
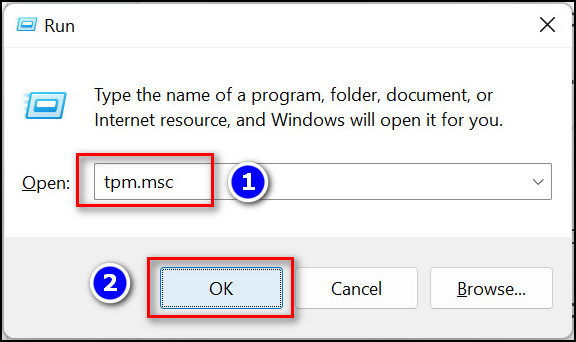
- Open the Windows Run program by pressing the Windows+R keys.
- Type tpm.msc, hit the Enter key, or click OK to open the TPM Management system.
- If you see the message Compatible TPM cannot be found under the Status section, TPM is disabled. On the other hand, if it shows TPM is ready to use, your TPM is enabled.
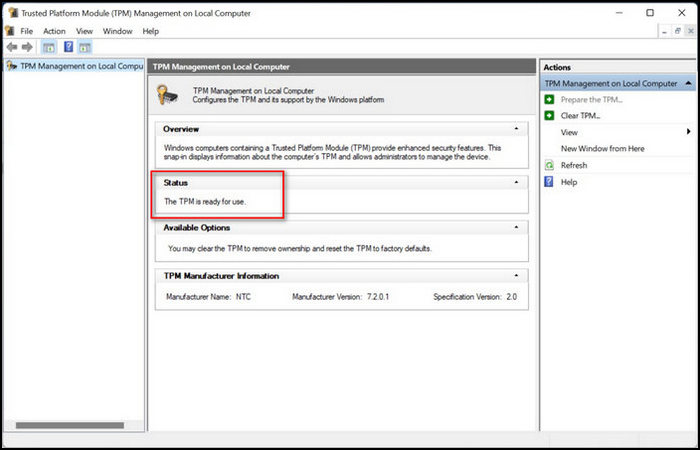
- Check your TMP version next to the Specification Version under the TPM Manufacturer Information Again, if the TPM version is not matched, your system is not compatible with Windows 11.
Now, it’s time to enable the TPM. Follow the steps below to turn on the TPM on your PC.
Check out our separate post: Disable File Compression on Windows 11/10.
Here are the steps to enable the TPM on your Windows 10 PC:
- Go to Settings > Update & Security > Recovery.
- Click on Restart now under the Advanced Startup.
- Wait a few seconds to open the Advanced Startup window.
- Navigate to Troubleshoot > Advanced Options > UEFI Firmware Settings.
- Click on Restart to open the UEFI Firmware Settings on your BIOS.
- Go to the Advanced, Security, or Trusted Computing tab, find the TPM option, and enable it.
- Click Save & Exit to apply the changes and restart your computer.
- Verify your TPM version after completing your system rebooting. If the TPM version is 0, try to install Windows 11.
4. Create New Installation Media
If you are trying to install Windows 11 on your PC using an installation media and encounter that Windows 11 is not installing, then most probably your installation media is corrupted.
So, create a new installation media and retry to install Windows 11 to complete Windows 11 installation on your computer.
Here are the steps to create Windows 11 Installation Media:
- Go to Microsoft Windows 11 official website to download Windows 11.
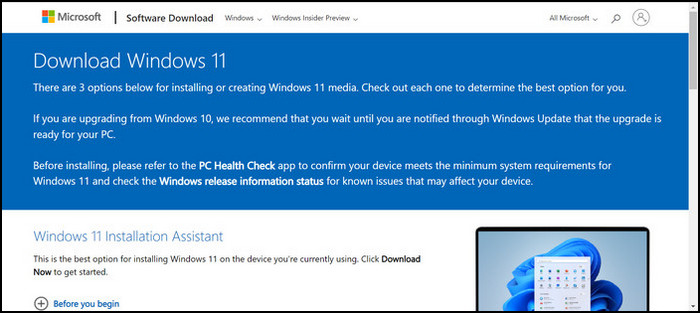
- Scroll down and click the Download Now button under the Create Windows 11 Installation Media section.
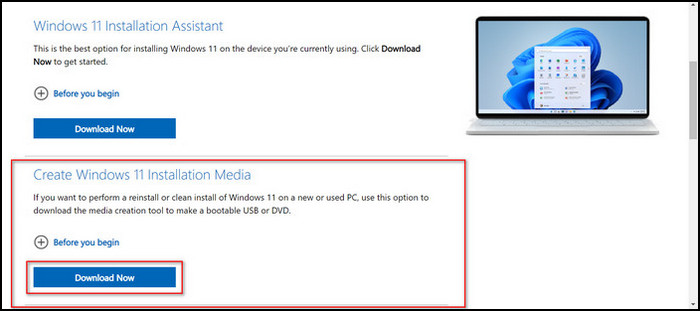
- Run the MediaCreationTool.exe to set up Windows 11.
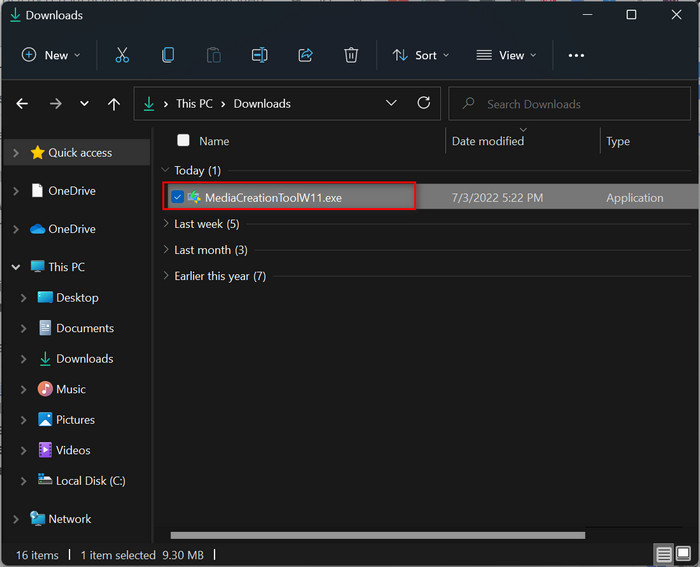
- Follow the on-screen instructions to create a new installation media.
- Install Windows 11 after creating the Windows 11 Installation Media.
5. Install Windows 11 on a New/Different Drive
You may try installing Windows 11 on a new or different drive to complete Windows 11 installation on your computer.
Also, you can format your primary (C) driver before installing Windows 11. This method helps you to complete Windows 11 installation.
How to Install Windows 11 on Unsupported Hardware
Do you want to install Windows 11 on your unsupported hardware device but can’t find how to do it?
Relax! You can. Surprisingly, Microsoft is officially only allowed to install Windows 11 on an unsupported PC. But, you can’t upgrade from Windows 10 to Windows 11 through Windows Update.
To install Windows 11, you must create and use Windows 11 Installation Media. Using the Windows 11 Installation Media, you can easily install Windows 11 on your unsupported Windows PC.
Here are the steps to create Windows 11 Installation Media:
- Go to Microsoft Windows 11 official website to download Windows 11.
- Scroll down and click the Download Now button under the Create Windows 11 Installation Media section.
- Run the MediaCreationTool.exe to set up Windows 11.
- Follow the on-screen instructions to create a new installation media.
- Try to install Windows 11 after creating the Windows 11 Installation Media.
Why Is My PC Not Compatible With Windows 11?
Your PC is not compatible with Windows 11 due to a lack of meeting Windows 11 minimum system requirements such as more RAM, a recent-generation processor, more storage, UEFI Secure Boot, TPM 2.0, and other hardware requirements.
So, check your PC hardware requirements with Windows 11 minimum system requirements to ensure it is compatible with Windows 11. If your PC does not meet Windows 11 minimum system requirements, you can’t install Windows 11 on your PC.
Here are the minimum system requirements of Windows 11:
Processor: 1 gigahertz (GHz) or faster with 2 or more cores on a compatible 64-bit processor or System on a Chip (SoC).
RAM: 4 gigabytes (GB).
Storage: 64 GB or larger storage device.
System firmware: UEFI, Secure Boot capable.
TPM: Trusted Platform Module (TPM) version 2.0.
Graphics card: DirectX 12 or later with WDDM 2.0 driver.
Frequently Asked Questions
Why Is My PC Not Compatible With Windows 11?
Your PC is not compatible with Windows 11 because of not fulfilling Windows 11 minimum system requirements.
Why did Windows 11 fail to install?
Windows 11 fails to install on your PC because your PC doesn’t meet the minimum system requirements for installing Windows 11. Also, corrupted installation media is another reason Windows 11 won’t install on your PC.
Why can’t I Update to Windows 11 yet?
Due to a lack of compatibility with Windows 11 system requirements, you can’t update to Windows 11 yet.
What can I do if my PC is Not Compatible With Windows 11?
Install Windows 11 by creating the Installation Media. Microsoft is officially allowed only to install Windows 11 on an unsupported PC. But, you can’t upgrade from Windows 10 to Windows 11 using the Windows Update system.
Final Thoughts
Installing Windows 11 is an effortless and straightforward process. But, sometimes, some PCs can’t install Windows 11 due to not meeting Windows 11 minimum system requirements. So, ensure your device is compatible with Windows 11 system requirements before installing.
If your PC doesn’t meet the minimum system requirements, you can create Windows 11 Installation Media to install Windows 11 on your unsupported PC.
That’s all for now, folks. Thanks for staying with me till the end.
See you next one. Peace!