Microsoft Outlook is one of the most efficient email management software available out there. This program gets even more systematic if you set a rule for your inbox.
Usually, Outlook rules work automatically when assigned conditions are met. For instance, if you want specific emails to move into a folder, you can move every email manually, which will take a huge amount of time.
Alternatively, you can create an Outlook rule that will move the emails to a specific folder. And that’s without even touching your computer.
Sounds good, right?
But, due to the lack of proper information, most users can’t set up an Outlook rule properly. This article is about how you can create Outlook rules to manage emails.
So, keep reading.
Check out the easiest way to why Outlook not Marking Emails as Replied
Set up an Outlook Rule from Messages
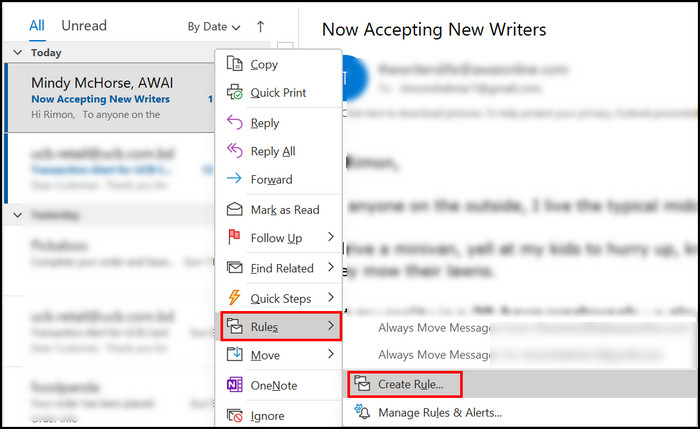
Generating a new Outlook rule from your inbox is by far the easiest option. Cause you don’t need to introduce the sender’s email manually. Just right-click on the message(sender) you want to select a rule for and follow the rest of the instructions.
Here are the steps to create Outlook rules from specific messages:
- Open Microsoft Outlook on your device.
- Right-click on any of the existing messages you want to create a rule for.
- Click on Rules > Create rule.
- Set up a condition—specific direction for what you want to do with the message. For example, tick on play a selected sound from do the following section.
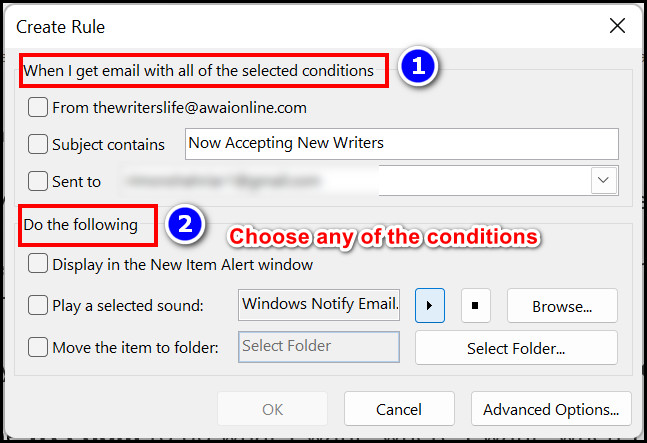
- Select Ok after creating the rule.
- Click on Run this new rule now on messages already in the current folder, then click Ok. That will ensure that your Outlook rule will apply from now on.
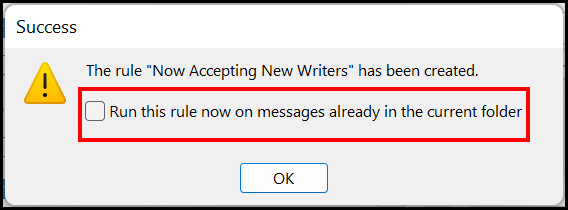
Note: You can skip the last step if you’re not interested in applying the rule immediately.
Here’s a complete guide on how to Automatically Forward Emails in Outlook
How to Create an Outlook Rule from a Template
Templates of the Outlook rule help you establish basic rules, such as flag messages, playing a sound when a message appears, display someone’s mail in the notification area.
Establishing a rule from a template is also effortless in MS Outlook. Just follow the steps that I mentioned here.
Here are the steps to create Outlook rules from a template:
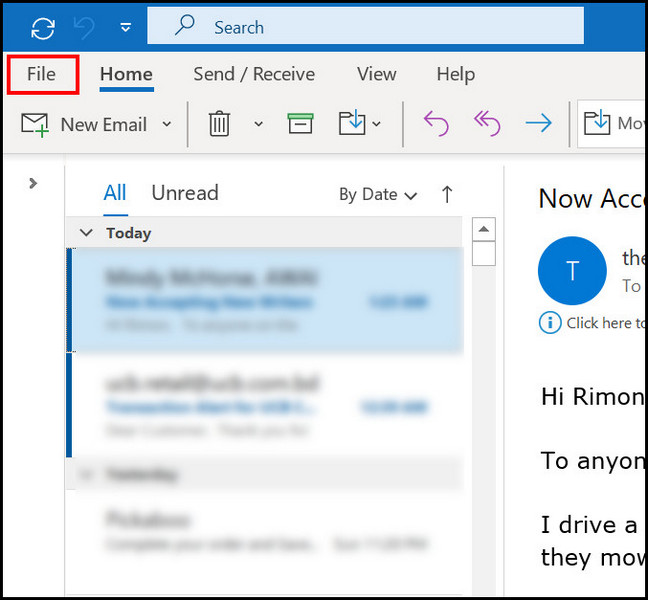
- Launch Outlook application.
- Click on File from the top left corner of the dashboard.
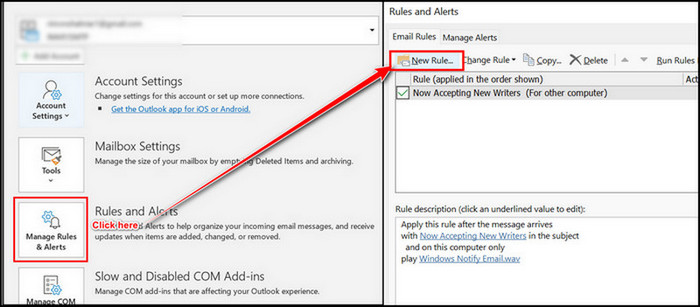
- Select Manage Rules & Alerts, then click on New rule.
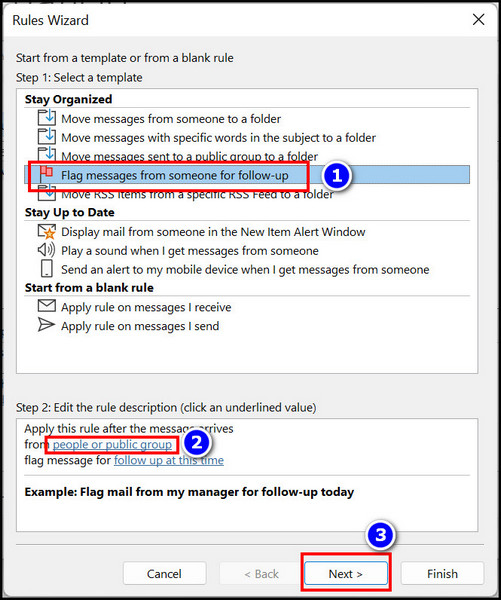
- Pick Flag messages from someone for follow-up, for example.
- Select a highlighted value from below, then click ok.
- Click on Next.
- Select relevant conditions from the following dialog.
- Click on Finish once you select the rules.
After following these steps, you’ll be able to set up Outlook rules from the pre-oriented templates. However, if you want to create rules in a complicated way, you can try setting up mailbox rules. Read further instructions to create a mailbox rule in Outlook.
Also related to this guide how to Enable or Disable Autosave Emails in Outlook
How to Set up a Mailbox Rule in Outlook
Mailbox rules are a bit different from the methods I shared earlier. With mailbox rules, you can set multiple rules for one inbox. Also, you can prioritize the rules.
Creating mailbox rules for Microsoft Outlook can be difficult. For that, I’ve arranged the whole method in a 4-step process. Read all the steps carefully to set up the mailbox rule successfully.
Here are the steps to create Outlook mailbox rules:
Step 1: Outlook Rules Wizard
- Launch Outlook.
- Click on the File tab.
- Locate Manage rules & alerts.
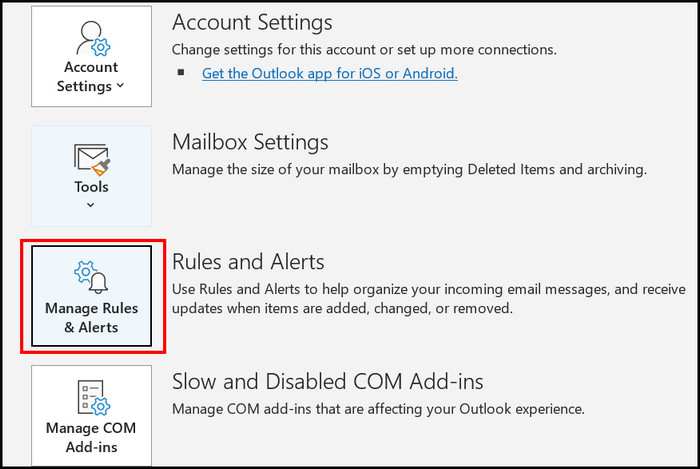
- Select New Rules to open the rules wizard window.
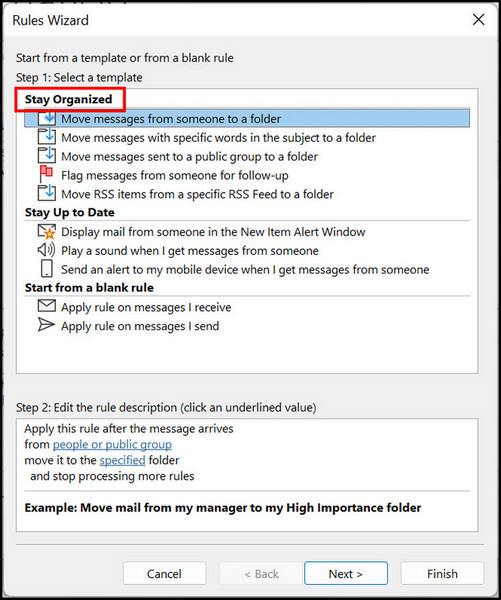
Step 2: Select a Rule Template
- Click on any of the options from the Stay Organized section.
- Edit the rule’s description from below. The editing option will change according to the template you selected earlier.
- Click Next to move to a new window.
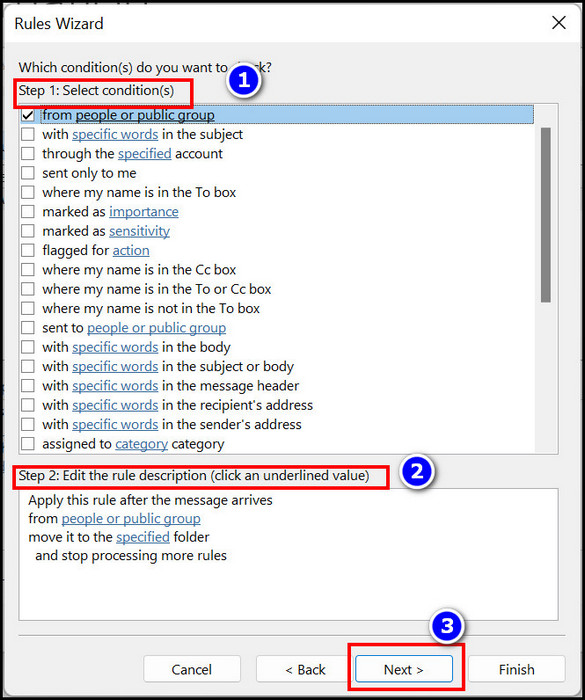
Step 3: Modify the Rule
- Select Actions for the emails.
- Set additional values that are needed for the rule you created.
- Edit the Underlined value of the rule by clicking on the hyperlinks below.
- Click on Next to add exceptions to rules (Optional).
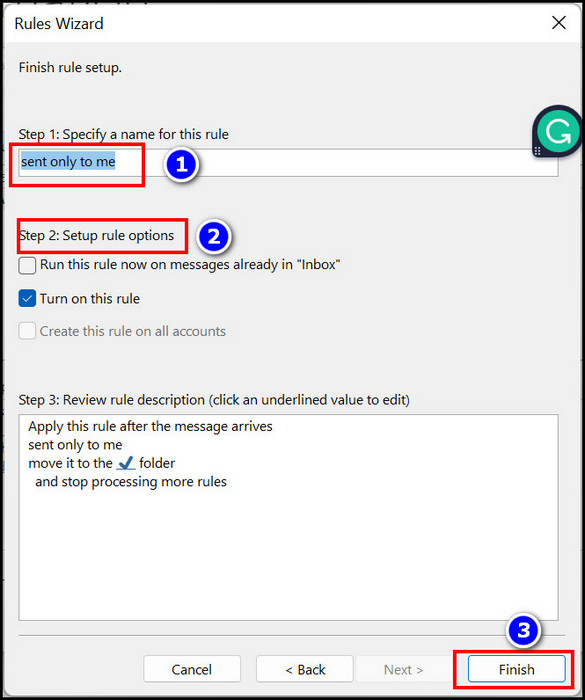
Step 4: Finish Creating a new Rule
- Set a name for the rule you just created.
- Set up additional rule options. E.g., turn on this rule/ run this rule for existing messages from the inbox.
- Click on Finish after setting up additional rules.
Once you’ve finished creating the rule, restart the Outlook client. Check whether the rules you created work or not.
However, check out the following section if you’re using the Outlook web version to manage emails. I’ll explain how to create rules in Outlook 365.
Check out the easiest way to Fix Outlook Crashes at Startup
How to Create Rules in Outlook 365
Nowadays, users don’t install the offline version of Microsft Office/Outlook. They prefer the online hassle-free version. If you’re one of them, don’t worry. You can also create Outlook rules in the web version.
But remember, the Rules of Outlook 365 aren’t as effective as the offline version. So, I recommend using the app version if you are to handle thousands of senders simultaneously.
Here’s the process of creating a rule in Outlook 365:
- Open an internet browser from your device and sign in to your OWA account.
- Click on the settings icon from the dashboard.
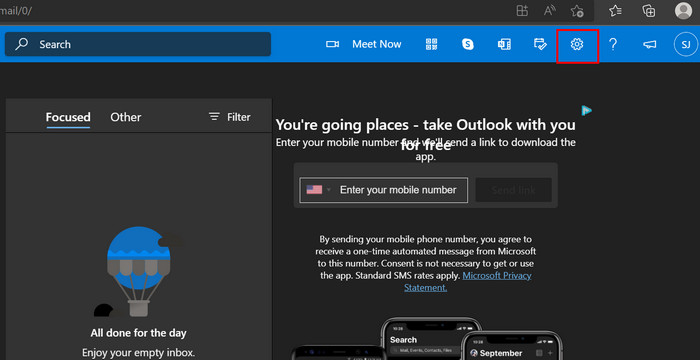
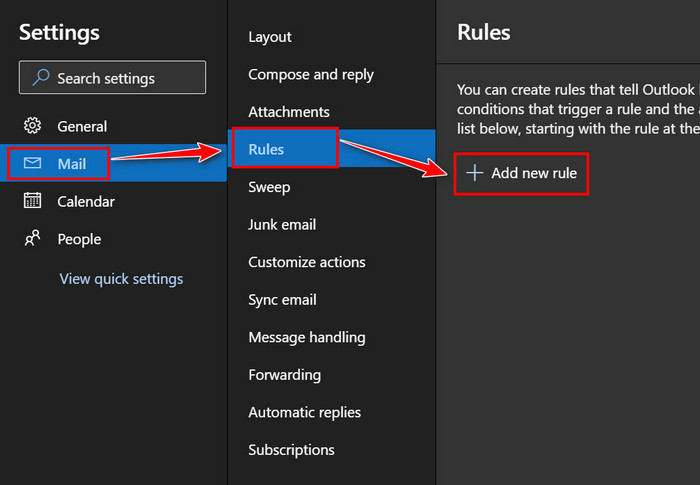
- Select Mail from the settings menu. A new menubar will appear.
- Select Rules from there.
- Click on the Add new rule section in the rules menu.
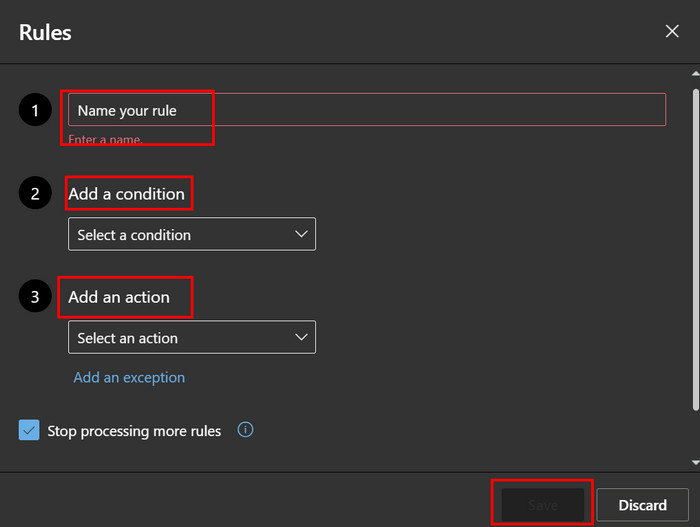
- Set a rule name and add conditions about the rules.
- Add an exception to the rule you just created (if necessary).
- Click on Save once you finish.
These are the most efficient methods of creating rules in MS Outlook. You can try any of the mentioned methods, and the result will be the same.
Also, check out the easiest way to Outlook: Something Is Wrong With Your Data File
Frequently Asked Questions
What does it mean to create a rule in Outlook?
Rules are the automatic action that your Outlook client takes after receiving an email. When you create an Outlook rule, an email’s moving/forwarding/deleting gets automated as you set the conditions.
How do I get emails to go directly to a folder in Outlook?
Open Outlook > Insert the email from the sender whose emails you want to move > Click on Home > Choose Rules > Always Move Messages From [Sender] > Select the destination folder.
How do I create a rule for specific words in Outlook?
Open any of the Outlook versions > File tab > Manage rules & Alerts > Rules > Create New rule > select apply rules to messages I receive > with specific words in the message header > Edit rule description > add > ok.
Follow our guide to Outlook: Enable or Disable Macros
Conclusion
This is the complete tutorial to create Outlook rules. If you’ve read the article till this point, I can assure setting up a new rule in Outlook won’t be an issue.
However, if any of these methods seems impractical to you, comment below. My team will help you set up Outlook rules, no matter which version you’re using.
Enjoy setting up rules for your emails.