On Windows 11, two types of user accounts are accessible: Standard and Administrator. And you can switch from one to another with some simple clicks.
Changing the account type is very easy and will come in handy when multiple users have access to your device. But there are several methods you can use to accomplish the task; the choice is up to you. That’s why I demonstrate them all with pictures in this article.
So without skipping any parts, read till the end and choose the best one.
How to Change User Account Type in Windows 11
Changing the account type will be crucial when numerous users use your Windows 11 system. And you can pursue several techniques to accomplish that operation. The Control Panel, Windows Settings and Run program can help you with that. Additionally, Command Prompt can also complete the job.
It all falls into your hand which process you want to trace, but they all lead to one place, successfully completing the changing account process.
Here are the methods to change account type in Windows 11:
1. Use the Control Panel
By properly utilizing the Control Panel, you can literally do everything on Windows 11. So in that context, you can also change your account type with the help of this program. Let’s move out and see the process briefly.
Here is the process of using the Control Panel to change your account type:
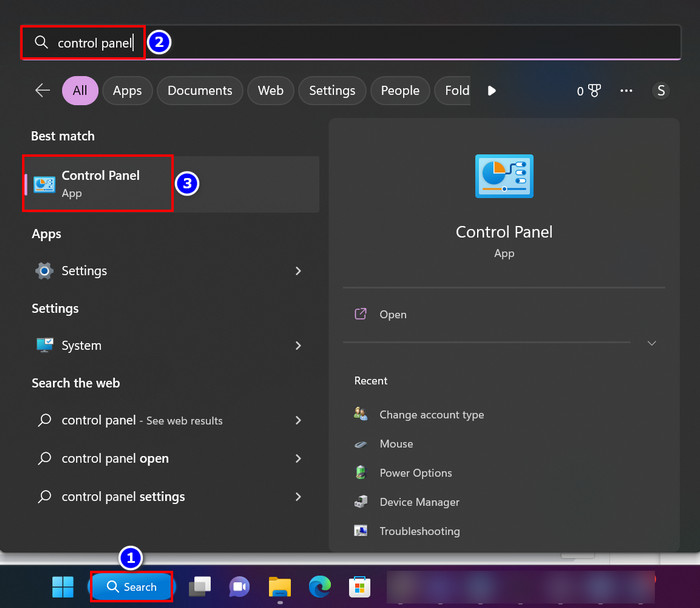
- Move into the Search box and type control panel, and select it.
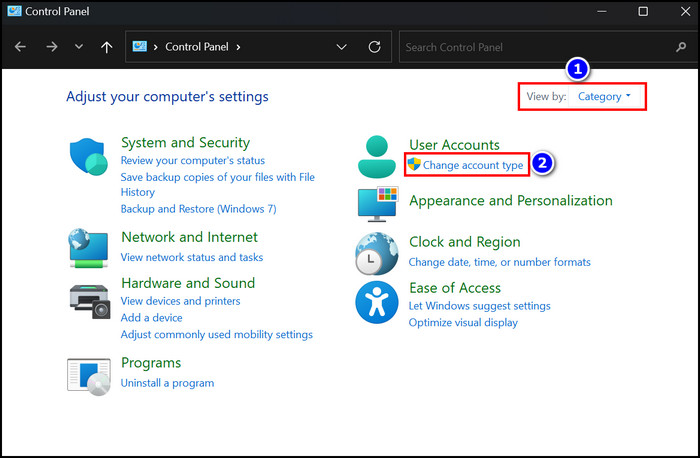
- Change the View by box to Category.
- Click on the Change account type hyperlink from the User Accounts section.
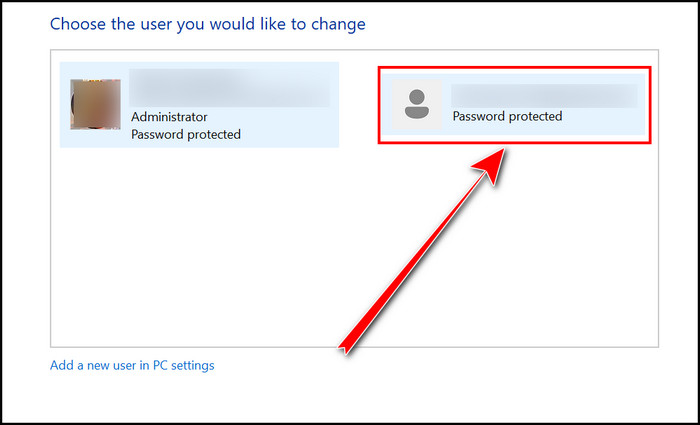
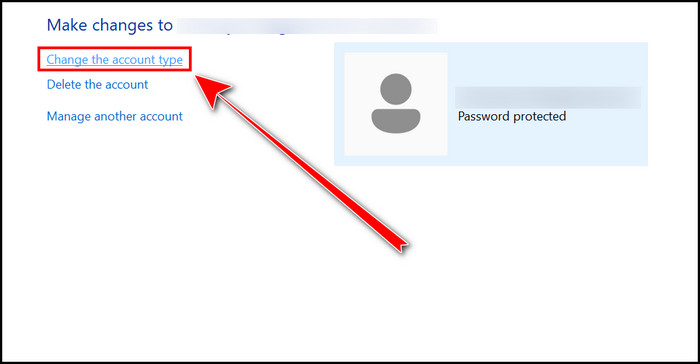
- Select the account for which you want to change the type.
- Press the Change the account type link.
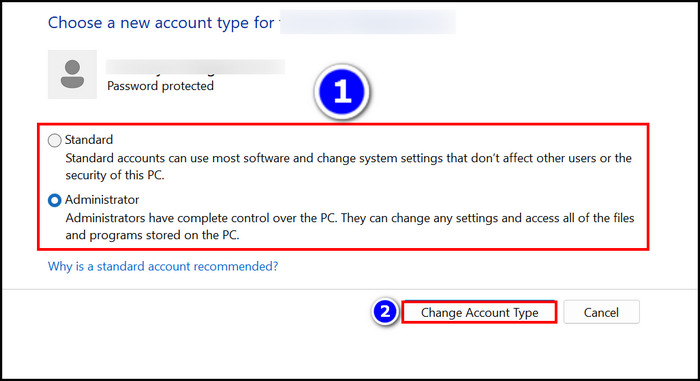
- Choose Standard or Administrator options.
- Hit the Change Account Type button.
That’s how you change the type of your account on Windows 11. Read the next segment to complete the same operation with Windows Settings.
Read more on how to boot to safe mode in Windows 11.
2. Apply the Windows Settings
Some twitching into the Windows Settings can also accomplish the account type-changing job for you. And the procedure to do that is really simple. Follow the instructions I have given below to complete the task.
Here are the steps to apply the Windows Settings to change the user account type:
- Press the Windows+I buttons to open the Windows Settings on your Windows 11.
- Navigate to the Accounts section from the left navigation panel.
- Scroll down and select Other users.

- Click on the Account that you want to change.
- Select the Change account type button from the Account options.

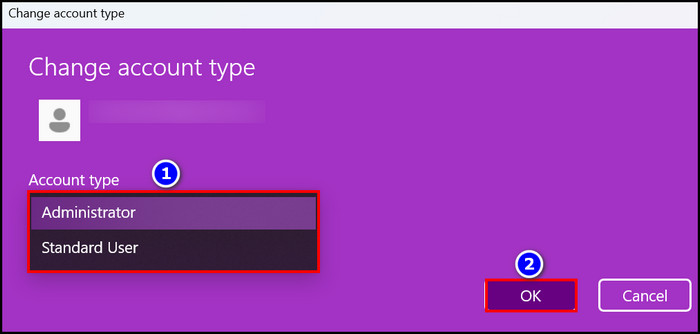
- Click on the Account type drop-down box.
- Pick Administrator or Standard User options.
- Press the OK key.
You can see how simple it is to change your preferred account type.
Check out the easiest way to fix blue screen on Windows 11.
3. Utilize the Run Program
The Run app can assist you in navigating some settings and programs quickly. By taking Run’s help, you can customize your account type. The procedure is easy and given below for your aid.
Here are the ways to utilize the Run program:
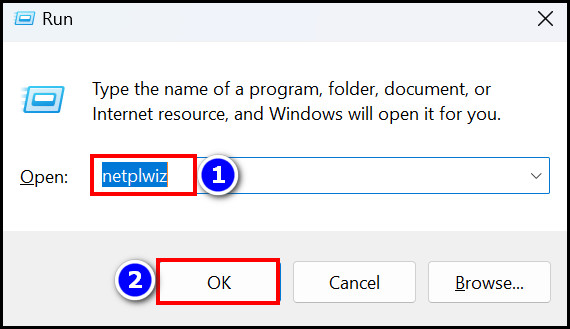
- Press the Win+R keys together to open the Run program.
- Write netplwiz into the box and hit Enter.
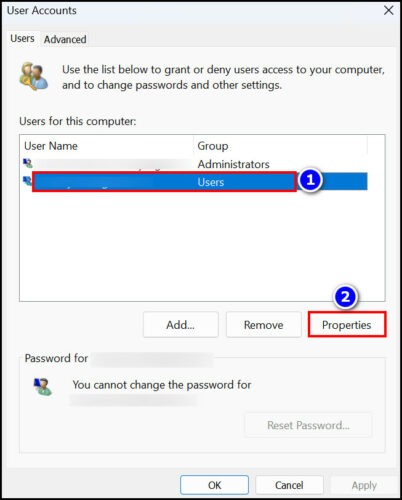
- Select your desired Account from the Users for this computer box.
- Click on the Properties option.
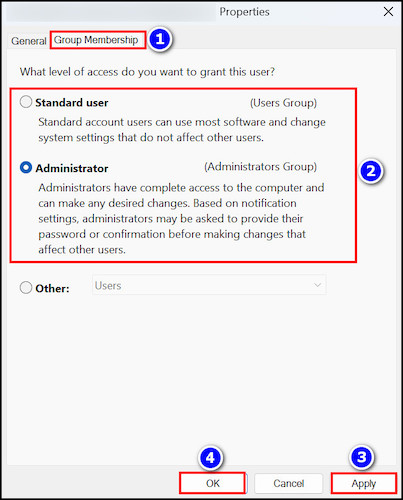
- Move into the Group Membership section.
- Select Standard User or Administrator radio buttons according to your demand.
- Hit Apply & OK to complete the changing process.
After navigating through the steps and properly following them, you will find that your account type has been changed accordingly.
If you love to code in the command window, don’t miss out on the next two segments, where I display how to change user account type using the CMD and Powershell.
Also, check out our separate post on how to fix Windows can’t access network drive on Windows 11.
4. Use the Command Prompt
Via Command Prompt, you can do several complex things with simple commands. Let’s find out how you can use this amazing program to change your account type.
Here’s the procedure to use the Command Prompt:
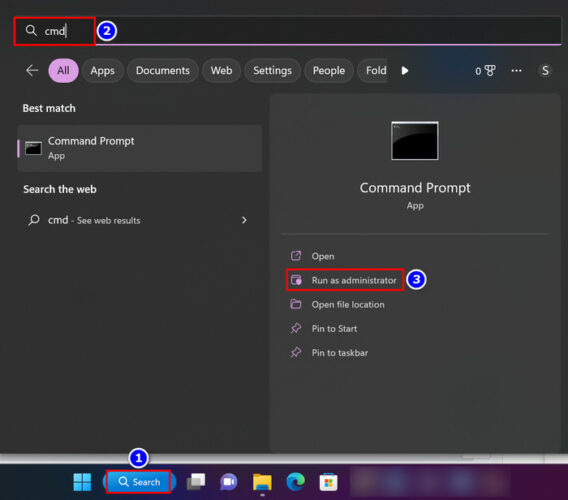
- Move into the Search bar and type cmd.
- Select the Run as administrator option.
- Type net user and hit Enter.
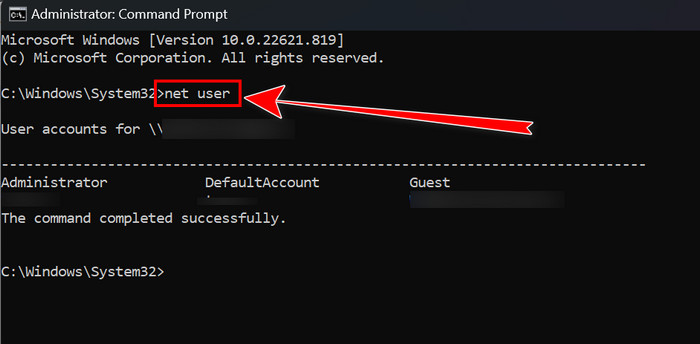
- See your account status and note their names.
- Copy the below command and hit Enter to make your Standard account into an Administrator Just change the Acc Name portion and type your account name there.
- net localgroup Administrators “Acc Name” /add

- net localgroup Administrators “Acc Name” /add
- Copy the beneath command to change your account type from Administrator to Standard.
- net localgroup Administrators “Acc Name” /delete

- net localgroup Administrators “Acc Name” /delete
- Close the Command Prompt.
After completing the mentioned steps, your account type will change. And you can accomplish the entire changing process by copying a single command. Isn’t that amazing? To learn about another amazing method via Powershell, Read on.
Check our latest post on how PC won’t go to sleep mode in Windows 11.
5. Apply the PowerShell Command
Using an individual command in PowerShell, you can quickly make your Standard account into Administrator and vice-versa. Let’s see the command and how you can utilize it.
Here are the steps to apply the PowerShell command:
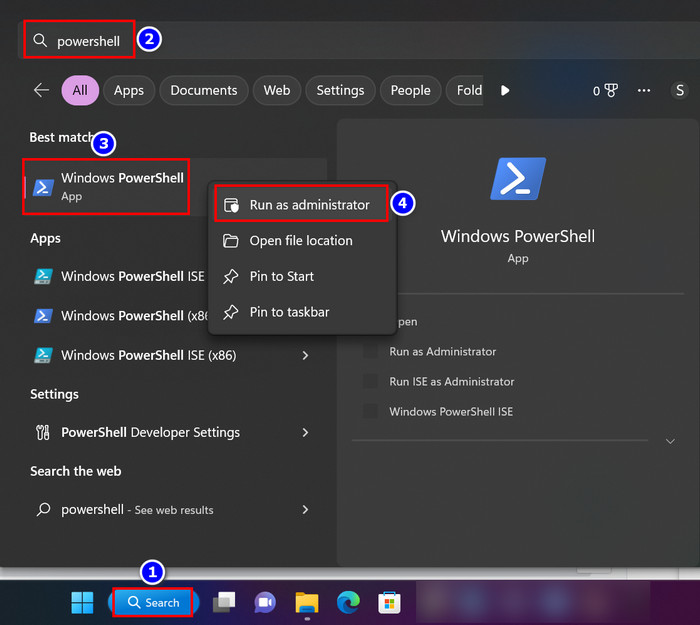
- Navigate to the Search box and write Powershell.
- Right-click on the Windows PowerShell app and select Run as administrator.
- Write net user and hit Enter, then mark the account name you want to change.
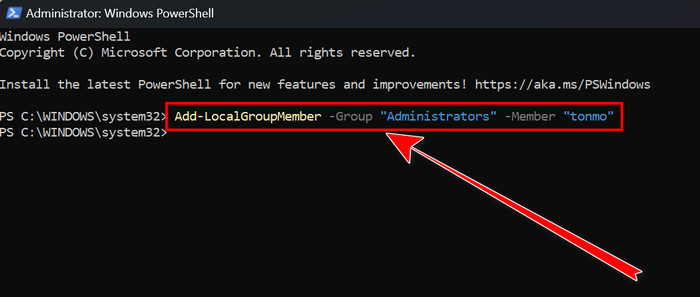
- Copy Add-LocalGroupMember -Group “Administrators” -Member “Acc Name” and press Enter to change Standard User to Administrator. Place the account name that you marked before into the Acc Name portion.
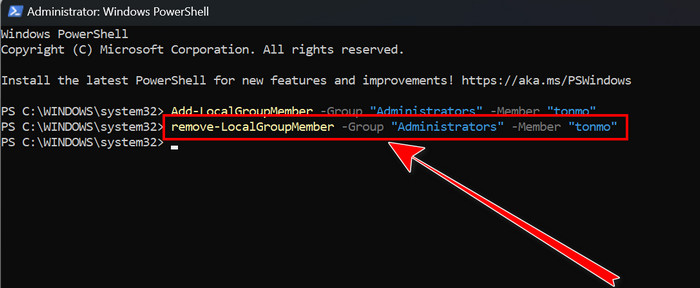
- Copy remove-LocalGroupMember -Group “Administrators” -Member “Acc Name” and hit the Enter button to make the Administrator account into Standard.
- Close the program after you are done.
The process is as simple and effective as that. Still, if you are wondering why account type changing is important, read the next segment to remove your confusion.
Here’s a complete guide on how to restore files from File History on Windows 11.
Why is Account Type Changing Important on Windows 11?
Account type changing is important to give an account authority to change the system’s appearance and functionality. You can enhance or reduce administrative privileges by making a user account Administrator or Standard. Basically, keeping the power in the right account is the actual reason.
As an Administrator, you can customize your Windows 11 system. On the contrary, the Standard account doesn’t offer that. So if multiple users are using your device, you can select which one you want to give the administrative power to and which not.
Standard account holders on your Windows 11 can not access authoritative apps or folders. They can’t modify anything; they are merely the spectators who are using the device.
Now you know why changing the user account type is crucial when necessary.
Frequently Asked Questions
How do I find my user account type in Windows 11?
To find your user account type in Windows 11, open the Control Panel, change the View by section to Category, and click on the Change account type.
How do I change my Administrator account to standard in Windows 11?
To change the Administrator account to Standard in Windows 11, open the Command Prompt with administrative rights. Then type net localgroup Administrators “Acc Name” /delete and hit Enter. Only change the Acc Name according to your account.
What are the types of user accounts on Windows 11?
There are two types of user accounts available on Windows 11: Administrator and Standard.
Conclusion
All the 5 approaches stated in this article will help you to change your user account type.
Now it’s time for you to change the user account type when needed. You can apply the Control Panel, Run or Windows Settings options. Furthermore, the Command Prompt and Powershell can also do the trick for you.
Tell me which one you use to change the type in the comment. Until then, bye!