Out of the many features provided by Windows 11, one of them is having the ability to compare two folders to each other.
It is not a feature that is not used by everyone, so many users have reported that they do not know how to compare folders on Windows 11.
Why compare two folders on Windows 11?
Being confused about how you can compare folders on Windows 11 is natural, as this is not done by most users. Remember that you are not the only one searching for answers and that I am here for you.
I have written the best methods that you can follow to compare folders on Windows 11, so please read the full post to know more details.
How to Compare Two Folders on Windows 11 Easily
To compare two folders on Windows 11 easily, you can follow multiple methods.
I have written these methods below because I care about you and I want you to learn how to compare folders so that you can use this in the future.
The processes are simple, so there is no need for you to worry or be tensed. Simply follow the methods given below and you will be all set.
Here are the methods to compare two folders on Windows 11:
1. Use Command Prompt
This is the best way to compare folders without installing any other software. The command prompt is provided by every version of Windows by default. If you have not used the command prompt before, do not worry as opening and using it is extremely simple.
Have you ever used Command Prompt?
If not, then don’t worry. It’s as simple as opening “My Computer”.
As this process is very straightforward, you will not have a hard time following the steps. Just follow the simple steps given below. I believe in you!
Follow our guide on how to Password Protect a File or Folder in Windows 11.
Here are the steps to use the Command Prompt to compare two folders on Windows 11:
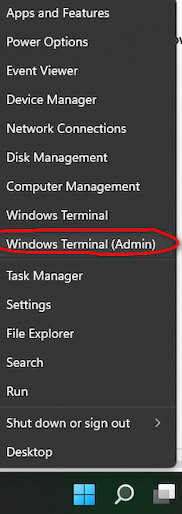
- Right-click on the Start button and click on Windows Terminal (Admin).
- Type in robocopy “path to first folder” “path to second folder” /L /NJH /NJS /NP /NS. In place of “ path to the first folder” enter the actual path of the first folder. The same goes for “path to the second folder” and press the Enter key. For example, robocopy “E:\job\43” “E:\Downloads” /L /NJH /NJS /NP. You can right-click on a folder and select Copy as path and paste it in the “path to first or second folder” portion.
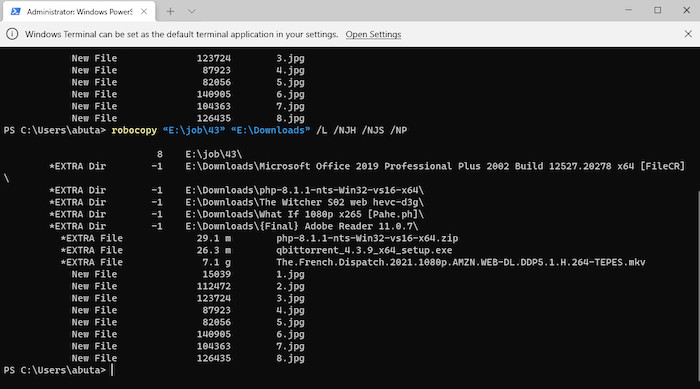
- The Command Prompt terminal will show you the differences between the two folders.
If this method was too hard for you to follow or you were not able to follow the steps, do not worry as I have given other methods as well.
Check our latest post on how PC won’t go to sleep mode in Windows 11.
2. Use Winmerge to Compare Two Folders
Winmerge is a free open source tool that allows users to compare files and folders. The differences will be displayed when two folders are compared using this tool. It is a fantastic tool as it is free and very user-friendly.
If you had difficulty following the previous method, I guarantee you this method is easier so it will be better for you.
Here are the steps to use Winmerge to compare two folders on Windows 11:
- Download Winmerge from the website. It is better to download the Zip file as you can directly run it after extraction and no installation is necessary. If you download the installer, just follow the on-screen prompts.
- Open Winmerge after installing it.
- Press the Ctrl and O buttons at the same time or go to File>Open.
- Under 1st File or Folder, click Browse and select the file or folder. Do the same for the 2nd File or Folder.
- Click on Compare after both files or folders are selected. The differences between the two files or folders will be shown to you.
If this method did not work for you or it was too complicated for you, do not be sad as the other methods are given below.
Also, check out our separate post to disable SuperFetch in Windows 11.
3. Use Windows PowerShell to Compare Two Folders on Windows 11
Windows PowerShell is another excellent tool provided by Windows 11 by default. It has many purposes but for today, it will be used to compare two folders. The great thing is that using Windows Powershell is very easy as it is user-friendly.
There is no reason to be nervous if you have not used Windows Powershell before, as I have given the simple steps to use PowerShell easily. So let us not waste time and kindly go through the steps below.
Quickly check out our latest fix for Bluetooth Toggle Missing On Windows 11.
Here are the steps to use Windows Powershell to compare folders on Windows 11:
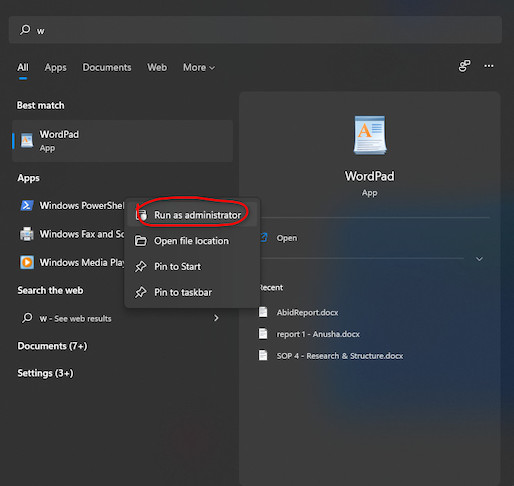
- Click on the Start button and search for Windows PowerShell.
- Right-click on Windows PowerShell and click on Run as Administrator.
- Paste $fso = Get-ChildItem -Recurse -path “C:\folder” and replace the C:\folder portion with the first folder address. For example, $fso = Get-ChildItem -Recurse -path “C:\Program Files”.
- Paste $fsoBU = Get-ChildItem -Recurse -path “C:folder 2” and replace the C:folder 2 portion with the folder address of the second folder. Press the Enter key if the command line does not run. For example, $fsoBU = Get-ChildItem -Recurse -path “C:\Program Files\ModifiableWindowsApps”. The differences between the two folders will be shown to you.
Related guides: How To Fix Change to a 12 Hour Clock in Windows 11.
FAQ
Can Treesize Compare Folders?
Yes, Treesize can compare folders and files. It is a tool mainly used to see storage space management.
How can I Tell if Two Folders have the Same File?
You can drag the windows of the two folders and keep them side by side. You can see whether there are any differences or not. If the folders contain the same file or files, then yes the folders have the same file or files.
Conclusion
I hope that you could compare two folders on Windows 11 after following the methods I have given in this post. I hope you can now use this new knowledge in the future whenever you need it.
Usually people right-click on the folder they want to inspect and click on Properties to see the folder’s details. The methods given here are a much better way to do that. I hope this post has helped you.
I wish you luck in whatever you do in the future!