In modern days, wireless internet connection is one of the most vital features in our daily life. You are used to the wireless internet connection in your daily work, such as virtual meetings with clients and audio or video chat sessions with friends on your Windows 11 computer.
But after upgrading to Windows 11, you noticed that your wireless internet connection is not working correctly on your Windows 11 system.
You try to solve the problem by restarting your computer many times, but alas! It doesn’t work.
If this is the case and you’re concerned about it, don’t worry.
As a tech specialist and enthusiast, I found the most effortless method to solve the wireless network connection problem. So, if you are looking for an ultimate step-by-step guide to fix the wireless network issue, then you have come to the right place.
This post will show you some of the best proven and effective techniques to solve the wireless network connection problem on your Windows 11 system.
Keep reading and precisely follow the instructions to know the solution.
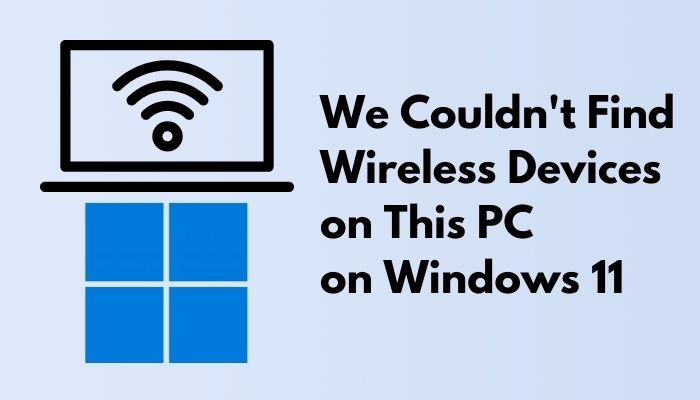
Why does Wireless Network Connection Error Occur on Windows 11?
We couldn’t find wireless devices on this PC error occur on Windows 11 computer because of network adapter issue, outdated or corrupted network driver, or outdated version of Windows. Also, a weak or disrupted WiFi frequency problem is another reason for wireless network issues on Windows 11 PC.
There are many potential reasons for wireless network connectivity errors on your Windows 11 computer. This section will discuss the possible reasons for the wireless network connection issue.
Here are the reasons for wireless network connection issues on your Windows 11 computer:
Network Adapter Issue
The network adapter problem is one of the most common causes of wireless network connection problems on Windows 11 devices.
You may experience a wireless network connection problem if the hardware in your network adapter is damaged or cuts down the adapter’s efficiency.
To solve the problem, try to fix the related network adapter issue by updating the driver or installing the new network adapter device.
Check out our expert-recommended to fix Stop Apps Running in Background Windows 11.
Corrupted or Outdated Network Driver
The most common cause of wireless network connectivity problems on Windows 11 computers is a faulty or outdated network driver. If you do not keep your network driver up to date, your Windows 11 computer device may experience wireless network connection troubles.
So, keep your network driver always up to date to avoid wireless network connection problems in your Windows 11 computer device.
Current Version of Windows
Another factor for your Windows 11 computer’s wireless network connection problem is a problematic current operating system version. When your current Windows OS is corrupted, the functionality of your system may conflict with other functions, resulting in wireless network connectivity issues.
So, update your Windows or roll back the previous version of Windows to avoid wireless network connectivity issues on your Windows 11 computer device.
So far, you’ve seen the potential reasons for wireless network connectivity problems on your Windows 11 machine. In the next section, I’ll show you several tested and proven solutions to solve the problem.
So, let’s get started figuring out how to fix your Windows 11 computer’s wireless network connection troubles.
Follow our guide on How to Boot to Safe Mode in Windows 11.
How to Fix couldn’t Find Wireless Devices on Windows 11
With the increasing popularity of the Internet, Wi-Fi has become a crucial feature. Nowadays, we are connected with the internet most of the time, and we are regularly doing so many daily activities on the internet.
Many Windows 11 users reported that after upgrading to Windows 11, they faced wireless network connectivity issues on their Windows 11 computers.
In the previous section, you’ve seen the possible potential reason for the wireless network connection issues on your Windows 11 computer so far. This section will show you several tested and proven solutions to solve the problem.
So, let’s dive right in to know the solution for the wireless network connectivity issues.
Here are the steps to fix the wireless network connection issues on Windows 11:
1. Run Network Adapter Troubleshooter
Try running your problem-related troubleshooter when you have a problem with your Windows 11 machine. The troubleshooting method might assist you in automatically identifying and correcting your problem.
So, run the Network Adapter troubleshooter on your Windows 11 system to resolve the wireless network connectivity issue.
Here are the steps to run the Network Adapter troubleshooter:
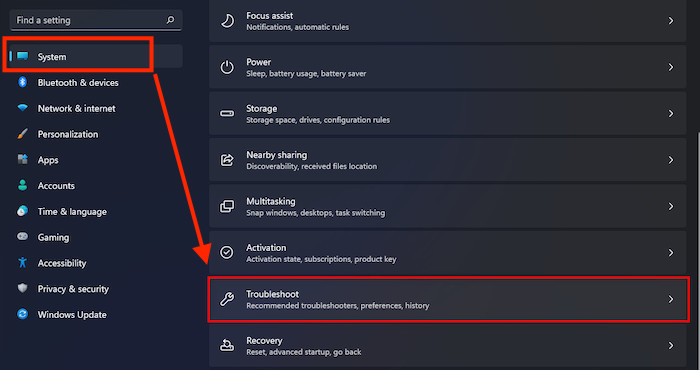
- Press the Win + I keys on your keyboard to open the System Settings.
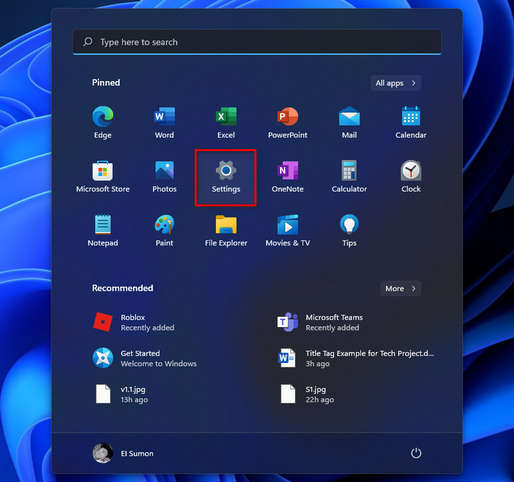
- Click on the Start / Windows icon and select Settings app under the Pinned apps to open the System Settings.
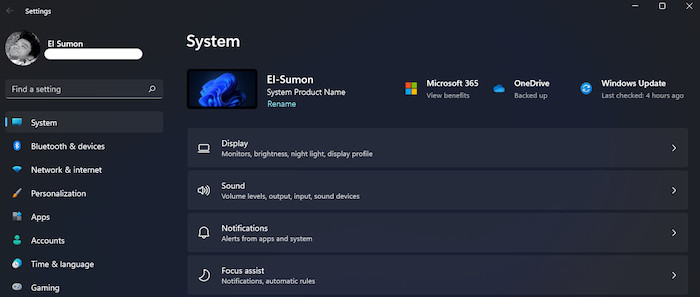
- Select System tab on the left side settings menu panel.
- Select Troubleshoot option on the right-side system window.
- Click on the Other troubleshooter’s
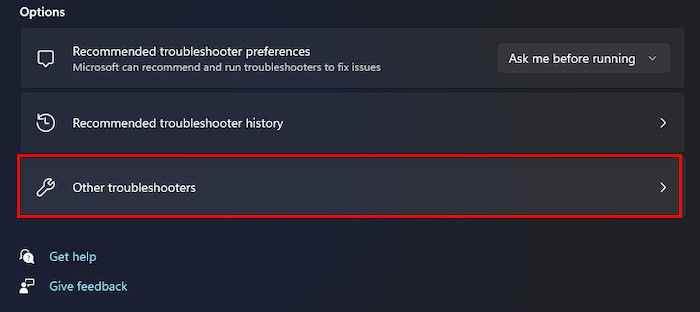
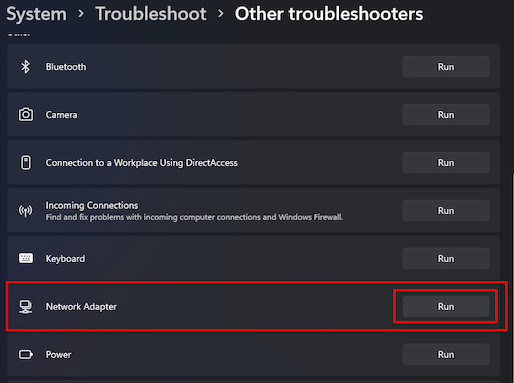
- Find the Network Adapter troubleshoot option under the Other
- Click on the Run button to run the Network Adapter
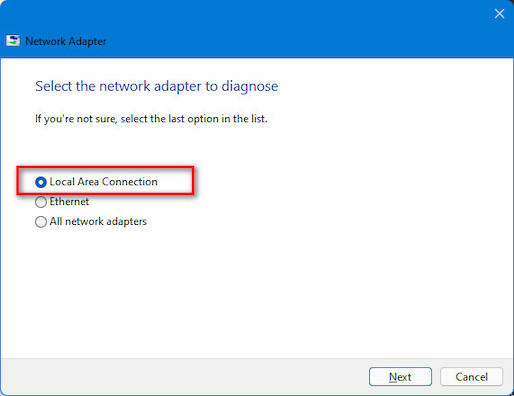
- Select your network adapter to diagnose your problem. If you are not sure which kind of network adapter you have, select the last option in the list.
- Click on the Next button to start the troubleshooting and detect the problem.
- Wait a few seconds to detect and resolve the issues.
- After a few seconds, troubleshooting is completed.
- Click on the View detailed information to view the detailed information on the problems.
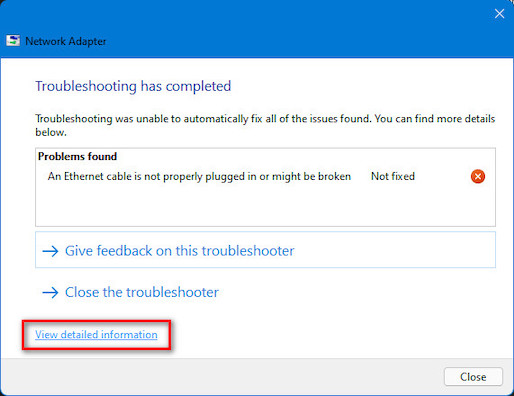
- Click on the Close button to close the troubleshooter window. Image No – 1.13
- Check to see whether the problem is solved. If not, then try the next solution.
Quickly check out our latest fix for Bluetooth Toggle Missing On Windows 11.
2. Update Network Adapter Drivers
If the wireless network connectivity issue occurs on your Windows 11 computer, you should update your network adapter drivers to fix the problem.
Here are the steps to update your network adapter drivers:
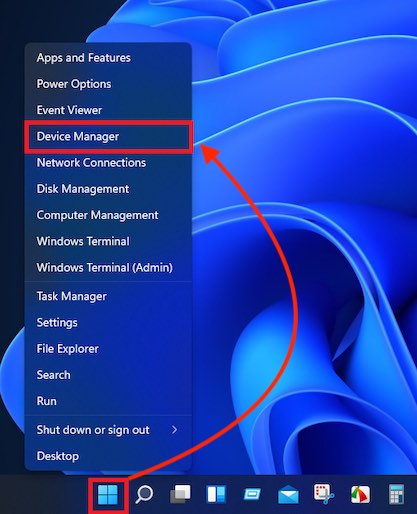
- Press Windows Key + X on your keyboard and select Device Manager from the list. Or,
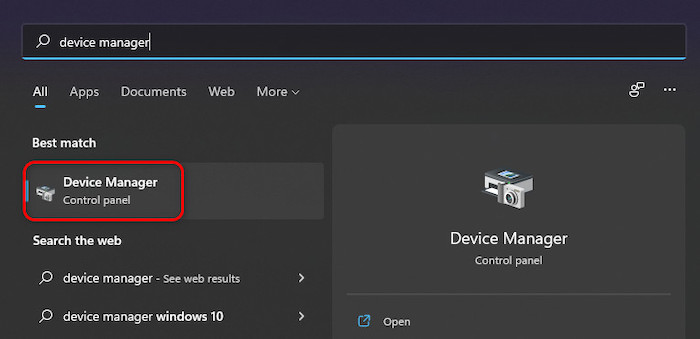
- Type Device Manager on the Windows search bar and press Enter key to open the Device Manager.
- Select the Network adapters option and click on it to expand to see the drivers list.
- Select your Wireless Network adapters driver to update the drivers.

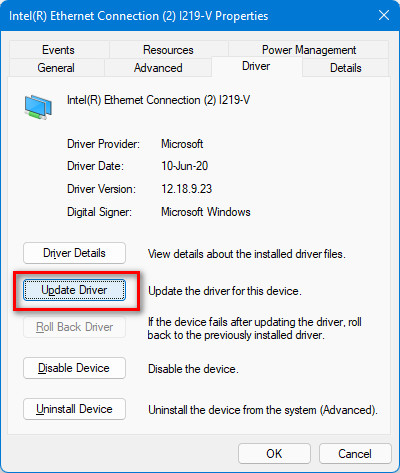
- Hit the Enter key to open the driver Properties window.
- Click on the Driver tab to open the driver details and options.
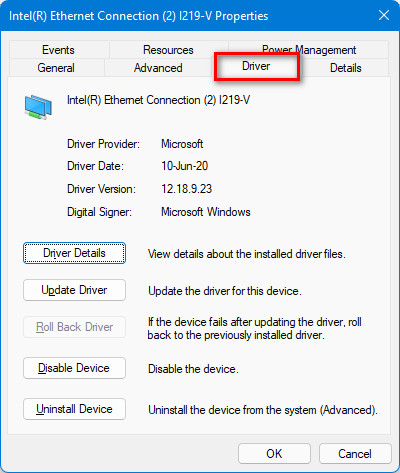
- Click on the Update Driver
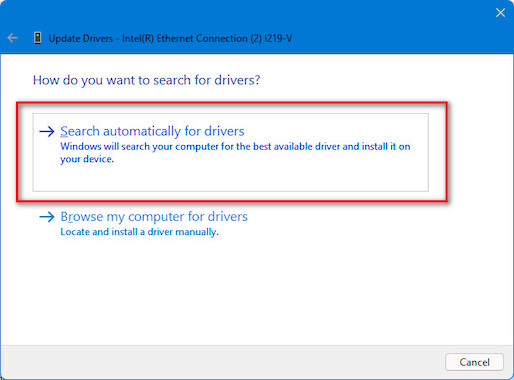
- Click on the Search automatically for drivers option to update the driver automatically.
- Wait some time to finish updating your driver.
- After the updated driver, check to see whether your problem is solved. If not, then try the next solution.
You may also like to read: Show Folder Size in Windows 11.
3. Reinstall Network Adapter Driver
If updating the network adapter drivers does not solve the wireless network connectivity problem, you can reinstall your network adapter drivers to fix the problem.
Here are the steps to reinstall the network adapter drivers:
- Press Windows Key + X on your keyboard and select Device Manager from the list. Or,
- Type Device Manager on the Windows search bar and press Enter key to open the Device Manager.
- Select the Network adapters option and click on it to expand to see the drivers list.
- Select your Wireless Network adapter device to uninstall the drivers.
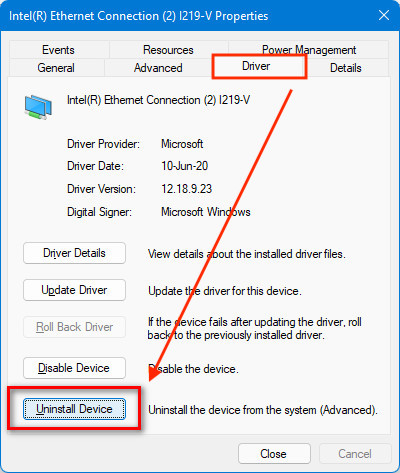
- Hit the Enter key to open the driver Properties window.
- Click on the Driver tab to open the driver details and options.
- Click on the Uninstall Device
- Wait some time to finish uninstalling your driver and Restart your computer.
- After rebooting your computer, the Wireless Network Adapter driver is automatically reinstalled.
- Check to see whether your problem is solved. If not, then try the next solution.
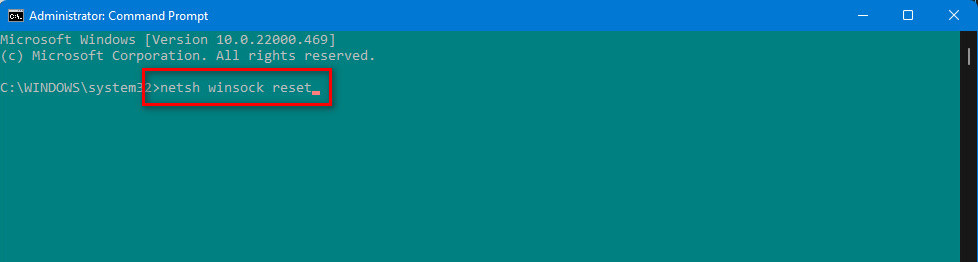
4. Reset Winsock Catalog and Flush DNS
Another effective method to solve the wireless network connectivity problem on your Windows 11 computer is resetting the Winsock catalog and Flush the DNS.
Here are the steps to reset the Winsock catalog and Flush the DNS:
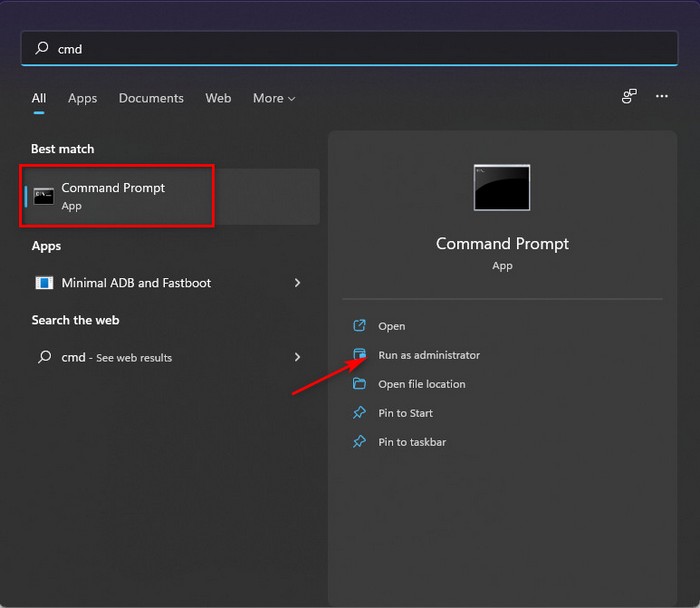
- Press Win+S on your keyboard to open the Windows Search bar and type cmd.
- Click on the Run as administrator to open the Command Prompt as an admin privilege.
- Enter the following commands one by one to reset the Winsock catalog and Flush the DNS:
- netsh winsock reset
- netsh int ip reset
- ipconfig /release
- ipconfig /renew
- ipconfig /flushdns
- Check whether your problem is solved or continue, then try the next solution.
Follow our epic guide to Change Power Mode on Windows 11.
5. Reset TCP / IP Settings
Resetting the TCP / IP settings on your Windows 11 machine is another excellent way to fix the wireless network connectivity problem.
Here are the steps to reset the TCP / IP settings:
- Press Win+S on your keyboard to open the Windows Search bar and type cmd.
- Click on the Run as administrator to open the Command Prompt as an admin privilege.
- Enter the following command to reset the TCP / IP settings:
- netsh int ip reset resetlog.txt
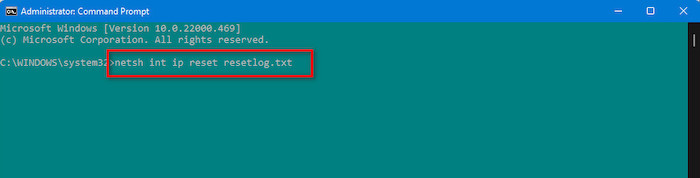
- netsh int ip reset resetlog.txt
- Check whether your problem is solved or continue, then try the next solution.
6. Change Power Management Options
If the previous solution fails to resolve the wireless network connectivity issue, you can turn off the power management options to solve the problem.
Here are the steps to change the power management options:
- Press Windows Key + X on your keyboard and select Device Manager from the list. Or,
- Type Device Manager on the Windows search bar and press Enter key to open the Device Manager.
- Select the Network adapters option and click on it to expand to see the drivers list.
- Select your Wireless Network adapter device to update the drivers.
- Hit the Enter key to open the driver Properties window.
- Click on the Power Management tab to see the power management options.
- Uncheck the Allow the computer to turn off this device to save power
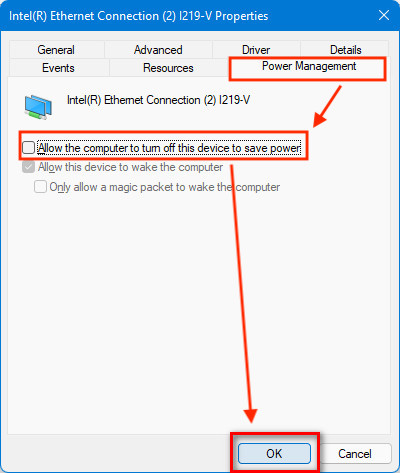
- Click on the OK button to save the changes.
- Check to see whether your wireless connection problem is solved.
7. Uninstall Windows 11 Updates
If you face a network connectivity problem after updating the latest Windows 11 version on your system, then the possibility is the issue may occur for the Windows 11 current version.
Uninstalling the latest Windows 11 updates is the effective method to solve the network connectivity problem.
Here are the steps to uninstall the latest Windows 11 updates:
- Press the Win + I keys on your keyboard to open the System Settings.
- Click on the Start / Windows icon and select Settings app under the Pinned apps to open the System Settings.
- Select the Windows Update tab on the left side settings menu panel.
- Select the Update history option on the right-side system window.
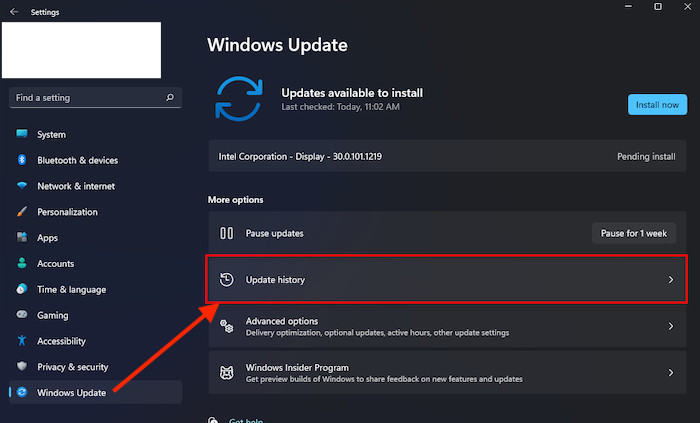
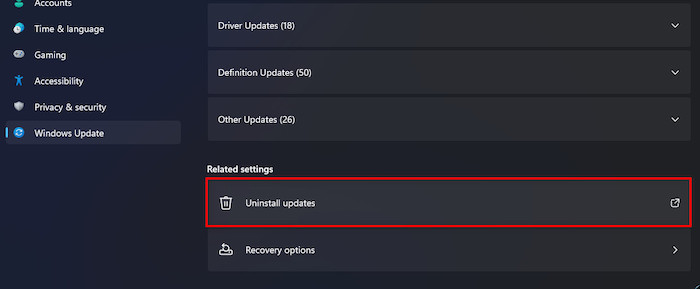
- Scroll down and click on the Uninstall updates under the Related settings
- Select the latest update version you want to remove.
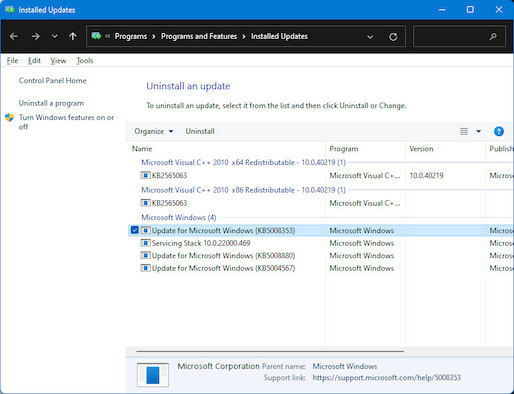
- Right-click on it and select Uninstall or hit the Enter key and click on the Yes button to uninstall the current Windows 11 update.
- Wait until the uninstalling process is complete.
- After completing the uninstalling process, check whether the problem is solved.
Final Thoughts
Many Windows 11 users have reported facing the network connectivity error message when updating Windows 10 to 11.
There are many potential reasons for wireless network connectivity errors on your Windows 11 computer. This post describes the possible causes for the network connectivity issue of Windows 11.
Here, I demonstrate several tested and proven solutions to solve the network connectivity problem. You can successfully solve your Windows 11 network connectivity issue easily using these practical methods.
I hope you found this post to be informative. If you found your solution, please let me know which method works for you.
You may also look at other posts if you’re interested in learning more about similar topics.