When you try to update your Windows 11, do you get an update error 0x8007000d that prevents you from doing so?
If this is the case, there is nothing to worry about.
If you are looking for an ultimate step-by-step guide to fix the update error on your Windows 11 system, you have come to the right place.
As a tech expert and enthusiast, I will research and test many methods to find the best possible solutions. This post will show you some of the best practical and effective techniques to fix the update error on your Windows 11 system.
So, how do I fix the update error 0x8007000d?
Keep reading the whole post and precisely follow the instructions.
Follow our guide on how to Fix Update Error Code 0x80004005 in Windows 11
Why Does the Update Error 0x80070490 Occur?
The Update Error 0x80070490 occurs mainly for two reasons: corrupted system files and windows update components become outdated. There are also have other reasons to occur the update error 0x80070490, but these are the main two reasons to appear the error.
When your system has corrupted files, the corrupted files create some unusual issues, for example, conflict with others software or prevents system or software process, etc.
However, the corrupted system files can also prevent the system update process while updating your Windows 11 system and facing the update error 0x80070490. To try performing a repair installation can fix your update error 0x80070490 on Windows 11.
Another main reason is windows update components become outdated. The outdated windows component may create the windows update process stacked when the system tries to finish the update process.
You can efficiently solve the update error 0x80070490 on your Windows 11 system to update the Windows update components.
The following section will show you some effective methods to solve the update error 0x80070490 on your Windows 11 system.
Check our guide if your PC won’t go into Sleep mode in Windows 11.
How to Fix Windows 11 Update Error 0×8007000d
There are many reasons that the update error 0×8007000d when you try to update the windows on your Windows 11 system. The error prevents you from installing Windows updates or upgrading to a newer version.
This section will show you some proven and effective methods to solve the update error 0x80070490 on your Windows 11 system.
Let’s dive right in and see what solutions you have for resolving this issue.
Check our exclusive tutorial on How to Fix Blue Screen on Windows 11.
Here are the septs to fix the Windows 11 update error 0×8007000d:
1. Run Windows Update Troubleshooter
If you get the update error 0×8007000d on your windows 11 system, you can run the Windows update troubleshooter to solve the error.
Follow these steps to solve the update error 0×8007000d on your windows 11 system running the Windows Update troubleshooter:
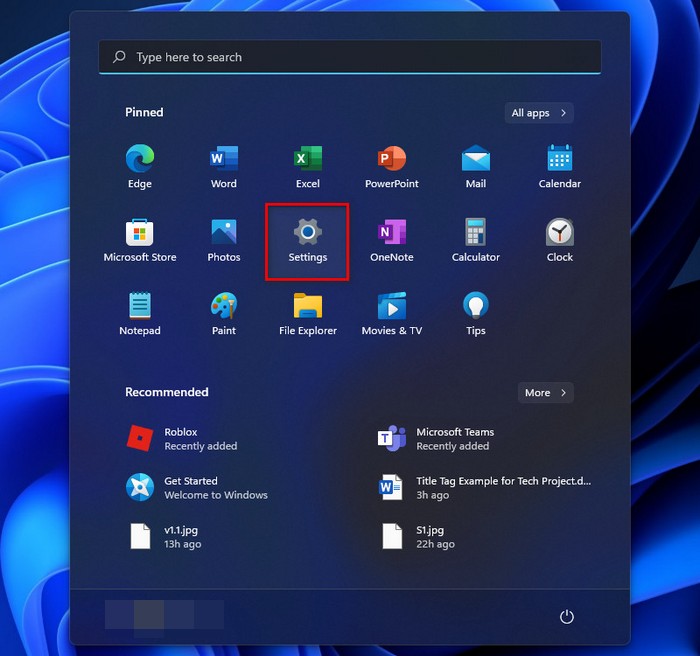
- Press the Win + I keys on your keyboard to open the Windows System Settings.
- Click on the Start icon at the left side corner at the taskbar and select Settings app under the Pinned apps to open the System Settings.
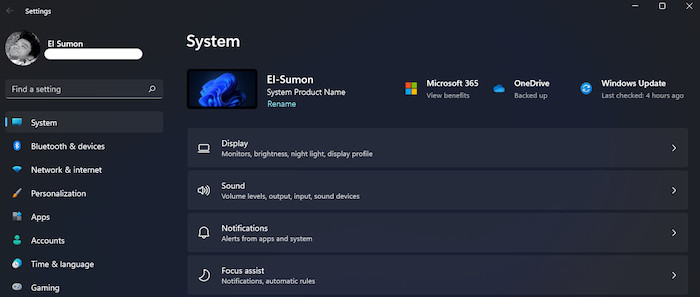
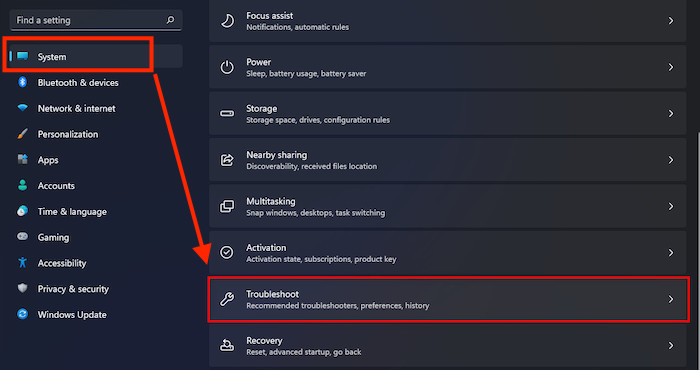
- Select System tab on the left side settings menu panel.
- Select Troubleshoot option on the right-side system window.
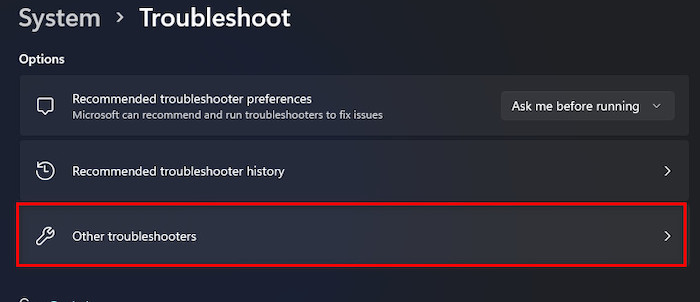
- Click on the Other troubleshooter’s
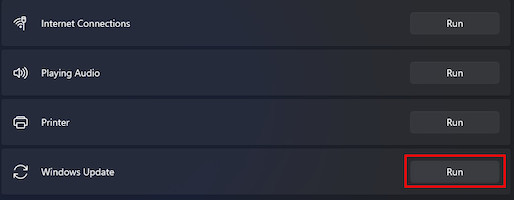
- Under the Most frequent section, find the Windows Update troubleshoot option.
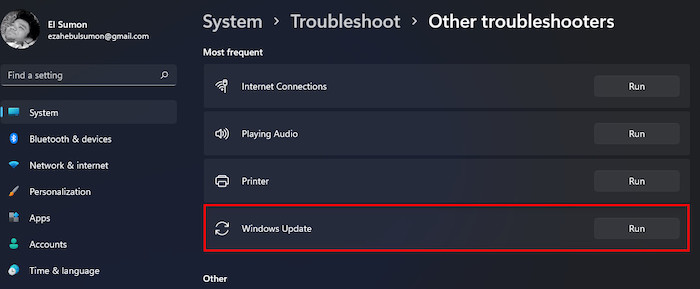
- Click on the Windows Update Run button to run the Windows Update troubleshooter.
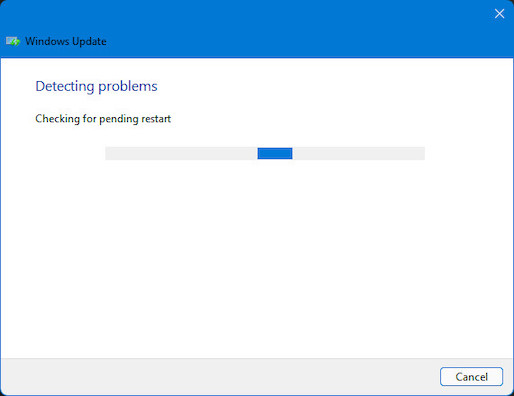
- Wait a few seconds to detect and resolve the Windows Update issues.
- After fixing the update issue, Windows Update troubleshooting is completed.
- Click on the View detailed information to view the detailed information on the problems.
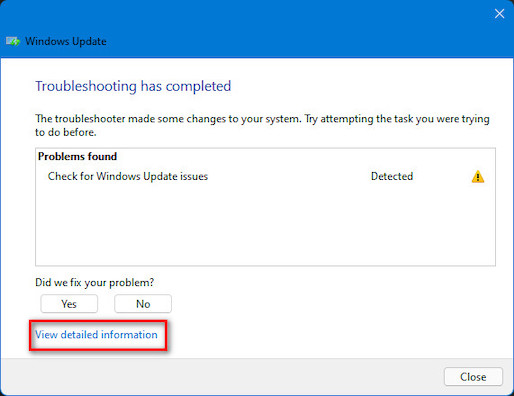
- Click on the Close button to close the Windows Update troubleshooter window.
Also read, Stop Apps Running in Background Windows 11.
2. Reset Windows Update Components
Outdated windows update components are one of the main reasons to get the windows to update error 0×8007000d.
So, to solve the windows update error 0×8007000d on your Windows 11 system computer, you need to reset the windows update components.
Follow the steps below to reset the windows update components to solve the update error 0×8007000d on your windows 11 system:
- Press Win + S on your keyboard or click on the Search icon on the left-side taskbar to open the Windows Search
- Type cmd on the search bar and click on Run as Administrator to open the Command Prompt as an administrator privilege.

- Run each of the following commands separately to stop the services:
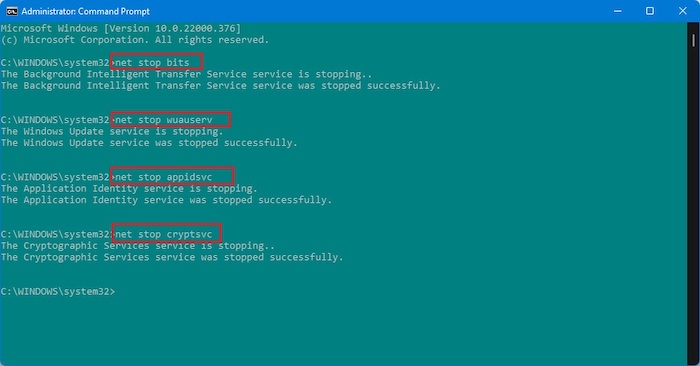
- net stop bits
- net stop wuauserv
- net stop appidsvc
- net stop cryptsvc
- Enter the following commands and hit the Enter button to rename the SoftwareDistribution and Catroot2 folder:
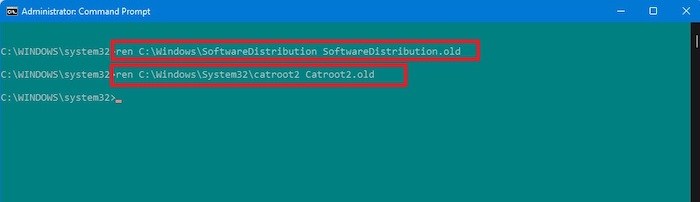
- ren C:\Windows\SoftwareDistribution SoftwareDistribution.old
- ren C:\Windows\System32\catroot2 Catroot2.old
- Enter the following commands to restart the service again:
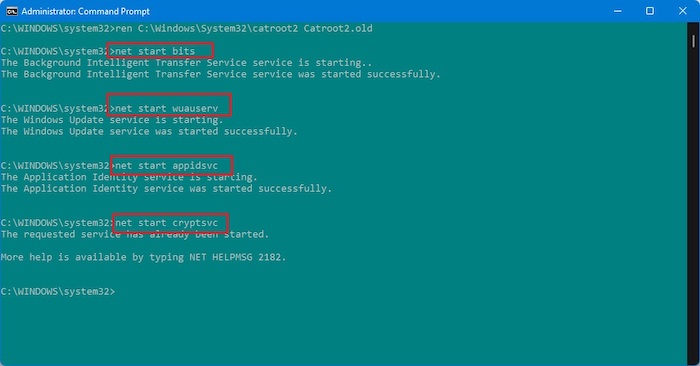
- net start bits
- net start wuauserv
- net start appidsvc
- net start cryptsvc
- Restart your computer and update the windows again to see whether the problem is fixed.
Quickly check out our latest fix for Bluetooth Toggle Missing On Windows 11
3. Uninstall the Antivirus Software
The third-party antivirus software is one of the leading causes to see the update error 0x8007000d while updating the windows on your Windows 11 system.
To solve the Windows update error, you need to remove or uninstall the third-party antivirus software on your device.
Follow these steps to fix the error by removing or uninstalling the apps:
- Press Windows Key + I on your keyboard to open the Windows System Settings App.
- Click on the Windows icon on your taskbar, and then click on the Settings icon under the pinned apps to open Windows Settings.
- Select the Apps tab option from the left side settings menu panel.
- Click on the Apps & features option at the top of the right side screen.

- Scroll down and find your antivirus software.
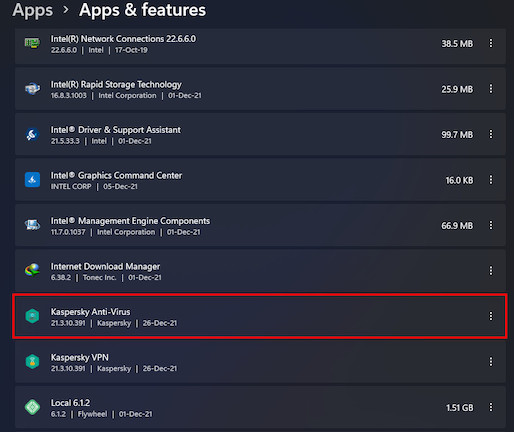
- Click on the three-dot menu and select the Uninstall button.
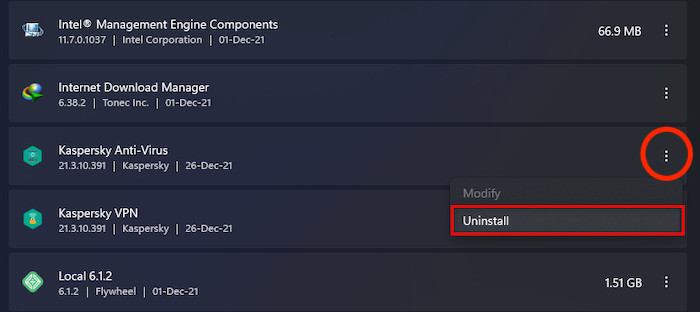
- Click on the Uninstall button to confirm to delete or remove the app.
Follow our guide on How to Boot to Safe Mode in Windows 11
4. Run the System File Checker (SFC) Tool
Another option to fix the error on your Windows 11 system is to use the Command Prompt to run the System File Checker (SFC) tool to scan and restore the corrupted system files.
Follow the steps below to fix the error on your Windows 11 system run the SFC tool:
- Click on the Windows Search icon at the left side of the taskbar to open the Windows Search panel.
- Type cmd and click on Run as administrator to open the Command Prompt with admin privileges.
- Type the sfc /scannow command. Hit the Enter button to run the SFC tool to scan and restore the corrupted system files.
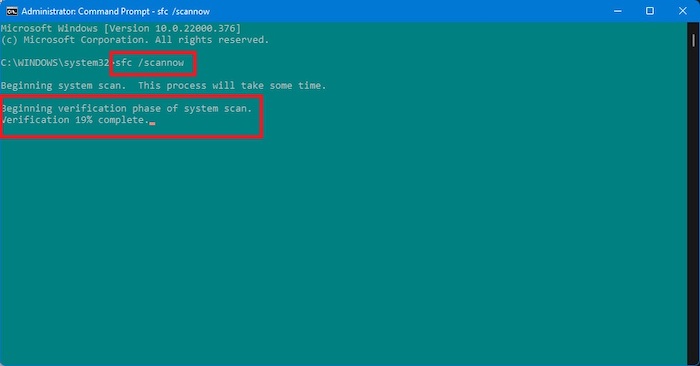
- Wait until the process is complete.
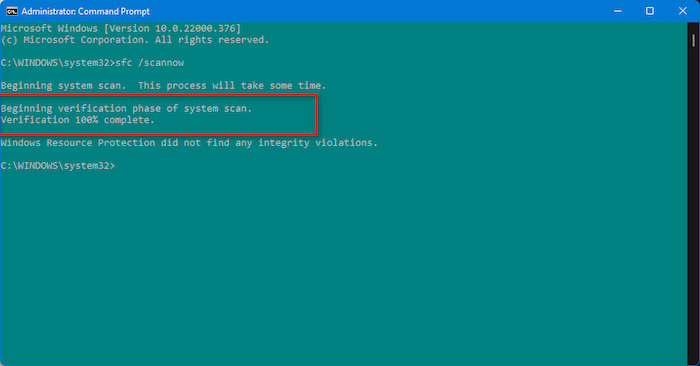
- Restart your computer after the successful scan and update the windows again to see whether your error is solved.
Check out our expert-recommended guide on How To Enable Telnet On Windows 11
5. Run the DISM Tool
Running the Deployment Image Servicing and Management (DISM) program in the Command Prompt is another way to fix the error on your Windows 11 PC.
Follow the steps below to fix the error on your Windows 11 system by the DISM tool:
- Press the Win + S key on your keyboard to open the Windows Search panel.
- Type cmd and click on Run as administrator to open the Command Prompt with admin privileges.
- Type the DISM.exe /Online /Cleanup-image /Scanhealth command and hit the Enter button, and wait until the process is complete.
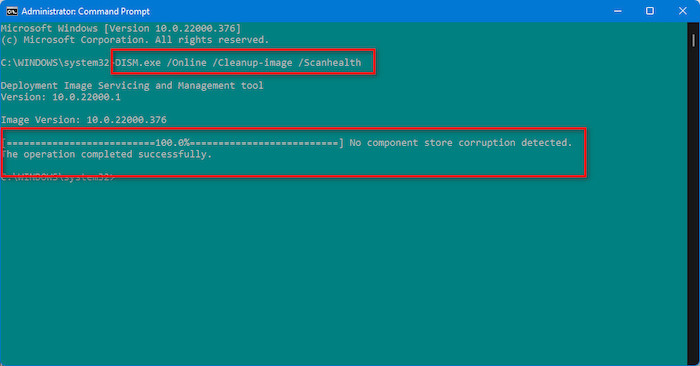
- After completing the first process, enter DISM.exe /Online /Cleanup-image /Restorehealth command and press the Enter button, and wait until the process is complete.
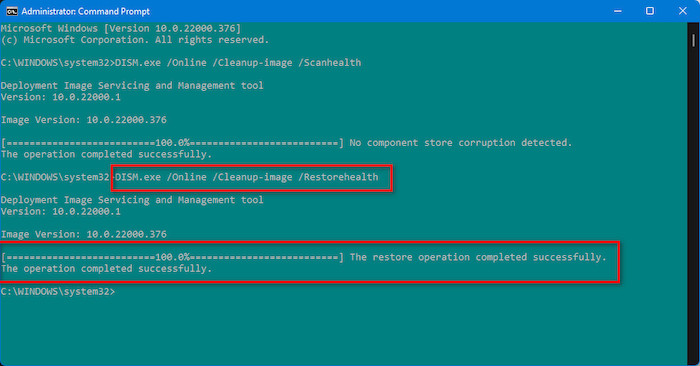
- Restart your computer after the successful scan and update the windows again to see whether your error is solved.
Here’s a complete guide to turn off Touchpad Clicks on Windows 11.
Final Thoughts
The Windows update error 0x8007000d is familiar to Windows users. When you try to update Windows on your Windows 11 PC, you may receive an update error for various reasons.
Here, I explain the cause of the error that occurred while updating your Windows 11 system’s operating system, as well as six effective solutions to solve the error. You can try all of the techniques until you find the one that works best for you.
I hope you find this article to be helpful. Please let me know which way works best for you if you found this valuable information.