Suppose you are on your PC and working for your office. Out of the blue, you needed to set a background image instantly on the document that you were preparing on Microsoft Word. Now, will you download and install any word or photo editor just for this?
No way! It is pretty easy to use an image on the document background on Word. Yet, I will not let you stay on pins and needles.

So, in the latter portion of my article, I will list down all the feasible methods to apply an image at the back of your Word file. As a power Office user, I practically researched the matters a lot and heavily dealt with them for different purposes.
Keep reading till the end. Please, do not skip anything.
Let’s get started.
Why should you Set a Background Image in MS Word?
I think you all know a single image can speak louder than a thousand words. Not only to persuade readers more easily and laconically but there are also diverse aspects and benefits of using an image on your Microsoft Word document as well.
No, guys. I am not talking about using an image anywhere inside your writing that is capable of describing your content or enhancing the implicit meaning. Instead, I want to focus merely on using an image in the background of your document.
It would be boring for the readers to digest your content written on a bare white background with the same black text. But, if you just add an image in the background, the document will obtain a distinct dimension. As a plus, if you think of using a few special features and colors, you will be able to create a profound impression on the person who will consume it. Moreover, having an appealing look at the document will enhance your morale as well.
For a myriad of purposes, a person needs to set images in the background.
Here are the steps to set a background image in MS word:
- If your documents are to be used as marketing materials such as brochures, flyers, tripods, and so forth, the background image plays not only a crucial role here, rather it is inextricably related to your reach to your target audience and ultimately the revenue.
- Using choosy and enticing background images, you can create demanding templates that can, of course, pave the way for you to make money out of it.
- An embellished and precisely adorned background will enrich the visual appeal of your document over others. That will, in turn, keep your audience concentrated on your content.
- One most important thing is if you preserve your document or intellectual property from plagiarism or being copied, simply insert a watermark at the background of your document and stay safe. It is the traditional way to take digital thieves out of the market.
- A well-arranged document coupled with the fluidity of language helps you make your document professional. Not only in professions, but youngsters can also utilize this approach in their academics as well.
Hence, it is evident that slightly working on the representation of your document will lead to widespread acceptability over others. So, without wasting time, let’s dive into the process of how to do it.
Check out the Microsoft Refund policy to get absolutely full refunds to your products.
How to Set Background Image on Microsoft Word?
I discussed the purposes of setting a background image on your word document. Now, I am going to list down all the steps that you need to follow throughout the process. And, worth mentioning, I will consider the Microsoft Word document as the word file here.
However, you can set your background simply in 3 ways- you can just fill the background with a solid color, you can add a watermark, you can add a complete image as your document’s background. I would like to explain the procedures separately. So, stay tuned, and make sure you have a plain white MS Word document before you.
Here are the ways of setting backgrounds, along with their steps to make it happen:
1. Setting the Background with a Solid Color
When you do not need to do more except insert a solid color guided by Microsoft Word, follow the steps below to get the job done.
Here are the steps to set the background with a solid color:
- Go to the Design from the ribbon at the top.

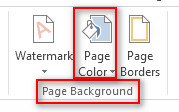
- Navigate to the area that says Page Background. You will find it at the top-right of your window.
- Click on Page Color. From here, you can actually select a solid color to change the background color.
- Choose a color and hover over it. You will get the preview instantly.
- Click on it to finalize the background color.
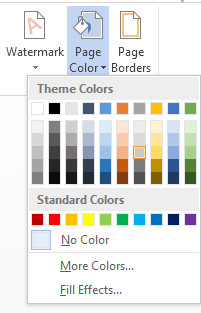
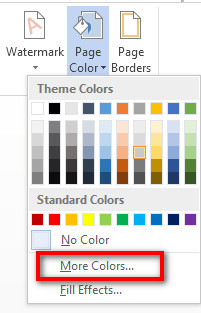
- Tap on More Colors if you want to have more colors as options.
- Choose any color by navigating the two tabs- Standard and Custom.
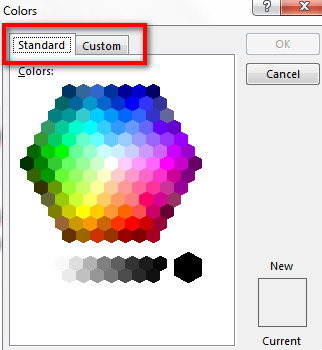
- Click OK to fix it.
This is the easiest and most precise way to apply solid colors as the background of your document.
Quickly check out our epic guide on how to enable word wrap in notepad.
2. Setting the Background with a Watermark
For safety purposes, a watermark has been used for a long time, and still, it is the most suitable and accessible way for mass users. But, you can use a text or even an image as your document watermark. I will delineate both the procedures.
Text Watermark
- Go to Design from the ribbon at the top.
- Locate the Watermark on the top-right under the Page Background A dropdown will show up.
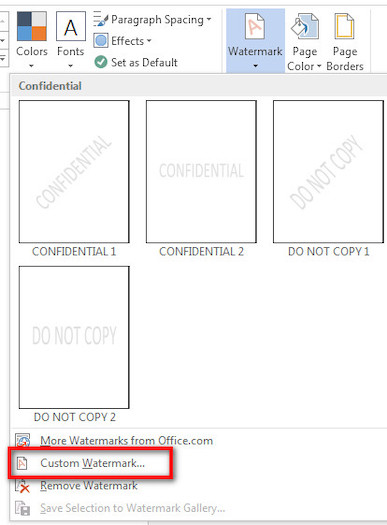
- Click on Custom Watermark.
- Enable the Text watermark
- Fill up the fields carefully according to your requirements.
- Type the content that you want to see as a watermark on the Text

- Click on Apply and then OK to save the changes.
Check out our epic guide on why can’t I copy paste in Microsoft Word.
Image Watermark
- Go to Design at the top.
- Navigate to the Watermark on the top-right under the Page Background section, and click on it.
- Tap on Custom Watermark from the dropdown.
- Click on the Picture watermark.
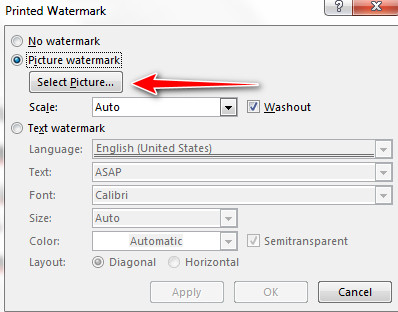
- Click on the Select Picture button and show the path of your image.
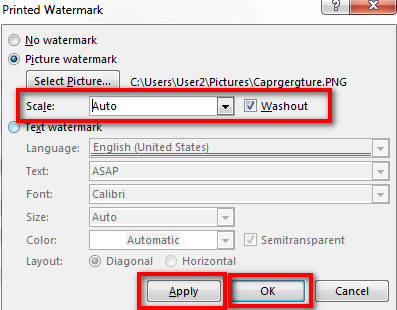
- Check the Scale and other options.
- Click on Apply, and then OK to set the image as a watermark.
But before that, go through our epic guide on do Microsoft points still work.
3. Setting the Background with an Image
If you want to set your background with an image, the process is as simple as the previous ones. The first couple of steps is exactly the same.
Here are the steps to set the document background with an image:
- Open the MS Word document.
- Go to Design from the top bar.
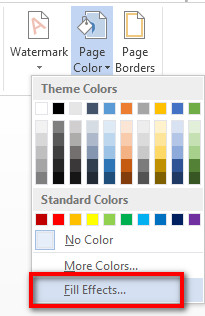
- Move across to Page Color at the top-right of the window.
- Select the option Fill Effects here, as this time you want to insert an image as background. A dialog box will appear.
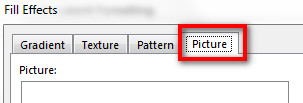
- Navigate to the tab Picture.
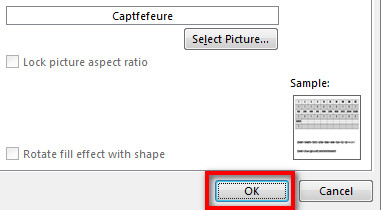
- Click on the Select Picture button at the middle of the box.
- Show the path where the picture is. You will see a preview there if you select another picture by mistake.
- Click on OK to change the background with your selected image.
Conclusion
There you have it. The approaches I demonstrated are the simplest words possible ever. Already many users reported to me about their satisfaction and definite outcome after following my methods.
This time, I focused on simply setting the background with images, colors, and watermarks. In another article, I will definitely cover how to edit them and insert special features into the background images.
Was this article helpful? If you find your job done successfully, please share this article with others to let them get help.
Comment in the box below if you have anything to ask. I will try to get back to you shortly.