Millions of worldwide users use Microsoft Teams for video conferences. Considering the features and reliability, it is one of the most used ones among the other competitors.
Despite having an enormous popularity of 280 million daily active users, Teams isn’t at the God-tier level as it has some flaws that bother users. The camera doesn’t get detected while attempting any video conference is quite a common issue for Teams users.
You most likely want anything but your camera not working while you need to attend an important video call on Teams. I know how it feels!
But don’t worry. In this article, I’ll help you to eliminate this issue and make sure this problem doesn’t come back.
Let’s get started!
Why isn’t the Camera Working on MS Teams?
Your system camera might not work on Teams if it doesn’t get the app permission, has an outdated driver, has a defective camera module, the camera is used by some other applications or any misconfiguration in the Teams app. On browsers, denied permission can cause this issue as well.
Here are the reasons for the camera not working on MS Teams:
App Permission
There are a bunch of cases where users don’t get to use their webcam due to the system’s denied permission. Usually, the camera permission on your system is turned on by default.
However, in many instances, the permission gets turned off. In that case, you don’t get to use the camera on MS Teams.
Outdated Camera Driver
Drivers are the main components to function any device on your system. When the driver is not as per updated as the Teams requirement, the camera won’t work on MS Teams. Aside from the updated driver, the camera won’t work on Teams if its driver gets corrupted somehow.
Other Devices are Using the Camera
In any operating system, the camera is set to use one specific device at a time. As long as another app uses the camera, MS Teams won’t get to use it. That’s why you may see the app isn’t functioning in Teams.
Defective Camera
Your system’s camera will not work on any platform when it’s broken. Any hardware issue such as loose camera pins, loose external webcam connection, or even a dead camera module can cause the camera not to work on MS Teams.
Denied Camera Permission on Browser
All modern browsers have the integrity to ask for permission whenever they try to use the camera. So by any chance, if you intentionally or mistakenly deny permission while performing a video conference on Teams, the browser won’t get to use the camera.
Hence, you can’t use the camera for Teams calls on your browser.
Misconfigured Teams App
In the Teams app, Microsoft offers tons of configurations. Whenever you make any misconfiguration in the app, in this case, the camera, you won’t get to use the camera for the video calls.
There you have the bts (behind the scene) of the camera issue, and now it’s time to resolve it.
Also, check out our separate post on how to fix Microsoft Teams you can’t send messages error.
How to Fix MS Teams not Detecting Camera
There are several methods to fix MS Teams not detecting the system camera. Among them, the most popular ones are updating your OS, removing other applications that use camera functionalities, checking app permission and driver update, and updating the Teams app.
Wait, there’s more! As different people have different situations and scenarios, I have included a total of 14 fixes for this issue that cover almost every scenario. Apply the methods below and see which case matches your situation.
Here are the methods to resolve MS Teams not detecting camera:
1. Check for Updates
The first thing you need to do is check the OS updates for your system. If the system updates are available, download and install the updates. New updates eliminate the existing issues and bugs.
After updating the OS, your camera issue for not working on MS Teams will get eliminated. Apart from the OS updates, you should also check the Teams app update.
Here is how you can update your MS Teams app:
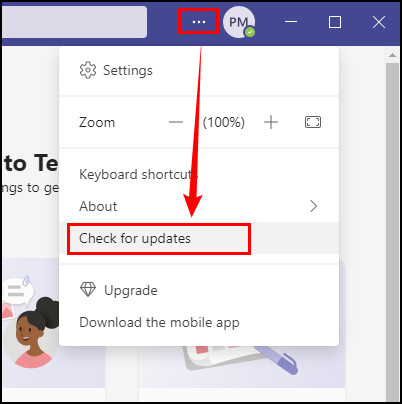
- Launch the Teams app on your computer.
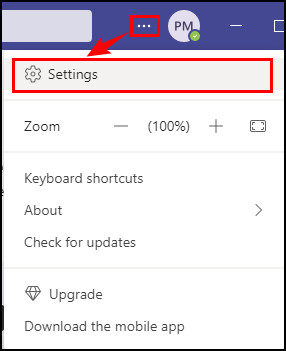
- Click on the three dots from the top right corner.
- Select Check for updates.
If there is any update for the app, it will automatically download and install the updates after checking the app updates.
Quickly check out our epic guide on Microsoft Teams set out of office alerts.
2. Check if Other Apps are Using the Camera
In Windows, users are allowed to use the camera app in one circumstance at once. That’s why whenever another app uses the camera, you won’t get to use it on the MS Teams app. So what you need to do is disable the extra devices that use the camera.
Here is how you can disable devices on Windows:
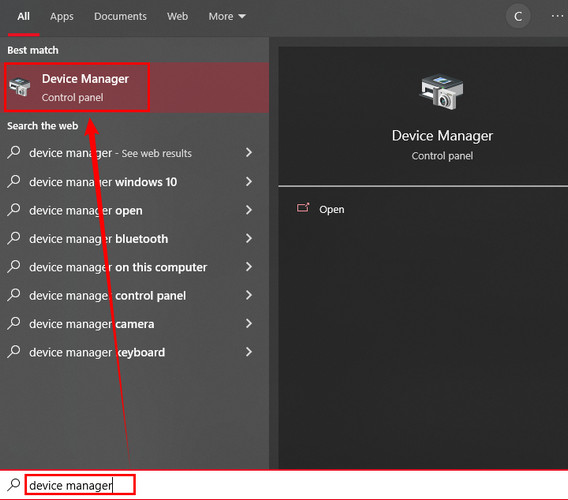
- Click on the Windows Start icon.
- Type device manager and launch it.
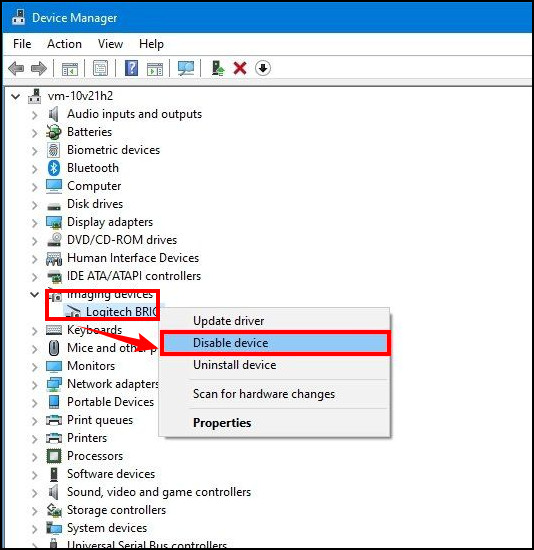
- Expand the Imaging devices, Cameras, or Sound, video, and game controllers branch.
- Right-click on the camera and select the Disable device option.
Now you might be thinking, how do I enable the devices again? Well, the procedure is the same as the disabling method. Just allow the devices after finishing the Teams video conferences.
You can also forbid other apps from using the camera feature on Mac. To do that, you need to force quit the apps that require a camera to function.
Here are the steps to force quit apps on Mac:
- Launch Finder and select Applications.
- Open Utilities.
- Double-click on Activity Monitor. On the Process Name column, all the programs and processes running in the background are listed.
- Click on All Processes to filter the active processes and programs.
- Select the programs that use the camera, including FaceTime, and hit Force Quit.
Note: In case you are using any external camera, unplug the connection and plug it in again. 
Follow our guide to fix Teams not working on WiFi.
3. Check Your App Permission
In both Windows and Mac OS, there is an option to enable or disable the camera from the system. It acts like a main switch of your home that can cut the whole electricity of your house.
When the camera permission is disabled from the system, no matter what you do, you won’t be able to use the camera by any means. So you must ensure that your system gives you full permission to use the camera.
Here is how you can check and enable the camera permission on your system:
On Windows
- Open Settings.
- Click on Privacy.
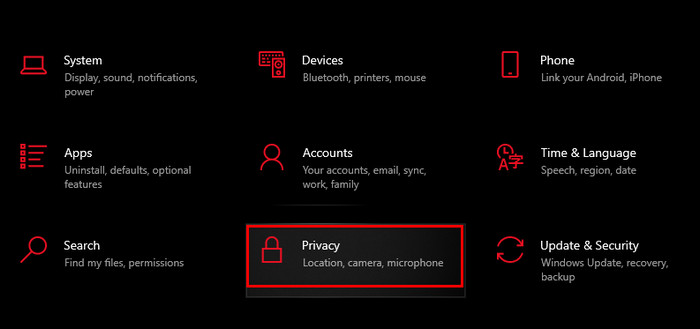
- Navigate to Camera.
- Click on the Change button under the Allow access to the camera on this device section.
- Toggle on the Camera access for this device switch.
- Turn on the Allow apps to access your camera toggle switch.
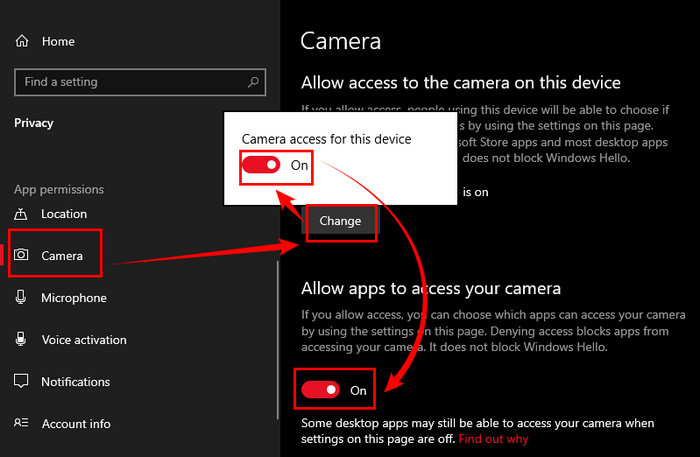
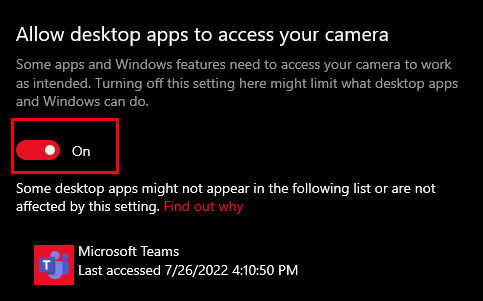
- Toggle on the Allow desktop apps to access the camera switch at the bottom of the page.
On Mac
- Open System Preferences.
- Select Security & Privacy.
- Choose Camera on the left, from under Privacy.
- Make sure Microsoft Teams is selected.
- Close all apps and restart your device.
Note: These settings only apply to Mac OS 10.14 and higher.
Check out our latest fix for Microsoft Teams Error 80090030.
4. Run the Hardware and Device Troubleshooter
When your device or hardware has any issue, it won’t function properly. Sometimes it refuses to run at all. So run a hardware and device troubleshooter to check if there is any issue in your system.
Your camera will be diagnosed as well. And in case there is any hardware issue, the troubleshooter will detect and fix it right away.
Here is how you can run the hardware and device troubleshooter:
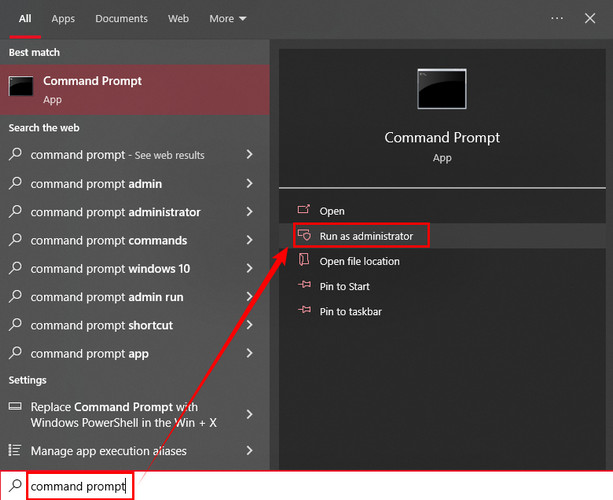
- Click on the Windows Start icon and type command prompt.
- Run the command prompt using the administrative privilege.
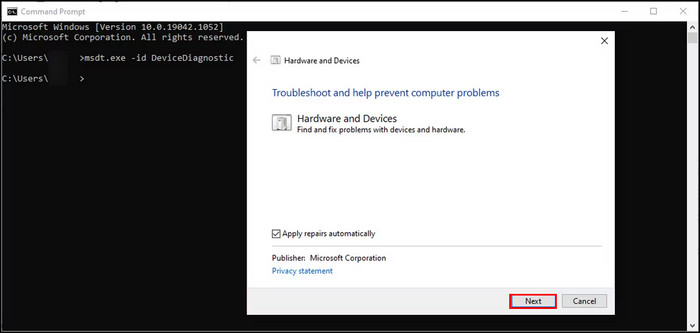
- Type msdt.exe -id DeviceDiagnostic and hit Enter to open the Hardware and Device troubleshooter.
- Click Next to start the scan.
When it finds any issues, it will automatically fix them.
5. Re-register the Camera App
There is a command line to disable the camera and re-register it. To perform this task, you need the help of Windows Powershell.
Here is how you can re-register the camera app in Windows:
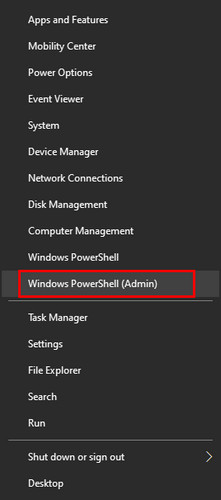
- Press the Windows + X button and select Windows Powershell (Admin).
- Enter the following command and hit Enter.
Get-AppxPackage -allusers Microsoft.WindowsCamera | Foreach {Add-AppxPackage -DisableDevelopmentMode -Register “$($_.InstallLocation)\AppXManifest.xml”} 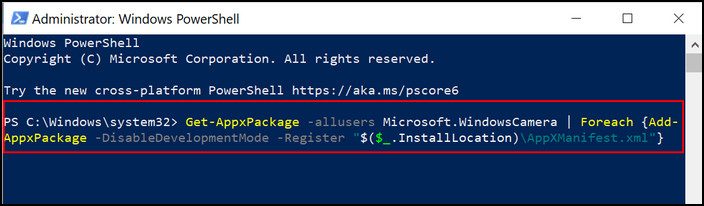
- Close Powershell and check if the camera is functioning correctly.
6. Make a Test Call on Teams
In Teams, there is a feature named Test Call Bots. It records a short video message and plays it back to check if the camera, speaker, and microphone are working properly.
You will get an overview of the test call, and you can get back to your device settings to make changes.
Here is the process of making a test call on MS Teams:
- Launch the MS Teams app on your computer.
- Click on the three-dots button from the top right section.
- Select Settings.
- Navigate to Devices.
- Select Make a test call under Audio devices.

Important Note: The test call feature is currently unavailable for Teams on the web.
7. Check for Driver Updates
Maybe there is an issue specifically with your camera’s current driver version. You can check for updates and upgrade the driver.
Here are steps to update your camera driver:
- Click on the Windows Start icon.
- Type device manager and launch it.
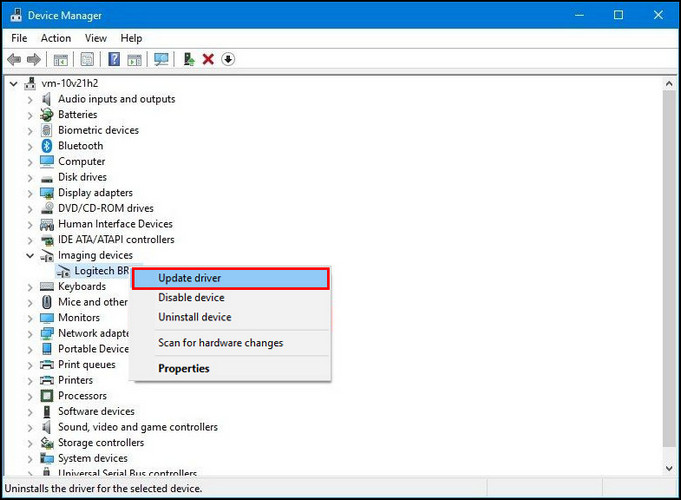
- Expand the Imaging devices, Cameras, or Sound, video, and game controllers branch.
- Right-click on the camera and select the Update driver option.
- Click on Search automatically for drivers. (It will show The best driver for your device is already installed message when there isn’t any newer version available for the driver)
- Wait until it finishes downloading and installing the latest driver.
Restart your computer and check whether the camera is working with MS Teams.
8. Check Your Browser Settings
You should check the browser settings first if you are one of those people who use Teams on your browser. Browsers have the settings to enable or disable the camera and microphone manually.
Your browser should ask for permission to use the camera while making a video call on Teams. In this case, the permission must be disabled on your browser. So you need to enable the permission to use your system camera on MS Teams.
Here is the method to enable camera permission on your browser:
On Google Chrome
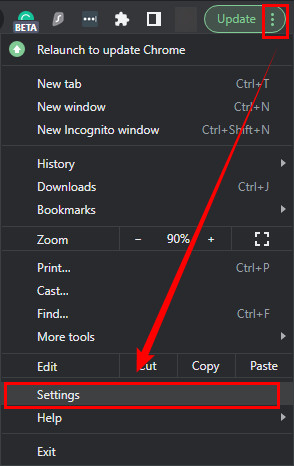
- Click the three dots from the top-right corner and select Settings.
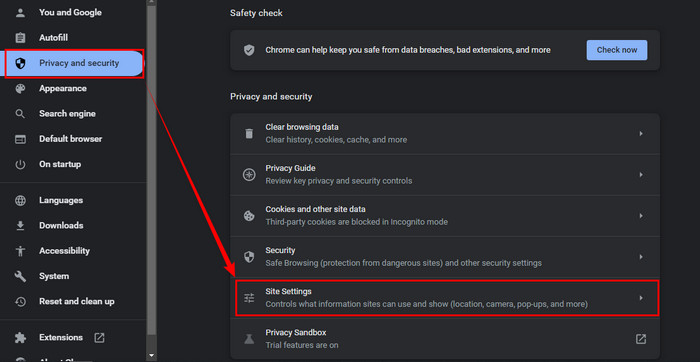
- Navigate to Privacy and security from the left pane.
- Click on Site Settings.
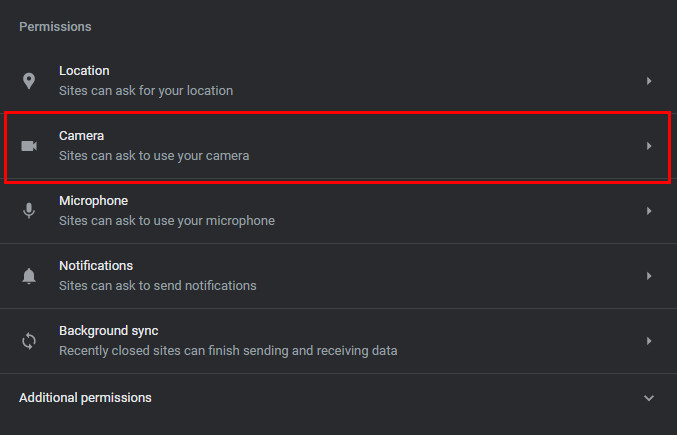
- Expand the Camera section.
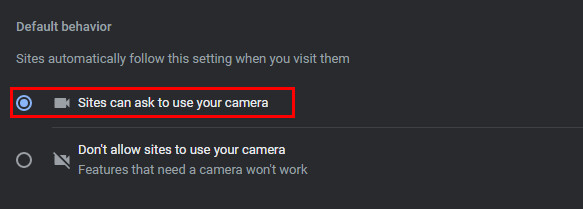
- Select the radio button that says Sites can ask to use your camera.
On Microsoft Edge
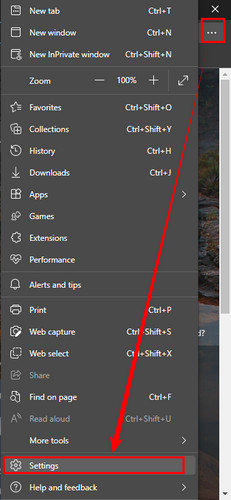
- Click the three dots from the top-right corner (You can use Alt + F) and select Settings.
- Head to Cookies and site permissions and expand the All sites section.
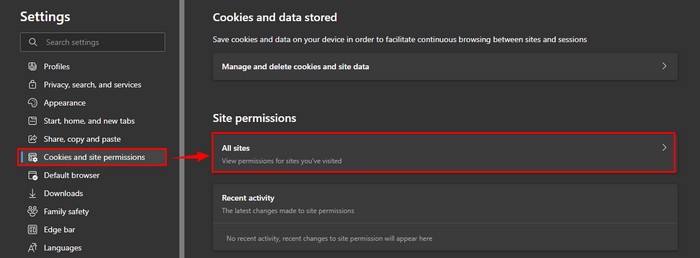
- Select the Microsoft Teams site.
- Use the drop-down menus next to Camera and Microphone and select Allow.
Facing error code caa70004,you can quickly fix Microsoft Teams error code CAA70004 from our detailed guide.
9. Configure Teams Camera Settings
Microsoft Teams usually recognize the camera of your system. However, in case that didn’t happen, there must be some settings issue inside the Teams app.
Here are the camera settings you need to configure:
- Open Microsoft Teams.
- Click the three dots button from the top-right corner.
- Select the Settings option.
- Navigate to Devices.
- Click on the drop-down menu and select the correct camera under the Camera section.
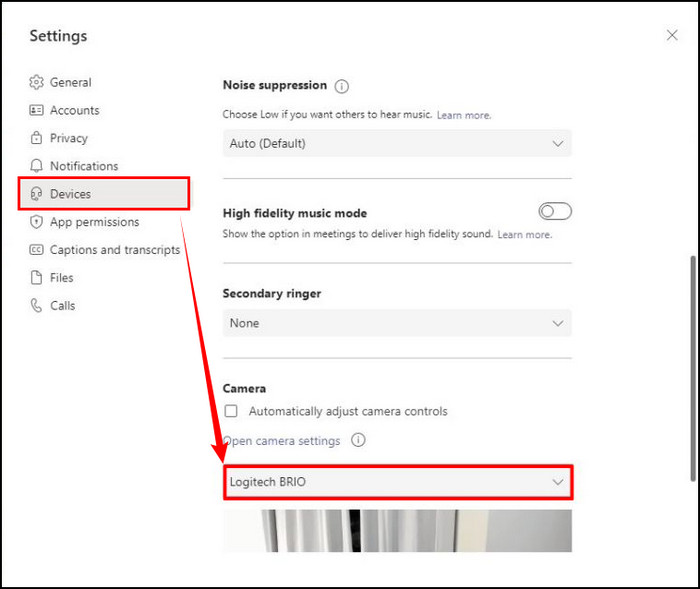
- Make sure the camera is working by confirming with the preview.
10. Allow Teams Media Permission
Often any add-on that can’t access the camera, and if that is the case, the app permission of Teams is responsible for this issue. But you can easily turn on the camera permission on the Teams app for add-ons.
Here are the steps to allow add-ons to access the camera on Teams:
- Launch Microsoft Teams.
- Click the three dots button from the top-right corner.
- Select the Settings option.
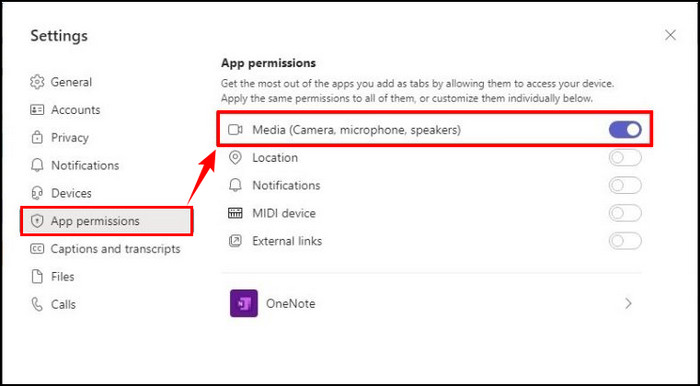
- Click on App permissions.
- Toggle on the Media (Camera, microphone, speakers) switch.
11. Configure Antivirus Access
Any third-party antivirus software can prevent the MS Teams from using the camera. Most of the modern anti-malware softwares has the webcam protection feature.
So you better disable this feature for a short period and make video calls on Teams. Hop on to your antivirus settings and disable it.
But wait! Don’t forget to turn it on after finishing your video conference. This feature can save you from hackers gaining access to your webcam.
12. Clear Microsoft Teams Cache
Cache files can also create this camera issue on MS Teams. These files are stored on your device as you keep using the app.
But these cache files can be deleted and won’t harm your system.
Here is the method to delete MS Teams cache files:
- Open Windows Run by pressing Windows + R button.
- Type %appdata%\Microsoft\Teams in the box and hit Enter.
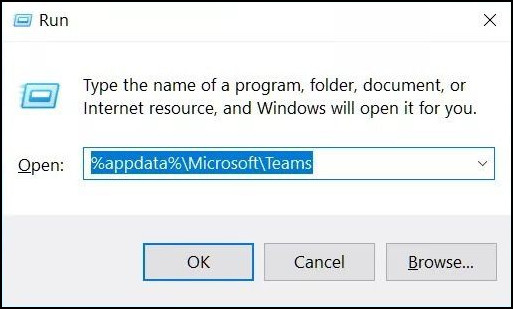
- Delete all the files and folders you see there.
Now try using the camera on Teams and check if it works.
13. Roll-back Camera Driver
You will most likely become hopeless when you check the driver update for the webcam and don’t see any updates! Isn’t that obvious?
Hey, wait! You can roll back the camera driver, which will take your driver to the previous version.
Here are the steps to roll back the camera driver:
- Click on the Windows Start icon.
- Type device manager and launch it.
- Expand the Imaging devices, Cameras, or Sound, video, and game controllers branch.
- Right-click on the camera and select the Properties.
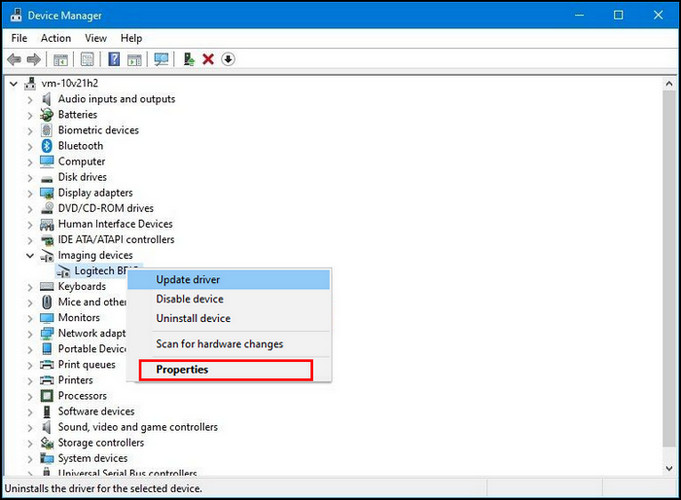
- Navigate to the Driver tab.
- Click the Roll Back Driver (In case you see the option grayed out, the driver’s previous version is unavailable) (Image Needed)
- Select a reason for rolling back.
- Click the Yes button.
- Click on the Yes button once again.
- Restart your computer.
After completing these steps, your system should detect the camera using the older driver version.
14. Re-install the Teams App
The last thing you can try is re-install the Teams app. Just uninstall the current installed one, go to the Teams download website, and download the latest Teams version from there. Install it and enjoy the video conferences.
Wrapping Up
There you go!
You can fix MS Teams not detecting the camera by updating the app, disabling other applications that use the camera, updating the camera driver, enabling the camera permission, configuring the camera settings in the Teams app, running the hardware troubleshooter, and so on.
I believe that whatever the reason behind this issue, your problem will be solved after applying these methods. Let us know in the comment section which one worked for you.
Thanks for reading this article.
Signing out!