Did you find unallocated space in the storage drive which you forgot to merge while installing Windows 11?
Merging that unused space is easy as pie, and you must do it from the Windows Disk Management utility tool. If you are unfamiliar with this system utility tool and don’t know how to launch it, read along.
This article provides 5 tested ways for opening Disk Management in your Windows 11.
How to Open Disk Management on Windows 11
You can launch the Disk Management utility tool directly from Taksbar’s Windows Start menu by right-clicking on it. You can open it using the Windows search or launch it from the Run dialog window. Quickly initiating the disk utility is possible from the Computer Management tool.
Moreover, you can use the command-line interpreter, or cmd, to launch the disk utility. For a precise disk management operation like removing disk write-protected errors, it is recommended to use PowerShell. You can also launch Disk Management quickly with it.
If you use Settings for maximum modifications to the system, you can launch the Disk Management tool from there too. Just search for Create and format hard disk partitions or disk management directly from the Settings search bar.
So, do you want to launch Disk Management right now? Let’s take a look at all the quick methods.
Here are the methods to launch Disk Management on Windows 11:
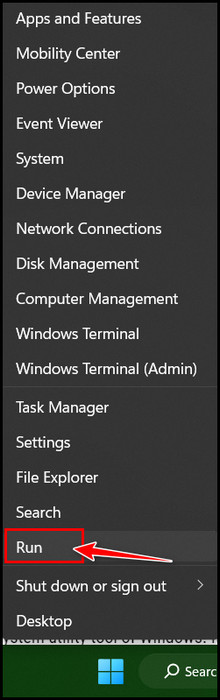
The Power user menu includes essential tools such as Power Options, Event viewer, Device Manager, Task Manager, Settings, Disk Management, etc. So, you can go to the power user menu and select the disk utility from there to launch it.
Here are the steps to launch Disk Management from the Power User Menu:
- Take the cursor to the Taskbar.
- Right-click on the Windows Start icon.
- Choose Disk Management from the context menu list.
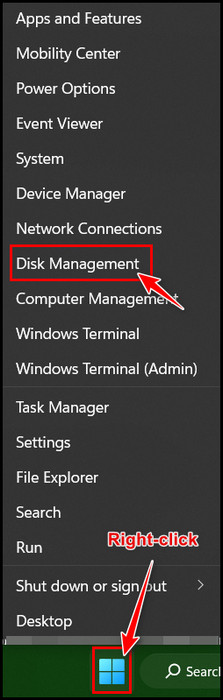
After clicking on it, the storage system utility tool will launch at that instance.
Check out our separate post on how to quickly create a sleep timer in Windows 11?
2. Search & Open Disk Management from Windows Search
To launch it through search, use the Windows search tool. From the Windows Search tool, you can launch any app or feature in Windows 11. Using this search tool to run the Disk Management utility is quick and effortless.
Here are the steps to search & open the Disk Management tool from Windows search:
- Go to Windows search from any of the following ways:
- Click the search tool icon from the Taskbar.
- Press the Windows key + S.
- Press the Windows key from the keyboard and click on the top search bar.
- Type Disk Management and hit Enter.
- Click on the Open button or directly click on Disk Management from the search result.
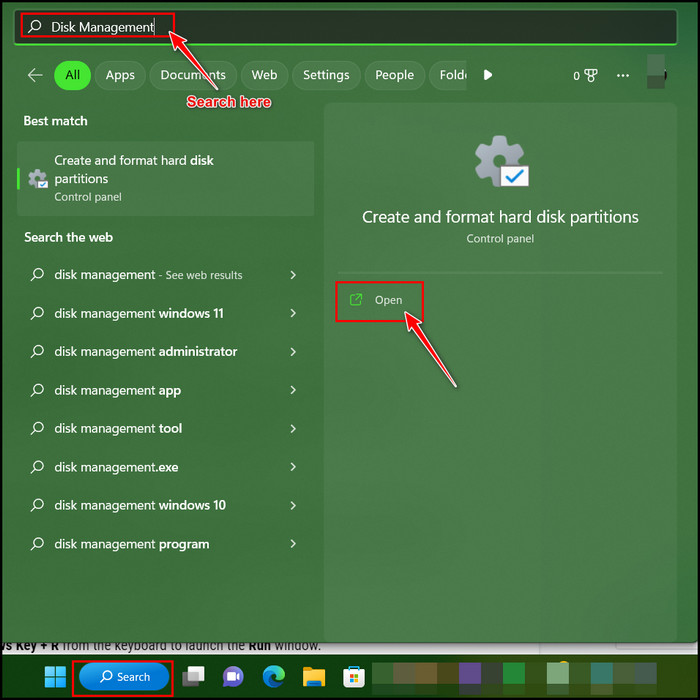
Launching the disk utility tool won’t take more than a few seconds.
3. Open Disk Management from Run
The Run command console is a great tool for launching any app or feature. Opening the disk utility tool from Run is a straightforward process. If you don’t want to waste time and need to launch the Disk Management tool asap, go for the Run command console.
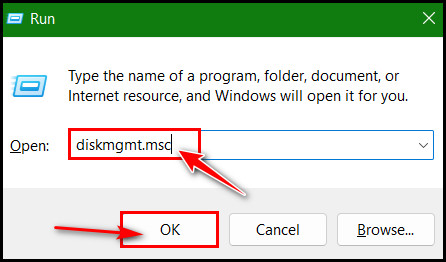
Here are the steps to open disk management from Run:
- Press Windows Key + R from the keyboard to launch the Run window.
- Type diskmgmt.msc in the command box.
- Hit Enter key afterward to run the command.
The Windows disk storage utility app will launch in the blink of an eye.
You may also like to read about meaning of blinking power button on Windows 11.
4. Launch Disk Management from CMD or PowerShell
CMD or PowerShell is similar, but both can work in different ways. Command prompts use the primary batch commands to execute primary troubleshooting, whereas PowerShell can also perform the batch commands for administrative purposes.
You can use these terminals or consoles to initiate the Disk Management utility tool.
So it’s your call which one you should go for, cmd or PowerShell. But don’t worry, I will show the steps for both.
Here are the steps to launch Disk Management from CMD or PowerShell:
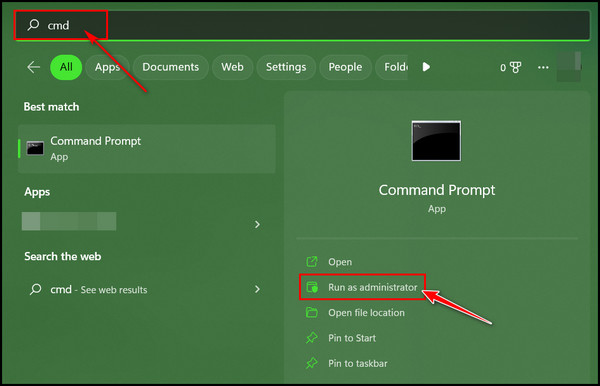
On Command Prompt or CMD
- Click on the Search icon and type cmd in it.
- Choose the Run as administrator option for CMD.
- Type diskmgmt.msc as a command line and press Enter.
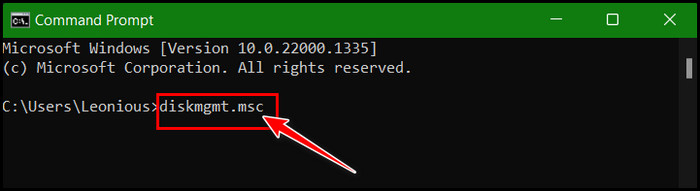
Within a second, the command prompt terminal will appear, and you can do all types of disk operations with it by some command lines.
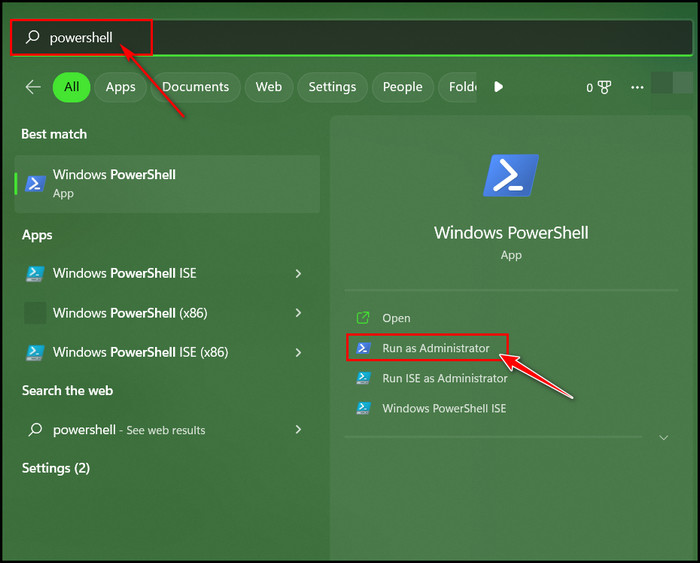
On PowerShell
- Press Windows Key + S and search PowerShell.
- Choose the Run as administrator option for PowerShell.
- Type diskmgmt.msc in the console and press Enter.
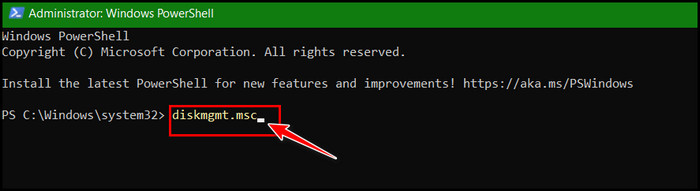
After pressing the Enter key, PowerShell will launch the Disk Management tool.
5. Open Disk Management from Computer Management Tool
Computer Management is a Windows tool that helps to access admin tools such as Task Scheduler, Event Viewer, Local Users and Groups, Device Manager, etc. In the Storage section, you’ll find the Disk Management tool.
Here are the steps to open Disk Management from the Computer Management tool:
- Press the Windows key + X and select Run.
- Type compmgmt.msc and hit Enter or Click OK.

- Expand the Storage section from the left panel.
- Click on the Disk Management option.
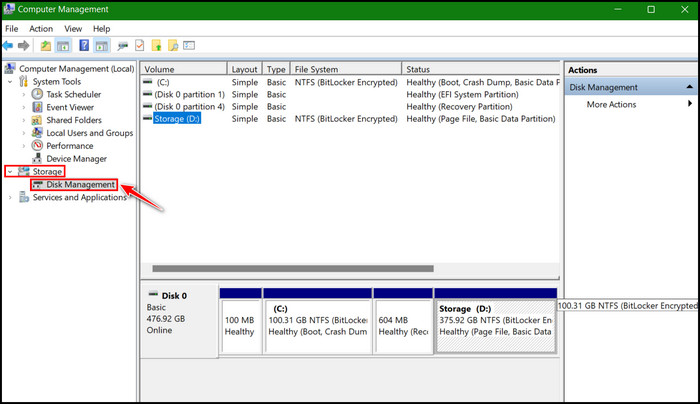
In the right panel, the Disk Management tool will open. From here, you can detect the internal disk keeps disconnecting issue and solve it afterward or check the disk partition status.
What is Disk Management & What does it Do?
Disk Management is a system utility tool of Windows. It’s a built-in utility tool in the Windows OS and is available in Windows 10 & 11. With this tool, one can perform tasks like shrinking or extending the volume, changing the drive letter & name, and creating a new disk.
While running PCs for a long time, you may fall victim to high disk usage. You can go to the Disk Management tool to check and solve the disk health for disk usage issues. After checking the disk health from this tool, you can solve it by applying the necessary steps.
Moreover, there are multiple things you can do from the Disk Management tool. The followings are things you can do from this system utility tool:
Here are the tasks you can perform from the Disk Management too:
- Create and set up new drives.
- Extend volume by allocating unused space to it.
- Shrink partition for extending another partition volume whenever needed.
- Change drive name & letter.
- See the total details of any disk.
- Format any drives or disk space.
- Launch disk defragments on any disks.
The Disk Management utility tool is an all-in-one package to perform all disk-related operations. So, move over to this disk utility tool whenever you need to perform any disk operations.
FAQs
How can I launch Disk Management in Windows 11?
You can launch the Disk Management tool by right-clicking on the Start button from the Taskbar. Moreover, you can open it using the Run console or from the cmd or PowerShell.
How do I launch Disk Management in Windows 11 as an administrator?
Click on the Windows search icon and type PowerShell. Choose the Run as administrator option from the right side. In the PowerShell terminal, type diskmgmt.msc and hit Enter.
Is it possible to shrink disk volume from Disk Management?
Not only shrinking, but it is also possible to extend, format, and add mirror disks from the Disk Management utility tool. Plus, you can change the drive’s name & letter with it.
Final Thoughts
Disk Management tool almost works like any pro-grade disk utility app available in the market. If you want to perform minimalistic disk-related tasks like creating & formatting partitions, shrinking & extending volumes, and changing drive letters & names, you can use this tool.
In this article, I have shown all the quick steps to launch the Disk Management tool. I hope you got all the methods in a pretty straightforward way.
Feel free to knock me in the comment box below for further guidance. Peace out!