Your friend returned the pen drive after borrowing it from you. Hence, you didn’t check it after receiving it. While in the office, you inserted the pendrive into your workstation to transfer the presentation file.
Therefore you got this message This Disk is write protected. Remove the write protection or use another disk. Does this message increase your heartbeat?
Don’t be a heart attack patient for this ordinary matter. You can fix the USB stick easily. If your question is how? The answer is to read this article till the end. To solve your USB’s write-protected error, I have dug into all the possible fixes and implemented those in this article.
So, plug in your USB to the PC and apply the methods. Let’s begin the fixing!
What is Write Protected USB?
Write protected USB means the owner or administrator of the USB has set a security setting on the USB to prevent the ability to write or delete files from that pendrive. A storage device with write protection turned on won’t support copying or pasting any files in it. You can’t format the USB disk either.
If you are the owner and turned on this security feature on your thumb drive, it is okay because you know how to disable it. But others who did this accidentally may be pulling their hair right now.
Reversing this security feature is not complicated, and you can fix this quickly. All you need is a perfect fixing guide.
In this article, I will show you how to fix this matter effortlessly.
Also, check out our effective solution post Fix Internal Hard Disk Keeps Disconnecting.
How to Fix a Write Protected Disk?
Several methods are applicable to fix the write protection USB error. I suggest applying all the methods one by one from this article. Be patient while applying those steps.
Here are the methods to fix USB write-protected errors:
1. Check for the Physical Write Protection Switch
Many USB storage Devices come with a physical switch to enable or disable the write protection. You will find the button at the side of the thumb drive or SD/SDHC/SDXC memory cards.
You will see icons on both sides of the lock switch, which indicate lock and unlock write protection.
Here are the steps to disable write protection by sliding the switch:
- Look at the side of the pendrive or SD card for the write-protected switch.
- Slide the switch to the other side if it’s in the lock position.
- Disconnect or Eject the removable disk and insert it again.
- Transfer any files to the removable drive.
I hope you won’t see the error again. Just in case your device doesn’t have any lock switch, follow the next method.
Check out the easiest way to 7 tested solutions for Windows 11 High Disk Usage.
2. Scan for Viruses
Sometimes malware or other viruses cause this type of phenomenon to your USB storage devices. Malware is highly capable of destroying or changing the file’s attributes. For virus attack, you might face this error.
You must perform a full scan for viruses to resolve this irritating issue with your thumb drives or SD cards. Some viruses can change the file attributes to hide all the files.
For example, viruses like BDS.Mirc.Backdoor hides all the files by changing the attributes. Try scanning the disk with a powerful antivirus and send the viruses or malware to the vault.
Then format the entire USB disk and try sending any files in it. I hope you successfully fixed the write protection error when the virus is the main culprit.
3. Make Sure the USB Device Storage isn’t Full
In case the above methods don’t fill up your scenario, it’s time to look for the available free space for your USB storage devices. If there is not enough space left to send any files to the portable disk you may face this error.
Here are the steps to check your USB devices space:
- Go to File Explorer and right-click on that particular Disk.
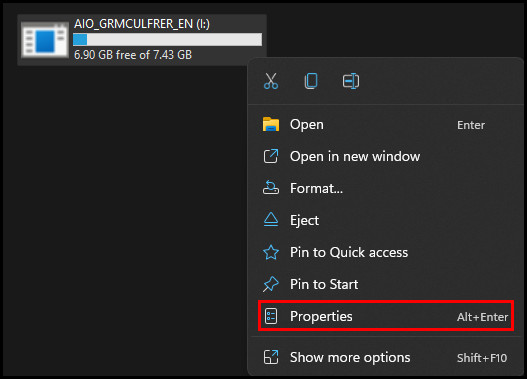
- Select the Properties option.
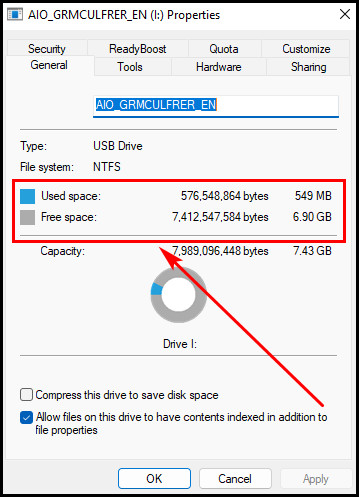
A Window will pop up with all the information available on the Disk. You can see the used and free space and the drive’s capacity here. Empty the drive if it’s full.
Resend the file again. Hopefully, you won’t face the error again.
You check out our new post how Will SSD Reduce High Disk Usage.
4. Change Individual File Attributes
Sometimes file attributes can change accidentally. For this reason, you could face this error while accessing or transferring any file.
With file attributes, you can set permissions to files like the Read only, Write, Hidden, Full control or special permissions, etc. While facing the write protected error, check individual files for the file attributes.
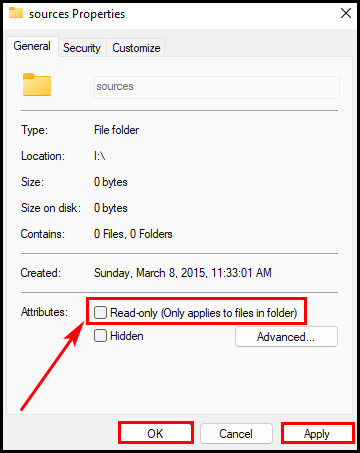
Here are the steps to check file attributes for individual files:
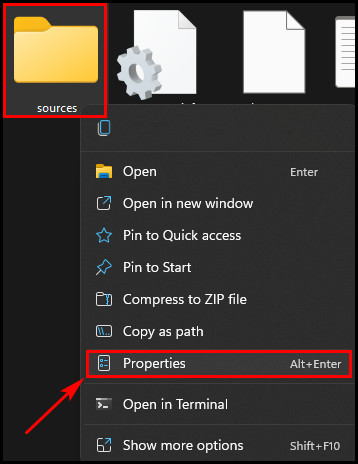
- Go to your USB drive and locate the offending file.
- Click on the file and press Alt + Enter at a time to open the File Properties.
- Locate the Attributes section, which is at the bottom.
- Uncheck the Read-only option.
- Click Apply > OK.
Transfer those particular files from the USB to the other drive. I hope following the above steps solved your problem.
But checking all the files one by one could be time-consuming and irritating. Go for the following method if you don’t want to waste much time.
Do check our latest post on the how to Fix Steam Disk Write Error.
5. Remove USB’s Read-Only Attributes Using CMD
Using CMD to change all the attributes is super easy. You don’t need to be a programmer to use the CMD and change the file attributes.
Here are the steps to clear Read-only attributes using CMD:
- Press Windows key + R and type in CMD.
- Press Ctrl + Shift + Enter to run CMD with Administrative Privileges.
Type the following command lines, and press the Enter key after every line. 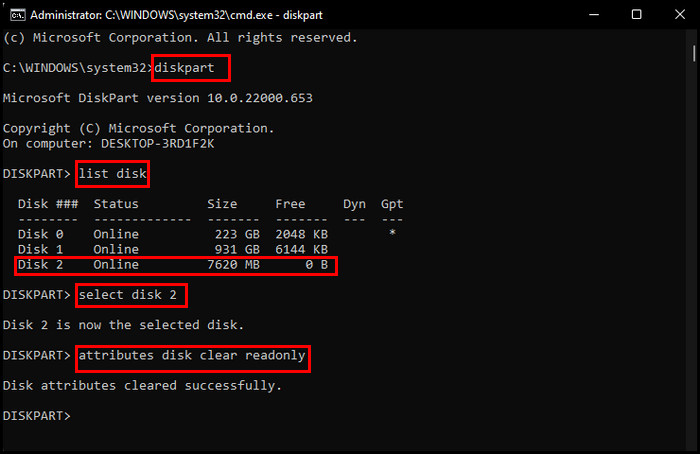 Diskpart
List disk
Select disk number (Input the removable disk number. Example: select disk 2)
attributes disk clear readonly
After completing the process, you will see — Disk attributes cleared successfully. Now, check for the error’s existence by sending or copying any file from that drive to another.
6. Disable Write Protection from Registry Editor
Though the procedures mentioned above didn’t solve the issue, you can also try this method. Sometimes disabling the write protection is only possible from the Registry Editor.
Here are the steps to Disable write protection from Registry Editor:
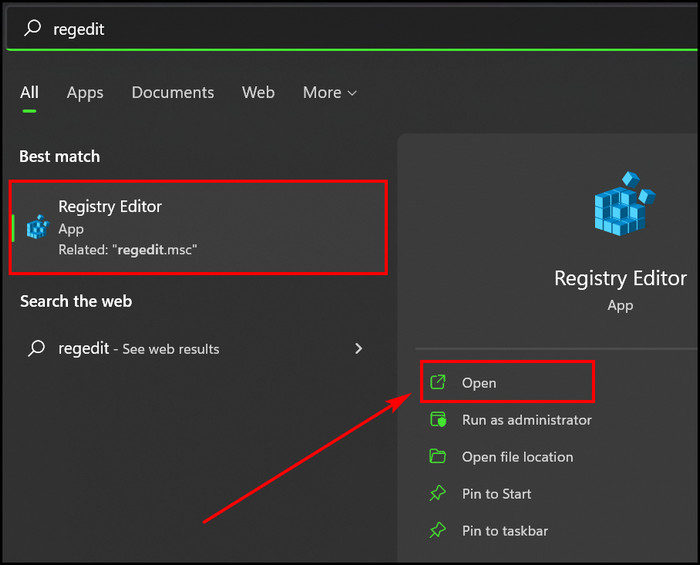
- Press Windows key + S and type Regedit. Launch the Registry Editor.
- Navigate to the following location.
HKEY_LOCAL_MACHINE\SYSTEM\CurrentControlSet\Control\StorageDevicePolicies
- Find a key named WriteProtect.
- Double-click to edit the DWORD (32-bit) value.
- Change the value from 1 to 0.
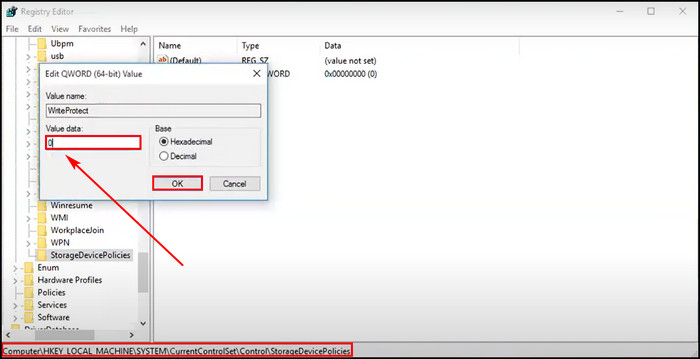
- Press OK.
Navigate to HKEY_CURRENT_USER instead of HKEY_LOCAL_MACHINE when you don’t find StorageDevicePolicies or WriteProtect. After this, reboot the system.
7. Format the USB Drive Using CMD
You can try to format the USB drive using the CMD command line whether the usual formatting doesn’t work for you. Just insert the write-protected USB disk and run those command lines.
Here are the steps to format a USB drive using CMD:
- Launch CMD with the admin.
- Type the following command line after each command line, and hit Enter.
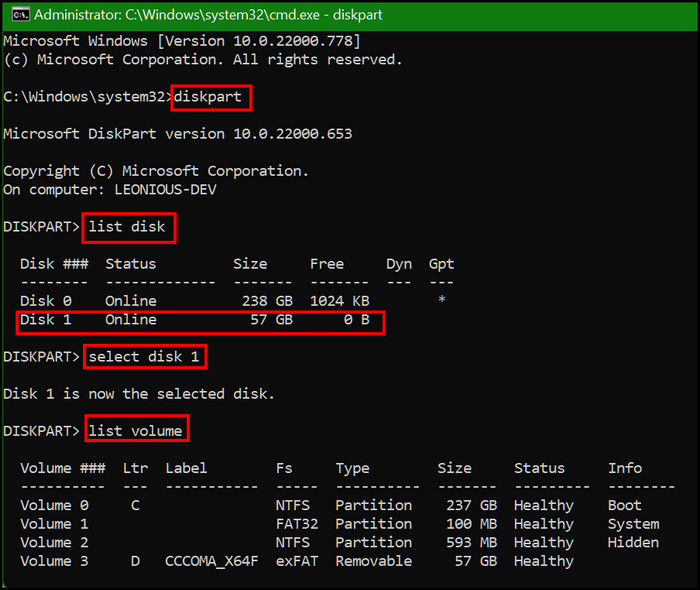
Diskpart
List disk
Select disk number (Input the removable disk number. Example: select disk 1)
List volume 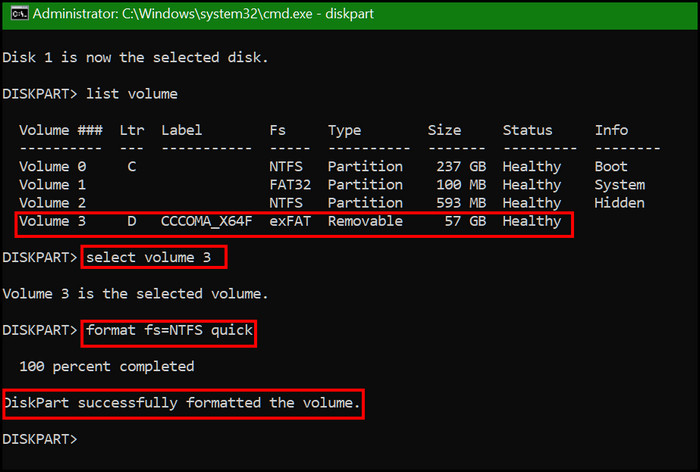
Select volume number (Input the USB disk volume number. Example: select volume 3)
Format fs=FAT32 quick (You can replace FAT32 with NTFS or exFAT)
Exit
After a successful formatting process, the problem will be resolved.
8. It’s Bricked, or NAND Get Damaged
Still facing the error after trying all the above methods? Your USB disk may be bricked or the NAND damaged. While trying to make a bootable USB disk, your pendrive can be bricked due to an error in the process.
If your pendrive is still under warranty, return it and ask for a replacement. You can face this type of error when you are using a removable disk for a long time because its life cycle may be expired. You can throw or save the expired pendrive as a showpiece.
Check out my new post on how to Fix Windows Error Reporting High CPU and Disk Usage.
FAQs
How to fix a USB disk with write protected error?
To fix a USB disk with write protected error, you can check for a physical write protection switch, scan the drive for viruses, clear all the files with Read-only attributes using CMD, or disable the write protection from Windows Registry.
Can I remove the write protection from the Windows Registry?
You can remove write protection by changing the value from Windows Registry. To do this, simply go to HKEY_LOCAL_MACHINE\SYSTEM\CurrentControlSet\Control\StorageDevicePolicies in this directory. Find WriteProtect and the double-click DWORD (32-bit) value. Change it from 1 to 0. This will solve the error.
How did my pendrive/SD card become write protected?
Your pendrive or SD card might have a write protection on-off switch. Somehow you turned on the switch and activated the write protection. Slide back to unlock position, and your problem will be solved. Sometimes software testing or making a bootable pendrive can lead to this issue.
Wrapping Up
Repairing or fixing a USB storage device becomes crucial when it contains essential files. Write protection error is chaos when you are unable to transfer backup files.
After applying all the methods from this article, I hope you fixed the write-protected error. But remember that you won’t be able to fix it by using all the methods when the disk is bricked, or the NAND is damaged.
For a case like this claiming the warranty is the only option. Ask me for further assistance in the comment section. Best of luck fixing the USB!