So, I hear you have been getting unusually high disk usage reports from your task manager, sometimes going up to a hundred percent. If you want to fix this problem, this article is all you need.
Why is my disk usage so high in Windows 11?
You are definitely not the first person who has faced this issue. I had the same problem and I followed the wrong guides and messed up my system. It took me a while to find a proper fix but you won’t need to waste that much time like me.
You can fix this issue in less than five minutes after you read this article because I handpicked these myself after I made sure they actually work. So, grab a cup of coffee and dive right into the article.
How to Fix Windows 11 High Disk Usage
When too much of your disk is occupied, you will start to experience lags and stutters and some of the programs will stop responding. You are lucky if you didn’t experience this but it’s only a matter of time before you do.
You should try some universal fixes before you try the methods below like rebooting your PC. If you still face the same problem repeatedly, keep reading.
Here are the ways to fix Windows 11 high disk usage:
1. Turn off All Startup Apps
Most of the applications you install typically create a new entry for the program at Startup which enables that application to start running in the background as soon as your PC boots up. So, what’s the issue?
Well, as more programs start running in the background, more memory is being occupied. This will eventually cause a high disk usage problem.
Check out the easiest way to Fix Windows Error Reporting High CPU and Disk Usage.
Here are the steps to disable startup apps:
- Go to the Start menu, search for ‘Task manager’ and click on the best result.
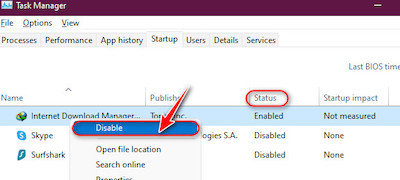
- Once the task manager loads switch to the Startup tab from the top menu bar.

- The number of applications listed here will vary depending on the programs you installed but right-click on all the programs one by one that is ‘enabled’ under Status, and click on Disable.
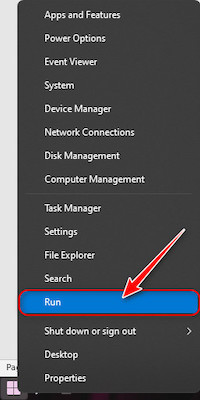
- After that, right-click on the Start icon and select Run.
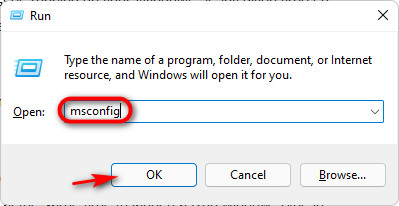
- Type ‘msconfig’ in the text box and click on the OK button.
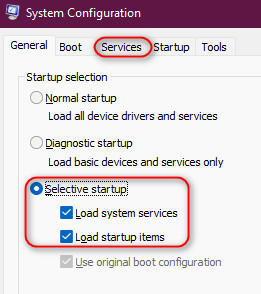
- Ensure that Selective startup is selected under Startup selection and that Load startup services and Load startup items are checked. Then, switch to the Services tab.
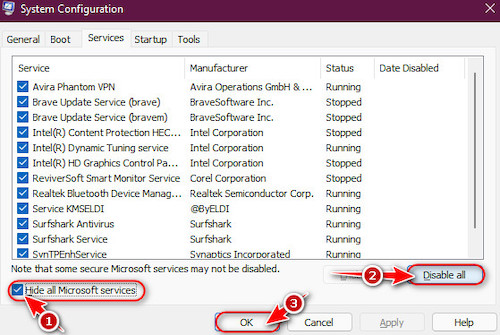
- Click on the check box next to Hide all Microsoft services and then click the Disable all button. Finally, click on the OK button to save the changes.
- If a prompt appears to restart Windows, click on the Restart button.
You may also like to read: Show Folder Size in Windows 11.
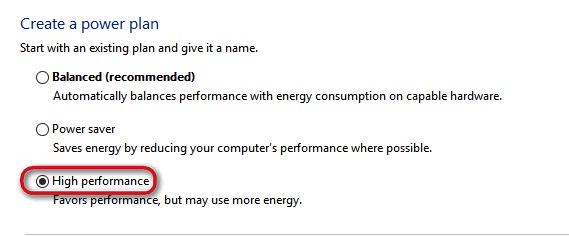
2. Switch to Performance Mode
You might not know that your computer has three power plans to choose from. You need to choose the power plan based on whether you want to save battery, improve the overall performance or stay in the middle ground.
By default, Windows starts with the Balanced plan but if you are getting disk usage issues on that, you can try switching to Performance mode.
Here are the steps to switch to performance mode:
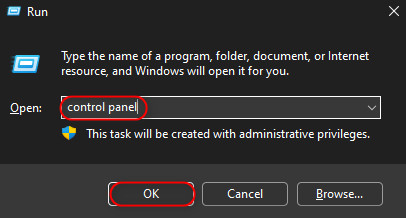
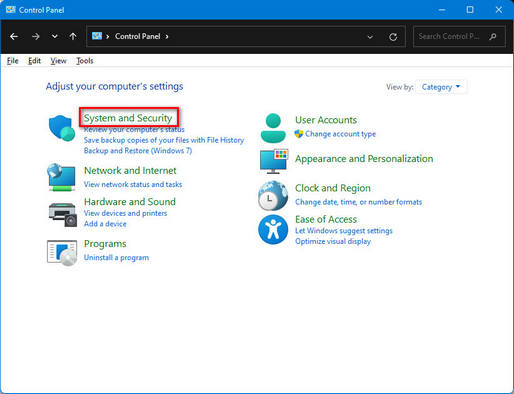
- Use the ‘Windows key + R’ to launch a Run window, type ‘Control panel’ and hit enter.
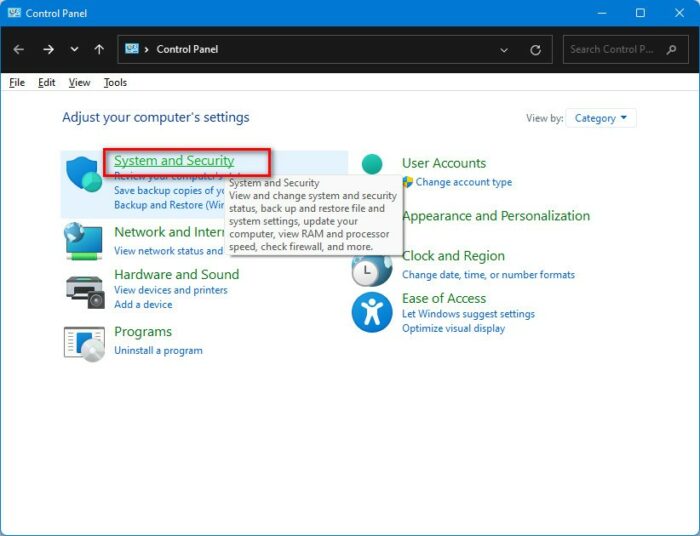
- Click on the System and Security option.
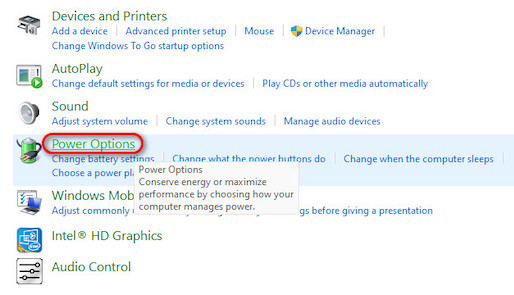
- On the next page, click on the ‘Power Options’ title.
- Click on the High-performance radio button and close the window.
3. Turn off Windows 11 Notifications
Don’t worry, you won’t need to turn off any important email notifications for this. You only need to disable the unimportant ones since they take up a significant amount of memory in the background.
Follow these steps to turn off Windows 11 notifications:
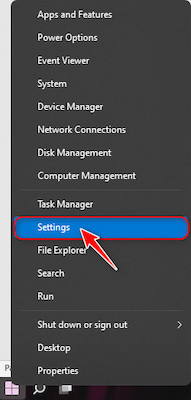
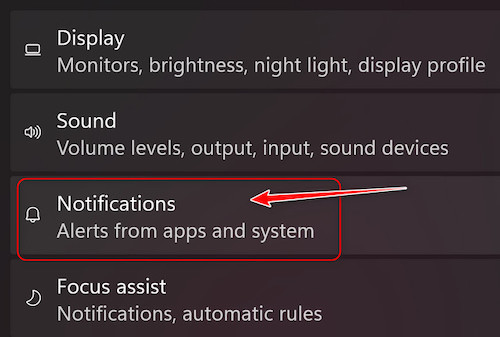
- Do a right-click on the Start icon and select Settings.
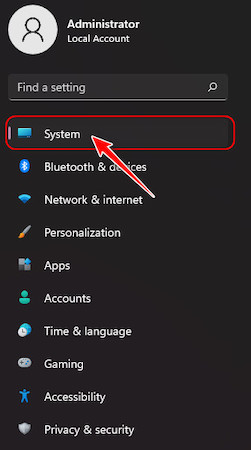
- Switch to the System tab if you are not already on it.
- Look for the Notifications option and click on it.
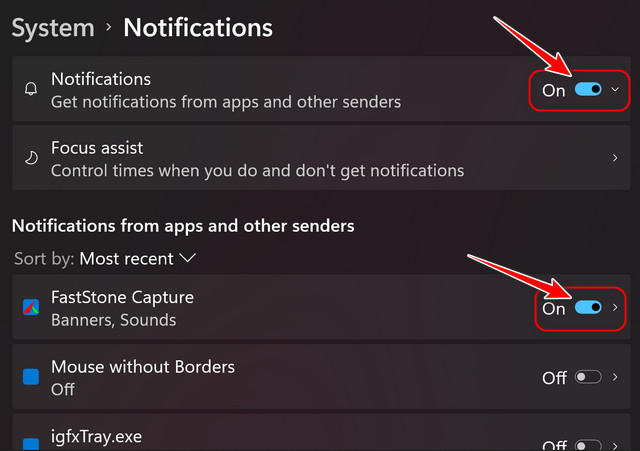
- Turn off the toggle for Notifications and then scroll down and enable notifications for only the apps that are important.
Also, check out our expert-recommended guide on How To Enable Telnet On Windows 11.
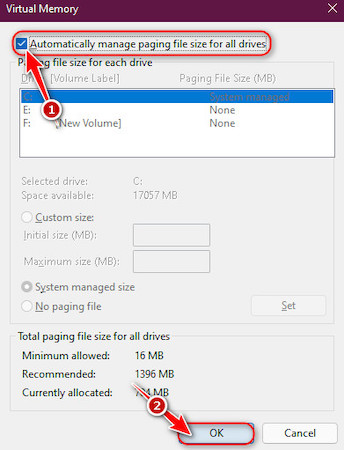
4. Restore Default Virtual Memory Settings
Virtual memory isn’t as powerful as RAM but it is used to assist the RAM in managing memory more efficiently. If you have tweaked these settings in the past or even if you didn’t, you should make sure the default memory settings are selected.
Follow these steps to restore default virtual memory settings:
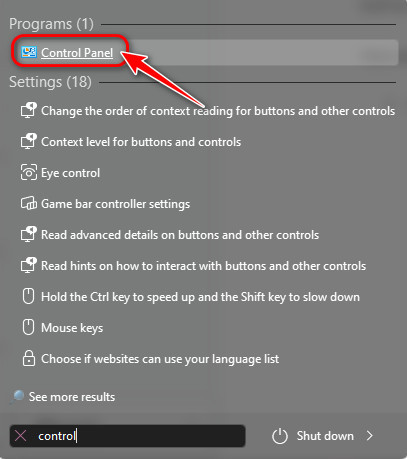
- Launch the Control Panel by searching for it and clicking on the first result.
- Click the System and Security option like you did earlier.
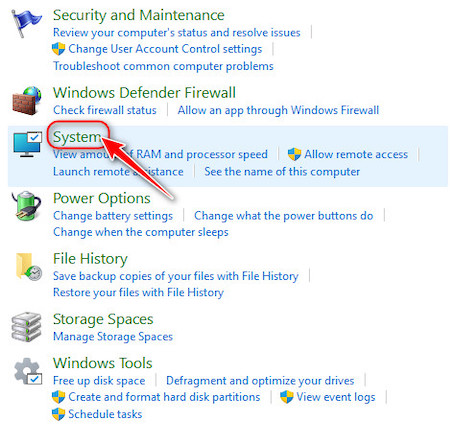
- Then, click on System.
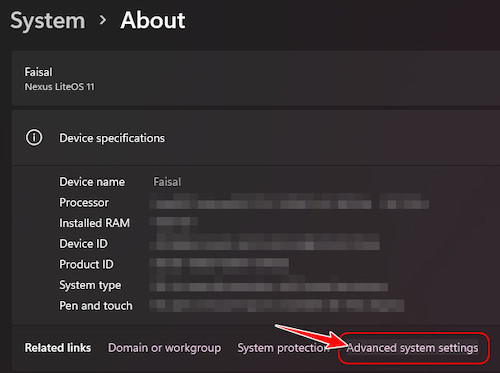
- This will redirect to a Settings page where you need to click on ‘Advanced system settings’ under Device specifications.
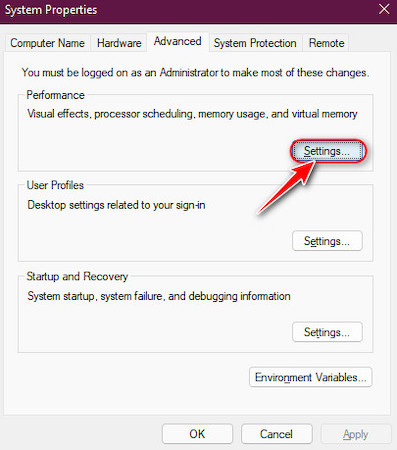
- Switch to the Advanced tab if you are not already on it and click on the Settings button under Performance.
- On the next window, tap on Advanced and click on the change button in the Virtual memory section.
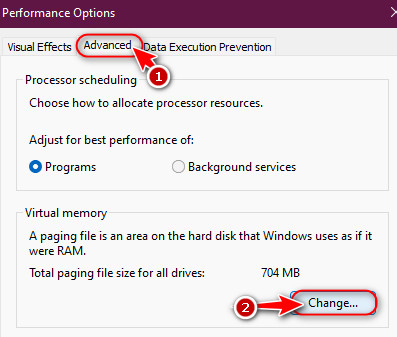
- Check the box next to Automatically manage paging file size for all drives and click on OK. If the box was already checked, uncheck it once, then check it and click OK.
5. Disable Search Indexing
You are probably unaware but all Windows versions have a search service running in the background that consumes a lot of resources. The good news is you can choose to disable it very easily.
Don’t worry, you will still be able to search for your files and apps, but it will be a little slower.
Here are the steps to disable the Windows Search service:
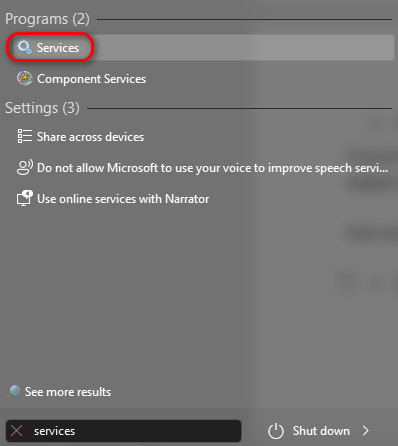
- Search for Services from the start menu and click on the best result.
- Click on any service from the list and tap the W key on your keyboard. Then, scroll until you see Windows Search and double-click on it.
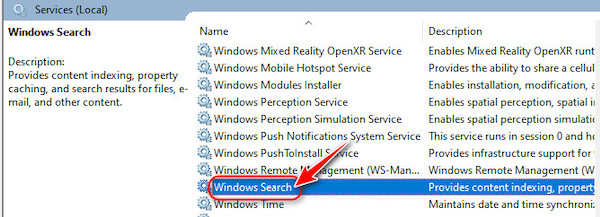
- Expand the drop-down menu next to Startup type, select Disabled and click on OK to save the changes.

Check out our expert-recommended to fix Stop Apps Running in Background Windows 11.
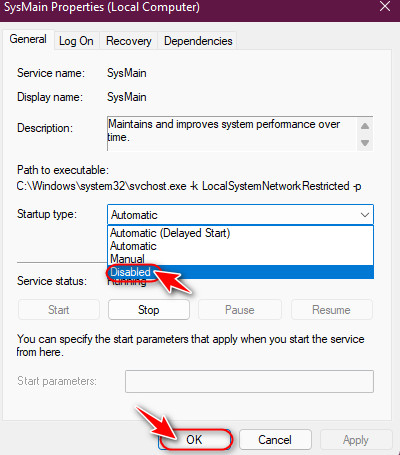
6. Turn Off Windows Superfetch
I’m going to go out on a limb and assume that most of you are hearing this term for the first time. This is a service that existed in Windows 10 as well and this was actually included to enhance the system performance.
Don’t get me wrong, this service probably works for PCs with great hardware and RAM but if you are getting disk usage issues, you don’t want services like these consuming memory in the background.
Here are the steps to disable superfetch service in Windows:
- Launch services like you did earlier from the Start menu.
- Just like the previous method, click on any service but this time press the S key from your keyboard.
- Scroll a little until you see a service called SysMain and double-click on it.
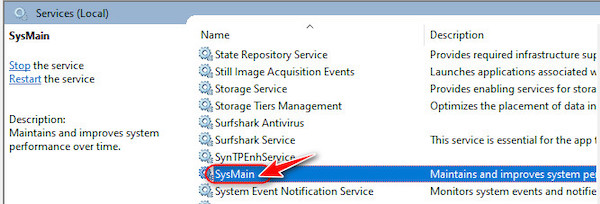
- Similar to the previous method, switch the Startup type to disabled and click OK.
7. Scan And Fix Disk Errors
If you have come this far without seeing any improvements to the disk usage, there is probably some issue with the disk itself. Thankfully, Windows made it very simple to scan and fix errors using a simple command.
Here are the steps to scan and fix disk errors on Windows 11:
- Launch a Run window by pressing the Windows and R keys simultaneously.
- Search for cmd and click OK.

- Type the following command into the Command Prompt window and press Enter.
chkdsk C: /f /r /x
You should see an error message asking you for confirmation. Press the y key on your keyboard followed by the Enter key. When you restart your PC, the system will automatically scan and fix any disk issues. 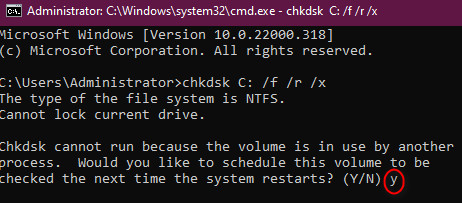
Check out the easiest way to fix Windows Can’t Access Network Drive On Windows 11.
Final Thoughts
I know how frustrating it can be to run laggy Windows since until recently, I was using a laptop powered by Intel Celeron.
It’s common to see memory issues like these with poor processors like that but you can at least minimize the problem by disabling the unnecessary services as I showed you. Thank you for reading my article and good luck.