After so many years, OBS is still the top pick for streaming on any platform. Unfortunately for some, especially for low/mid-range hardware users, the performance might be poor due to high CPU usage by OBS.
If you’re one of those unfortunate, don’t worry. Below, I have shortlisted the 100% working solutions to reduce excessive CPU utilization for OBS.
Let’s get started.
Fix OBS High CPU Usage on Windows/Mac
The main reason for OBS’s high CPU usage is misconfigured OBS settings. For example, downscaling the output resolution of screen recording can effectively reduce OBS’s CPU utilization by a lot. You can also try other solutions, such as lowering the framerate, customizing the x264 preset, etc.
Read on as I have thoroughly discussed all these methods, along with some additional ones, which can resolve this issue in no time.
Here’s how to reduce OBS’s CPU usage on Windows 10/11/Mac:
1. Downscale the Output Resolution
Since the OBS records the screen in real time, the program’s CPU usage will rise based on the recording resolution. Why? Because encoding higher resolution equals a higher processing load.
This is one of the main reasons why you might encounter error notifications such as Encoding overload or high CPU usage in OBS.
Follow these steps to scale down the output resolution in OBS:
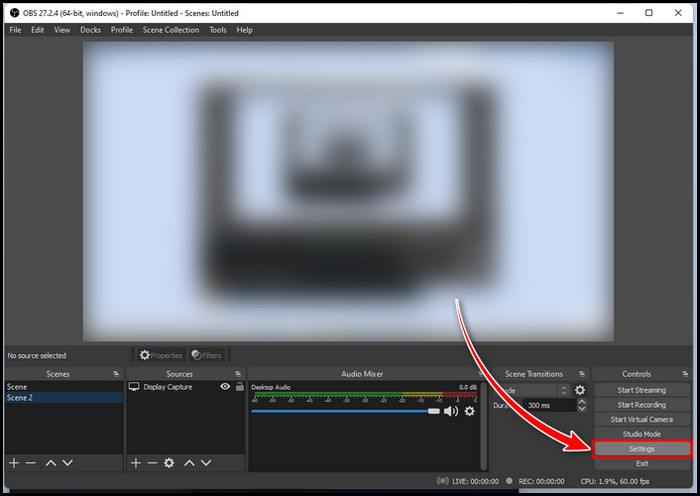
- Launch the OBS application and click on Settings from the bottom right corner of the screen.
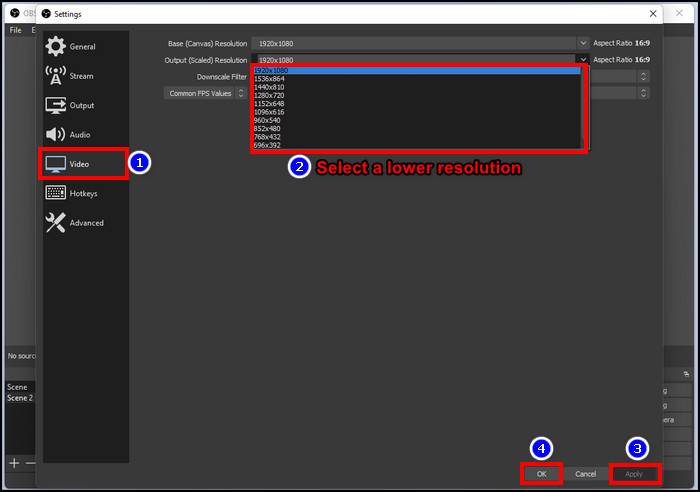
- Select the Video tab.
- Click on the drop-down menu for Output (Scaled) Resolution and select a lower resolution.
- Hit Apply > OK.
Keep in mind, the output quality of your video might downgrade due to lower capture resolution. You can also downscale various capture filters to further reduce the rendering pressure from the CPU.
System Interrupts help Windows to communicate with the Hardware devices. But it should not use all your CPU resources. If you are constantly getting high CPU usage with System Interrupts, check our separate article and follow along with the fixes to solve this issue.
2. Lower FPS for Recording
Capturing more frames per second has a huge impact on the overall processor utilization by OBS. If you’re recording at a higher FPS and often seeing Encoding overload notifications on your screen, then your system clearly can’t handle the rendering load.
In such a case, lower the capture FPS to 24 or 30 to reduce the rendering load, thus effectively lowering the overall CPU utilization by the app.
Here are the steps to lower the framerate for OBS recording:
- Run OBS and click on Settings.
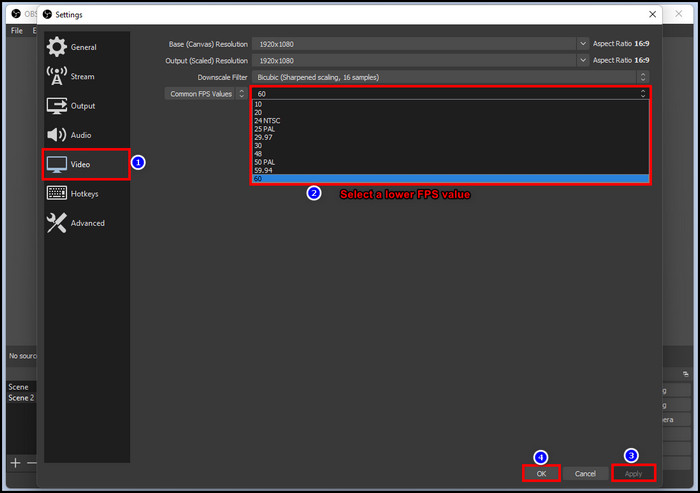
- Navigate to the Video tab.
- Expand the drop-down menu for Common FPS Values.
- Select a lower FPS value(like 24 or 30).
- Click on Apply > OK.
- Exit OBS.
Capturing the screen at lower fps might not offer as smooth of a video as 60fps or higher. But it will ensure that everything runs smoothly and resolve any abnormally high resource usage issues.
Many users face high usage with WMI Provider Host without any reason. Well, not to worry anymore. Read our troubleshooting and fix it instantly for your Windows 10.
3. Use GPU/Hardware Accelerated Encoder
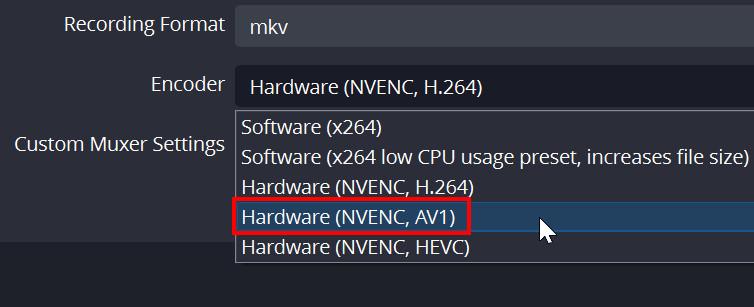
Hardware encoders such as NVENC, AV1, etc are much more efficient than typical x264 software encoder. These encoders use GPU hardware acceleration to render a given task much faster, hence requiring a lot less CPU usage.
This is why using a dedicated GPU & hardware-accelerated encoder to run OBS is an ideal solution to get rid of OBS’s high CPU usage while streaming.
Here’s how to use hardware accelerated encoder on OBS:
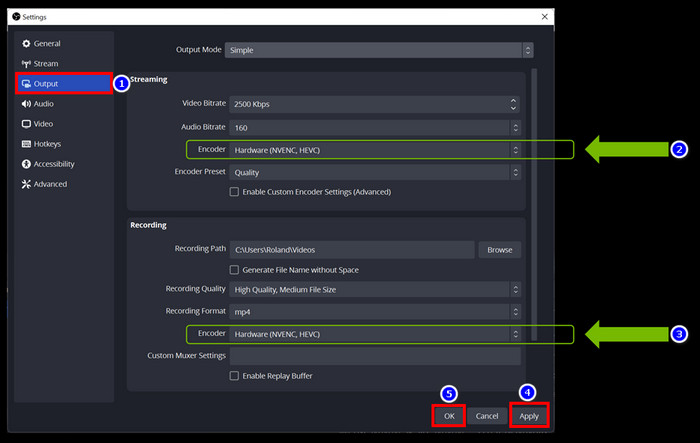
- Go to OBS’s Settings and click on the Output tab.
- Expand the drop-down menu for Encoder in the Streaming section.
- Select Hardware(QSV). If you have an Nvidia GPU that supports NVENC codec, select Hardware(NVENC, HEVC) or Hardware(NVENC, AV1).
- Do the same for the Encoder option from the Recording section.
- Hit Apply > OK.
Furthermore, ensure you’re using the dedicated GPU(Nvidia/AMD) to run the OBS application.
Follow these steps to run OBS with a dedicated GPU:
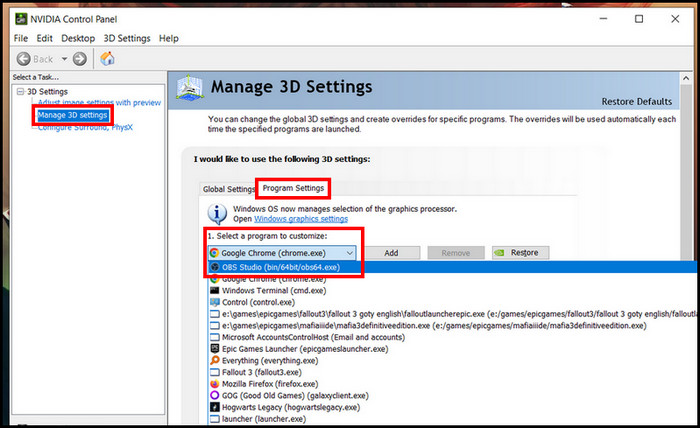
- Open Nvidia Control Panel and click on Manage 3D settings.
- Go to the Program Settings window.
- Expand the drop-down menu to Select a program to customize:
- Find and select OBS Studio(bin/64bit/obs64.exe).
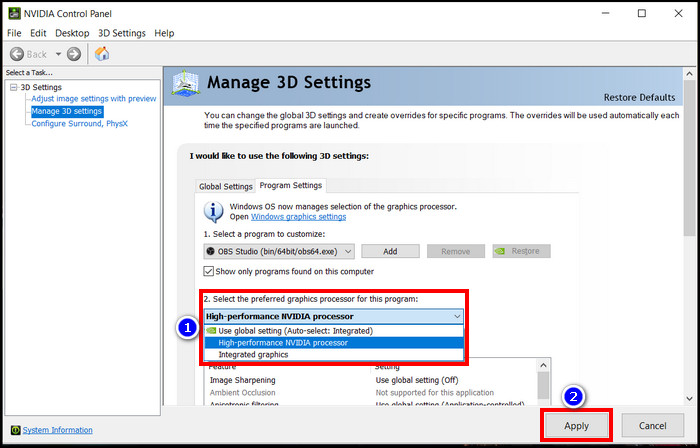
- Click on the drop-down menu for Select the preferred graphics processor for the program:
- Choose High-performance NVIDIA processor from the context menu.
- Hit Apply.
Since these steps are for Nvidia users, the name or path will vary in the AMD Catalyst software panel for Radeon GPU users. But you should get a general idea of what to do to run OBS with a dedicated AMD graphics.
If you are facing high CPU usage with WUDFHost.exe, follow our separate article, where we give you the solutions to fix it.
4. Run the Audio Sources at the Same Frequency
If the system audio frequency and the capture frequency don’t match, it’ll put more load on the CPU. Why? Because the program now has to load the system audio and convert it to the set frequency value of the output audio. Hence the extra CPU usage.
To mitigate this issue, you need to match the OBS’s audio capture frequency with the system output audio of your device.
Follow these steps to match the OBS audio frequency with the system output audio:
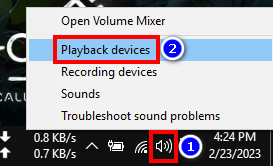
- Right-click on the speaker icon and select Playback devices.
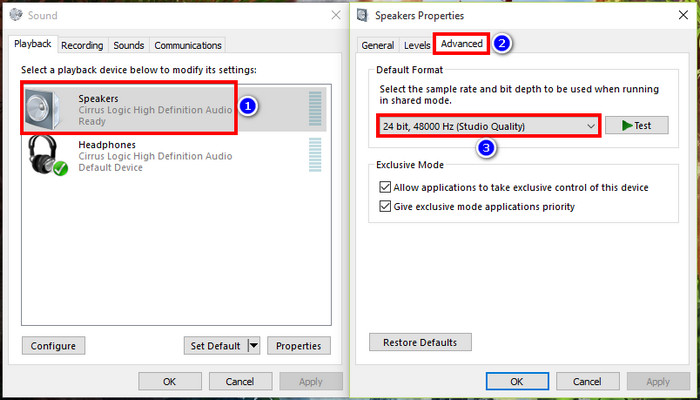
- Double-click on the Speaker or Headphones.
- Go to the Advanced tab. Here, you’ll see the Hz level of your system audio output.
- Launch OBS and click on Settings.
- Click on the Audio tab and expand the drop-down menu for Sample Rate.
- Select a value that matches the audio output frequency of your system. For me, it’s 48KHz.
Additionally, make sure all your audio sources are running at the same output frequency. Otherwise, it’ll also affect the performance of your system.
Is Windows Graph Isolation using all your CPU? That’s not normal, though. To fix this, read our troubleshooting guide.
5. Customize the x264 Preset Values
OBS offers different performance presets for the x264 encoder to manage the CPU load. Changing the preset from very fast to medium will effectively reduce the required processor load when recording or streaming a clip.
Here’s how to change the x264 preset in OBS:
- Run OBS and click on Settings.
- Select the Output tab.
- Tick the box for Enable Advanced Encoder Settings.
- Click on the drop-down menu next to Encoder Preset from the Streaming section.
- Select speed if you have hardware encoder enabled. When you’re using software encoder, you will see other options. In such a case, select medium or low.
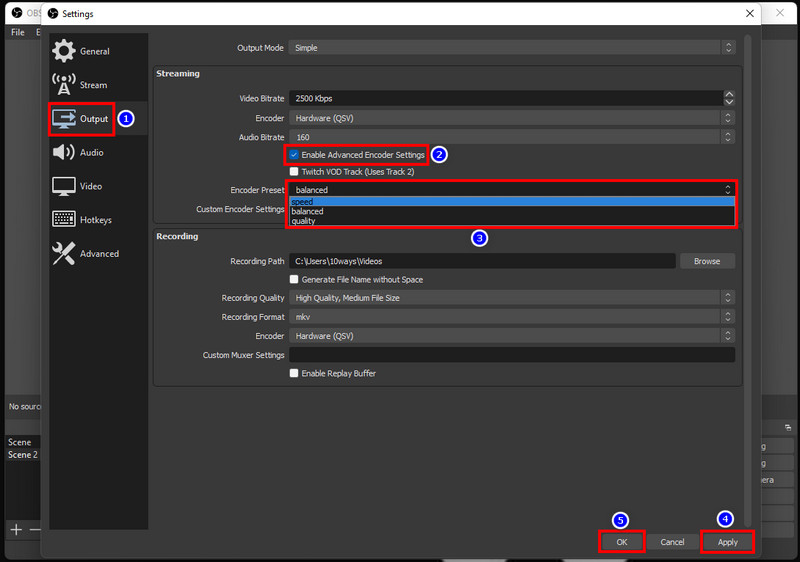

- Hit Apply > OK.
Remember, the quality of your video will be sacrificed because the system will skip frames in order to reduce the rendering load.
6. Check the Video Source & Lower OBS Processing Priority
In case you’re using a webcam along with the streaming on OBS, it will add extra load on the CPU. So make sure the webcam or other video sources aren’t running at a higher resolution or bitrate.
Additionally, lowering the processing priority(dedicated to OBS by the CPU) will require less hardware resources for rendering.
Here are the steps to lower OBS process priority:
- Launch the OBS application and click on Settings.
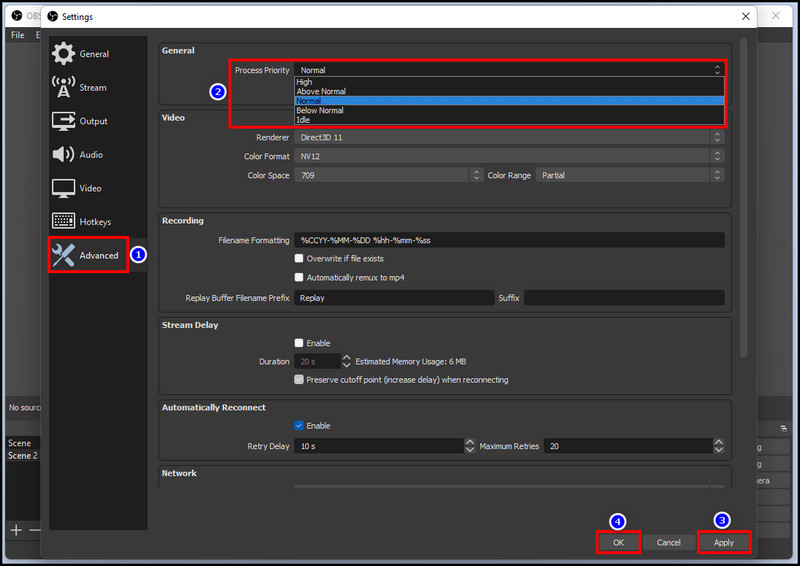
- Select the Advanced tab.
- Expand the drop-down menu for Process Priority.
- Choose Normal or Below Normal.
- Click on Apply > OK.
- Restart OBS.
Not to mention, close all the unnecessary background running apps in order to reduce hardware load while streaming/recording.
Getting high CPU usage with svchost? You are not alone in this. We faced a similar issue and hence the troubleshooting guide. Do check it out.
7. Disable Game Mode
Windows Game Mode detects programs and runs Xbox Game Bar in the background to capture the screen. When you use OBS to stream your gameplay, the Game Mode might detect both OBS+the game and run Game Bar in the background. Thus increasing CPU utilization.
To lessen the amount of process on your CPU, disable Game Bar before using OBS. This method is also useful for fixing any kind of high CPU usage issues on your computer.
Follow these steps to disable Game Mode on Windows:
- Press Windows Key+S and type game mode.
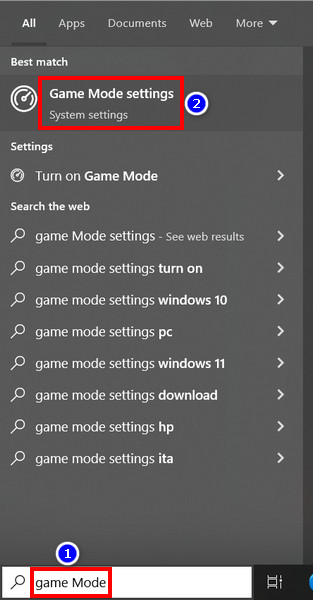
- Hit the Enter button on your keyboard.
- Toggle off Game Mode.
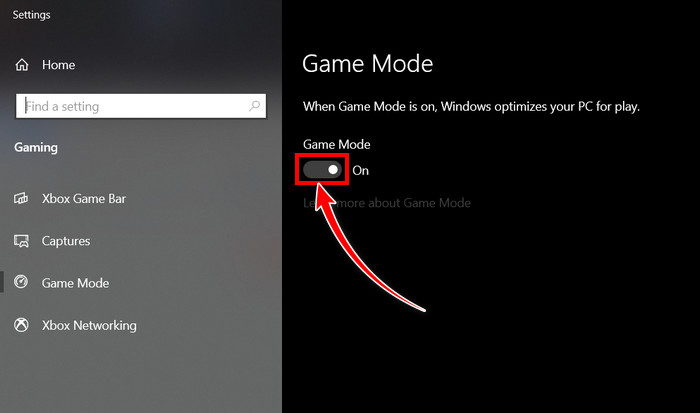
Now restart your device to see if it lowers the processor utilization for OBS. If not, move on to the next method.
Desktop Window Manager can sometimes use a lot of CPU. Reduce CPU utilization easily by following our separate article, where we give you all the fixes.
8. Update or Downgrade the OBS version
If none of the above-mentioned solutions have worked for you, consider updating the OBS app. Uninstall the program from your computer and download the latest version from their official website.
The app will also show a prompt for update whenever there’s a patch available for download. Click on Update Now to keep the program up to date.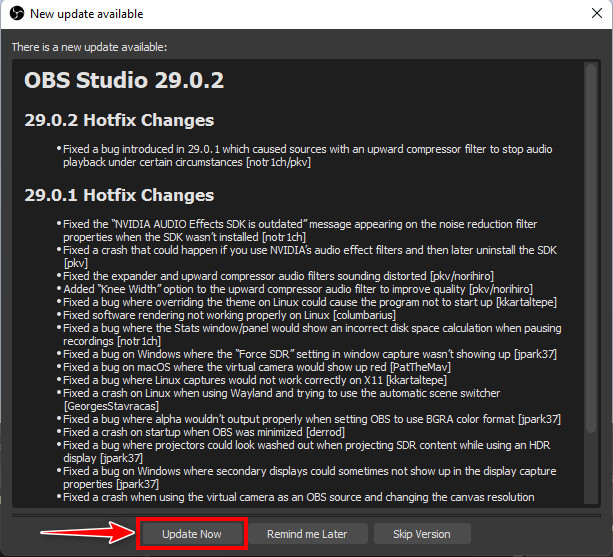
Additionally, software updates can often introduce compatibility or technical issues. If you’re facing random OBS high CPU usage in idle after updating the app, revert back to an older build to see if it resolves the issue.
When Windows installs updates, this can increase the CPU usage of the Windows Modules Installer Worker. But if you see this constantly, use our troubleshooting guide and get rid of this problem.
With everything being said, a hardware upgrade can fix high CPU usage. Heck, you can even upgrade the CPU without reinstalling Windows. Yes it’s that easy!
Frequently Asked Questions
What is a good CPU for OBS?
AMD Ryzen 9 7900x is currently the best pick for streaming with OBS.
Is OBS CPU or GPU heavy?
OBS is primarily a CPU-heavy program as video encoding is a very processor-intensive task.
How do I make OBS use GPU instead of CPU?
Switch to a GPU hardware encoder from the OBS settings. That way, the program will use the graphics card for encoding.
Why is my CPU so high on OBS?
The CPU utilization of OBS can spike when you’re trying to stream at a very high frame rate and resolution. The processor usage can also be high if you don’t use a hardware encoder like NVENC.
Conclusion
Despite certain issues, OBS is still one of the most reliable software for recording & streaming. By following the methods listed in this article, you’ll be able to reduce OBS CPU usage and get better performance out of your system.
Which method has worked for you? Share your experience in the comments below.
Have a good one!