System interrupts is like a friendly middleman between the hardware and the Windows OS, which handles the communication between them. And you’ll find it as a process in the Task Manager.
But, the finding won’t be pleasant if you see the System interrupts alone consuming the entire CPU power.
Why is it causing high CPU usage & how to fix that?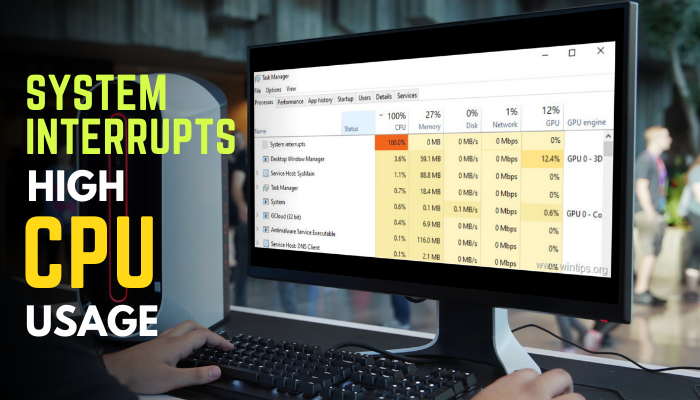
If you’re seeking the answer to both, you must read this article till the end. So, let’s begin!
What is the System Interrupts Process?
System interrupts is a communication medium between the hardware and the OS. You’ll find it in the Task Manager as a process by pressing Ctrl + Shift + Esc, but it’s actually not a process. It’s like a signal that alerts the CPU only when any hardware task requires high priority.
The CPU holds & saves the present ongoing process and starts executing high-priority based hardware instructions when the system interruption calls for it. After accomplishing the task, the CPU returns to the previous on-hold instructions.
System interrupts is a usual process in the OS, and you’ll find it consuming 0.1% to 3% of the CPU most of the time. However, the CPU utilization by this process may differ depending on the load of the apps, which are highly hardware focused.
You might face system interrupts using 7% to 9% CPU or even 10%. But it becomes a matter of concern when it crosses the safe borderline, which is 10% or above and remains constant.
Any hardware module might have issues when this process keeps using more than 10% or 20% of the CPU power. Unfortunately, it’ll be more shocking for you when the CPU usage spikes at 100% due to system interrupts.
But, what makes the system interrupt 100% of CPU usage? Let’s find out.
What Causes System Interrupts to Use 100% of the CPU?
System interrupts will hold the CPU utilization at 100% when you connect any faulty external device to the PC via USB ports. Additionally, corrupted device drivers trigger this issue too. However, any failing hardware in the PC will cause the CPU utilization to be 100% constant.
It handles mostly hardware-related processes in the system. That’s why anything wrong with the hardware will affect CPU usage by a significant margin. And this hardware task handler will represent that.
Faulty internal devices like network adapters, internal modems & sound devices, or any add-on cards will cause disturbance in the system, and use the CPU in a high amount.
However, the sound effects in the system use CPU on a large scale, and that’s when you’ll notice the system interrupts is consuming more CPU power.
CPU usage spiked at 100% by this process is not good, and you must fix it, a.s.a.p. Let me show you the fixes real quick.
Windows Installer Moduler Worker engages and causes high CPU usage when Windows installs new programs. But if you get this process to use the CPU every time, follow our separate article to troubleshoot this issue.
How to Fix High CPU Usage by System Interrupts on Windows 10/11
To fix system interrupts causing maxed-out CPU usage, you must restart the PC first. It’s a quick and fast fix. Plus, update all outdated hardware drivers and look for any faulty hardware.
Replace the damaged hardware if you find any plus, updating the BIOS will resolve this issue too.
Windows OS built-in sound effects or enhancements make this process consume more CPU power. That’s why disabling all the sound enhancement will reduce CPU usage and solve the problem.
Now, let’s move into how to fix System Interrupts that cause 100% CPU usage.
Here are the methods to fix system interrupts causing high CPU usage:
1. Restart the PC
When Windows 10 or 11’s system interrupts use 100% CPU, the first thing to do is to restart the PC. Because the hardware-based execution process sometimes gets stuck, and to get out of this state the system interrupts push the CPU until it gets maxed out.
To solve this high CPU usage by system interrupts, the first thing you should do is restart the PC. Restarting the computer will break the stuck loop, and this process will no longer use the total CPU power.
2. Disable USB Root Hubs
Faulty devices cause trouble in the system when you connect one to the PC. As a result, you’ll face the system interrupt process consuming 100% of the CPU power.
If more than one external peripheral USB device is attached, you must check and disable the faulty one to resolve this high CPU usage issue. Follow the below steps to disable USB root hubs.
Here are the steps to disable USB root hubs:
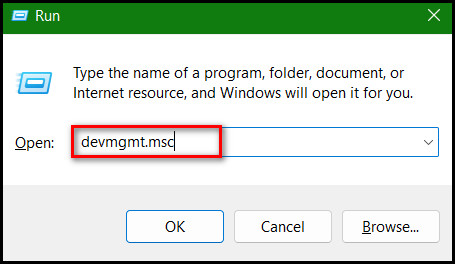
- Press the Windows key + R to launch the Run dialog.
- Type devmgmt.msc in the command field and hit Enter.
- Click the arrow button to expand the Universal Serial Bus controllers section.
- Right-click on each USB Root Hub and select the Disable option.
Note: Don’t disable the USB Root Hub to which the mouse and keyboard are connected.
To know the mouse and keyboard is connected to which USB, simply right-click on the USB Root Hub and choose Properties. Go to the Power tab and check the attached devices. You’ll find the mouse and keyboard are in the list if connected.
After disabling the USB Root Hub, restart the PC and check the system interrupt CPU usage. I bet you’ll find the system interrupts CPU usage is normal now.
Sometimes the svchost process can increase CPU usage. If that’s happening to your PC, read our troubleshooting guide and fix it in an instant.
3. Update Hardware Drivers
Outdated hardware drivers are another reason behind system interrupts’ 100% CPU usage problem. To resolve this issue, check for backdated hardware drivers and update those as early as possible.
Below are the instructions to update the hardware drivers:
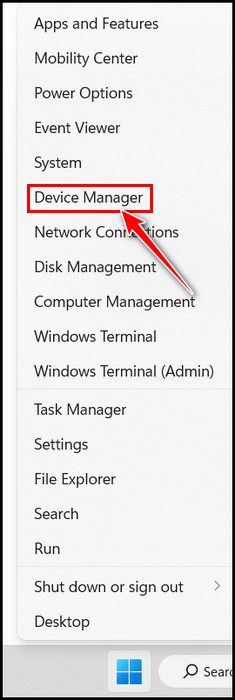
- Press Windows key + X and select Device Manager from the list.
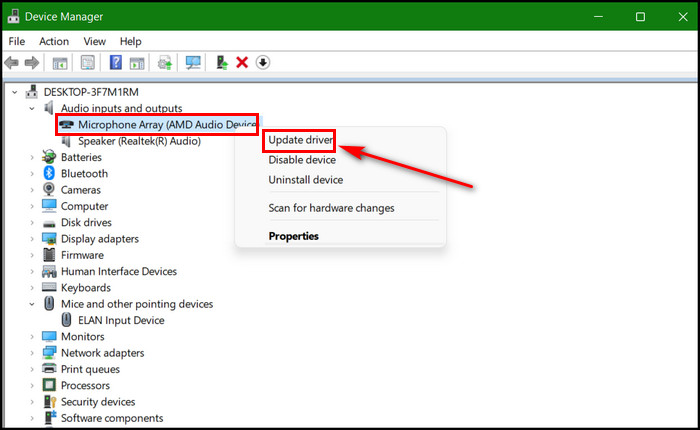
- Click the arrow button next to the device section you want to update the driver.
- Right-click on the driver and choose the Update driver option.
- Select Search automatically for the updated driver software option from the appeared window.
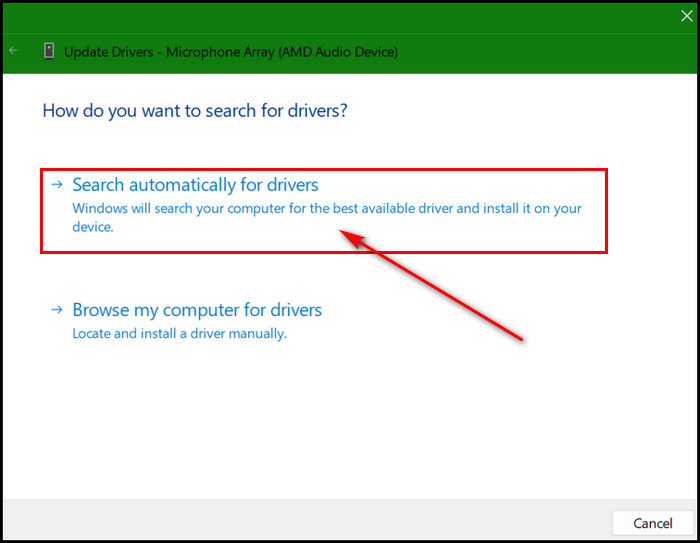
Now, the Windows updater system will check for the latest driver and download it. After the download is complete, Windows will install the latest driver automatically. Repeat the same procedure to update other device drivers too.
Restart the PC if required. If the backdated drivers are the real culprit, updating those already solved the issue.
Pro Tip: You can also go to Settings > Windows Update and check for updates to update the entire Windows to the latest version. Updating the Windows will update the device drivers too.
You can also read our separate guide on how to update drivers on Windows 11. We have listed all the possible ways you can do that.
4. Disable Internal Devices
If updating each device driver seems time-consuming, you can disable internal devices only to find the real culprit. Internal devices you might need to disable include:
- Network adapters
- Internal modems
- Internal sound devices
- Add-on cards
To disable those drivers, you must go to the Windows Device Manager. To do so, follow the below steps. For example, I’ll show you how to disable the network adapter, and you can follow the same process to disable the rest of the internal devices.
Read the instructions below to disable the network adapter:
- Right-click on the Window logo and choose Device Manager from the context menu.
- Look for the Network adapters and expand this section.
- Right-click on the driver and select Properties.

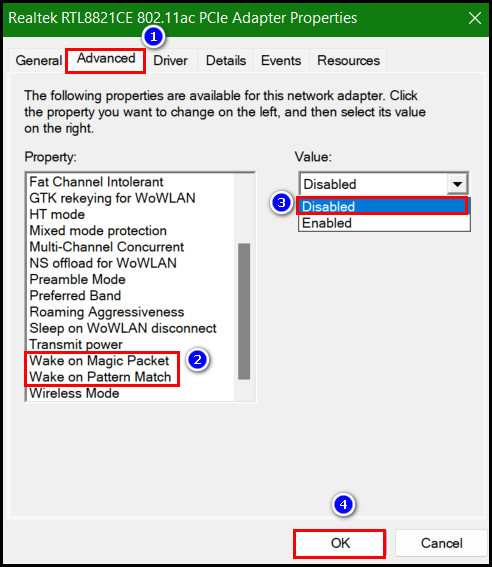
- Click on the Advanced tab and scroll down the Property section to the last.
- Select Wake on Magic Packet and set its value to Disabled from the right side.
- Choose Wake on pattern match again and set its value to Disabled too.
- Select OK to save the settings.
Now, check whether system interrupts is still consuming high CPU or not. If not, then the Network adapter is the main culprit. Otherwise, enable the network adapter again and disable other internal devices too. Then check if the issue exists.
If you are not getting the desired Internet speeds on Windows 10, check our separate article. There we have written an extensive guide on the troubleshooting steps.
5. Exclude Faulty Hardware
When you have any faulty hardware in the system, like damaged RAM, corrupted hard disk, or SSD, the system interrupts will consume more CPU power than it should. So, look for any damaged hardware in the system.
If there is a problem with the storage disk, you’ll find disk usage is also too high as well as the system interrupts process.
If you’re out of luck and nothing fixes the high disk usage, it’s time to swap out the hard drive and install a new one. Like a faulty hard drive, the RAM could get damaged too.
You can use some programs to check for faulty RAM. With those apps, you can run tests on RAM and find out if those are okay or not. Faulty RAM increases CPU usage by system interrupts. So, change the RAM to solve this issue.
6. Disable Sound Effects
Sound effect in your system uses specific hardware and driver, which uses a lot of CPU power. System interrupts might max out the CPU utilization when the sound enhancement is enabled. Disabling it will solve the problem for sure. So, follow underneath steps to do that.
Here are the steps to disable sound effects:
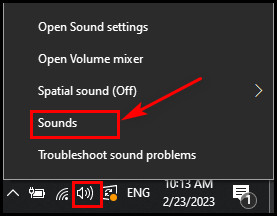
- Go to the Windows taskbar and right-click on the Speaker icon.
- Choose Sounds from the list.
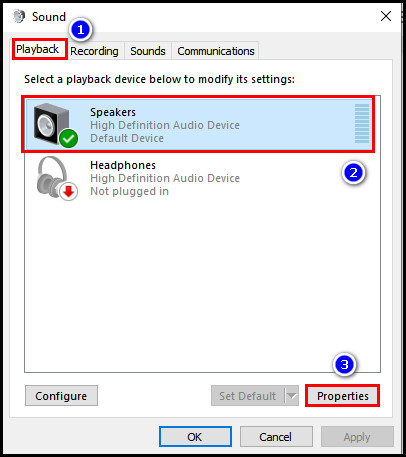
- Select the Default device and click on the Properties button.
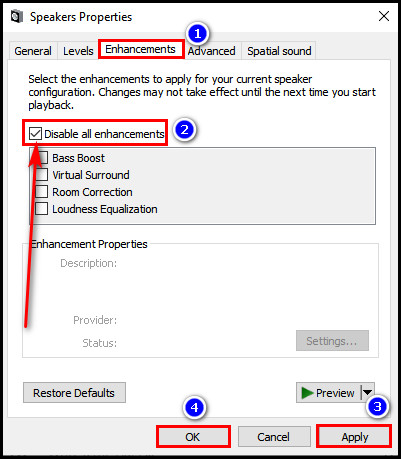
- Go to the Enhancement tab.
- Check the box of Disable all enhancements.
- Hit Apply > OK.
Now, restart the PC. After a restart, you won’t find CPU utilization maxed out by the system interrupts anymore.
Windows 11 comes with many changes and optimization. You won’t find the old sound settings in Win 11, as you find them easily in Windows 10. That is where our guide comes in.
7. Turn Off Fast Startup
Is Fast Startup feature good or bad? Some find their PC performance improves after they enable fast startup. But according to my test, disabling the Windows fast startup solves the system interrupts high CPU usage problem. To turn off Windows fast startup, simply follow the steps.
Below are the steps to turn off fast startup:
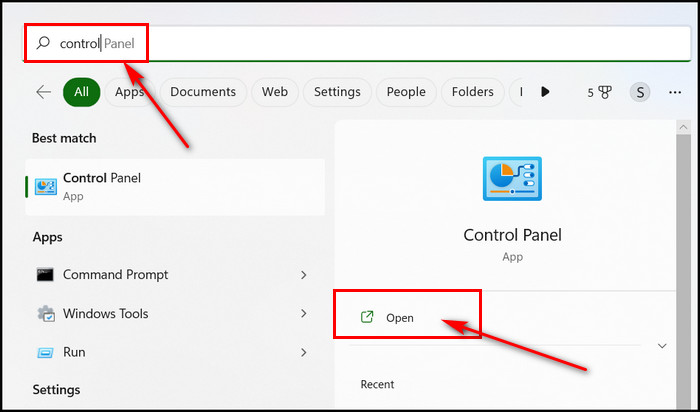
- Go to Windows search and look for the control panel.
- Click to open the Control panel from the search result.
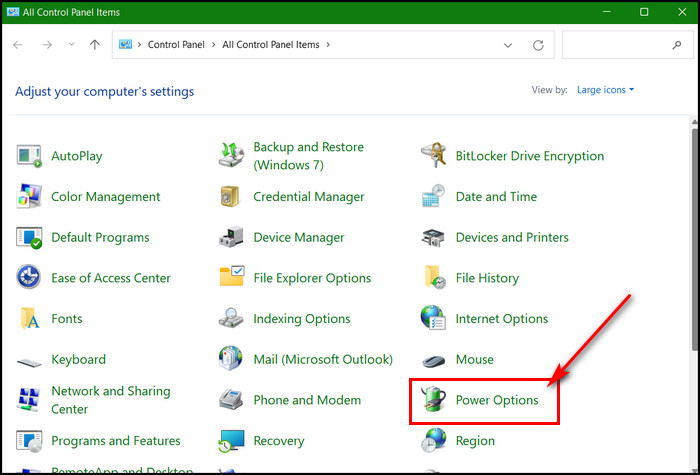
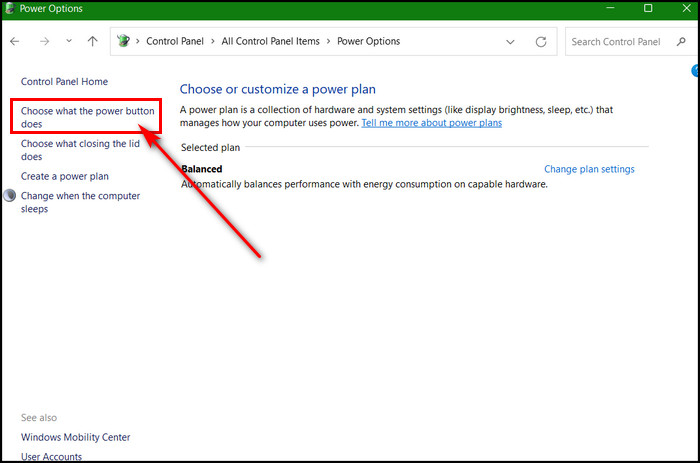
- Select Power Options and click the Choose what the power buttons do button from the left panel.
- Click on the Change Settings that are currently unavailable button.
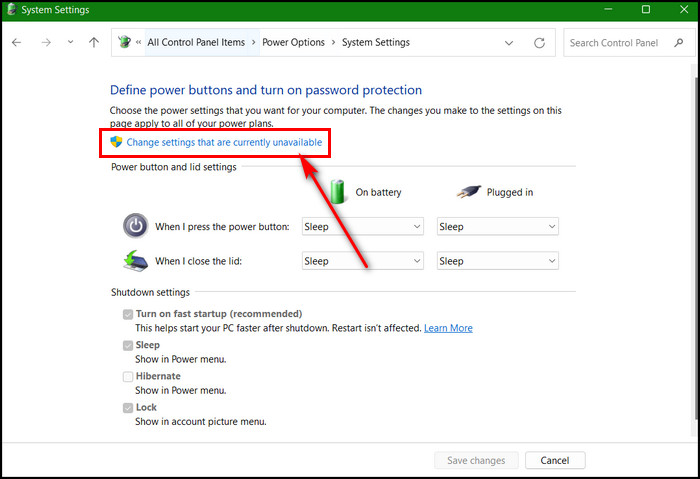
- Uncheck the box for the Turn on fast startup (recommended) feature.
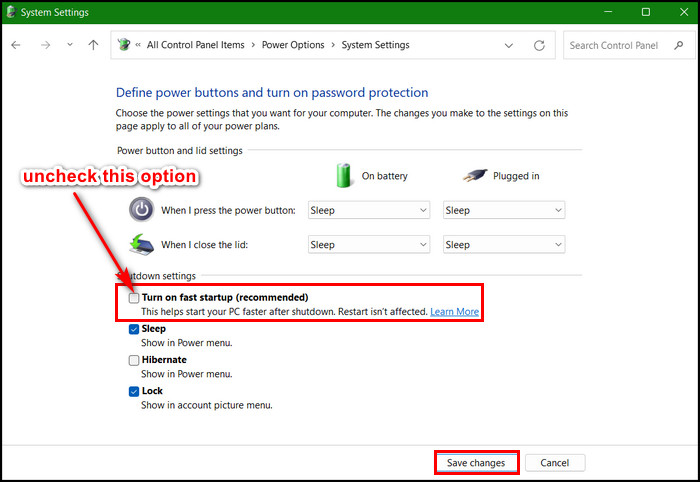
- Click the Save changes button and exit from the control panel.
Now, restart the PC and go to Task Manager. Congratulations! You have fixed the 100% CPU usage issue by the system interrupting process.
8. Update BIOS
If the above methods didn’t solve the problem, then it’s time to sneak into the BIOS. Because backdated BIOS could trigger the system interrupts process to consume massive CPU power. For this, you must check the BIOS version and update it.
Follow the instructions below to check and update BIOS:
- Go to Windows search and search for cmd.
- Click the Run as administrator option under the search result.
- Hit Enter after typing the following command lines:
wmic bios get manufacturer, smbiosbiosversion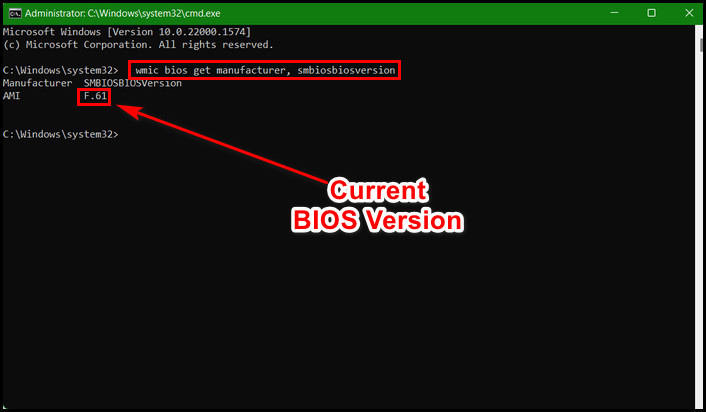
Executing this command line will show you the current BIOS version of the system. Now, go to the manufacturer’s website and look for the latest BIOS version. If the system’s current BIOS is outdated, download the latest one.
Then follow the manufacturer’s instructions to update the BIOS.
Note: Updating the BIOS is a very complicated & risky process. So, take expert help if needed.
This hardware task manager process isn’t the only factor that can make CPU utilization high. But don’t worry it’s possible to fix high CPU usage by applying some methods no matter what causes it.
FAQs
Is system interrupts a virus?
No, System interrupts isn’t a virus. It’s a process that helps to maintain communication between the hardware and the OS.
Can I end System interrupts task?
System interrupts is a vital part of the Windows OS, and it helps to alert the CPU when any hardware task needs to be executed on a high-priority basis. That’s why you can’t disable this process.
How can I fix System interrupts using high CPU?
To fix System interrupts causing high CPU usage, update all the backdated hardware drivers and disable the USB root hub. Moreover, disabling the corrupted internal devices also fixes the high CPU usage by this hardware task prioritize process.
Wrapping Up
System interrupts help to speed up top-priority hardware-level instructions to be executed first. But, this process shouldn’t exceed CPU usage of more than 10%.
In this article, I have shown the main reasons behind this issue and the solving methods. I believe you read till the end and already solved the issue.
For more queries, leave your comment in the box below. See you at the next one. Peace out!