Does your computer suddenly run slower than usual, but the CPU usage is consistently high? The Windows Modules Installer Worker process, aka TiWorker.exe, most likely caused it.
This Windows process frequently uses over 50% of your CPU resources, and sometimes it may even jump to 100%. It crushed my windows several times and even damaged my motherboard once.
But, don’t worry. In this article, I’ll walk you through some of the most effective solutions for this issue.
So without further ado, let’s jump in.
How to Fix Windows Modules Installer Worker Max CPU
The Windows Modules Install Worker, or TiWorker.exe, is a system process that manages Windows updates installation, removal, and modification. When this process puts extreme pressure on the CPU, you must disable the Windows Update service temporarily first.
If the issue remains, you can remove the Software Distribution folder, run Windows Update Troubleshooter or use the DISM command.
This portion will give you a step-by-step guide for every available solution. It will help you apply the fixes easily.
Here are the methods to solve the windows modules installer worker’s high CPU problem:
1. Delete the Software Distribution Folder
The Software Distribution folder stores new Windows updates. When some files get corrupted in this folder, you will face a high CPU usage problem. So you should delete this folder.
But worry not. Deleting this file has no risks. When your PC finds new updates, it automatically generates the same folder.
Follow the steps to delete the Software Distribution folder:
- Open File Explorer.
- Go to C:\Windows and find the SoftwareDistribution folder.
- Select the folder and delete it.
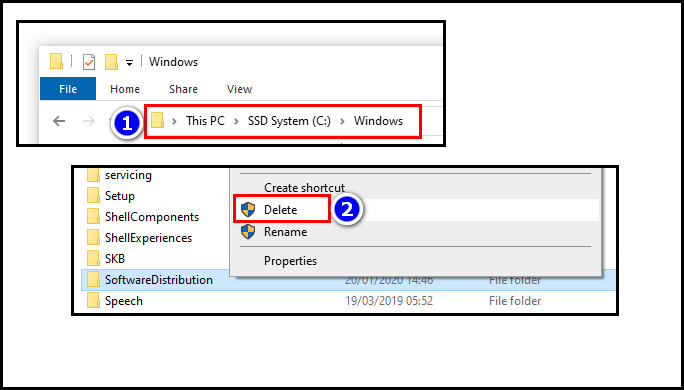
- Reboot your device.
If the issue remains, follow the next solution.
2. Disable Windows Update Temporarily
Sometimes, Windows Module’s Install Worker consumes large CPU resources when the updated app doesn’t run properly. Then you should temporarily disable the Windows update service to solve It.
These are the steps to disable the Windows update service temporarily:
- Press the Win + R key to open the Run app.
- Enter services.msc and hit the OK option.
- Scroll the Windows Update Services window.
- Right-click on the option and select Pause/Stop.
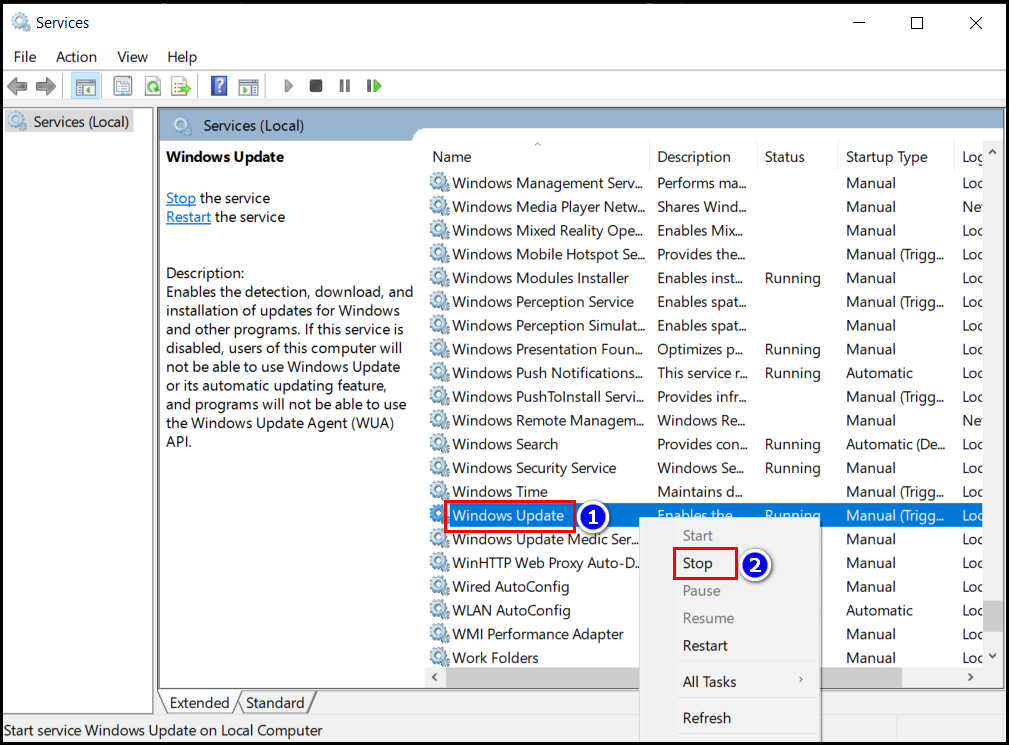
- Wait for half a minute.
- Again Right-click at the Windows Update service option.
- Choose Start to reboot the service.
After completing the steps, you should check your CPU usage to be sure.
3. Run Windows Troubleshooter
Microsoft has a Windows Update Troubleshooting tool to fix any Windows updates issues. It also can solve the Windows Modules Installer Worker High CPU problem because the app is associated with Windows updates.
Follow the steps to run Windows Update Troubleshooter:
- Navigate to Start > Settings > Update & Security and Choose the Troubleshoot option.
- Click on the Additional Troubleshooters option and click on Windows Update.
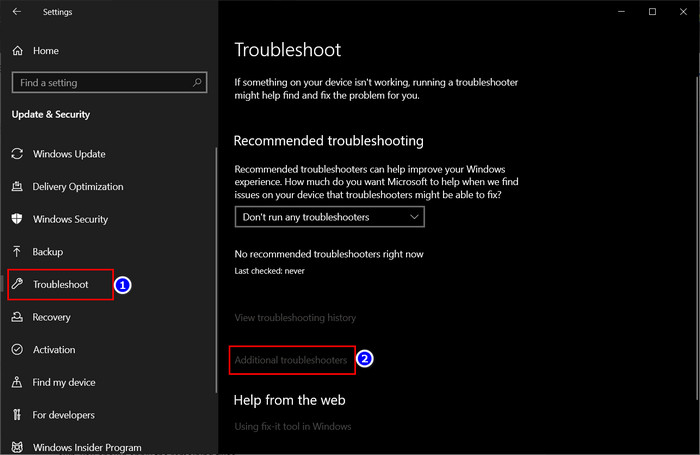
- Select Windows Update & Run the troubleshooter.

- Choose yes if you find any errors.
- Close the window and restart your PC.
Note: The Windows Troubleshooter isn’t flawless. So, if you can’t find any errors through this, you must apply the remaining fixes.
The Desktop Window Manager can use all the CPU resources sometimes. This is not normal, though. Read our separate article where we fix this.
4. Use SFC Scan from Command Prompt
System File Checker aka SFC scan fixes system files corruption. So it’s an effective solution for Windows installer Module errors.
To run the SFC Scan, follow the steps below:
- Click on the Windows search icon and type cmd in the box.
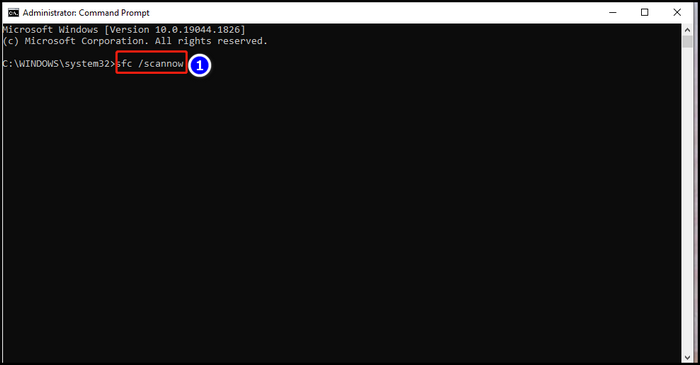
- Click on the Command Prompt and select the Run as administrator option from the left.
- Input sfc/scannow in the window and tap Enter.
- Wait until the scan process to complete, then reboot your device.
After completing the steps, your high CPU usage issue will go away.
The SFC command is also useful when troubleshooting high CPU usage with Windows Search Indexer. Read our separate article if you face this issue.
5. Run DISM Command
DISM option also identifies and fixes data corruption issues. You can also run it when you see high CPU use in your control panel.
Here are the steps to run DISM Command on your PC:
- Click on the Windows search icon and type cmd in the box.
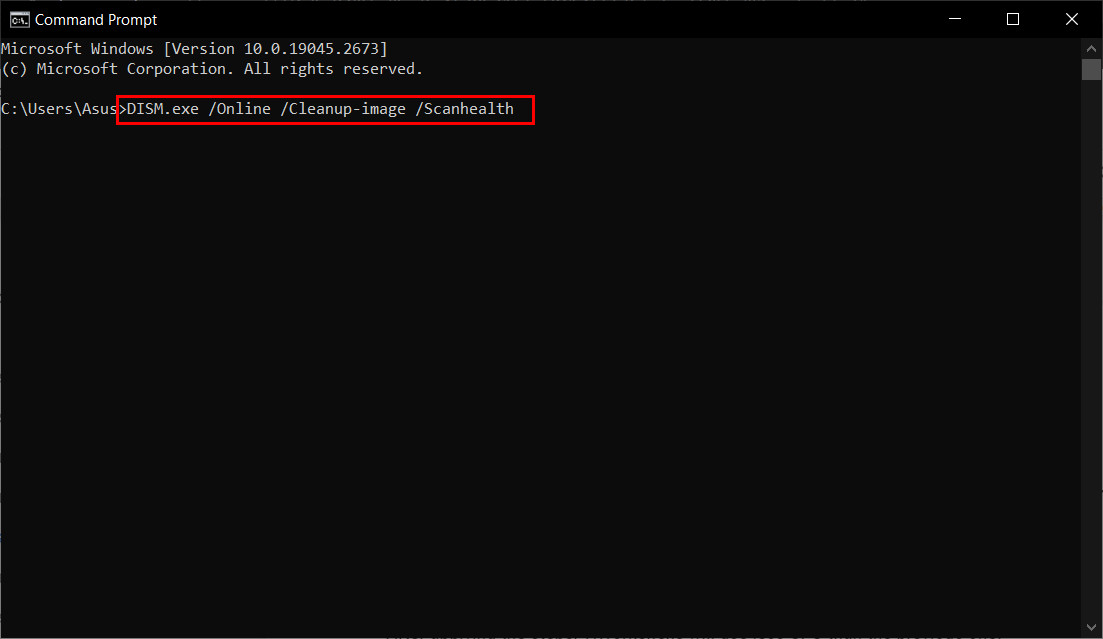
- Right-click Command Prompt, then choose the Run as administrator option.
- Type DISM.exe /Online /Cleanup-image /Scanhealth in the command line and hit Enter.
- Input DISM.exe /Online /Cleanup-image /Restorehealth again and press Enter.
- Wait to finish the process.
- Close the CMD window and reboot your PC.
After applying the steps, TiWorker.exe will use less CPU than the previous one.
The process WSAPPX can use all your CPU sometimes. If you are looking for a solution, read our troubleshooting guide where we solve this problem.
6. Pause Automatic Windows Updates
Pausing automatic Windows updates will automatically stop the Windows Installer Modules. And your CPU load will gradually decrease if TiWorker.exe stops running.
Follow this method to Pause Automatic Windows Updates:
- Press the Win key and click on the cogwheel icon to unlock the Windows settings.
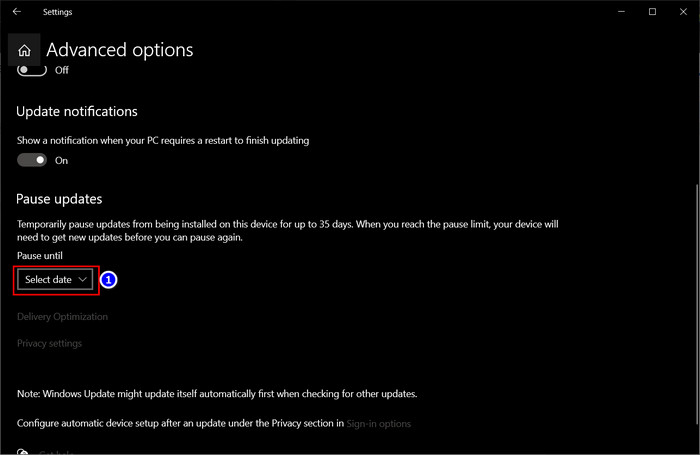
- Go to Update & Security and select the Advanced Option.
- Select the date in the Pause Updates section.
Now Windows will not automatically update. Instead, you have control over when to install the latest Windows features.
7. Re-Configure Internet Settings
You should configure your internet settings if any previous fixes don’t solve your issue. You must use different steps to configure your network settings For Wi-Fi and Ethernet.
But don’t worry. I will cover both steps in this portion. So let’s do it.
Here are the steps to Re-Configure Internet Settings:
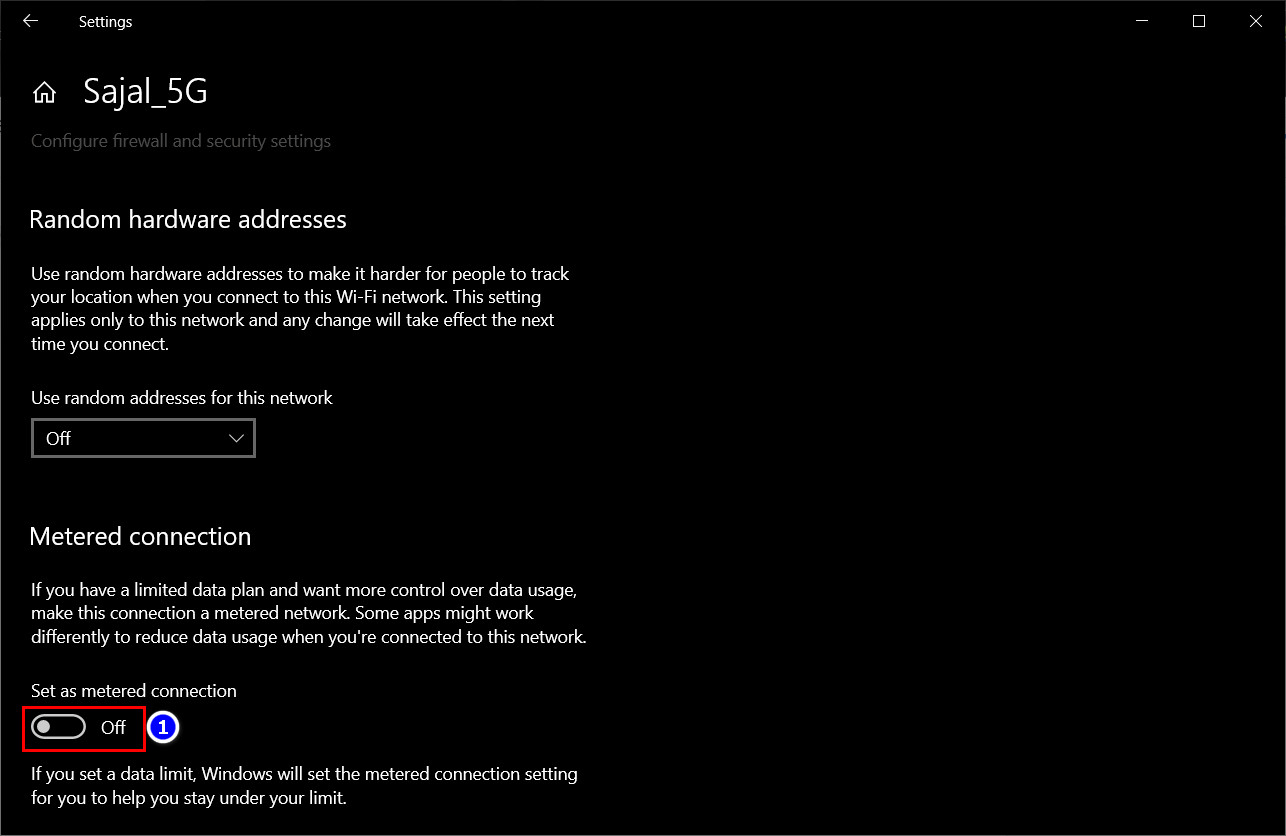
For Wi-Fi Network
- Press Win + I key to view Windows Settings.
- Tap Network and Internet and go to the Wi-Fi tab.
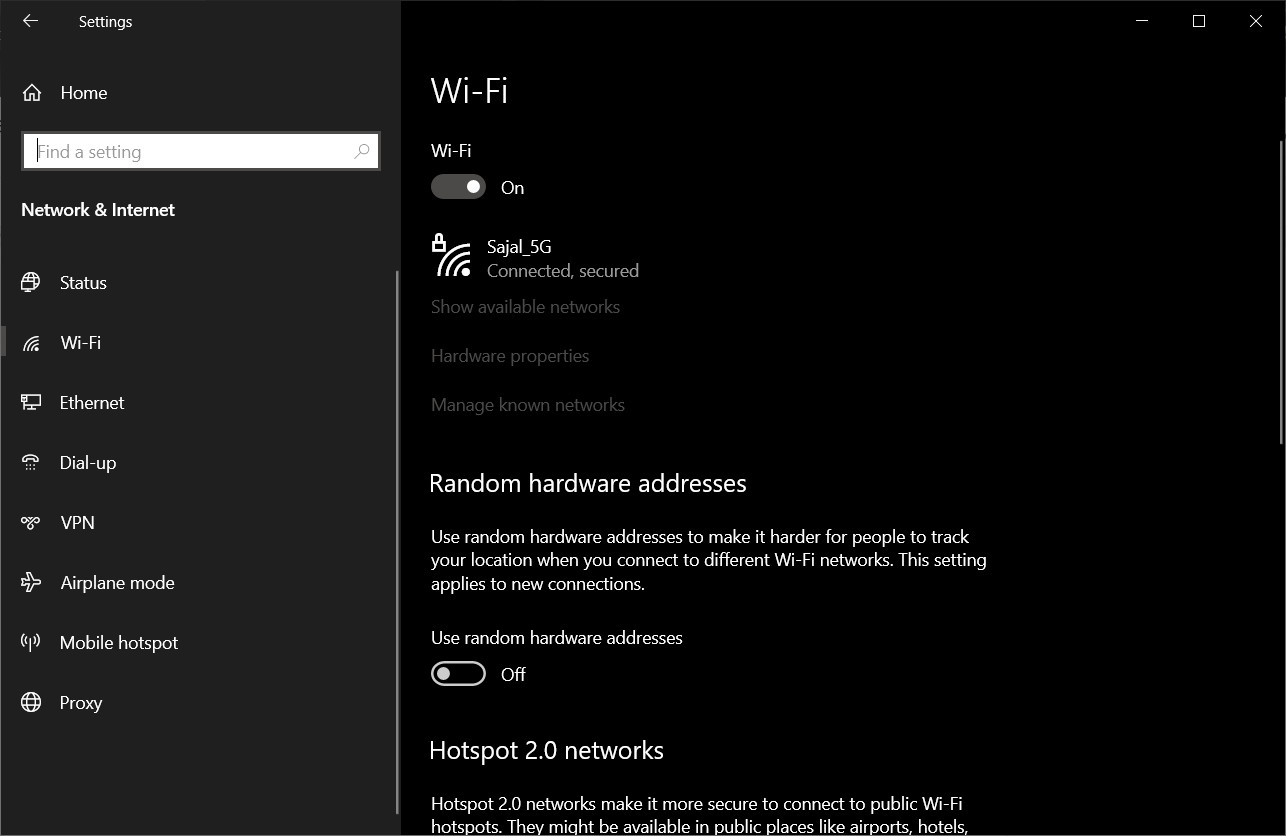
- Pick your current Wi-Fi network.
- Toggle on the Set as metered connection option.
For Ethernet Connection
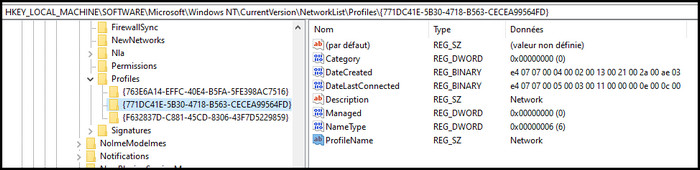
- Tap Windows + R, type regedit, and press Enter.
- Go to HKEY_LOCAL_MACHINE > SOFTWARE > Microsoft > Windows NT > CurrentVersion > NetworkList folder.
- Right-click on the DefaultMediaCost folder and choose the Permissions… option.
- Click the Add... option and input your username in the Enter the object names to select box.
- Select Check Names and hit OK.
- Pick the just added user and tick mark Allow for the Full Control option.
- Go to the DefaultMediaCost folder and click on the Ethernet file then press Enter.
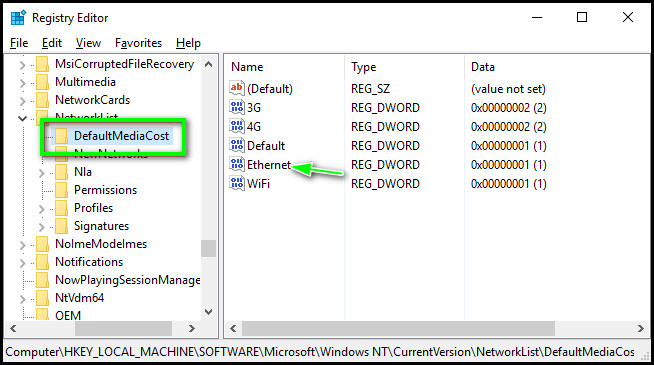
- Set the Data value to 2 and press Ok.
- Restart your PC.

After completing the fixes, the Windows modules installer worker high CPU issue won’t bother you ever.
Why Do Windows Modules Installer Worker Increase CPU Usage?
The Windows Modules Installer Worker process controls Windows updates. When you install the Windows updates, the TiWorker will ensure your system changes correctly. That’s why it usages the CPU, especially when you install or apply updates.
In this portion, I will show why the Windows Modules Installer Worker uses so much CPU. Let’s see.
These are the reasons the Windows Modules Installer Worker needs so much processor power:
- The Windows Modules Installer Worker process manages Windows updates installation, removal, and modification. So, it needs high CPU power.
- TiWorker requires significant system resources to complete its tasks, especially when installing or applying updates.
- The process scans through numerous files and makes multiple changes to the system, which cause high CPU usage.
- You can also face high CPU usage when Windows Modules Installer conflicts with other programs or background processes, such as third-party antivirus software.
These are the reasons the Windows Modules Installer Worker increases your processor usage on your PC.
High CPU usage can slow down your computer and make it difficult to perform other tasks.
FAQs
Is Windows Modules Installer Worker a computer virus?
No, It’s an integrated part of Windows. So, you don’t need to worry about Windows Modules Installer worker or the TiWorker.exe process. However, if you’re concerned about malware, you should scan your PC with an antivirus.
Can You Disable the Windows Modules Installer Worker?
Yes, you can disable the Windows Modules Installer worker option from your Windows. But deactivating it will stop Windows from installing updates. That’s why you shouldn’t do it.
What is Windows Module Installer Worker?
Windows Module installer worker, aka TiWorker.exe, is a window process to check the Windows updates automatically. It also downloads and installs the Updates.
Conclusion
In short, Windows Installer Modules sometimes cause high CPU usage, which slows your PC performance.
You can solve this issue by removing the Software Distribution folder, running Windows Update Troubleshooter, or using the DISM command. If the problem remains, you must re-configure your internet settings.
After applying the fixes in this article, I’m sure you’ve solved your issue. Comment if you face any difficulties while applying the fixes. And for everything else, stick with 10 Scopes.