Only mid to low-end PC users can feel the pain of annoying high CPU usage of certain Windows services, the Search Index being one of them.
Since you’re here, you might’ve noticed the Windows Search service eating up all the CPU resources, which is causing your PC to slow down. Lucky for you, I’ve got just the right medicine for this issue.
So without any delay, let the troubleshooting commence.
How to Reduce CPU Usage of Search Indexer on Windows 10/11
The high CPU usage issue of Microsoft Windows Search Indexer can be fixed by using different methods, such as restarting the Windows Search service or troubleshooting the Search and Indexer. You can also reduce the indexed data, rebuild the index or run a System File Checker(SFC) scan to decrease CPU usage.
Additionally, disabling and enabling the search bar can also be an effective solution.
Below I have discussed each method in great detail. Just follow the instructions step by step and you’ll be good to go.
Here are the fixes for Microsoft Windows Search Indexer’s high CPU usage issue:
1. Restart the Windows Search Service
Even after years of updates, Windows still harbors many bugs which are related to system operation. Bugs/glitches can be the reason why Windows Search Indexer slows down the computer due to its high CPU usage.
In such a case, restarting the Windows Search service from the Services app can be beneficial.
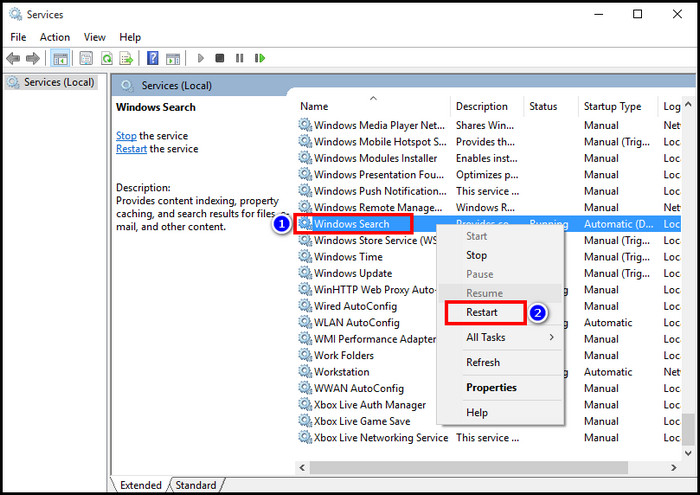
Here’s how to restart the Windows Search service:
- Press the Windows button+S and type services.
- Hit the Enter button.

- Scroll down to find Windows Search and right-click on it.
- Select Restart.
Now press Ctrl+Shift+Esc to open the task manager and check if the processor usage of the search indexer has reduced.
2. Run the Troubleshooter for Search and Indexing
Running the troubleshooter is also an effective way to fix the underlying issues, especially when it’s hard to pinpoint the exact cause of the error.
In case you notice the Windows Search Indexer taking up way too much CPU resources on your PC for a prolonged period, consider running the troubleshooter. This method is also useful when you’re trying to fix any search index problems in Windows 10 or 11.
Here are the steps to troubleshoot Search and Indexing for all Windows versions:
For Windows 10
- Press Windows key+I and select Update & Security.

- Click on Troubleshoot > Additional troubleshooters.
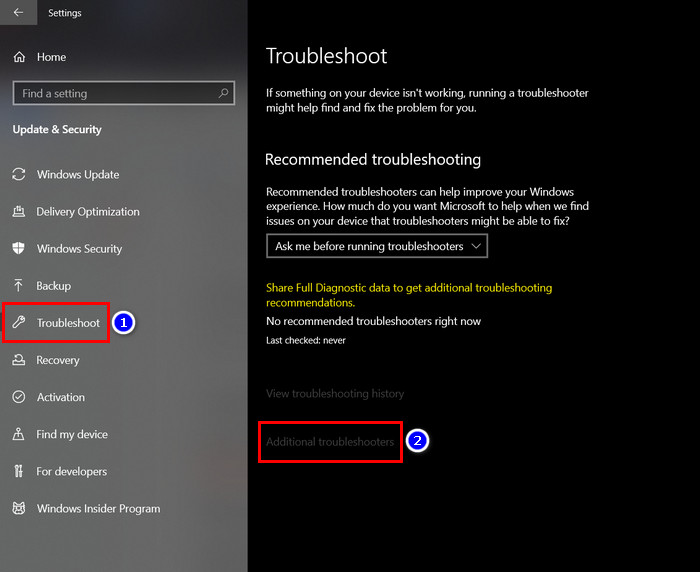
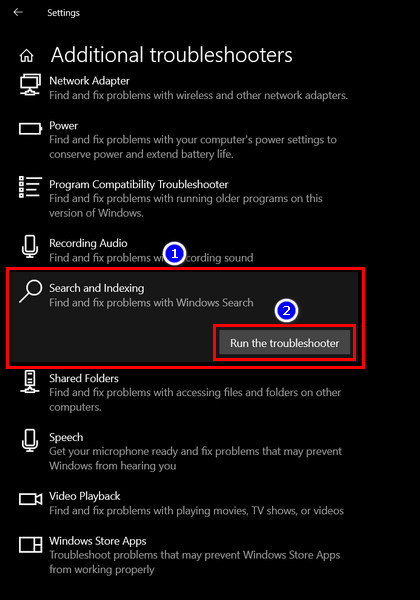
- Scroll down to find Search and Indexing.
- Click on it and select Run the troubleshooter.
For Windows 11
- Press Windows Key+I.
- Go to System > Troubleshoot.
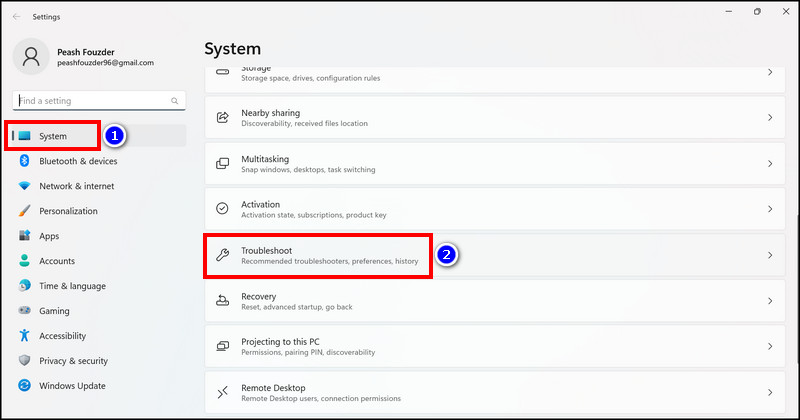
- Select Other troubleshooters.
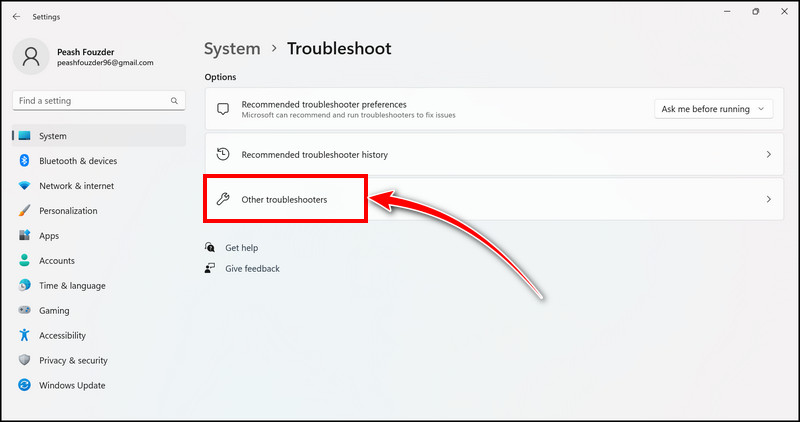
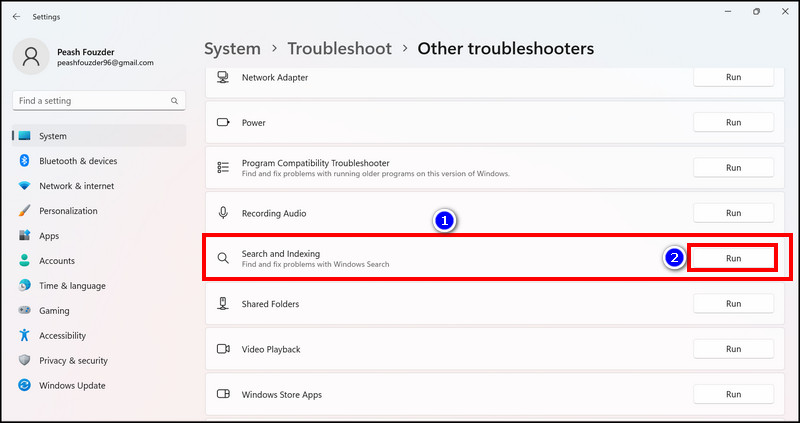
- Scroll down and find Search and Indexing.
- Click on its Run option.
Now select Search or indexing is slowing down the computer option & hit Next. Wait for the troubleshooter to find the problems and apply the necessary fixes.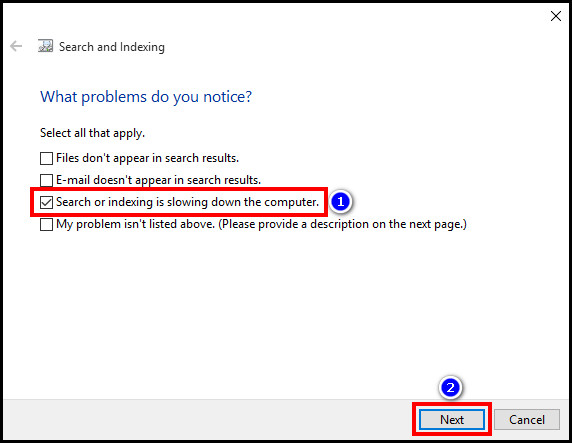
If the troubleshooter’s following message reads as Troubleshooting couldn’t identify the problem, click on Close and move on to the next method.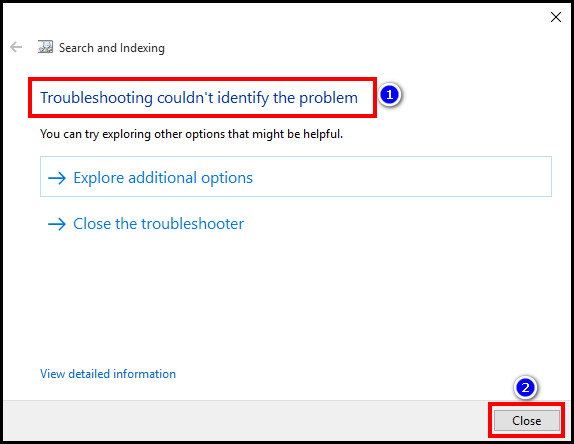
The process svchost.exe can show high CPU usage at times. But don’t be alarmed. Read our separate article dedicated to troubleshooting this issue and apply the fixes accordingly.
3. Reduce the Indexed Data
From my personal experience, reducing the indexed data can decrease the CPU usage of the Search Indexer by quite a lot. Not only me, when I was searching for the solution to this issue, I noticed many users saying that this method has worked for them as well.
Follow these steps to reduce the amount of indexed data:
- Click on the Windows Search bar and type indexed options.
- Hit Enter.

- Click on Modify.
- Expand the C-Drive and uncheck all the boxes.
- Hit OK > Close.

Keep in mind, after applying this method, you won’t be able to search for built-in system tools from the Windows Search bar anymore.
Windows Modules Installer can sometimes use all your CPU and leave the other apps hanging. To fix this, check our separate troubleshooting guide and fix this instantly.
4. Delete and Rebuild Index
Another possible fix to reduce processor usage for Search Indexer is to rebuild the index from the Indexing options.
Here are the steps to rebuild the search index:
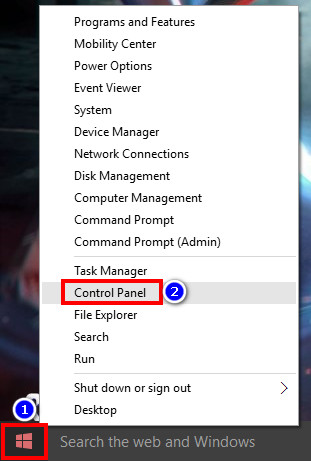
- Right-click on the Windows icon and select Control Panel.
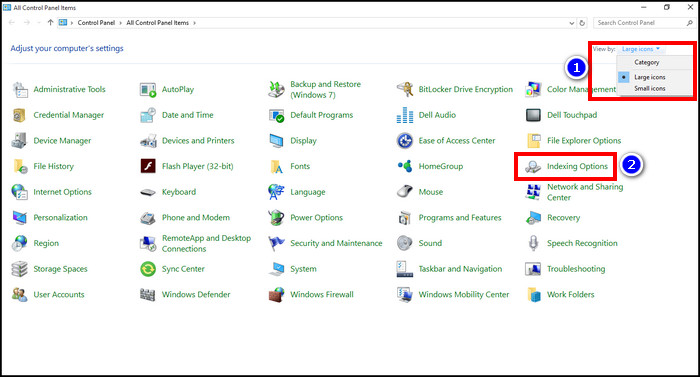
- Expand the drop-down menu for View by option and select Large icons.
- Select Indexing Options.
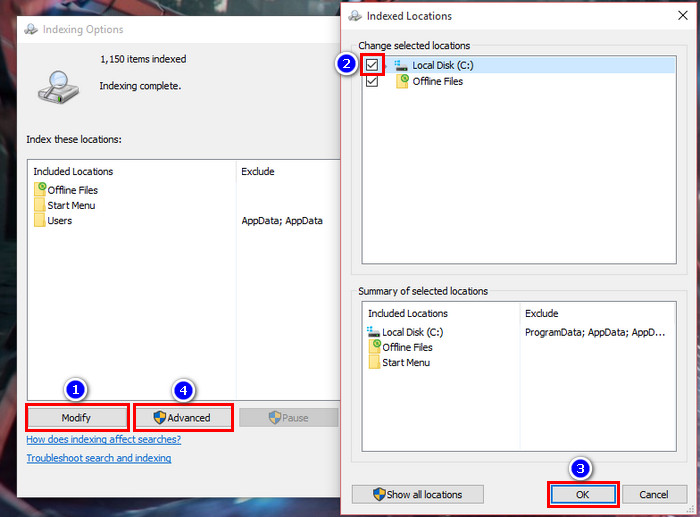
- Click on Modify and check the box for C-Drive.
- Hit OK.
- Click on Advanced.
- Select Rebuild from the Troubleshooting section.
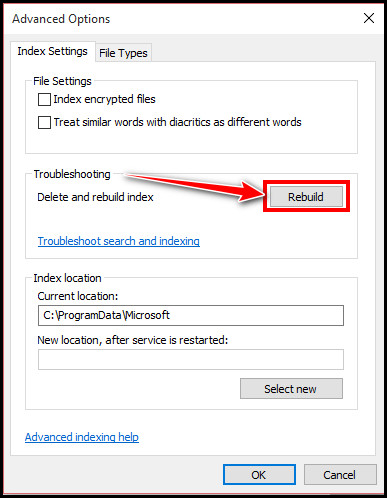
- Hit OK.

Done. Now close the windows and check if the search service is still hogging too much CPU. At this point, the issue should’ve been fixed. In case it’s not, go to the next solution.
5. Run the System File Checker Utility
If the problem still hasn’t been fixed after applying the above-mentioned solutions, the issue might be occurring due to corrupted system files. Fortunately, you can repair corrupted system files by running an SFC scan.
Click on the Windows Search bar and type cmd. Right-click on the Command Prompt and select Run as administrator. Now type the following command: sfc /scannow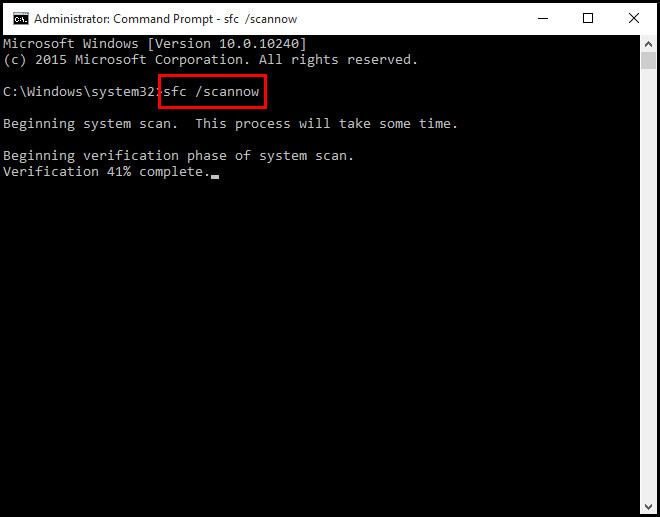
Upon completion, the utility will repair any corrupted file automatically. Now restart your computer to see if the processor utilization by the search indexer has been normalized.
None of these fixes should break the Windows Search system, but in case it does, you can simply fix Windows 11 search not working issues effortlessly.
FAQs
How do I fix Microsoft Windows Search Indexer?
You can troubleshoot the search indexer to fix any issues related to the Windows Search service. Go to Settings > Update & Security > Troubleshoot > Additional troubleshooters & select Search and Indexing > Run the troubleshooter, which should fix the Search Indexer.
Can I disable Microsoft Windows Search Indexer?
Yes, you can disable the Windows Search Indexer from the Services app.
What is Microsoft Windows Search Indexer doing?
The search indexer in Microsoft Windows looks at an index of terms to find the results faster.
Should I turn off search indexing?
If you don’t use Windows Search that often, then you can just turn off the search indexer.
Ending Note
That’s all folks. This guide should suffice for anyone who is trying the reduce the processor utilization of the Windows Search Indexer. Bonus suggestion; since it’s not a crucial system process, just disable the search indexer if it annoys you that much.
If you still have some questions on your mind, let me know in the comment section below.
Have a great day!