When looking for a file, email, or content, the Windows search indexing comes in handy to find your results quickly.
However, it becomes a nightmare when the search index fails and takes a lot of your time to return a result.
But you don’t need to worry. Because here, I’ll provide effortless solutions to indexing problems and make them work again.
So, let’s begin.
How to Fix Windows 10 Searching Index Problem
Users can fix the Searching Index issue in Windows 10 by running the Search & Indexing Troubleshooter, updating Windows, and changing the Windows Search services status. Also, you can restart, repair, and rebuild the indexing files to fix the Searching Index problem.
Read the following methods to resolve the issues with searching indexes in Windows 10.
Here are the ways to fix the search indexing problem in Windows 10:
1. Update Windows
Keeping your computer up-to-date with the latest update is better to ensure stability. If you’re facing an indexing problem in Windows 10, updating the Windows will fix your issue.
Follow the steps below to update to Windows 10:
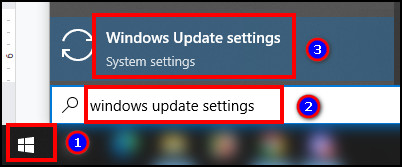
- Click on the Start menu.
- Search and go to Windows Update settings.
- Press on Check for updates.
- Click on Download and install.
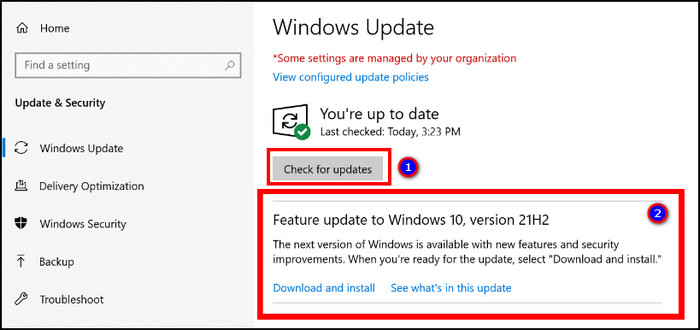
It will install the latest update for your Windows 10. You can also upgrade your Windows to get the latest updates with the search indexing.
2. Run the Search & Indexing Troubleshooter
If you have search & indexing issues, the troubleshooter will detect the problem and reset it to the default experience.
You need to run the troubleshooter from the Search & Indexing option and follow the process.
Here’s how you can run the Search & Indexing Troubleshooter:
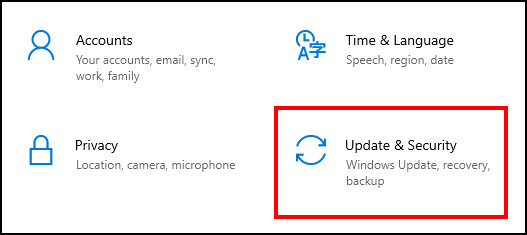
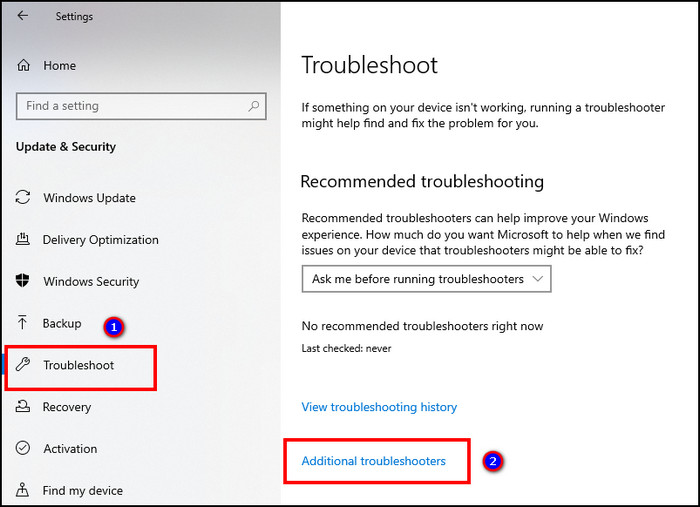
- Press Win + I together to open Settings.
- Click on Update & Security.
- Navigate to Troubleshoot from the left pane.
- Press on Additional troubleshooters.
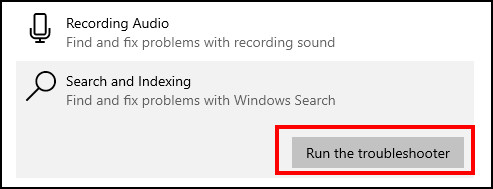
- Scroll down and find Search & Indexing.
- Click on Run the troubleshooter.
- Check the boxes and press Next.
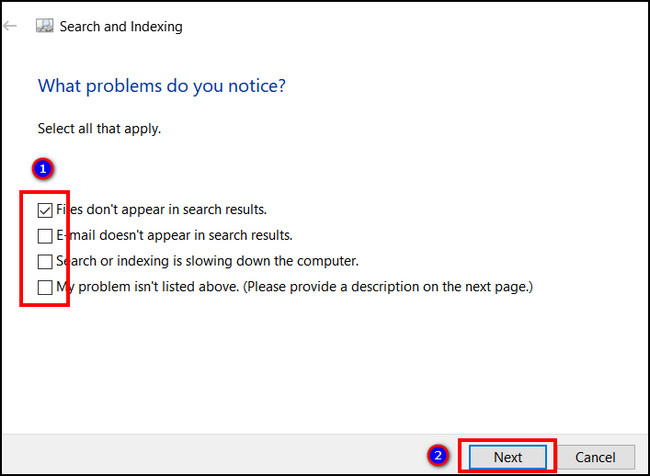
Troubleshooters will identify and resolve your problem regarding search and indexing. Also, the process helps fix the search not working issue in Windows.
3. Change Windows Search Service Status
The Windows Search services stay enabled by default, and Windows doesn’t have the role of disabling it.
However, the status may have changed for some reason, and you must change the settings from the Services.
Read the instructions below to change the Windows Search Service status:
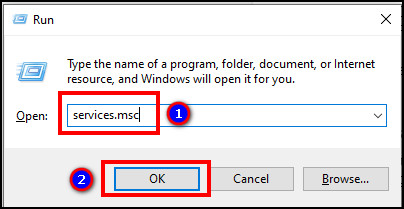
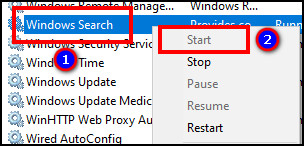
- Open the Run dialog box.
- Type services.msc and press OK.
- Right-click on Windows Search and press on Start.
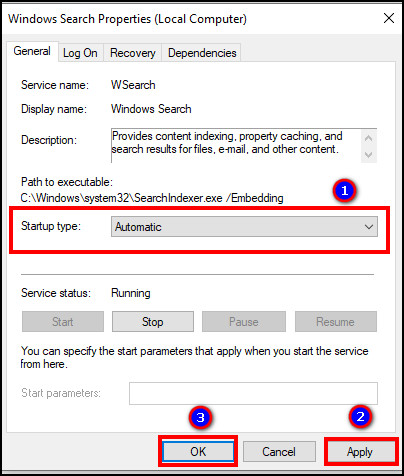
- Double-click on Windows Search.
- Choose Automatic from the Startup type.
- Press Apply and then OK.
It will start the Windows Search service as soon as you open your computer. But, if the box is missing from the taskbar, enable the search bar in Windows 10.
4. Restart Windows Search Service
Sometimes, the Windows Search services fail to work properly and need a restart. Consider following the procedures below to restart the Windows Search services.
Here are the steps to restart Windows Search services:
- Press Win + R to open the Run dialog box.
- Type services.msc and click on OK.
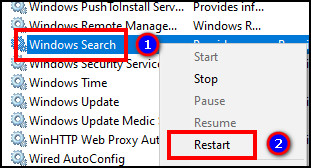
- Scroll down and find Windows Search.
- Right-click on Windows Search and press Restart.
If the Windows Search service doesn’t start after the restart, right-click on it and press Start.
5. Repair Indexing Files
Due to bugs, glitches, and corrupted files, Windows Search Index encounters some issues in providing search results. Repairing the indexing file will work as a solution to the problem.
Follow the process below to repair indexing files in Windows 10:
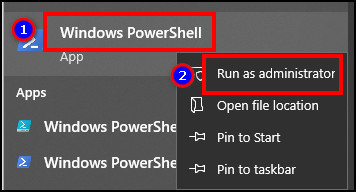
- Search Windows PowerShell from the Start menu.
- Right-click and Run as administrator.
- Paste the command below and press Enter.
dism /online /disable-feature /featurename:SearchEngine-Client-Package 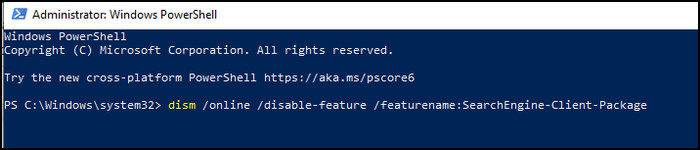
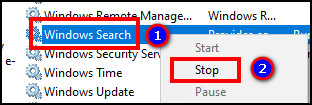
- Open the Run dialog box.
- Type services.msc and click on OK.
- Stop the Windows Search service.
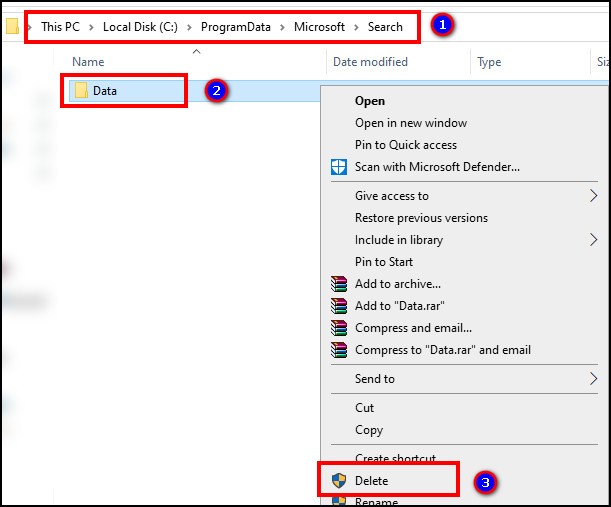
- Navigate to C:\ProgramData\Microsoft\Search from the file explorer.
- Delete all files and folders.
- Open the Windows PowerShell as administrator.
- Execute the following command.
dism /online /enable-feature /featurename:SearchEngine-Client-Package 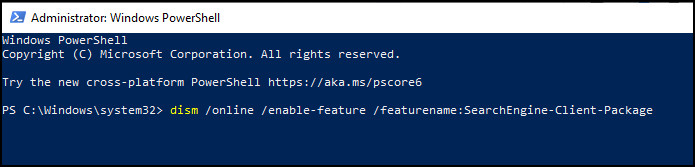
Now, check if the Search Index is working correctly.
Additionally, delete the file explorer history in Windows if you want to remove all the file opening records.
6. Rebuild the Search Engine Index
The computer automatically indexes the content to deliver faster search results. If the service fails to provide results, rebuilding the search engine index will fix the problem.
Read the procedures carefully to rebuild the Search Engine Index:
- Press on the Start menu.
- Search and open Indexing Options.

- Click on the Advanced option.
- Press on Rebuild.
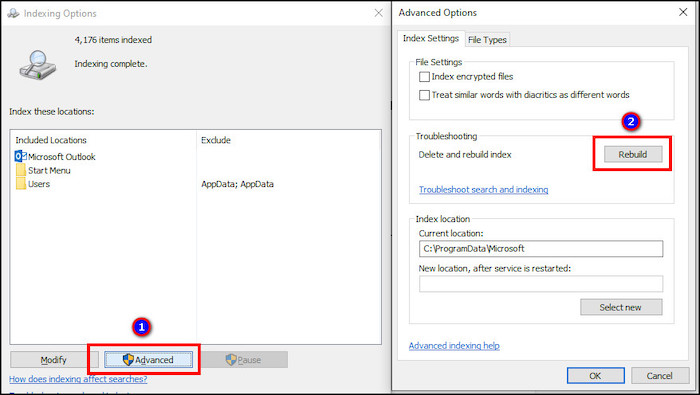
- Click on OK to confirm.
The process will take some time to complete. In most cases, it takes about 5-10 minutes.
7. Use Registry Editor
By tweaking the registry editor, you can fix the search index problem in Windows 10.
But, changing the registry value is critical and can hamper your system. So it’s safer to export the registry keys and keep a backup.
Here is the way to use the registry to fix the Searching Index problem:
- Click on the Windows Start menu.
- Search and open the Registry Editor.
- Navigate to HKEY_CURRENT_USER\SOFTWARE\Microsoft\Windows\CurrentVersion\Search
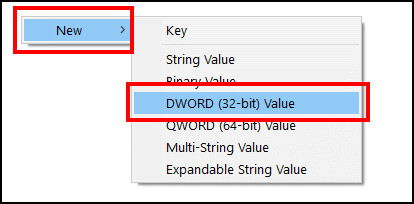
- Create a new DWORD (32-bit) Value from the right pane.
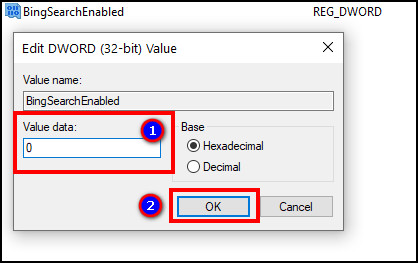
- Rename it as BingSearchEnabled.
- Double-click on BingSearchEnabled.
- Set the Value data to 0.
- Press on OK.
- Restart your computer.
After rebooting your PC, check if the searching index is working properly.
Frequently Asked Questions
How do I fix the search index in Windows?
To fix the search indexing in Windows, go to Settings > Update & Security > Troubleshoot > Additional troubleshooters > Search & Indexing > Run the troubleshooter.
Why is my indexing not working?
Your Windows Search Indexing isn’t working because of corrupted indexing modules or missing registry values.
What happens if I turn off search indexing?
Disabling the search indexing will require more time to return the search results compared to average.
Wrapping Up
Windows Search Index is vital to find results quickly. But, it becomes problematic when the indexing fails to work correctly.
This article has explained the necessary steps to fix the search indexing problem in Windows 10, and I hope you’ve managed to resolve the issue.
If you have any queries, don’t forget to share them in the comment box below. Goodbye.