The keyboard is like a piano that expresses your thoughts by typing words.
But when it stops working, the creativity in our minds stops for a moment, and the melody of keyboard typing suddenly goes quiet.
However, there are proven ways to fix the keyboard not functioning issue in Windows 10, and I will describe the working processes in this article.
So, let’s begin.
How to Fix Keyboard Not Working Issue on Windows 10
Users can fix the keyboard issue by running the keyboard troubleshooter, disabling the filter keys & fast startup, and configuring power management and Bluetooth settings. Also, you can resolve the problem by ensuring the physical and battery condition.
The following passage will help to fix the keyboard not working issue. But, for some methods, you need a keyboard to search and navigate to different settings.
Using the on-screen keyboard, you can type and go to various settings until I fix your keyboard problem.
Follow the process below to learn the ways to enable the on-screen keyboard:
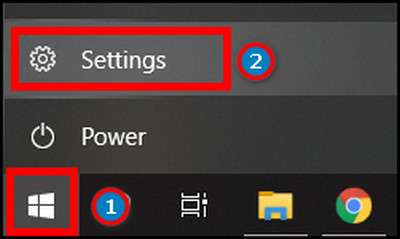
- Click on the Start menu and go to Settings.
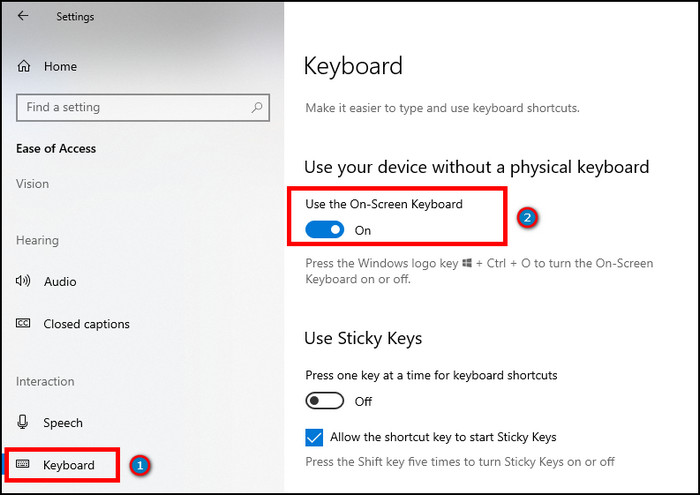
- Press on Ease of Access.

- Click on the Keyboard from the left pane.
- Enable Use the On-Screen Keyboard option.
Now, read the following passage to learn how to resolve the keyboard isn’t working problem in your Windows 10.
Here are the ways to fix the keyboard not functioning issue in Windows 10:
1. Change the Keyboard Layout
Before adjusting all the hardware and software-related settings, you might consider the more straightforward way. Changing the layout keyboard layout can help you to fix the issue in most cases.
Press Windows + Spacebar keys together to change the keyboard layout. Try the method several times to see if the keyboard problem fixes for you. 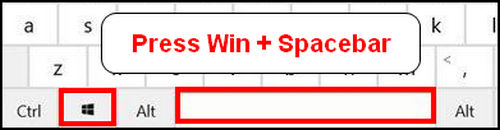
2. Check USB Port
Ensure that you’ve plugged the USB port correctly into your PC. If the port is loose, unplug the USB and insert it correctly.
Some keyboards come with USB 3.0 and work accurately with a USB 3.0 port. If you’ve inserted it into a USB 2.0 port, it will likely delay the data/signal transferring process and create issues.
So, insert the USB into the correct port according to your keyboard specification.
3. Check Physical Damage
If your keyboard has any physical damage, for example, a faulty wire, damaged USB port, or defective buttons, you’ll undoubtedly face this particular problem while operating the keyboard.
Check your keyboard and see if there’s any physical damage to the body or wire. If you find any wreck, change the keyboard or go to customer care if you have a warranty.
4. Check Battery Condition
Many people prefer using wireless keyboards because of less wire management. Unlike wired keyboards, you need a battery to power a wireless keyboard.
If the battery has low power or is damaged, it will fail to establish a good connection with the computer. So, you must change the battery and insert a new one into your wireless keyboard to resolve the problem.
5. Ensure Bluetooth Keyboard Driver Settings
The wireless keyboard uses Bluetooth to transfer the data to the computer. The keyboard can’t establish a connection if the Bluetooth settings aren’t well configured.
If your keyboard isn’t typing letters, consider reading the process below.
Here are the steps to change the Bluetooth keyboard driver settings:
- Go to the Control Panel.
- Right-click on your keyboard.
- Navigate to the Services tab.
- Enable Drivers for keyboard, mice, etc (HID).
- Press Apply and then OK.

- Restart your PC.
After restarting, the computer will save the changes in the Bluetooth settings. But, if the Bluetooth doesn’t turn on, fix the Bluetooth connections shortcut to connect your wireless keyboard.
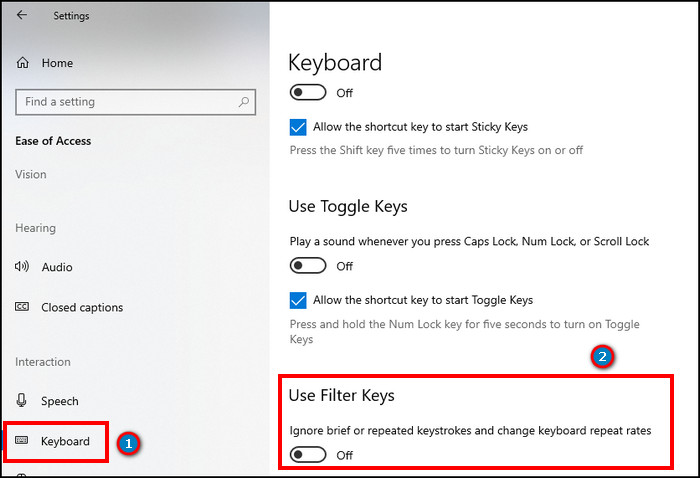
6. Disable Filter Keys
The Filter Keys option ignores the repeated keystrokes and adjusts the keyboard repeat rates. When typing quickly, it doesn’t register new clicks and creates an issue.
Especially during the account login session in the browser, people try to type the information rapidly. But, the Filter Keys hinder doing so.
However, you can disable the option and fix the keyboard not working issue in Google Chrome. Follow the process below to learn the disabling process.
Read the instructions below to disable Filter Keys:
- Click the Start button and navigate to Settings.
- Press on Ease of Access.
- Scroll down and click on the Keyboard from the left pane.
- Disable the Use Filter Keys.
Now, you’ll be able to press repetitive keystrokes and type quickly.
7. Update the Keyboard Driver
An outdated or corrupted driver will create problems with your keyboard. Updating the driver will fix the bugs and glitches and resolve the issues with your keyboard.
Here’s how to update the keyboard driver:
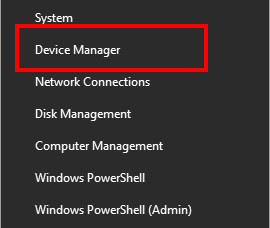
- Right-click on the Start menu and go to Device Manager.
- Expand the Keyboard section.
- Right-click on the listed keyboard.
- Press on the Update driver.

- Select the Search automatically for updated driver software option.
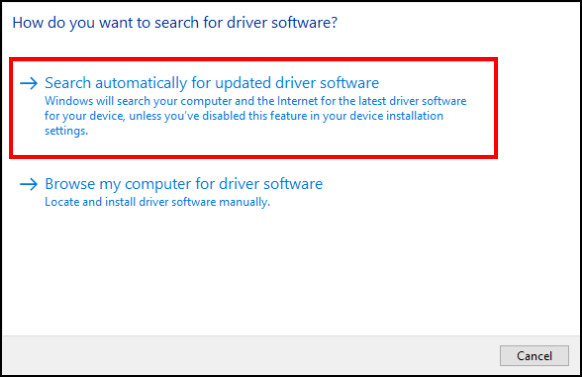
It will download and install the latest driver for your computer. After installation, restart your PC and check if the keyboard is working correctly.
If you use multiple keyboards and want to avoid the updating process every time, you can pre-install drivers from the Windows Store and install them on your PC.
8. Run Keyboard Troubleshooter
When you are unable to identify the reason, you need to run the keyboard troubleshooter to find the problem.
If you are facing a problem with the keyboard, the troubleshooter will help you to fix the keyboard not working issue in BIOS.
Follow the procedures below to run the keyboard troubleshooter:
- Press on Start and go to Settings.
- Click on Update & Security.
- Navigate to Troubleshoot and press on Additional troubleshooters.

- Scroll down and click on Keyboard.
- Press on Run the troubleshooter.

It will identify the problems with your keyboard, and you need to follow the provided instructions to resolve the issue.
9. Disable Fast Startup
The fast startup option reduces the bootup time of your computer. Sometimes it creates problems with the connected device, and they start malfunctioning.
Though the fast startup option isn’t bad, the users recommend keeping it disabled.
Read the steps below to disable the fast startup options:
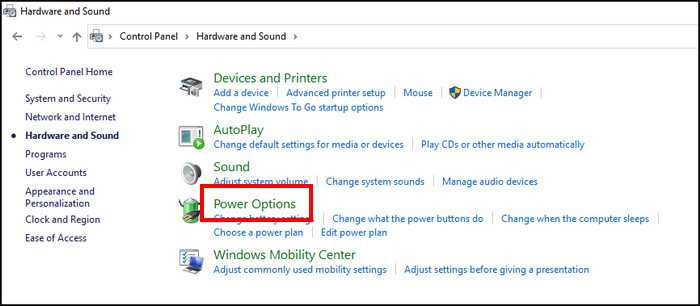
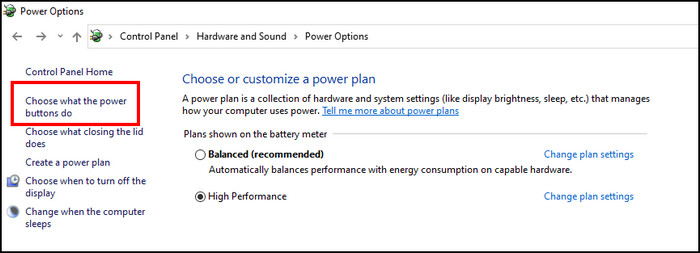
- Click on the Start menu and open Control Panel.
- Press on Hardware and Sound.

- Click on Power Options.
- Press on Choose what the power buttons do from the left pane.
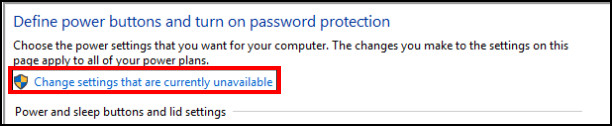
- Click on Change settings that are currently unavailable.
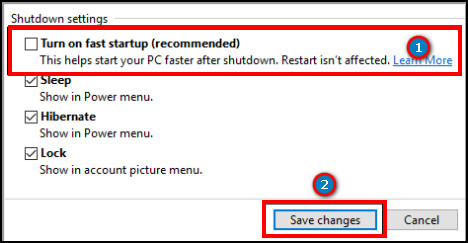
- Uncheck the Turn on fast startup option.
- Press on Save changes.
Now, restart your computer and see if the keyboard is working properly.
10. Configure Power Management
By default, the computer can turn off USB-connected devices to save power when it has a low battery or is in a power saver mode.
If you have a USB keyboard, you must configure the power management settings to keep the keyboard connection alive even in the low power mode.
Here’s how you can configure the power management:
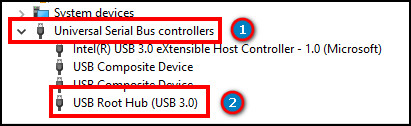
- Right-click on the Start menu and press on Device Manager.
- Expand the Universal Serial Bus controllers option.
- Double-click on USB Root Hub or Generic USB Hub.
- Go to the Power Management tab.
- Uncheck the box beside the Allow the computer to turn off this device to save power.
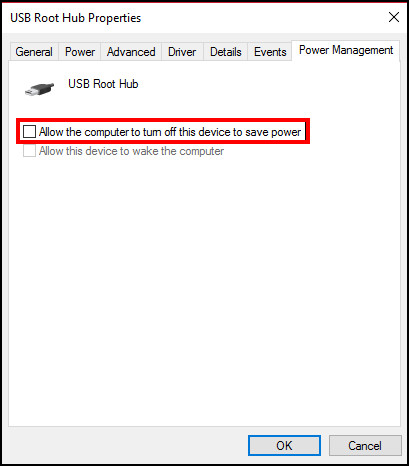
- Click on OK to save changes.
Restart your device, and see if the keyboard is working properly.
I hope the above methods have resolved the problem with your keyboard. However, if nothing worked and you need to buy a new keyboard, check the best Aura Sync keyboards for your computer.
If you want to learn the causes behind the issue, consider reading the following passage to know it in detail.
Why Does the Keyboard Not Functioning on Windows 10?
The keyboard is not functioning properly because of corrupted or damaged drivers, internal or external physical damage, and poor battery condition. The Filter Keys, Fast Startup options, and incorrect power management can hinder the connection and stop your keyboard from functioning.
Continue reading the following passage to know about the reason in depth.
Here are the reasons behind the keyboard not functioning on Windows 10:
Physical Damage
The keyboard won’t work if there is any physical damage to your keyboard, wire, or in USB port.
Your PC may have internal or external damage that is causing the keyboard not to function properly.
Low Battery Life
The wireless keyboard fails to work properly when the battery life is poor. If you’re using the same battery for a long time, it will likely cause the keyboard not to work.
Enabled Filter Keys
The Filter Keys help to correct repetitive keystrokes and the rate of your typing. However, it can create problems when typing quickly or pressing a key repeatedly.
Driver Error
Any bugs and errors can affect the keyboard driver. Also, the Windows update and corrupted driver can lead to a problem with your keyboard.
Enabled Fast Startup
The first startup helps to open your computer quickly. But, it can affect the other hardware connection and create problems.
You may have enabled the first startup option for your PC and thus are facing issues with the keyboard connection.
Incorrect Power Management
A lower battery or power saver mode can disconnect your USB keyboard to save battery life. If you’ve tweaked the power management and used the power saver mode, the keyboard will lose the connection and stop working.
After reading the above passage, I hope you’ve gathered knowledge about the problem and will benefit during the fix.
Frequently Asked Questions
How do I fix my keyboard not typing?
You can fix the keyboard not typing issue by ensuring the connection, and battery life, disabling filter keys & fast startup, running keyboard troubleshooters, and updating drivers.
Why did my keyboard suddenly stop working?
Your keyboard has stopped working because of physical or wireless disconnection, power saver mode, and a corrupted keyboard driver.
How to enable the on-screen keyboard on Windows?
To enable the on-screen keyboard on Windows, go to Settings > Ease of Access > Keyboard > enable Use the On-Screen Keyboard.
Conclusion
A working keyboard is vital for operating your computer properly. But it’s pathetic when the keyboard doesn’t work and hinders your work.
In this article, I’ve provided the reasons for your keyboard issue and the methods to resolve the issue.
Don’t forget to share your thoughts in the comment box below, and I’ll see you at the next one.
Cheers!