As a Microsoft framework, the Windows Driver Foundation develops device drivers. But it can also become a victim of its own success.
Mainly because, the associated WUDFHost.exe process can, at times, gobble up precious CPU resources, which can slow down the computer, or worse; crash the entire system. However, it isn’t a lost cause.
Because in this article, I’ll provide a set of highly effective solutions to overcome the WDF WUDFHost High CPU consumption and restore your computer to its former glory.
Let’s begin!
What is Windows Driver Foundation & the WUDFHost.exe Process?
The Windows Driver Foundation (WDF) is a collection of libraries that help users with the complex process of writing code for Windows Driver. Users can easily develop Windows drivers that execute in both kernel and user modes.
WDF simplifies the process of managing system drivers. It is an essential component for maintaining a stable system with optimal functionality, allowing you to operate your PC smoothly.
One of the integral components of WDF is the WUDFHost, an advanced process introduced in Windows Vista and has found its way to Windows 10 & Windows 11 PCs.
The WUDFHost.exe process is specially designed to provide stability and security to different peripheral devices, like MTP devices, Portable Devices, sensors, etc., that run user-mode drivers. With its complex architecture and kernel-mode drivers, the process minimizes system failures and maintains peak performance.
But after seeing WUDFHost.exe utilize so much CPU power, you might ask:
Is WUDFHost a Virus?
No, it’s not malware as long as it’s in the right directory. To verify its authenticity, you can check its location.
Here are the steps to check the WUDFHost file location:
- Press Ctrl + Shift + Esc to open the Task Manager.
- Right-click on WUDFHost.exe or Windows Driver Foundation and choose Open file location.
If it opens in C:\Windows\System32, it’s not a virus. But in case it opens in a different folder, take the necessary measures to protect your computer.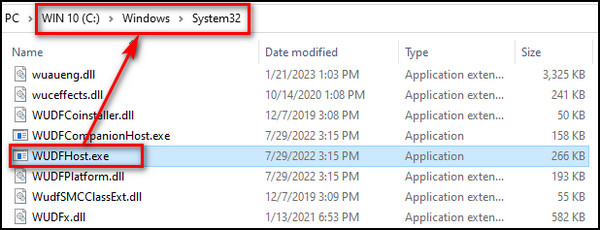
Sometime you can get a random app to show high CPU usage usage. If the usage does not die down normally, follow our guide to fix the high CPU usage.
Why is Windows Driver Foundation Using High CPU?
The Windows Driver Foundation can exhibit high CPU usage when system files get corrupted, malware attacks on WUDFHost.exe, old Windows versions & Drivers, or unsupported drivers. It is imperative to look out for these potential problems.
Here’s why Windows Driver Foundation is using high CPU:
Conflict with Third-Party Apps
Third-party applications may be engaging in activities that cause WDF to utilize high CPU. In such cases, a simple clean boot procedure can resolve the issue, and if you know which app is responsible for the problem, just uninstall it.
Problems with Windows Drivers
This issue may arise from driver-related glitches, particularly with the WiFi drivers. If you face such problems, it is necessary to either update or reinstall the driver.
Did you know that you can check CPU usage using Powershell? If you want to know this cool trick, check our separate article.
Problems with Zoom Features
Certain Zoom video features might engage the WDF processes, ultimately causing an increase in CPU resource usage. In that case, modifying the Zoom app settings.will free up the CPU.
Damaged Memory
Keep in mind that malfunctioning memory can be the primary cause of high CPU usage. The most effective solution for this is to initiate the Memory Diagnostic tool to fix the issue.
Now that you know what’s making Windows Driver Foundation consume so much processing power, let’s resolve them one by one.
How to Fix Windows Driver Foundation High CPU Usage Problem?
To fix Windows Driver Foundation consuming High CPU, make sure you are using the latest Windows version with updated drivers. If the drivers are up to date, reinstall the Network adapters, run System Maintenance, SFC & DISM scans, and perform a clean boot.
Here are the methods to fix Windows Driver Foundation’s high CPU usage problem:
1. Disable the Windows Driver Foundation Service
Turning the WDF service off will stop it from using high processing power and unburden the CPU.
Follow these steps to Disable the Windows Driver Foundation Service:
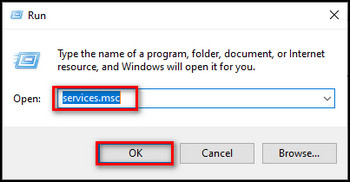
- Right-click on the Windows icon and choose Run. Or press the Windows + R key.
- Write services.msc in the text field and click OK to open Services.
- Look for Windows Driver Foundation – Kernel-mode Driver Framework or Windows Driver Foundation – User-mode Driver Framework, right-click on it, and select Properties.
- Set the Startup type to Manual and click on the Stop button.
2. Reinstall the WiFi Driver & Network Adapters
If temporary bugs or glitches are responsible for the issue, reinstalling the Windows drivers will eliminate them.
Here’s how to reinstall the Wi-Fi driver & Network adapters:
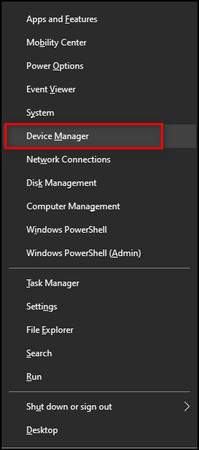
- Right-click on the Windows icon or press the Window + X key and choose Device Manager.
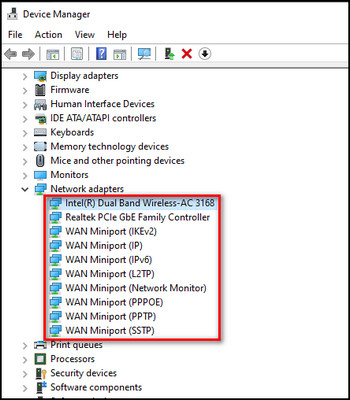
- Extend Network adapters.
- Right-click on any one of the devices and click Uninstall device.
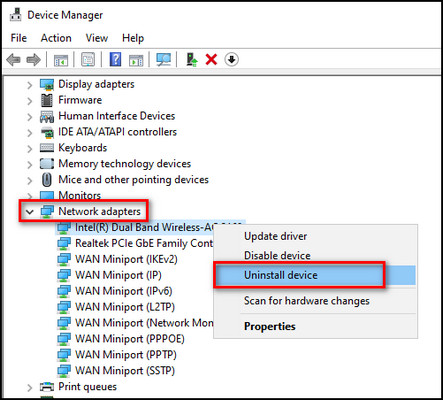
- Repeat this for all the devices under the Network adapter section.
Now restart your computer, and the drivers will be installed automatically.
Mac users also check their CPU usage very easily. To know how to do that, you have to check our separate article.
3. Run the System Maintenance troubleshooter
The System Maintenance Troubleshooter, as the name suggests, detects and troubleshoots maintenance problems that can lower the performance and stability of your PC.
Below is the instruction to run the System Maintenance troubleshooter:
- Right-click on the Start icon or press the Window + X key and choose Run.
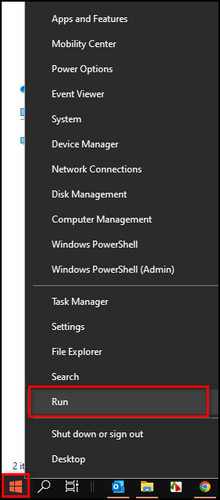
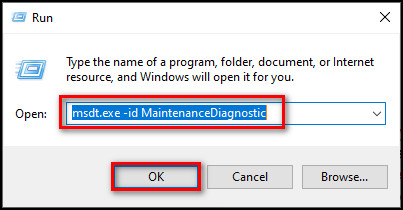
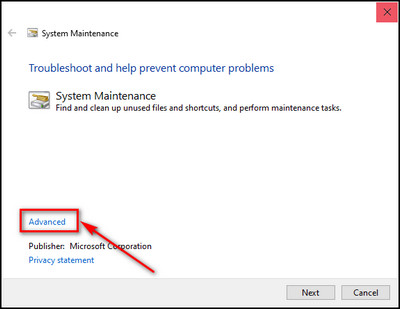
- Type msdt.exe -id MaintenanceDiagnostic in the text field and click OK to open the System Maintenance window.
- Select Advanced.
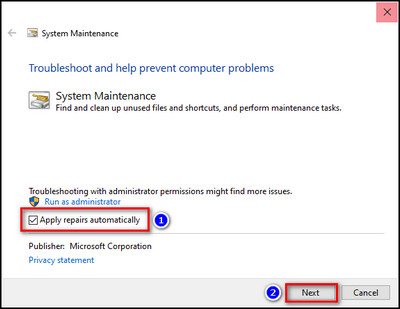
- Check Apply repairs automatically and click on Next.
- Select Try troubleshooting as an administrator.
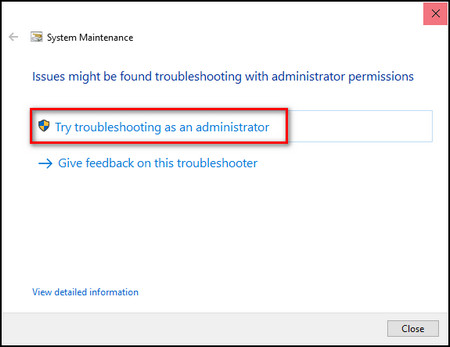
Now System Maintenance will try to fix the issue or at least give you the reason for the problem when the process is completed.
4. Modify the Zoom Video Setting
The Zoom app’s Media Foundation feature for Video Capturing Method can conflict with the Windows Driver Foundation process and lead to high CPU utilization. So, you need to change a few options from the app settings.
Follow the steps below to modify the Zoom video settings:
- Launch Zoom on your device.
- Select Settings from the top right corner.

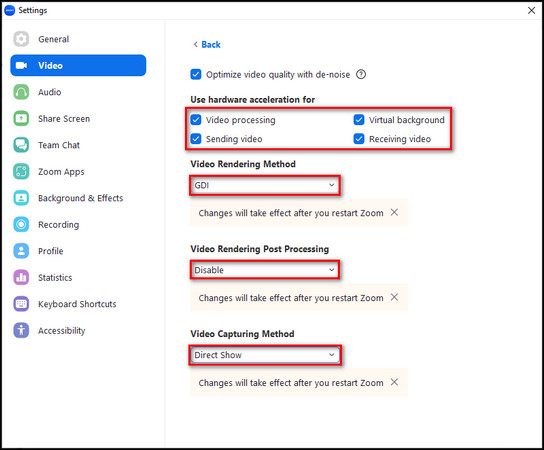
- Move to the Video tab and click on the Advanced button.

- Enable all the options in the Use hardware acceleration section.
- Set the Video Rendering Method to GDI, select Disable for Video Rendering Post Processing, and use Direct Show for Video Capturing Method.
- Restart Zoom.
Sometimes the svchost.exe process can use your precious CPU resources and make other applications slow. To fix this, we have a separate article where we bring the CPU utlilization to normal levels. Do check it out.
5. Execute a Clean Boot
Sometimes, third-party apps can clash with WDF causing the service to use more resources than it needs. Performing a clean boot won’t open the third-party app on the device startup and WUDFHost.exe can operate normally.
Here’s the process to execute a clean boot:
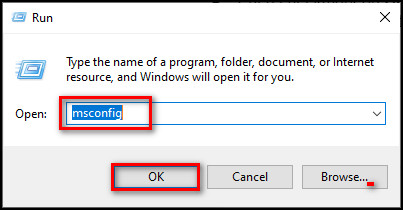
- Press the Windows + R key or right-click on the Start icon and choose Run.
- Write msconfig and press Enter to open System Configuration.
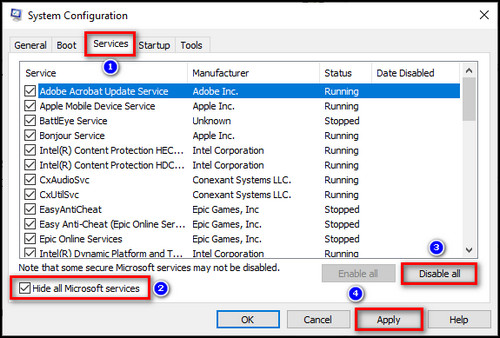
- Proceed to the Services tab.
- Put a checkmark on Hide all Microsoft’s services and click on Disable all.
- Click on the Apply button.
- Move to the Startup tab and select Open Task Manager.
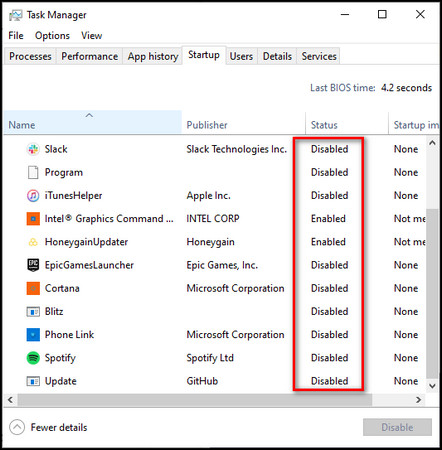
- Turn off all the Startup apps.
6. Use the Memory Diagnostic tool
In case the high CPU consumption by the Windows Driver Foundation is due to some kind of memory issue, running the Memory Diagnostic tool will fix it.
Here are the steps to run the Memory Diagnostic tool:
- Press Windows + R on the keyboard to open the Run program.
- Type in mdsched.exe in the text field, and press Enter.
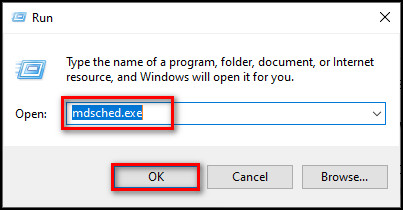
- Select the Restart now and check for problems (recommended) option.

Now, wait for the diagnosis to finish processing and apply the changes if recommended.
7. Run SFC And DISM
Both SFC and DISM can help to identify and troubleshoot problems with Windows systems. They will scan through all the system files and make sure everything is in order.
Follow the instructions below to run SFC and DISM:
- Click on the Search icon on the taskbar.
- Type Command Prompt in the search field and select Run as administrator.

- Write sfc /scannow and press Enter. Wait for the process to complete.

- Type DISM /Online /Cleanup-Image /RestoreHealth and press Enter.

Now restart your device and see if Windows Driver Foundation is using too much processing power.
The DISM tool can also help you when experiencing problems with Windows 10’s Search Indexing. Read our separate article where we show you how.
8. Turn Off HID Sensor Collection V2
If you’re using a laptop with a detachable keyboard and notice that your computer is using a lot of its processing power, it may be because of the sensors on the keyboard. So, disabling the HID Sensor will free up CPU.
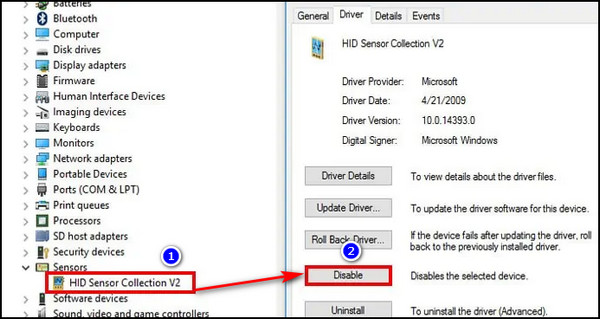
Here’s how to turn off HID Sensor Collection V2:
- Right-click on the Windows icon or press the Windows + X key and choose Device Manager.
- Extend Sensors, right-click on the HID Sensor Collection V2, and select Properties.
- Go to the Driver tab and click on the Disable button.
9. Update Windows Version
The WDF utilizing too much CPU resources can be due to a bug specific to the Windows version you are using at the time. So, update your Windows and see if it fixes the problem.
Here’s the process to update the windows version:
- Click on the Windows icon and choose Settings.

- Select Update & Security.

- Click on the Check for Updates button.
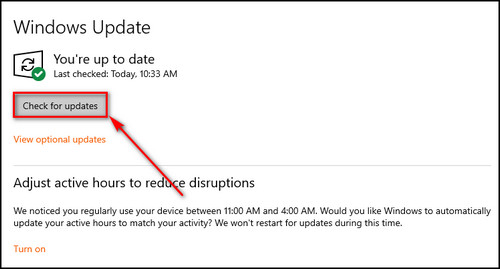
In case there’s an update, it’ll start to download automatically. Then restart the PC to complete the installation process.
If you see the Windows modules installer using all the CPU resources, something might be going wrong. Read our separate piece where we troubleshoot and fix this issue successfully.
10. Reconnect Peripheral Devices
After connecting a new device to your computer, it automatically installs the necessary driver for the device to work. But sometimes, this driver can cause problems with the computer’s performance, leading to the WDF using a lot of the processing power.
Don’t worry though. Reconnecting the device will solve the issue.
Here are the steps to reconnect peripheral devices:
- Right-click on the Windows icon or press the Window + X key and choose Device Manager.
- Extend Portable Devices.
- Right-click on any one of the devices and click Disable device.
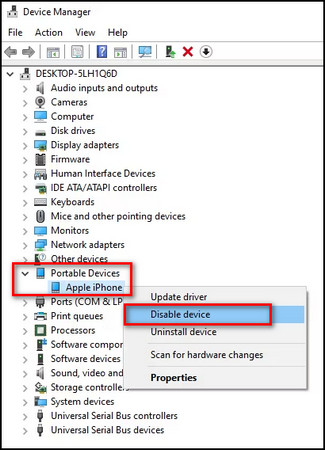
- Repeat this for all the devices under the Portable Devices section.
If you see a high CPU utilization with the WMI provider host process, follow our separate article to reduce the usage to normal levels.
11. Turn Off NFC
You should disable NFC if your device has it to unburden the processor.
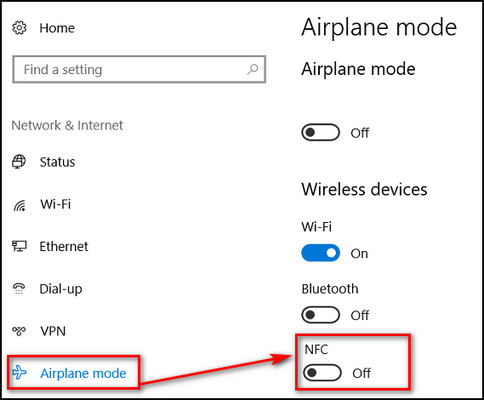
These are the steps to turn off NFC:
- Press Windows + I on the keyboard or right-click on the Start icon and choose Settings.
- Select Network & Internet.

- Move to the Airplane mode tab from the left bar.
- Toggle off NFC under Wireless devices.
12. Perform System Restore
Restoring the system will take you back to when Windows Driver Foundation didn’t cause any problems and operated correctly.
Here’s how to perform the system restore:
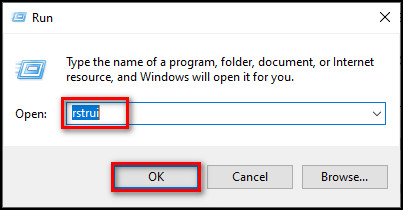
- Right-click on the Start icon and choose Run or press the Window + R key.
- Type rstrui in the text field and click OK to open System Restore.
- Choose the recommended or a different restore point and click on Next.
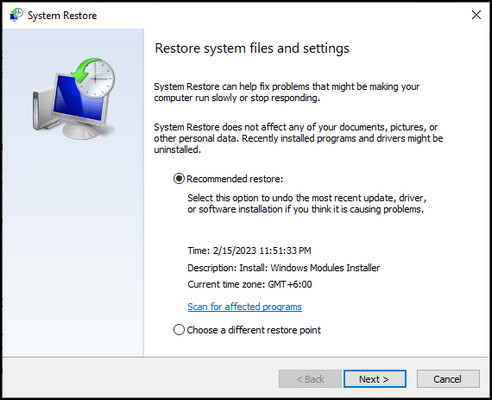
- Click on the Finish button.
- Select Yes to start the restoring process.
Now, the system will restart, taking you back to the point you’ve selected.
What Happens if You Remove the WUDFHost Executable File?
The WUDFHost.exe is an essential system file situated in the C:\Windows\System32 directory. All the files in that location are important for the Windows OS to function correctly. They make up a fundamental component of the operating system infrastructure.
The WUDFHost file plays a crucial role in the operation of various system functions, and removing or modifying it can produce a disastrous chain of events that can make the whole system end up in complete failure.
So, I wouldn’t recommend you delete the executable file because the outcome would be so severe that it could make the computer entirely unusable, thereby preventing any future attempts at booting. At this point, you’ll need to reinstall the entire operating system.
FAQs
What is Windows Driver Foundation’s high CPU?
Windows Driver Foundation develops Windows drivers. But it isn’t supposed to utilize high processing power. But because of errors, it can drain the battery too fast and use 100% CPU.
What is Wudfhost.exe used for?
The Wudfhost.exe is a driver host process which is one of the methods of the driver manager service. designed to provide stability and security to different portable devices.
How do I uninstall Windows Driver Foundation?
You cannot uninstall Windows Driver Foundation. But you can stop the process. To do so, press the Windows + R key, type services.msc, and click OK. Look for Windows Driver Foundation – Kernel-mode Driver Framework or Windows Driver Foundation – User-mode Driver Framework, right-click on it, and select Properties. Set the Startup type to Manual and click on Stop.
Final Thoughts
As you can see, there are several definitive solutions you can try to resolve the WUDFHost.exe process from consuming excessive CPU resources, including updating or reinstalling drivers, running system scans, and disabling certain services.
By following this article step by step, you can quickly improve the performance of your system and prevent the issue.
Leave a comment below and let me know which method you’ve found to be the most helpful.