The idea of upgrading computer hardware, disregarding a fresh installation of Windows, is relatable to the rise of a Phoenix from the ashes. The spontaneity elevates the experience to a new height of smooth sailing.
But does it always work like a charm?
In this article, I’ll touch on the slightest details on the parity of CPU or motherboard revamp and reinstalling Windows.
Can You Upgrade Your CPU Without Reinstalling Windows 11/10?
You can certainly upgrade your CPU without installing a new copy of Windows, whether it’s Windows 10, 7, or 11. When you install a new processor that is compatible with the motherboard, it doesn’t need any additional measures, thanks to the lack of license integration with the CPU.
See, the motherboard is usually bound to the Windows license, especially on OEM (Original Equipment Manufacturers) computers such as Dell, HP, Lenovo, etc.
So if you swap motherboards or go through an overhaul on your part, Windows installation is highly recommended. The same can be said for a DIY PC.
On an additional note, whenever you are upgrading the CPU, make sure it is installed properly, else your system won’t post whatsoever.
With that being said, you can upgrade to a new Motherboard or CPU free of any manual installation of Windows OS. It’s a little bit tricky process. Let’s quickly run you through this in detail in the next section.
How to Upgrade CPU and Motherboard Without Reinstalling Windows 11/10
There are 2 effective ways in which you can upgrade the motherboard and CPU devoid of Windows installation. They are involved with Windows registry alteration. Besides, these methods also save your wallet from expenditure on premium tools.
Before you move on to the process, you should create a backup of your system in case you mess up the registry values.
Follow these methods to upgrade your CPU and Motherboard without reinstalling Windows:
Online Registry Modification
Tweaking the registry values with the help of a Microsoft account lets you flawlessly use the existing Windows with the new hardware, especially, Motherboard and CPU.
Step 1: Connect Your Microsoft Account
First, you must link the Microsoft account with the operating system. Once the account is connected, changes will sync in real time. As a result, the registry tweak will be saved, and it should let you use the new hardware seamlessly.
Here are the steps to connect your Microsoft Account:
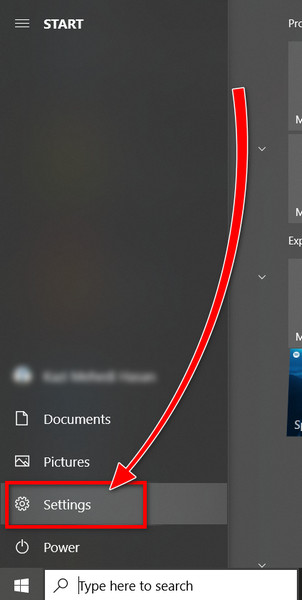
- Click on the Start menu icon from the bottom left corner.
- Choose Settings.
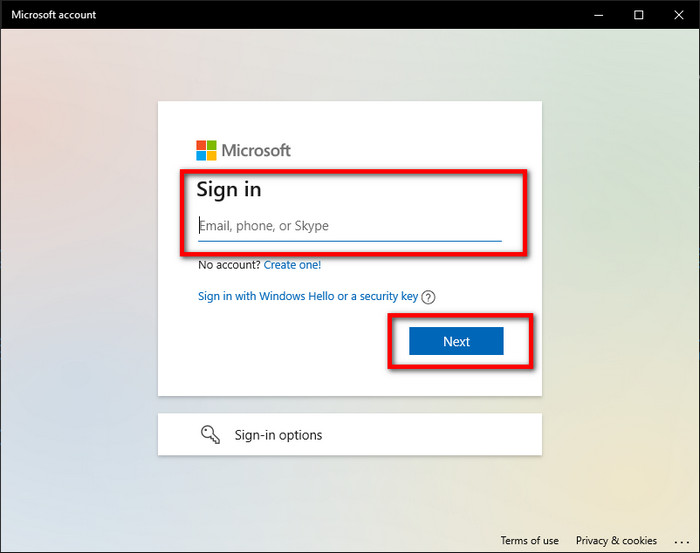
- Click on the Sign In text right below your local account avatar.
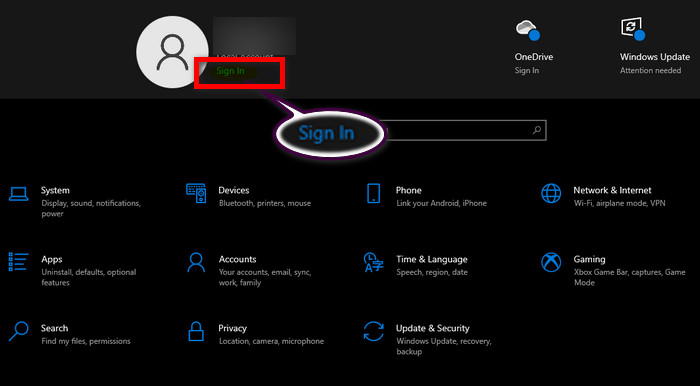
- Complete the login process by providing the necessary credential.
Step 2: Edit Windows Registry (msahci to StorAHCI)
For the next step, you need to modify a registry value of msahci which is replaced with StorAHCI to support any modern hardware changes like motherboard and CPU.
Here’s the process to modify msahci registry value:
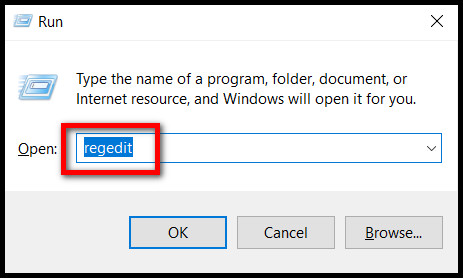
- Press Win+R to launch Run.
- Type regedit and hit Enter.
- Copy and paste Computer\HKEY_LOCAL_MACHINE\SYSTEM\CurrentControlSet\Services\msahci in the address bar and press Enter.
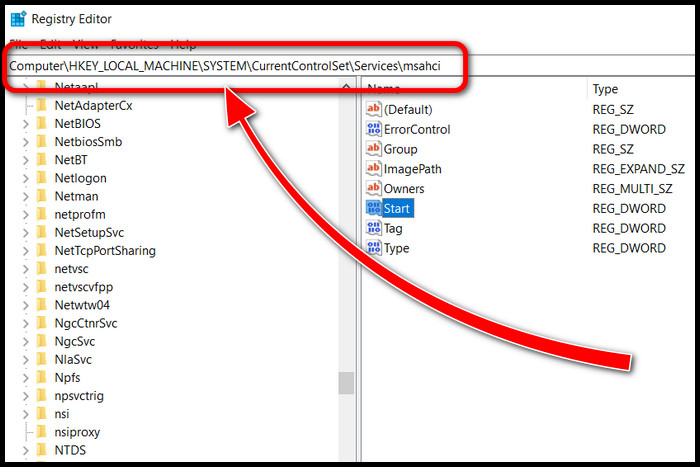
- Double-click on the Start file and set the DWORD value to 0.

- Replace msahci with pciide from as the folder path.
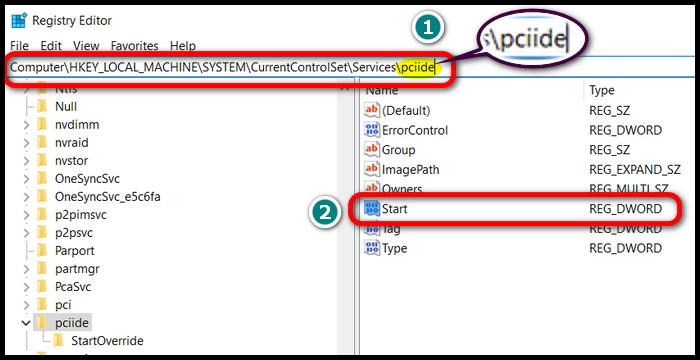
- Set the DWORD value to 0 for the Start file again in this folder.
Step 3: Upgrade CPU and Motherboard Physically
Once you are done with the registry edit, go ahead and swap your hardware connecting the boot drive. Then you need to confirm the hardware swap and sync settings.
Here are the steps to sync your new hardware with the Windows:
- Write update in the Windows search bar and click on Check for updates from the search result.

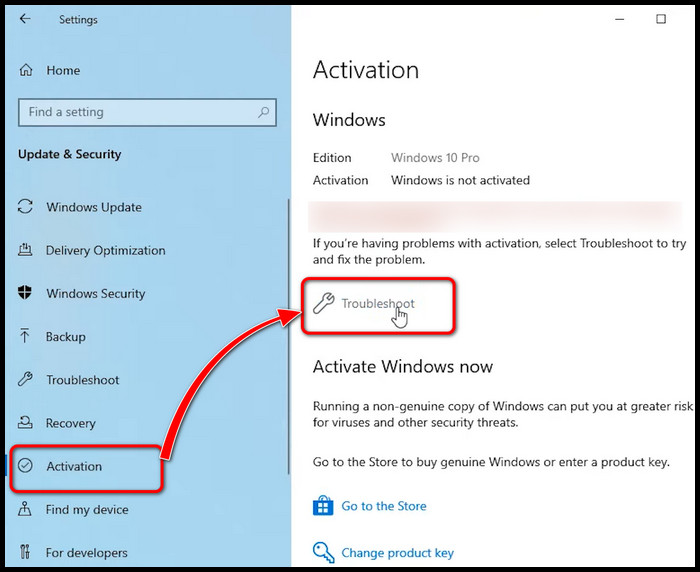
- Select the Activation tab from the left pane.
- Click on Troubleshoot.
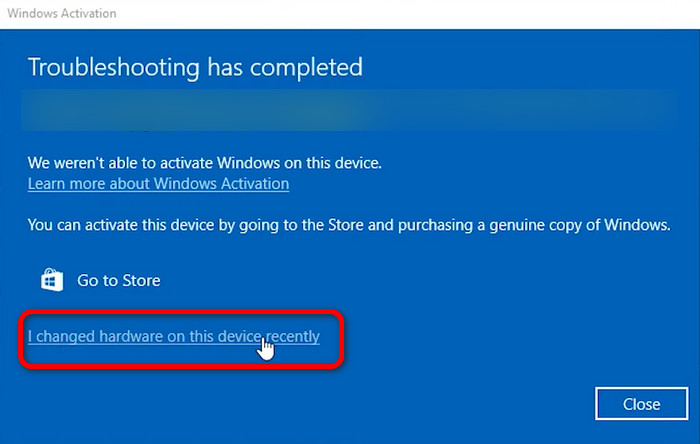
- Choose I changed hardware on this device recently from the new floating window.
- Sign in to your Microsoft account again.
Voila! Your CPU and motherboard upgrade is complete with license validation, yet no additional hassle like installing a new Windows!
Offline Registry Modification
With the help of the Windows installation disk or bootable USB disk, you can edit the registry. After that, your current Windows OS will be all set with the new CPU and motherboard. Even so, changing the motherboard without reinstalling Windows 11 is done this way.
Here are the steps to edit the registry offline:
- Insert or connect the installation disk or USB to your computer.
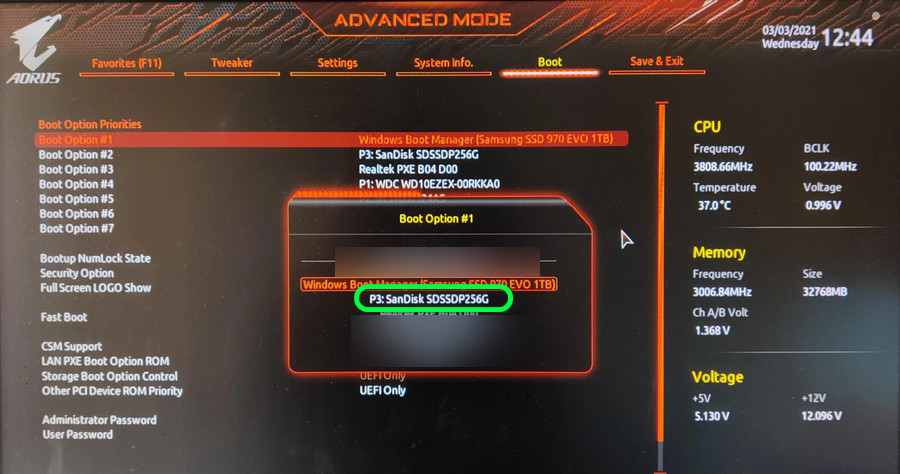
- Turn your PC on and keep pressing the BIOS switch. It can be Del, F2, F10, or F12 depending on the manufacturer.
- Set the installation media as the primary boot device.
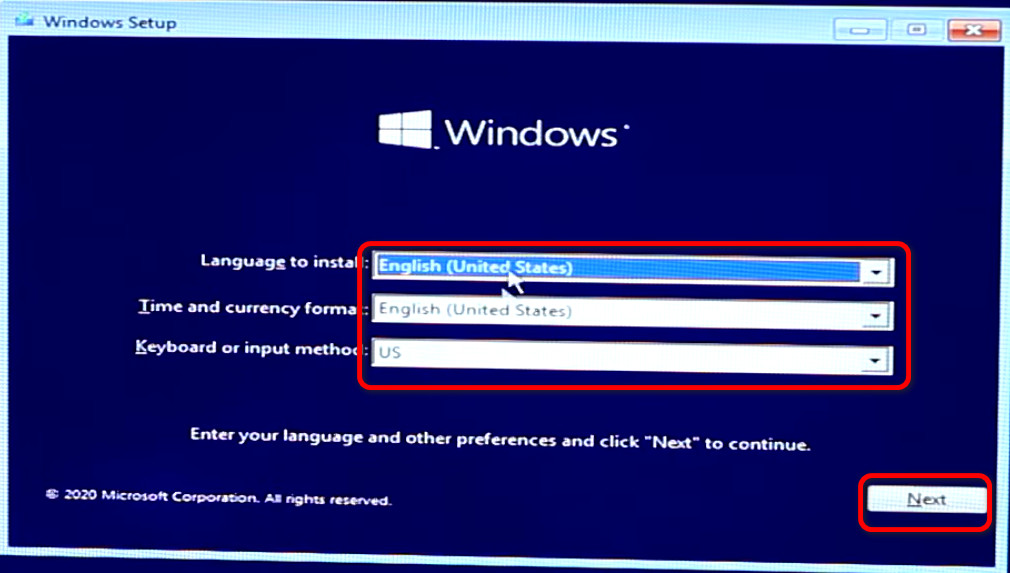
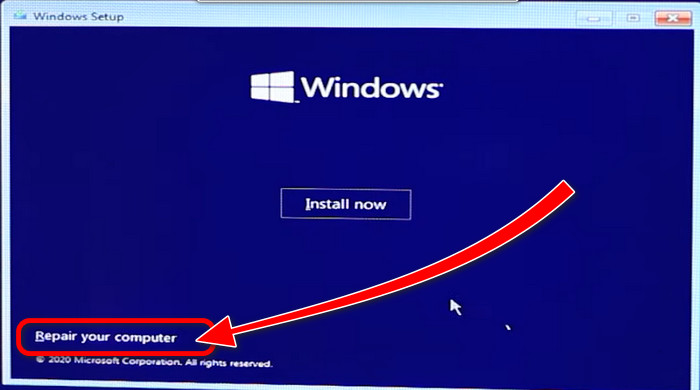
- Restart your computer, and you’ll see the installation screen on the next boot.
- Choose English as the language and press Next.
- Click on Repair your computer.
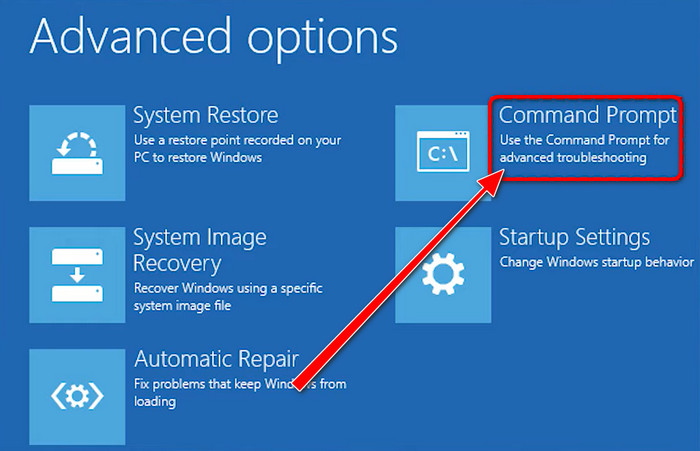
- Navigate to Troubleshoot > Advanced options > Command Prompt.
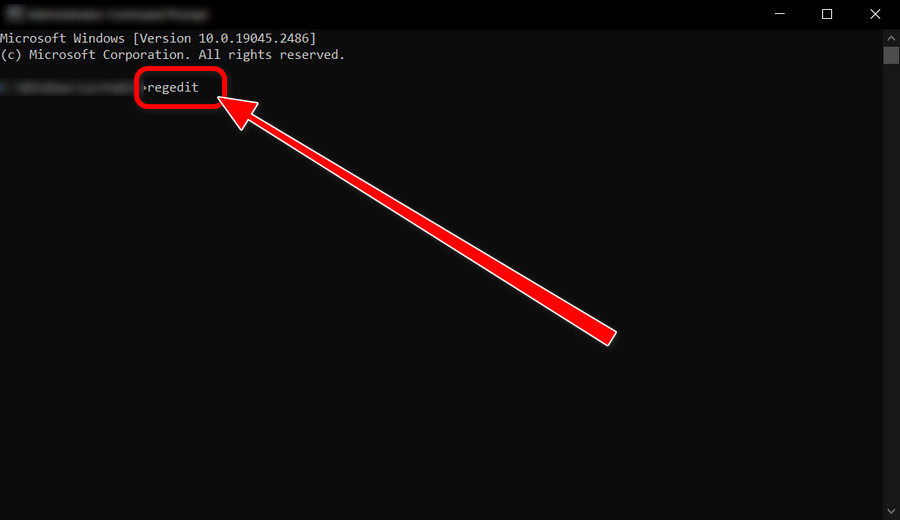
- Type regedit and press Enter.
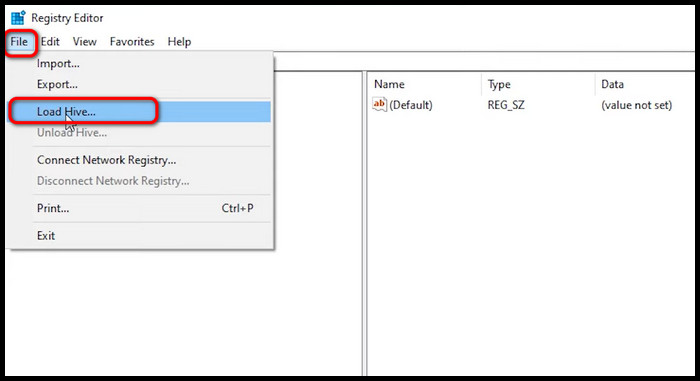
- Select HKEY_LOCAL_MACHINE and click on File from the top bar.

- Choose Load Hive.
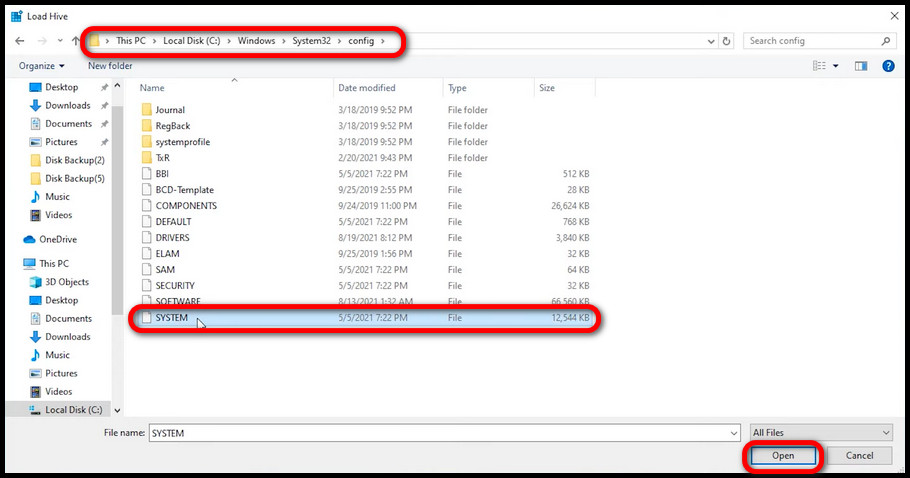
- Go to Local Disk (C:) > Windows > System 32 > config.
- Load the SYSTEM file.
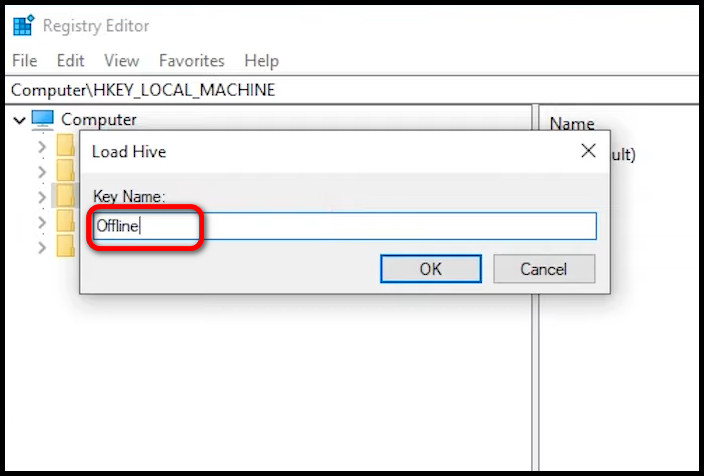
- Give the hive a name such as Offline.
- Navigate to Computer\HKEY_LOCAL_MACHINE\SYSTEM\CurrentControlSet001\Services\msahci and double-click on the Start file.
- Change the DWORD to 0.
- Take the same regedit path and replace msahci with pciide at the end, and set Start file DWORD to 0 again.
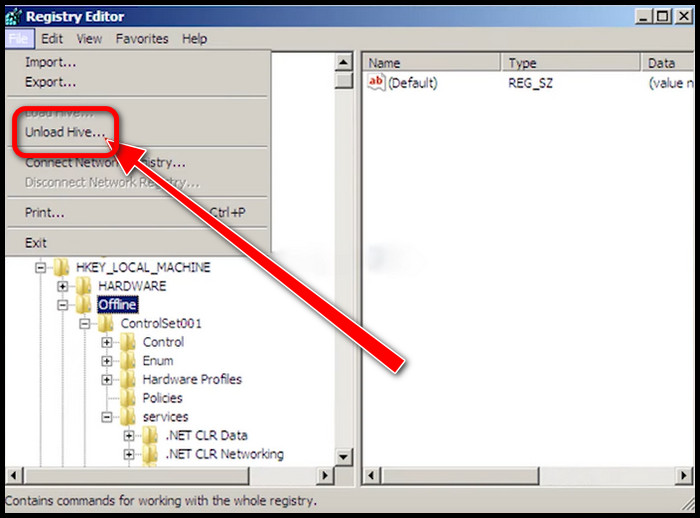
- Highlight the Offline key under HKEY_LOCAL_MACHINE.
- Click on File from the top and select Unload Hive.
Restart your computer and remove the disk or USB. Connect the boot drive with your new system, and you should be rebooted into Windows perfectly fine. Install drivers and updates if necessary.
Should You Keep the Old Windows With New CPU & Mainboard?
If you ask me whether you should install a fresh copy of windows with the updated CPU and motherboard, my answer will be both Yes and No! But how is it plausible?
You know, when you pair your old boot drive with a previously installed OS such as Windows 10, 11 etc., the first conflict that you might encounter is the driver incompatibility and Windows configuration settings error.
There can be, however, two common scenarios. Let’s get a closer picture.
Upgrade to A Different Platform
See, hardware from different vendors has particular firmware to function properly. When you upgrade from a dissimilar platform such as Intel to AMD or vice versa, the possibility of yielding a conflict is ridiculously high.
The operating system may start to crash out of nowhere with BSOD. Or worse, you might not be able to get into the desktop at all. Personally, I encountered the latter.
Long story short, I upgraded to an Intel system from AMD. And when I connected my primary boot SSD to the new system, I couldn’t get into Windows for once. It crashed every time right after the Windows 10 loading screen. 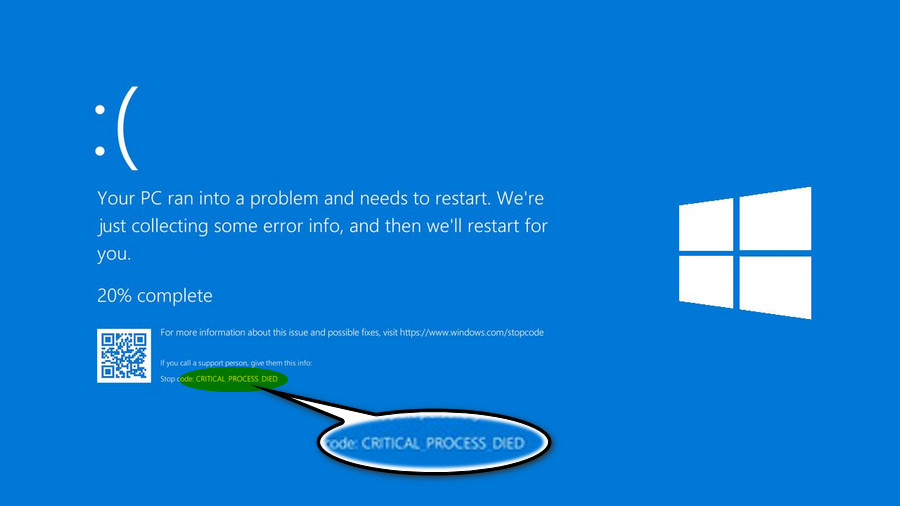
Interestingly, the BSOD message referred to missing hardware for a driver. Guess what?
Many moments behind, I figure out it was the AMD chipset driver that produced all that contradictions with the Intel processor and motherboard.
So, considering you’re switching platforms, for safety measures you should always reinstall Windows.
Upgrading on The Same Platform
Let’s say you are upgrading to a new CPU on the same board, such as Ryzen 5 1600 to Ryzen 5 5600 on a B450 motherboard. In such cases, you don’t have to reinstall a new Windows.
As you are on the same platform, the drivers and the system’s registry won’t freak out seeing a new hardware change. Even if you upgrade to a newer gen product, such as 8th gen Intel to 12th Gen, most likely you’ll be fine with the current Windows.
Choose one of the methods I discussed above, and everything will be a breeze. You’re free of hassles such as file transfer, logging into existing accounts, or driver installation.
Just to be on the safe side, however, check for updates and Windows will automatically install any required drivers. You can also download them manually.
FAQs
Can I Upgrade My CPU Without Changing Anything Else?
You can upgrade the CPU if it is compatible with the existing motherboard. In such a case, you don’t have to change any other components such as RAM, SSD, or PSU.
Do I have to Reactivate Windows Every time I Install It?
If your motherboard is licensed to a particular version, you don’t require activating it each time you install Windows. If it’s a digital license, you need to provide the key and activate it every time.
How to Change Motherboard Without Reinstalling Windows 11?
To change the motherboard without reinstalling Windows 11, first, check your old motherboard’s BIOS and note down the selected options if you have to. Also, make sure your current boot drive is compatible with the new motherboard. Connect the boot drive to the new motherboard with Windows 11 loaded onto it. Set up the BIOS with the proper boot setting, and you are pretty much good to go. Once you get to the Windows, remove the old motherboard drivers and install the new ones.
Ending Remarks
Upgrading to a new CPU along with a new motherboard uplifts the overall performance of your computer. But installing a new Windows forces you to move files and organize the workspace all over again.
Hope this article provides you with the perfect solution and makes the entire procedure easy as shooting fish in a barrel.
More questions? Leave a comment down below.