The brain is the most important and sensitive organ in the human body and is perfectly placed inside the skull. But, a small misalignment can lead to a serious injury or even paralysis.
Likewise, an incorrect CPU installation can damage your computer, and therefore knowing the exact condition of the installed CPU is crucial.
In this article, I’ll explain the ways to recognize a proper CPU installation and also the process to install the CPU accurately.
So, let’s begin.
How Do I Know if My CPU is Installed Correctly?
To identify whether the CPU is installed correctly, you need to look at the CPU socket and processor alignment keys to determine the correct CPU installation. Also, you must ensure the availability of correct cores and threads from the device manager to assure real performance.
In contrast, the computer will fail to boot without a CPU. So, if the computer has turned on normally, you are on the safe side.
But, sometimes the cores and threads count doesn’t appear correctly on the system specification. The motherboard fails to detect the number of existing cores or is outdated compared to your CPU generation.
Before installing a CPU, you must check the motherboard compatibility from the manufacturer’s website to guarantee a hassle-free installation.
If you find the motherboard compatible, consider reading the following process to check if the motherboard is detecting all the cores and threads of your CPU.
Follow the steps below to check the CPU cores & threads:
- Search and open Device Manager from the Start Menu.
- Expand the Processor tab.
- Check the threads count.
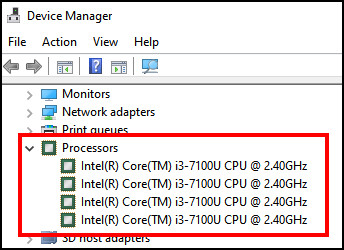
If the threads count matches your CPU specification, then the motherboard has detected all the cores & threads properly and the processor is working fine.
However, if the motherboard is compatible, but sees fewer threads on the list, you need to upgrade/flash your BIOS to get the latest CPU generation support and make all the threads discoverable.
Most people don’t assemble a PC on their own. They either take an expert’s help or buy a pre-built computer. If it’s your first time building a PC, or want to know about CPU installation, read the following passage carefully.
How to Install A CPU Correctly
To install a CPU, you must have a compatible motherboard based on the processor manufacturer. You will need to lift the CPU socket lever and load plate from the motherboard and place the CPU, maintaining the correct position and socket alignment keys.
There are some prerequisites to installing a processor. Read the following list to find the required components.
Here are the requirements to install a CPU:
- Compatible Motherboard.
- CPU.
- Thermal Paste.
- CPU Cooler.
If you’ve managed to gather all the necessary components, consider following the steps below to install your CPU.
Read the procedures below to install the CPU accurately:
1. Use a Compatible Motherboard
Not every motherboard is compatible with processors from all generations. Main circuit board compatibility varies from gen to gen and manufacturer. So, make sure your motherboard is suited for the CPU.
The motherboard architectures are different, and the same motherboard doesn’t work on AMD and Intel.
You need to verify the compatibility from the official website and use it to install your CPU.
2. Prepare the Motherboard
Before inserting the CPU into the socket, you must lift the load plate from the CPU socket. You’ll find a socket lever, and need to press it down and away to open up the load plate. 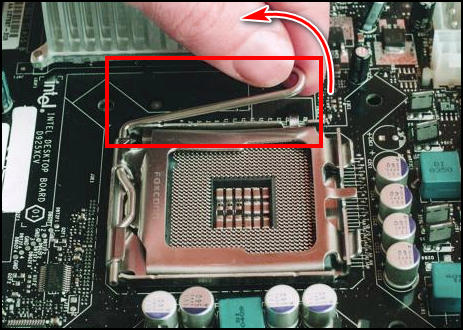
Once the load plate is lifted, you will see CPU pins on the motherboard, and it’s ready to set the processor into the socket.
3. Set the CPU into Socket
After opening the load plate, you have to put the CPU inside the socket. Placing the processor with a correct alignment is very easy, and if you do it carefully, there’s a 0% chance of failure.
You’ll find a triangle on your processor, and have to match it with the CPU socket. Also, you can use the socket alignment keys to perfectly place the CPU in the socket. 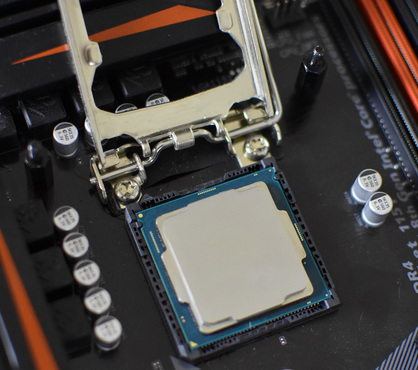
Once the processor is fit properly, place the load plate down, and push the socket lever back into the holder. 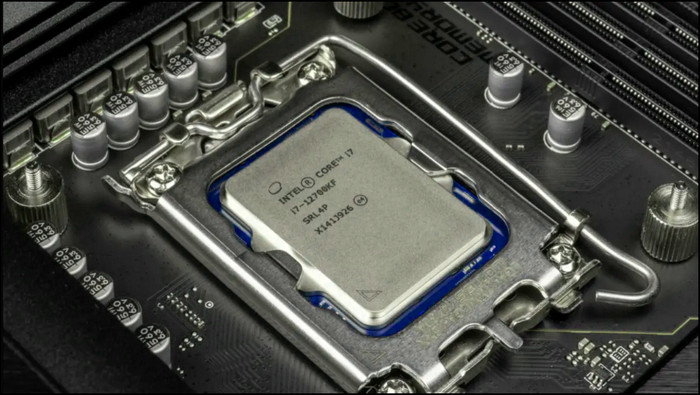
4. Apply Thermal Paste
Now, it’s time to apply some thermal paste on the CPU and set a cooler to keep the temperature down.
If you are installing or replacing an old CPU, you must clean the thermal paste and apply it newly. 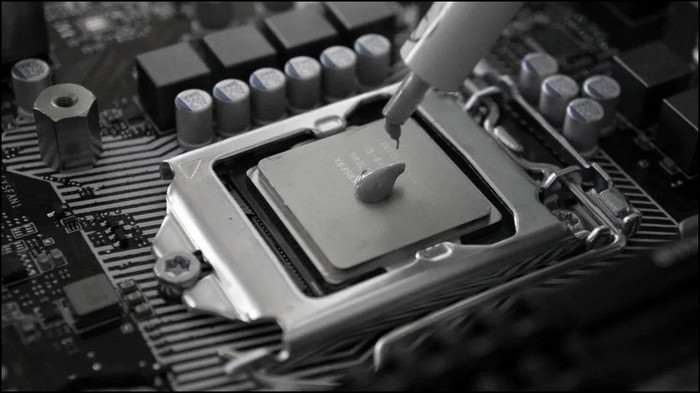
5. Install CPU Cooler
Keeping your processor cool is sorely necessary. But keep in mind that, depending on the processor manufacturer, the CPU cooler varies.
If you have a compatible CPU cooler, line it up on your CPU and tighten the screw. Then, you must connect the CPU cooler to the Intel LGA socket and complete the installation process.
In case you are an AMD user, you need to use a Ryzen-compatible CPU cooler. 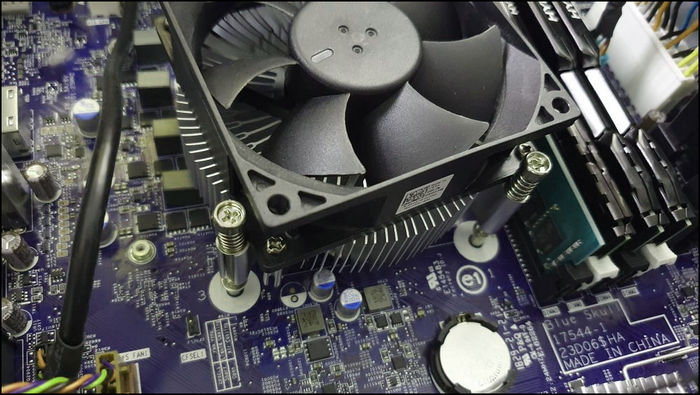
After completing the CPU and cooler installation, boot your PC and enjoy the power of your new processor.
What Happens if You Install A CPU Incorrectly?
If you fail to install a processor correctly, it won’t boot your computer at all. Also, if you give severe pressure on the load plate and socket lever, or place the CPU incorrectly in the socket, the pins on the processor may bend or break and make your CPU defective.
The CPU is considered a sensitive component of a computer. However, if you insert it with care, there’s absolutely zero possibility of installing the processor incorrectly.
Most average people will figure out the placement by observing the triangle on the CPU and cutouts on the processor.
But, humans aren’t above making mistakes. Though the chances are very rare, there are still possibilities to install the CPU in the wrong way.
If you ever install the processor incorrectly, you’ll face some consequences, and I’ve stated them below.
Here are the outcomes of installing a CPU incorrectly:
- The tiny golden pins on the processor will bend or get damaged.
- The CPU will be short-circuited.
- The CPU socket on the motherboard will get damaged.
- The computer won’t boot.
In most cases, the CPU may get damaged completely and require buying a new one.
Frequently Asked Questions
How do I know if my CPU is inserted correctly?
You can tell the CPU is inserted correctly, if the processor sits flat and all the corners meet correctly in the CPU socket.
How do you properly install a CPU?
You need to lift the load plate, insert the CPU on the socket and apply thermal paste on the processor after lifting down the CPU to install the processor correctly.
What will happen if the CPU is installed incorrectly?
The CPU pins will bend or get damaged if you install or place them on the motherboard incorrectly.
Wrapping Up
A correctly installed processor is a must to operate your computer without any issues. A misplaced CPU can lead to damage to your PC component and sometimes fail to provide its full potential.
This article has explained the steps to install a new processor properly, and the procedures to check the CPU condition.
Share your thoughts in the comment box below, and I’ll catch you at the next one.
Cheers!