When it comes to upgrading the CPU cooler from the stock or replacing a pruned one, does it intimidate you? Well, it’s understandable, as you require maneuvering in a tight space inside the case with a constant fear of damaging the main board.
So, do you have to take out the motherboard off the case, or is it okay to keep it as is?
Lucky for you, with this write-up I’m about to act as a light bearer to show you the ropes.
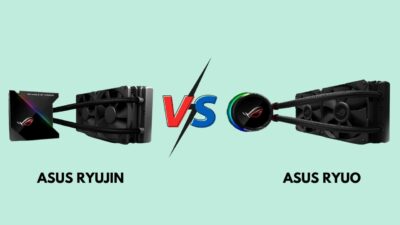
Can You Install CPU Cooler Without Removing Motherboard?
Yes, you can install a CPU cooler without removing the motherboard from the case on most modern systems. Although, it largely depends on the cooler and the chassis design. Enough wiggle room and coolers with easy unmounting mechanisms make the process a breeze.
You know, not long ago mainstream computer cases were congested with all the DVD, HDD, and floppy racks on the inside just ahead of the main board. On top of that, the PSU cables were all over the place, producing clutter and mess. Besides, there was not any noteworthy cable management system.
So, it was difficult to even install or remove simple components like RAM, SSD, HDD, etc.
Coming back to the CPU cooler removal, it was a nightmare, though it had a straightforward operation. 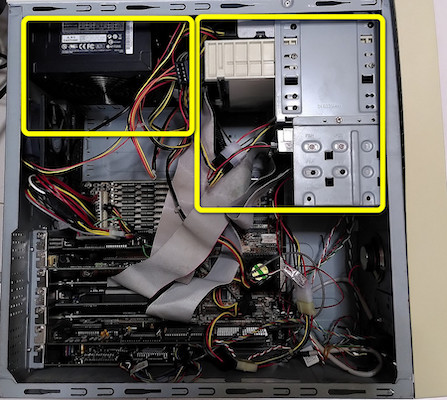
Speaking of cooler, even with today’s standards, some of them have a complicated design to work with. Especially, installing a dual tower air cooler such as Zalman CNPS14X, DeepCool Assasins III, Noctua NH-D15 Chromax.Black Arctic Freezer Extreme, etc., keeping the board’s placement intact. 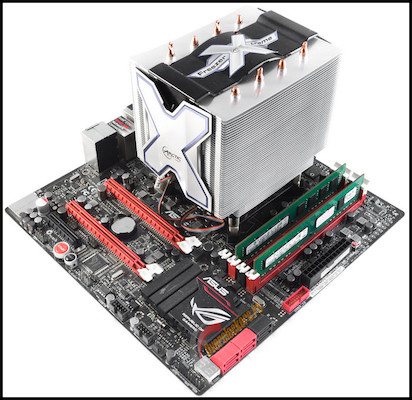
Imagine the damage these coolers can induct if you accidentally drop them on the motherboard; the possibility of shaving off some parts from the board is astronomical.
On the other side of the spectrum, liquid coolers are traditionally easy to mount. You can install them perfectly, disregarding the main board expulsion from the casing.
Condensing all the information, attempt installing the CPU cooler, retaining the motherboard in position depending on the breathing space of the case and the type of cooler.
In the next section, I will walk you through the process to upgrade the cooler without removing the motherboard when it is possible.
How to Change CPU Cooler Without Removing Motherboard
Changing the cooler of your processor requires some steps on your end. You must remove the current one, then go through the new cooler installation process.
The below process is also effective if you can’t install a cooler in the first place.
Note: Run some heavy CPU-intensive work such as CPU stress test for 10mins or more to heat it up. So that the thermal paste can loosen up. It makes cooler removal safe and easy.
Here is the procedure to install the CPU cooler leaving the main board just the way it is:
Step 1: Remove the Existing Cooler
- Turn off the computer and disconnect it completely from any power source.
- Open the side of the case to access the internal components.
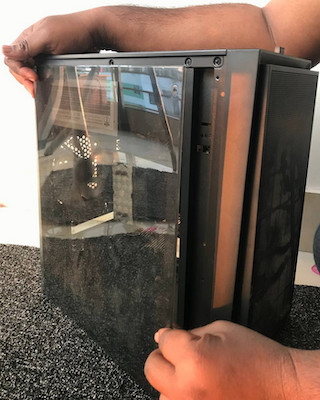
- Dismount RAM and GPU for easy access.
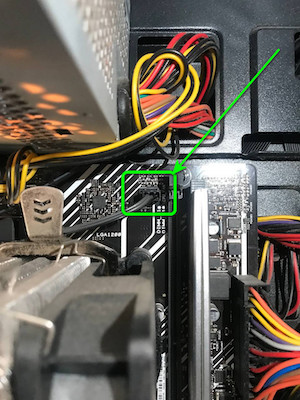
- Disconnect the cooler’s fan connector from the motherboard.
- Unscrew the cooler with a crisscross pattern. This ensures equal pressure on the motherboard.
- Push the screws down a bit harder and rotate them anti-clockwise if the cooler uses spring screws.

- Pull up the side clip and make the cooler ready to remove if it utilizes a retention mechanism.

- Wiggle the cooler back and forth gently to break the adhesive-like bond with the processor’s IHS, especially PGA socket CPUs such as AMD Ryzen.
- Pull the cooler towards you and it should come off swiftly.
- You can also remove the cooler fan beforehand, to make the process easier.
Step 2: Install A New Cooler
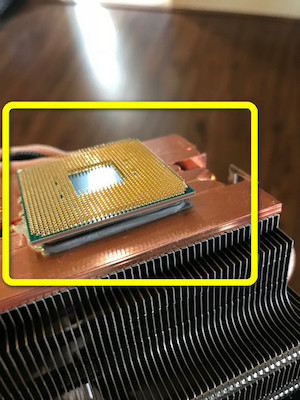
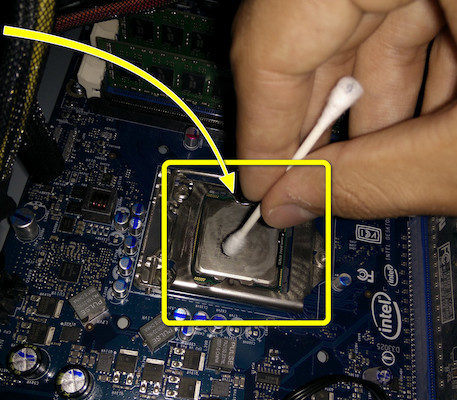
- Clean the IHS with isopropyl alcohol to remove the leftover thermal paste.
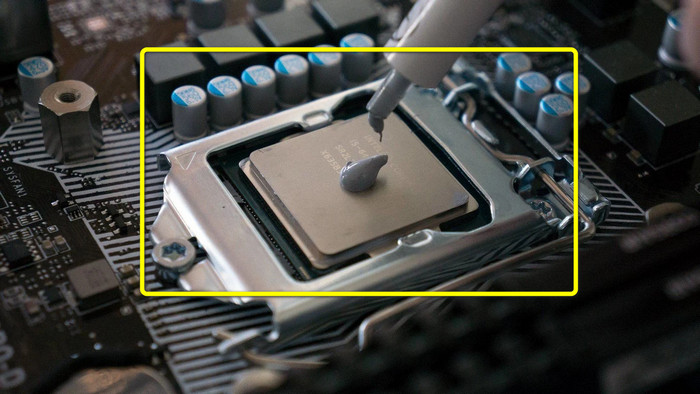
- Apply a blob or cross-shaped fresh thermal paste on the CPU. You don’t it in case your cooler has pre-applied paste.
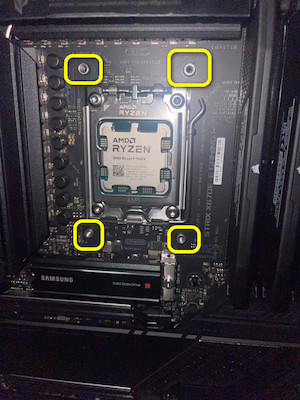
- Connect the backplate for the cooler from the back of the motherboard, holding it in place by hand and guiding it through the appropriate holes.
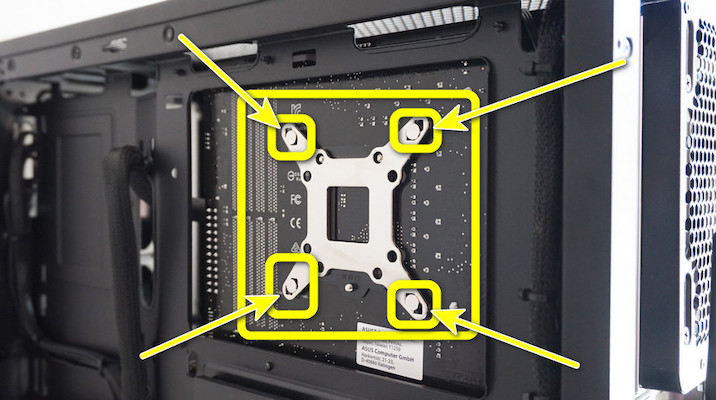
- Secure the backplate with provided screws if necessary. Some coolers may use the original backplate of the main board.
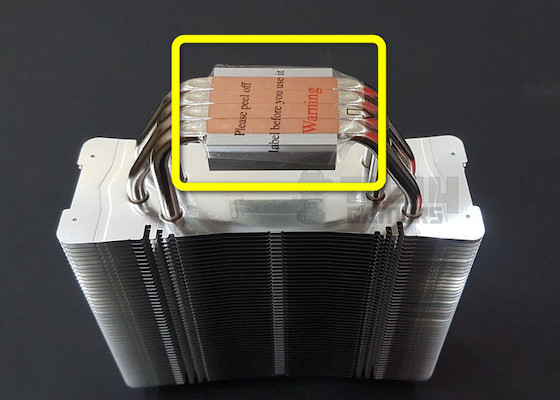
- Peel off the plastic from the heat sink contact surface at the bottom.
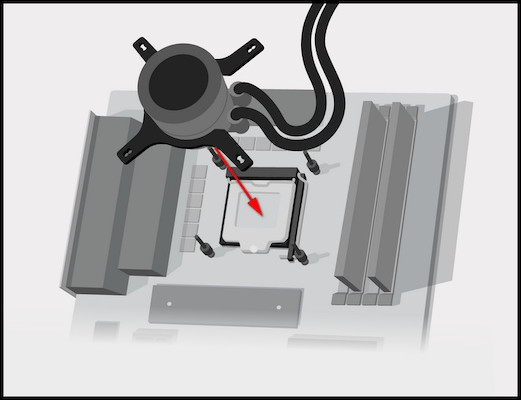
- Place the heat sink in line with the hole or the stands coming out of the backplate.
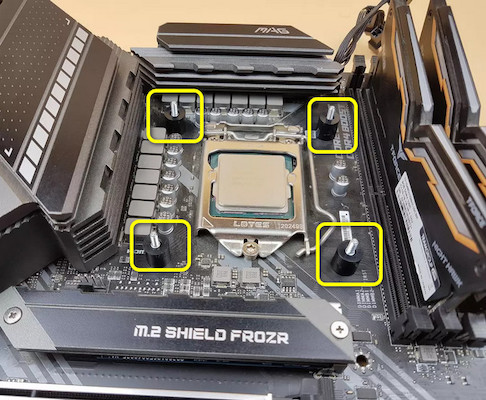
- Tighten the screws with a cross pattern to make sure uniform pressure is on the CPU and motherboard. It also helps to spread the thermal paste evenly. Check if it is seated properly.

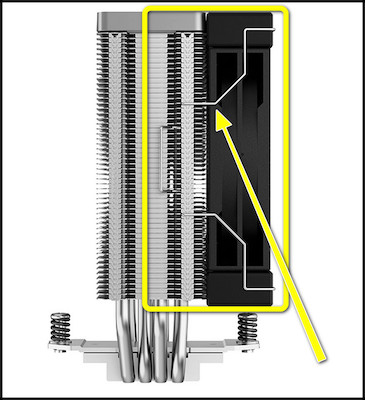
- Mount the fan on the heat sink with the provided retention bracket. Even if you want to replace the cooler fan, you can go through the same process.
- Connect the fan to the PWM port of the motherboard.
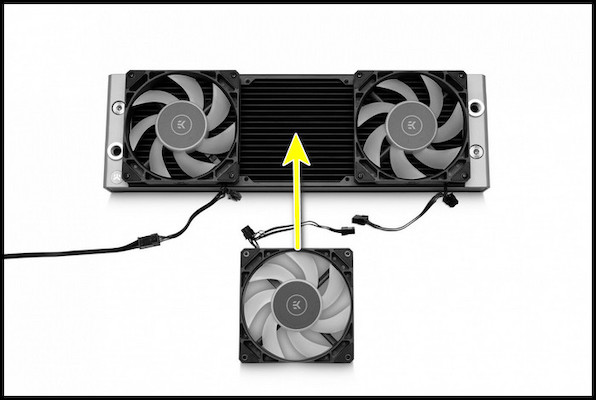
- Mount the pump instead of the heat sink if your new cooler is an AIO.
- Connect all the fans on the radiator and mount it on the case as an additional step.
- Secure all the connections on the motherboards where it is necessary such as power, fan, and RGB cables.
Once, you are done with all the procedures run some CPU stress tests like Cinebench R23, AIDA 64 Extreme, etc. and monitor the CPU temperature to check whether the cooler is working properly.
FAQs
Should I Install Cooler Before or After motherboard?
You should install the cooler before you mount the motherboard inside the case. Otherwise, you may run into clearance issues. It makes the DIY PC building process much easier.
Can a CPU Cooler Damage a Motherboard?
Yes, improper mounting of a cooler can damage the motherboard. It can bend or have a crack due to the variation in pressure on a different part of the board.
Do I Need to Do Anything After Installing a New CPU Cooler?
You should clean around the mounting socket to remove any thermal paste spillage. Try to move the cooler to see if it’s firm. After that, run some stress tests to check if the cooler is at its pace.
Ending Remarks
To be able to change the cooler of the processor without disassembling the motherboard is super convenient. But being extra cautious is always recommended, especially when you are working with hardware.
That’s all for today. For more queries, leave a comment down below.