The human brain gets bored pretty fast. It’s especially harmful when you are in your workplace; the repetitive work gets boring and lowers your urge to work.
And as most of us use Outlook in the office, customizing it to our liking and often changing it can prevent us from being bored.

More importantly, setting the Outlook inbox exactly how we want when we launch Outlook will increase our productivity. Microsoft knows this, and they’ve given us the power to customize every little thing in the inbox view.
Here, I’ve described how to change, create and customize the Outlook inbox view from scratch and explained how to put everything back to default.
Without further ado, let’s begin!
How to Change the Inbox View in Outlook from an Existing View
Everyone’s taste is different, and through Outlook, we can organize our emails according to our individual needs.
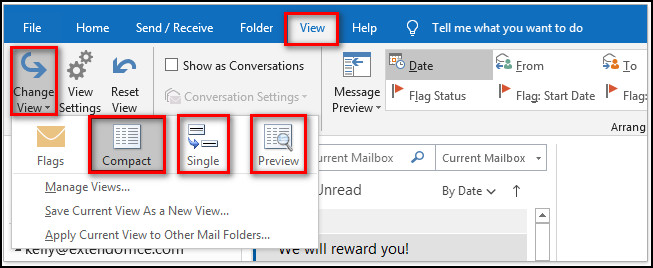
You have 3 inbox views already installed in Outlook. The Compact view, set by default, includes the message list and reading pane and specifically changes the message list’s layout.
The Single view includes the message list and reading pane as well. It provides more information about an email from the message list. And this view is good for widescreens.
The Preview view also gives more information about emails in the message list like the Single view but turns off the reading pane.
Here’s how to change the inbox view from an existing view:
- Open Outlook.
- Go to the View tab.
- Select Change View from the Current View group in the toolbar.
- Select the view you want. You have Compact, Single, and Preview by default.
Related guides on how to View Message Headers in Outlook.
How to Change the Inbox View in Outlook by Creating a New View
If you don’t like the views Outlook has, you can always make your own. You can choose what kind of inbox view you want to make.
Outlook has the following types of views:
- Table: it displays the emails in rows and columns. It’s fit for viewing emails.
- Timeline: it shows your emails in accordance with a designated timeline.
- Card: it’s normally utilized for People. It has a neat interface for your contacts.
- Business Card: it is also used for the Contact In this type of view, you just see the contacts with information.
- People: it shows only your contacts list with their names and images.
- Day/Week/Month: it’s suitable for the Calendar folders.
- Icon: it shows your items with icons and subjects.
Here are the steps to change the inbox view by creating a new view:
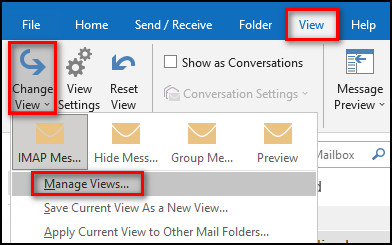
- Move to the View tab.
- Go to Change View > Manage Views.
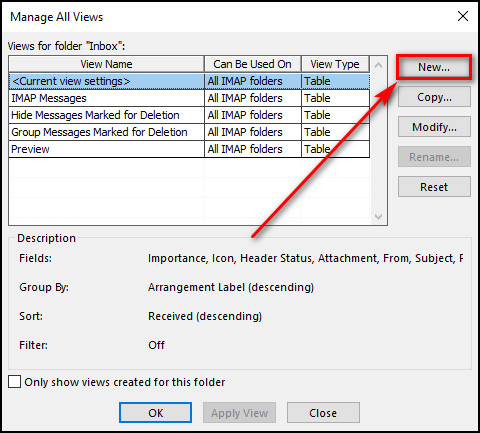
- Choose New to construct a new view.
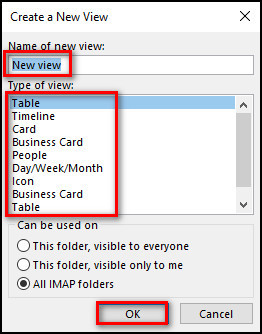
- Type the name of your view under Name of new view.
- Select the Type of view you want from the list of different views.
- Click the OK button after choosing your type of view. And a new view will be formed.
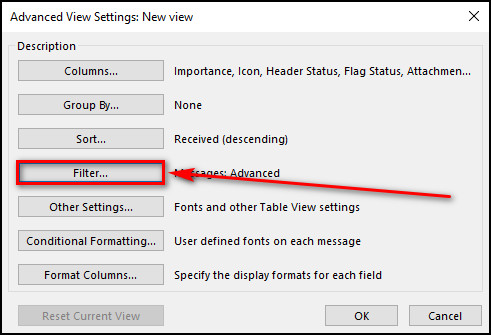
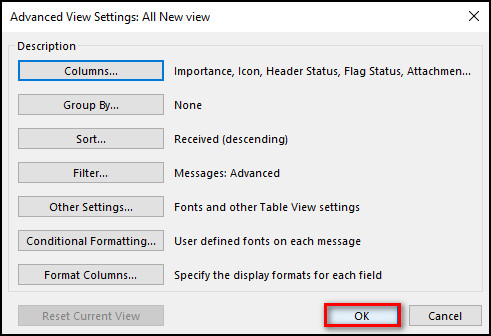
After these steps, Advanced View Settings will pop up, providing you with the options like Columns, Group By, Sort, Filter, etc., to customize your newly created view. 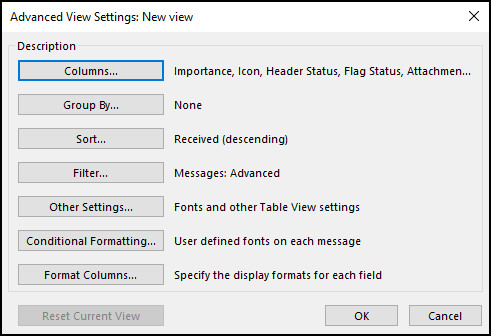
I’ve explained these options in the following sections.
Also related to this guide is how to Create an Outlook Rule to Manage Emails.
Change the Inbox View in Outlook by Adding Columns to the View
From these sections, we’ll customize the view you’ve just created using the Advanced View Settings window.
Here’s how to change the inbox view by adding columns to the view:
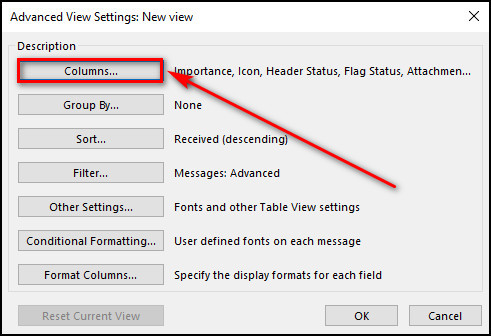
- Open the Advanced View Settings window.
- Click on the Columns button.
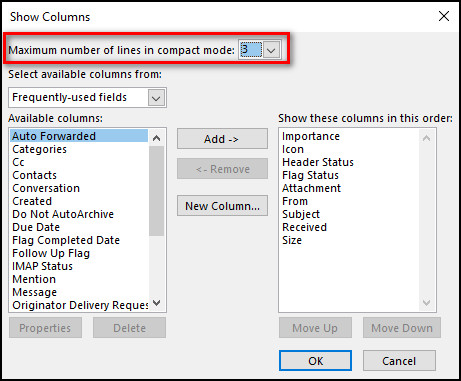
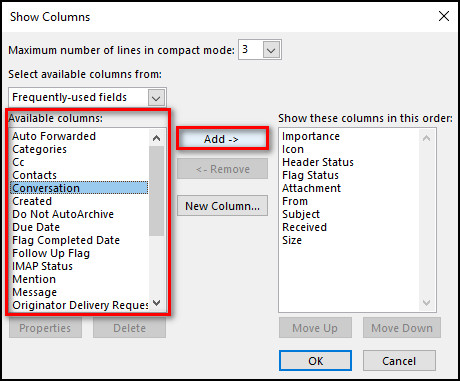
- Choose the Maximum number of lines in compact mode from the drop-down.
- Use the Select available columns from drop-down to select what to display in the left list.
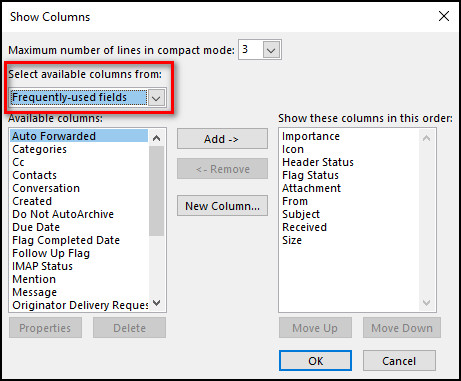
- Select the fields you want to add to your new view from the Available columns list, click Add, and that field will be available in your new view.
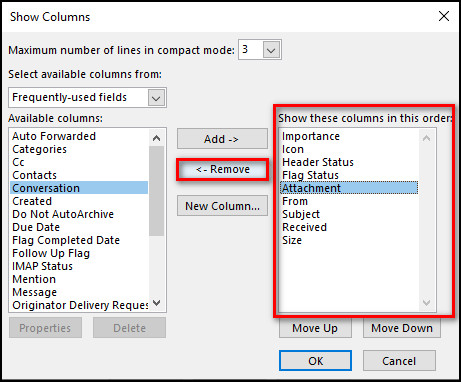
- Select the fields you want to remove from your view from the Show these columns in this order list, click Remove, and that field will be removed from the view.
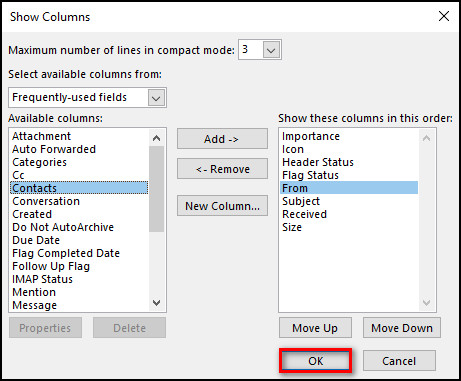
- Use the Move Up and Move Down buttons to change the position of the newly added fields.

- Click OK when you have finished organizing the fields.
Check out the easiest way to understand why Outlook not Marking Emails as Replied.
Change the Inbox View in Outlook by Grouping Items in the View
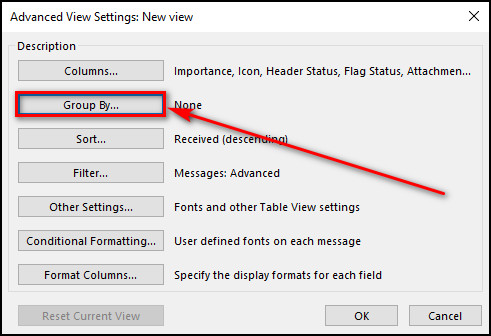
Next, in the Advanced View Settings, we have the Group By option.
Here’s how to change the inbox view by grouping items in the view:
- Open the Advanced View Settings window.
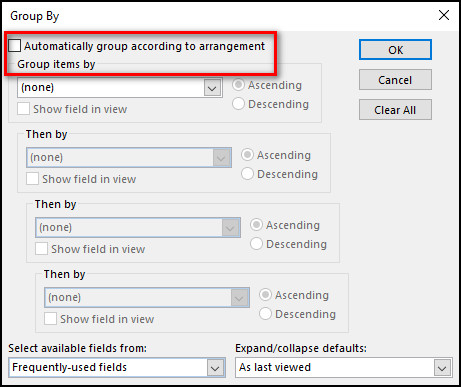
- Click on the Group By button.
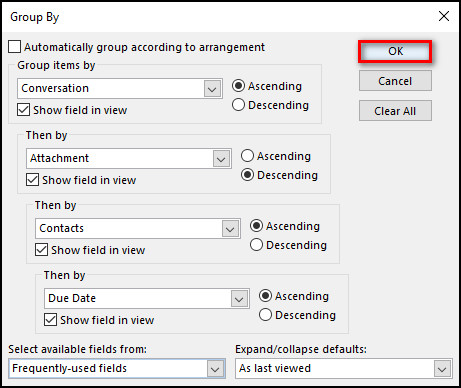
- Uncheck Automatically group according to arrangement if you want to modify the group items.
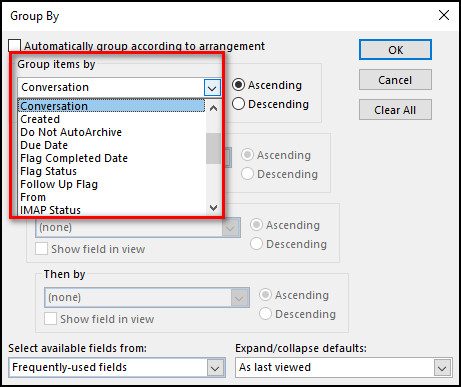
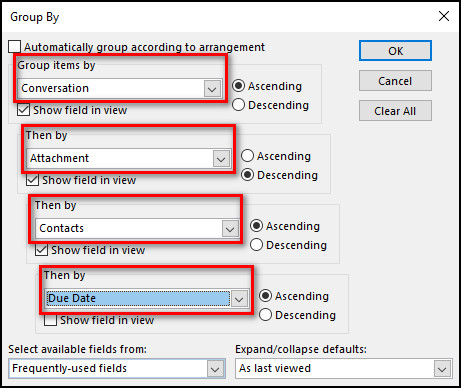
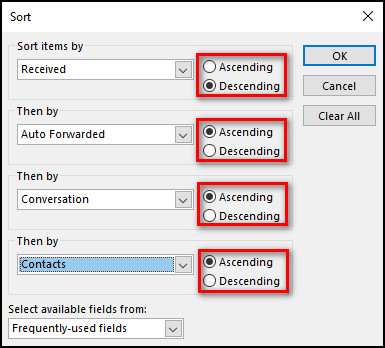
- Select the field you want in the group from the dropdown under Group items by. You can group up to 4 fields.
- Use the other 3 dropdown menus to select your other group items.
- Use Ascending and Descending to sort your grouped items.
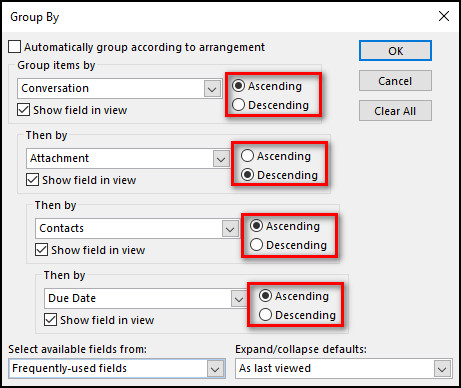
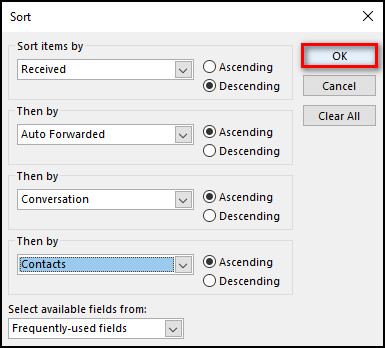
- Click OK when you are done with grouping fields.
Here’s a complete guide on how to Automatically Forward Emails in Outlook.
Change the Inbox View in Outlook by Changing the View’s Default Sort Order
Next up, we have the Sort option in the Advanced View Settings. You can have up to 4 items to sort through in a field. If you don’t like the default sort order, this option will help you modify it.
Here’s the process to change the inbox view by changing the default sort order:
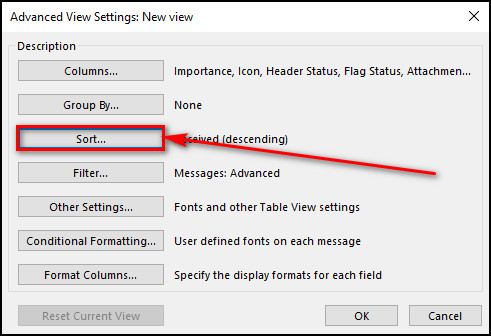
- Open the Advanced View Settings window and select the Sort button.
- Choose the set of fields you want to sort from the dropdown under Select available fields from.
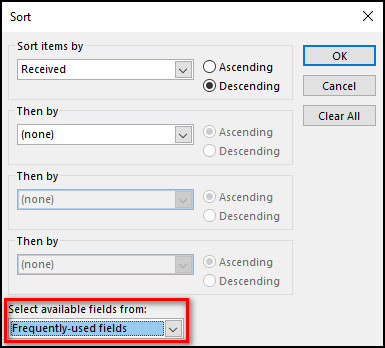
- Select the items you want to sort the fields by from the dropdown list under Sort items by.
- Use the other 3 dropdowns to select more items to sort the fields.
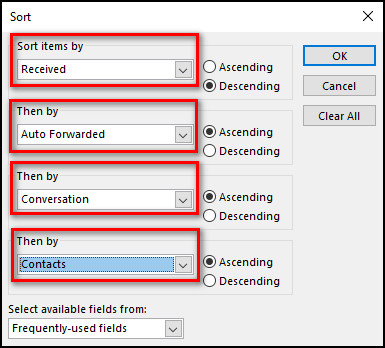
- Utilize Ascending and Descending to sort in your desired order.
- Click OK when you are done with sorting.
Also related to this guide is how to Enable or Disable Autosave Emails in Outlook.
Change the Inbox View in Outlook by Filtering the Items Displayed in the View
In the Advanced View Settings, we have the Filter option that will change the inbox view by filtering the available items in the view.
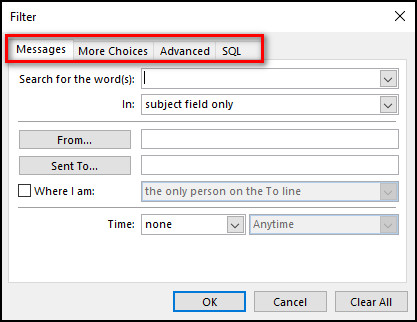
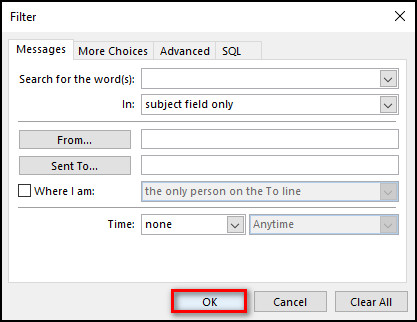
The filter option has the following tabs:
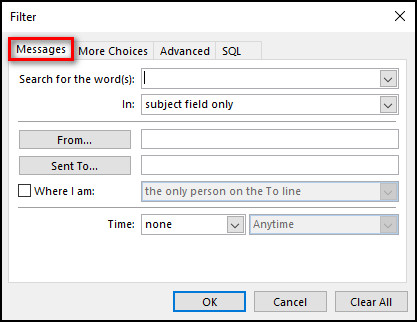
- The Message tab helps you select the filtering option using ordinary email fields.
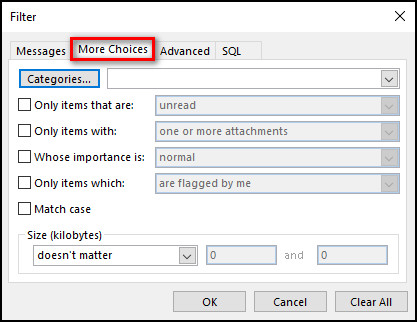
- The More Choices tab helps you select the filtering option using designated categories, message statuses, and other uncommon fields.
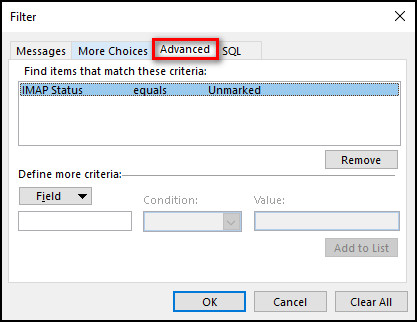
- The Advanced tab allows you to select any available fields to use as a filter. If you want any condition for filtering, select it from the dropdown menu under Condition and provide the value you want.
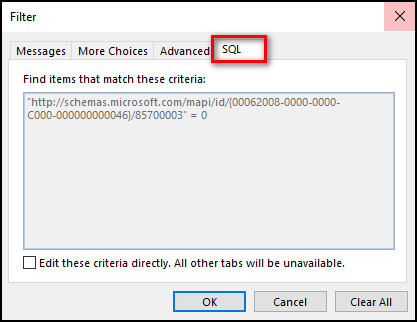
- The SQL tab lets you make your own statement using Structured Query Language to choose which items to appear.
Here’s how to change the inbox view by filtering the items shown in the view:
- Open the Advanced View Settings and click Filter.
- Select the tab you want to use as your filtering criteria.
- Click OK when you are done with providing the filtering information.
Change the Inbox View in Outlook by Modifying the Appearance of the Items in the View
The next button we have in the Advanced View Settings is the Other Settings which will change the appearance of the items in the inbox view.
Here’s the process of changing the appearance of the inbox view:
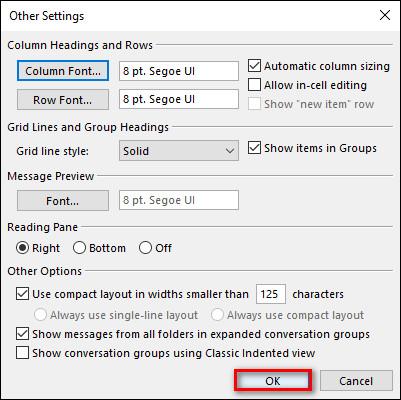
- Open the Advanced View Settings and select Other Settings.
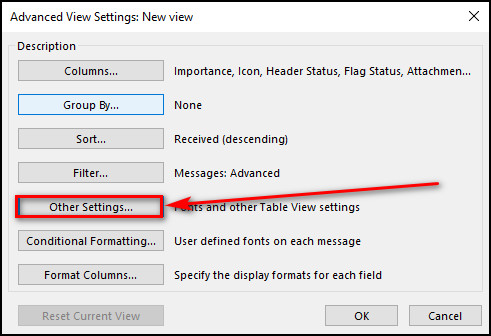
- Choose Column Font and Raw Font, and choose the font family, style, and size you want.
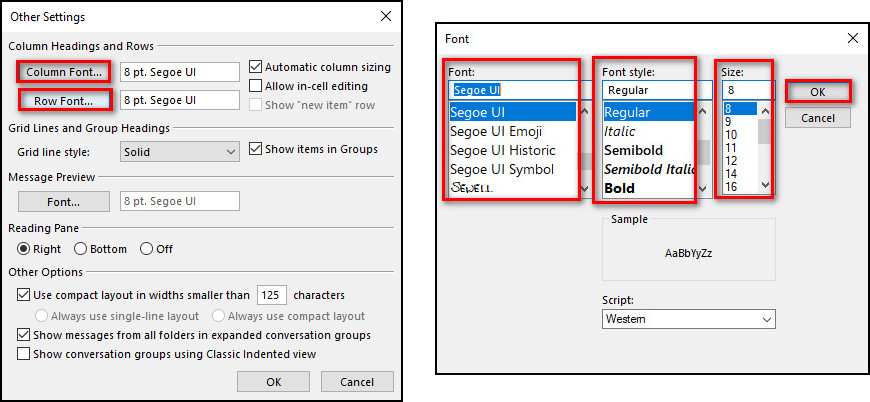
- Click OK to confirm the changes.
Change the Inbox View in Outlook by Altering the Appearance of Items in the View with a Condition
Next, in the Advanced View Settings, we have the Conditional formatting button used for making rules for formatting the items in the inbox view. Some rules are already given, and you can also create new rules.
Here’s how to change the appearance of the inbox view by changing the appearance of items in the view using a condition:
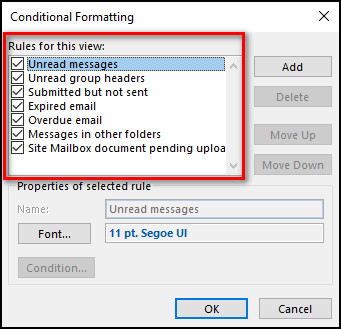
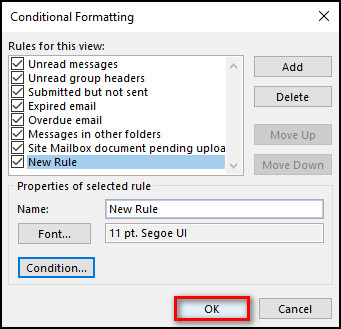
- Select Conditional Formatting from Advanced View Settings.

- Check the rules you want for your view.
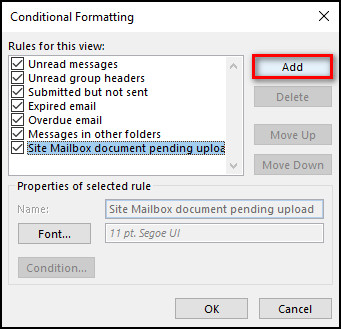
- Click the Add button to add a new rule.
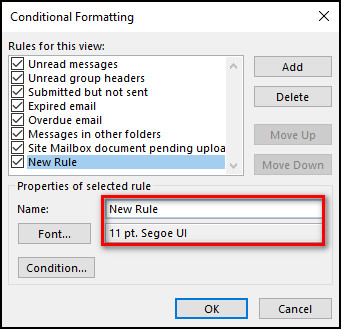
- Write the rule name and select its font family, style, and size.
- Select Condition if you want to give a condition for your rule.
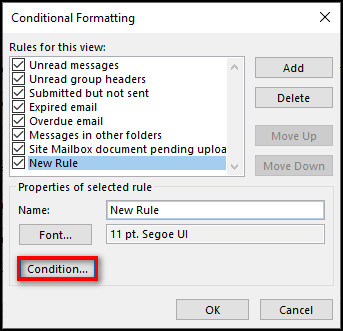
- Click OK when you are done with setting up your formatting conditions.
Change the Inbox View in Outlook by Modifying the Formation of Columns in a Table View
The last option in the Advanced View Settings to customize a newly created view is the Format Columns option. It is used for defining a format for the fields in your view for a Table base view.
Here’s how to change the appearance of the inbox view by modifying the formation of columns in a table view:
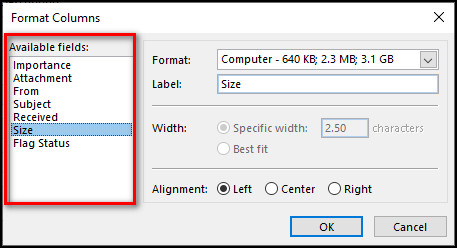
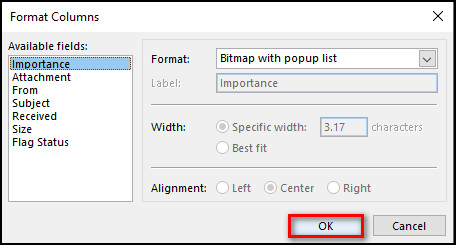
- Choose Format Columns from the Advanced View Settings window.
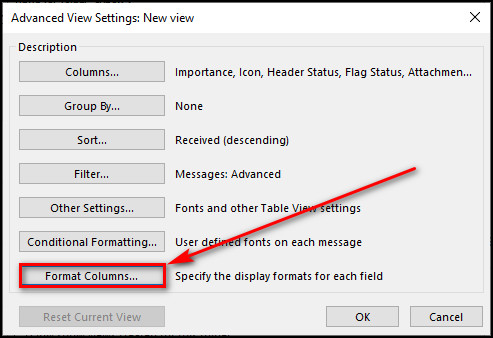
- Select the name of the field you want to modify from the Available fields.
- Change its properties from the right side of the Format Columns window.
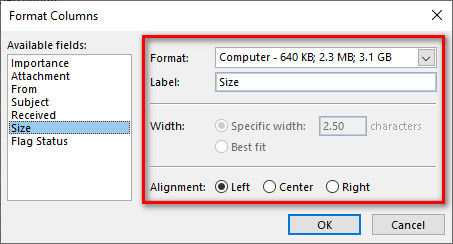
- Click OK when you are done.
Change the Inbox View in Outlook by Saving and Applying Your Advanced View Settings
Now all that’s left to do is just to save all the changes you’ve made in the Advanced View Settings and select your newly created view from the Change View option.
Here are the steps to save your view and select it:
- Click OK in the Advanced View Settings window when satisfied with all your changes.
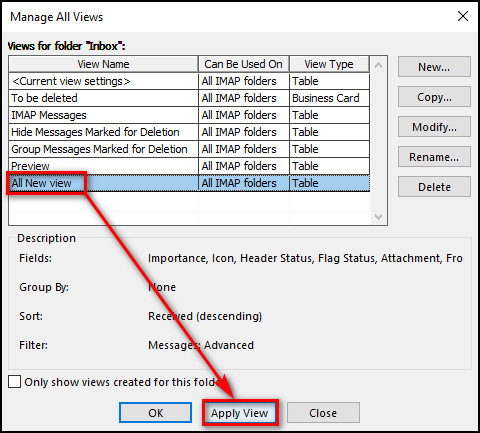
- Select the view you just created from the Manage All Views window, click the Apply View button, and your new view will be applied.
Check out the easiest way to Fix Outlook Crashes When Opening/Switching Calendar.
How to Delete Custom Mailbox Views in Outlook
If you mess up a view you’ve made or you’ve grown tired of it, you don’t have to worry because you have the ability to simply delete the view.
Keep in mind that you can only delete the views you have made; the views that were already installed by default cannot be erased.
Here’s how to delete a custom inbox view:
- Launch the Outlook app on your device.
- Go to the View tab.
- Go to Change View > Manage Views.
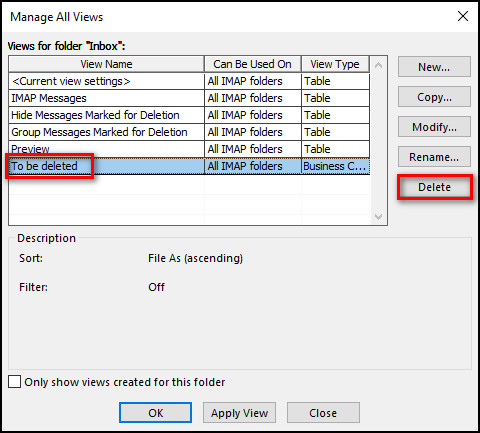
- Choose the view you want to erase and click the Delete button.
- Click Yes when you get a pop-up that asks, Are you sure you want to delete the view? It will confirm your decision, and the view will be removed.
How to Change the Inbox View in Outlook to Default
In case you’ve unknowingly changed some settings in your Outlook and having trouble finding the options to change it back to the way it was, you can just change everything back to the default view.
Here’s how to change the inbox view to default:
Using the Outlook App
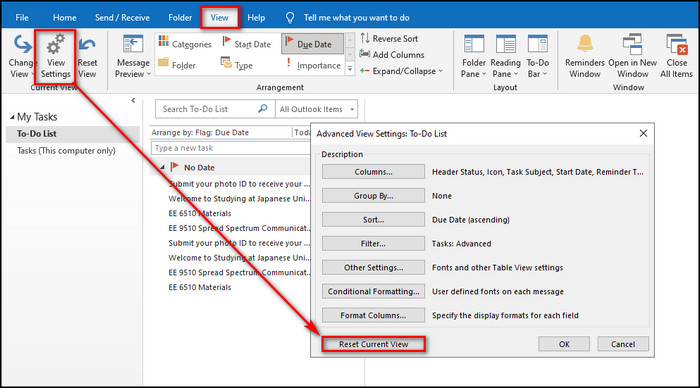
- Go to the View tab.
- Click View Settings, and the Advanced View Settings window will appear.
- Choose Reset Current View and click Yes to apply the reset.
Using Windows Run Program
- Close the Outlook app.
- Press the Windows + R key to launch the Run program or right-click on the Windows icon and select Run.
- Type outlook.exe /cleanviews and click the OK button.
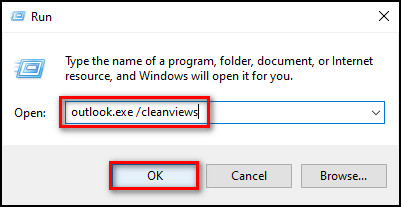
After these steps, Outlook will launch again with the default view.
FAQs
How do I get my outlook back to normal?
To change Outlook back to normal, right-click the Windows icon and choose Run, Type outlook.exe /cleanviews, click OK, and the view will switch back to normal.
How do I change the view of my emails in outlook?
To change the view in Outlook, go to View > Change View > Manage View. Then select the view you want and click OK.
Why has my Outlook email layout changed?
Your Outlook layout changed because you might’ve accidentally changed something. To change the layout to default, press the Windows+R, Type outlook.exe /cleanviews, and click OK.
Final Thoughts
Thanks to Outlook, your customization capability is not limited to only video games anymore.
Outlook lets you change almost every single item and feature in the inbox view, from creating new views from scratch to modifying the existing ones. I’ve covered everything that you can customize in this article.
Let me know if you have any questions regarding Outlook or other apps. See you in the comment section.