Sometimes documents in SharePoint need to have restricted access due to privacy reasons. Excluding such files in the search result is a great way to achieve that.
More often, it may feel convoluted to find the correct settings to make unwanted organization members avoid confidential documents.
In this article, I’m going to walk you through the process of how to prevent documents from appearing in SharePoint search.
Key Takeaways
- It’s sometimes necessary to be able to hide sensitive documents from the mass.
- Hide documents from the SharePoint search, setting up unique permission for a library or folder.
- Switch off site and library-level search indexing to exclude documents in the search result.
Imagine you are an HR manager, and you uploaded a document just for the HR department only. The idea here is no one else should come across this confidential file accidentally, even if they search for it by name on the site.
To achieve this, you can approach multiple ways to stop this document from showing up in SharePoint search.
Follow the methods below:
Method 1: Employ Unique Permission on A Library or Folder
The Document Library or a folder inside it inherits permission from the parent, which is the Communication or Team site in Sharepoint. By lifting off the inheritance, the search result availability of a library or a folder can be restricted.
Unique Permission for a Document Library
- Go to the document library you want to exclude in the SharePoint search.
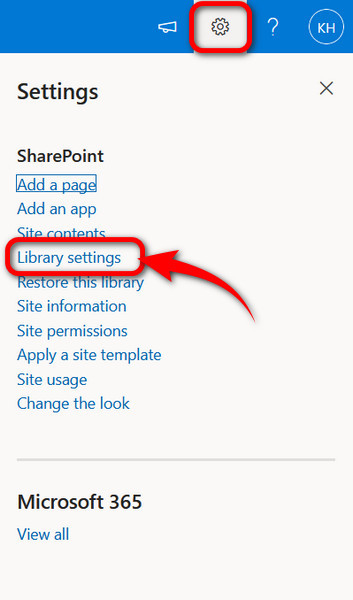
- Click on the gear icon in the top right corner to open SharePoint Settings.
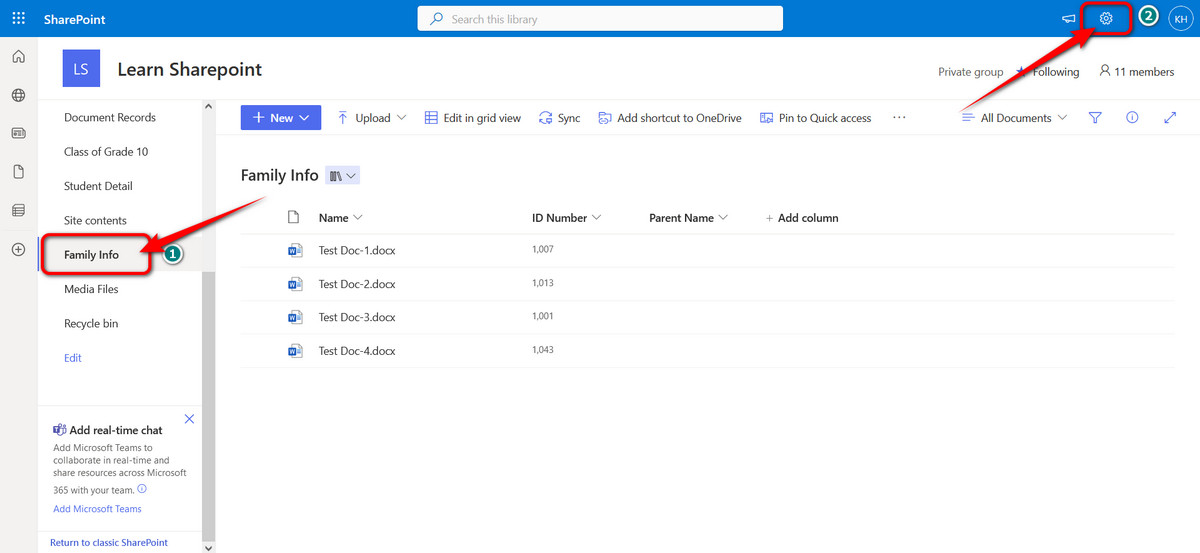
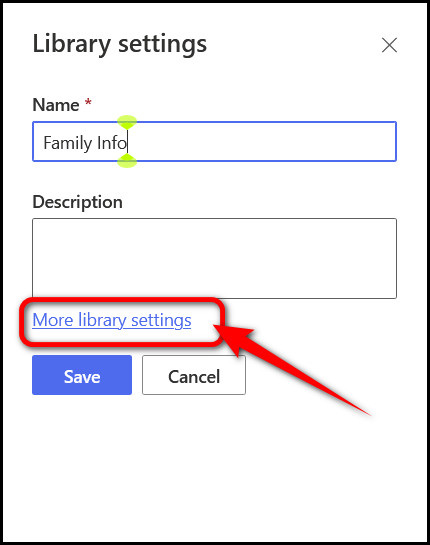
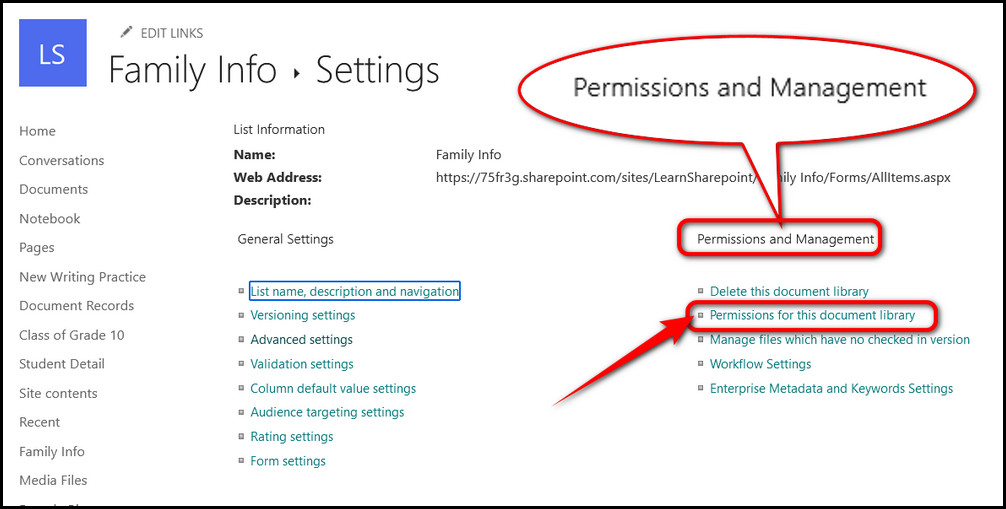
- Navigate to Library settings > More library settings.
- Click on Permissions for this document library under Permissions and Management.
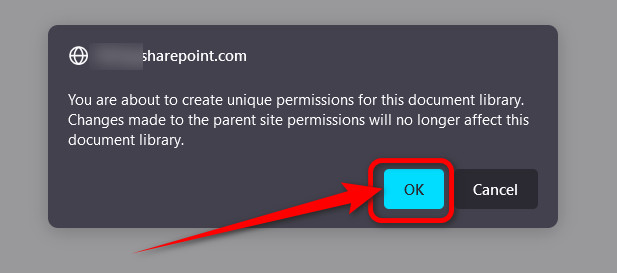
- Choose Stop Inheriting Permissions from the top to create a unique permission for the document library.
- Click Yes in the confirmation prompt.
Voilà! A unique permission for your document library is created successfully, and the parent will no longer pass down permission to this library.
However, if you want to re-enable the permission inheritance, click on Delete Unique Permissions navigating through the same settings.
Imply Unique Permissions on a Folder
- Get to a document library and select the folder you want to restrict from showing up as a search result in SharePoint.
- Click on the i icon at the right of the screen. The folder settings menu will slide in from the right of the screen.
- Press on the Manage access text under Has access sub-menu.
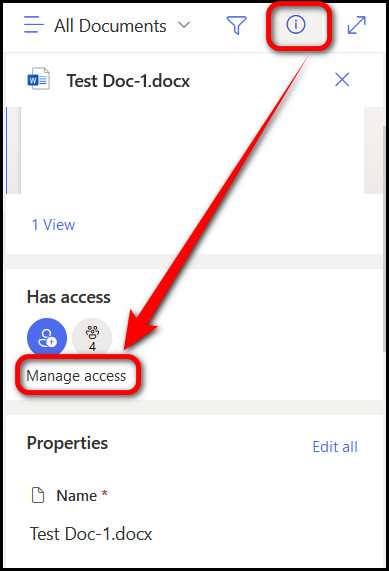
- Choose Advanced from the newly appeared floating window.

- Select Stop Inheriting Permissions from the top and confirm from the next prompt.
![stop-inheriting-permission-for-folders-sharepoint]](https://10scopes.com/wp-content/uploads/2023/05/stop-inheriting-permission-for-folders-sharepoint.jpg)
Next time you search for this folder, it won’t appear in the result.
You can easily hide contents from the search result when inside a Document library in SharePoint.
Here’s how to disable library search indexing in SharePoint:
- Reach out to a library on your SharePoint site.
- Click on the gear icon at the top right section to expand Settings.
- Access Library settings > More library settings.
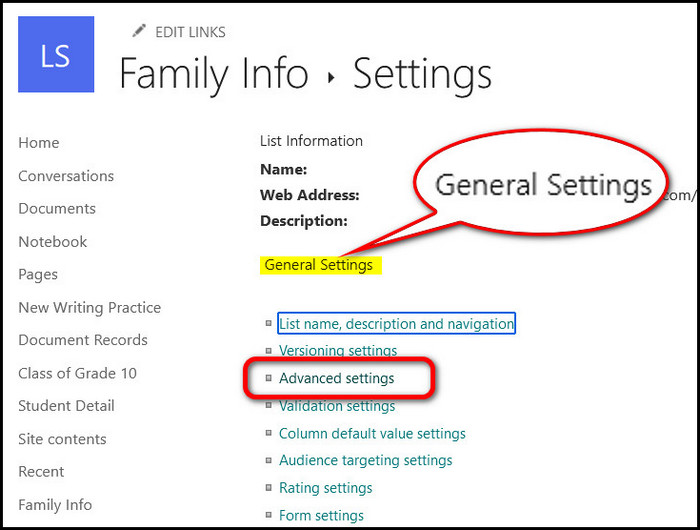
- Open Advanced Settings under General Settings.
- Scroll down and find the Search section.
- Choose No to Allow items from this document library to appear in search results option.
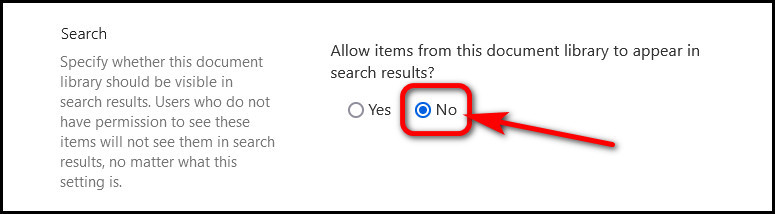
- Scroll down to the bottom and click OK to save the changes.
It’s also possible to hide the entire site from the SharePoint search result. To do this the following instructions will help you.
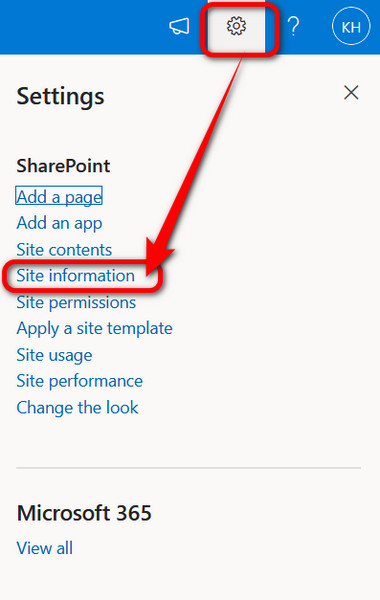
- Open SharePoint Settings with a click on the gear icon.
- Navigate to Site information > View all site settings.
- Click on Search and offline availability under Search settings.

- Select the No radio button under Allow this site to appear in search results option.
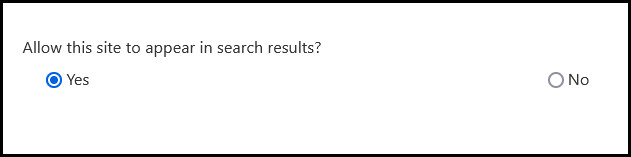
- Hit OK to save the changes.
Note: Disabling site and library level search will prevent the parent as well as the contents from emerging while searching with specific keywords. But members with proper permission for these libraries or sites can still access them.