The human brain gets bored pretty quickly. It’s especially bad when you are in the office; the repetitive work gets boring and diminishes your desire to work.
And as most of us use Outlook in the workplace, customizing it to our liking and often changing the theme can prevent us from being bored.
More importantly, setting the feature we use the most right in front of us when we launch Outlook will increase our productivity. Microsoft knows this, and they’ve provided the options to change almost every little thing according to our taste.
Here, I’ve described how to change Outlook UI, create a customized Outlook folder from scratch, and explain how to put everything back to default.
How to Change Outlook View?
Changing the view of Outlook is a pretty simple process. You can add, minimize and remove items from your layout. You can control the zoom level and even change the font.
Here’s how to modify the Outlook view:
1. Change Layout
The main Outlook interface is divided into Folder Pane, Reading Pane, and To-Do Bar. You can set these parts wherever you like and change their size as much as you want.
Here are the steps to change the Outlook layout:
- Open Outlook on the desktop.
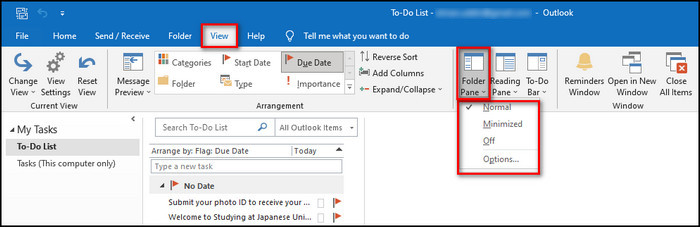
- Move to the View tab.
- Select Folder Pane in Layout. That’s the part at the left of the interface.
- Choose Normal to keep it on the left side.
- Pick Minimized to minimize the pane. Duh!
- Choose Off to remove it. You can dismiss the tick from Off to get the pane back again.
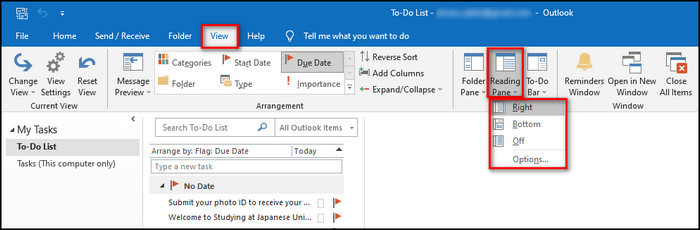
- Select Reading Pane from Layout. It’s the place where you read your selected message. You can choose Right, Bottom, and Off to change the position of the pane or remove it.
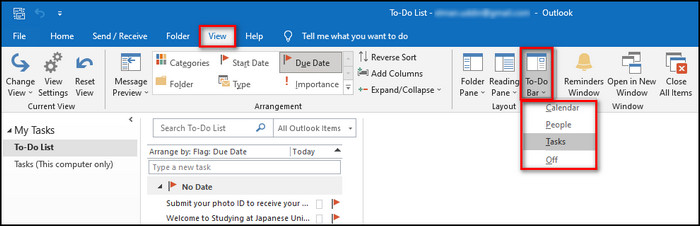
- Select To-Do Bar. This is the part on the right side of the interface. You can put Calendar, People, and Tasks in there or choose Off to remove it.
You can also use the mouse to expand or scale down the pane sizes.
In addition, you can click the Minimize or Expand button at the top right of the pane to collapse and expand it quickly and select the Pin icon to keep it on the interface.
Read more on how to Change Client-Only Rule to Server in Outlook.
The process can be different depending on which font you want to change.
Here’s how to change the font of Outlook:
Change the Font & Font Size in the Message List
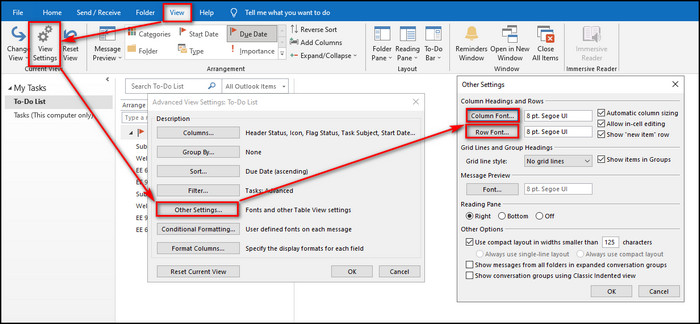
- Move to the View tab.
- Select View Settings from the toolbar.
- Choose Other Settings.
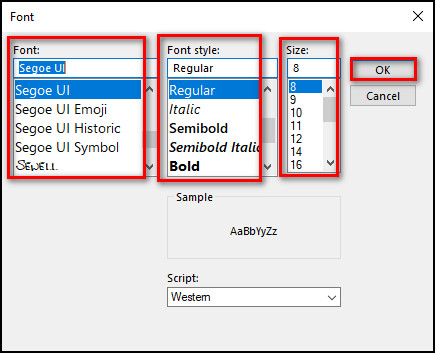
- Select Column Font and Raw Font and choose the font family, style, and size you want.
- Click OK to apply the changes.
Change Font Size for Messages when Composing, Replying, and Forwarding
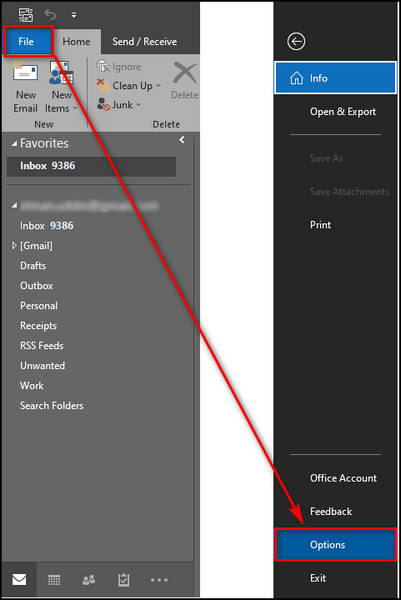
- Go to File > Options.
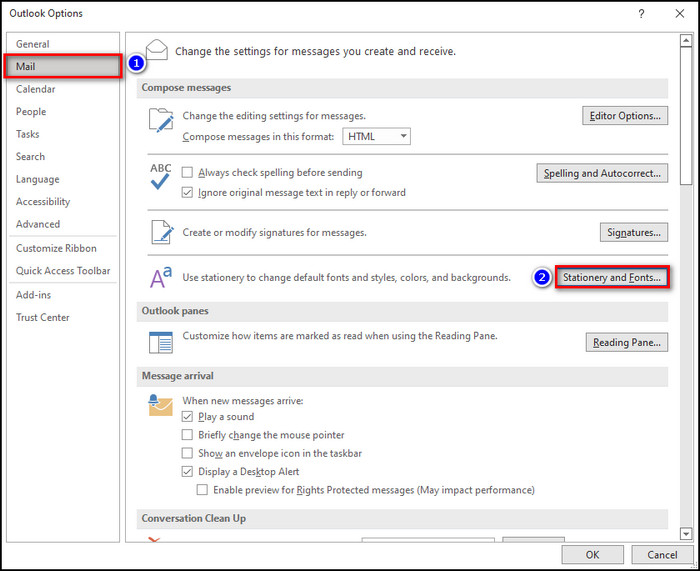
- Move to the Mail tab.
- Select Stationery and Fonts under Compose messages.
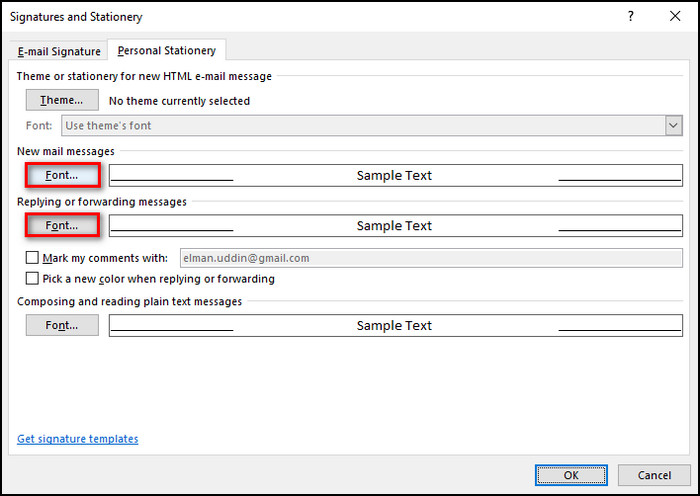
- Click Font under New mail messages and under Replying or forwarding messages.
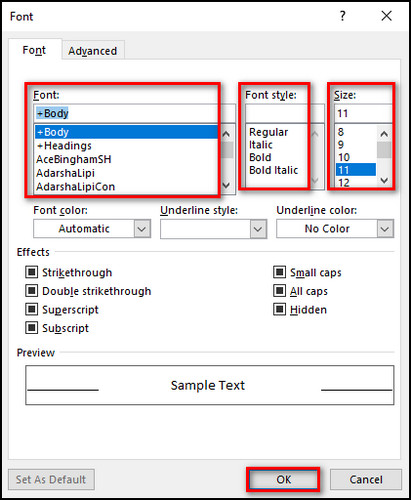
- Choose the font family, style, and size you like.
Also, read how to Enable Read Receipts In Outlook.
Change the Font Size in the Reading Pane
You can change the font size of the Reading Pane by using the zoom slider at the bottom right.
It is set to 100% by default. Slide it to the left to zoom out and to the right to zoom in. 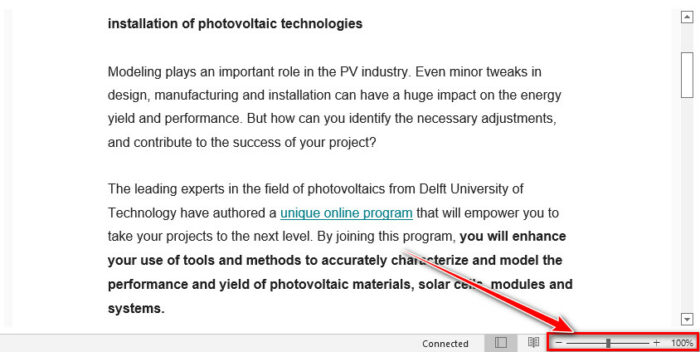
How to Create a New View?
If you don’t like the existing views in Outlook, you can create your own view from scratch. You can choose the name and the type of view you want according to your need.
Here’s the process of making a new view:
- Launch Outlook.
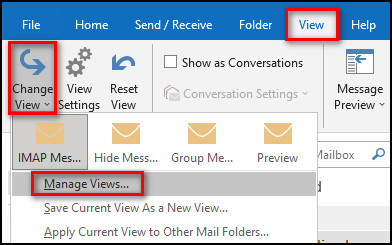
- Go to the View tab.
- Select Change View > Manage Views.
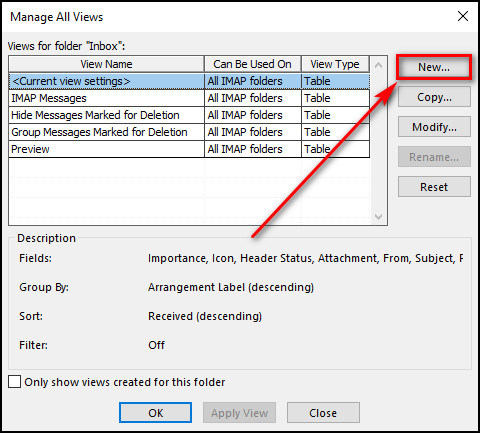
- Choose New to create a new view.
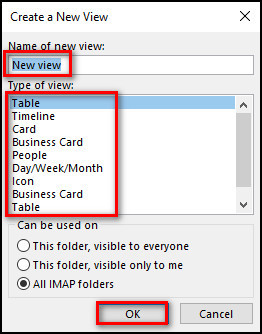
- Write the name of your view under Name of new view.
- Choose the Type of view you want from the list, which includes:
- Table: it displays your data in rows and columns. It’s suitable for viewing emails.
- Timeline: it shows your data according to a set timeline.
- Card: it is usually used for the People folder. It provides a clean interface for your contacts.
- Business Card: it is also used for the contact folders. In this type of view, you just see the fields with information.
- People: it shows your contacts list with their names and pictures.
- Day/Week/Month: it’s usually applied to the calendar folders.
- Icon: it represents your items with icons and subjects.
- Click OK after choosing the type of view you liked. And a new view will be created.
Also related to this guide is how to add email signature in Outlook.
How to Delete a Custom View?
If you mess up a view you’ve made, or you’ve grown tired of it, there’s no need to worry. And you have the ability to simply delete the view.
Keep in mind that you can only delete the views you have made; the views that were already there by default cannot be deleted.
Here are the steps to delete a custom view:
- Launch the Outlook app on your desktop.
- Open the View tab.
- Go to Change View > Manage Views.
- Choose the view you want to remove and click the Delete button.
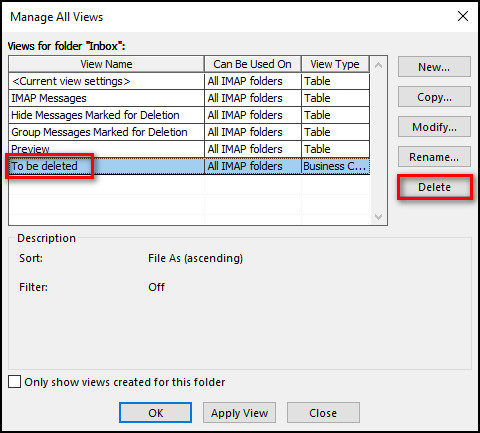
- Click Yes when you get a pop-up that asks, Are you sure you want to delete the view? It will confirm your decision, and the view will be erased.
Related guides on how to view message headers in Outlook.
How to Change View in Outlook to Default?
In case you accidentally change some settings in your Outlook and have trouble finding the option to change it back, you can just change everything back to the classic view.
Here’s how to change the view to default:
Using the Outlook App
- Open Outlook on your desktop.
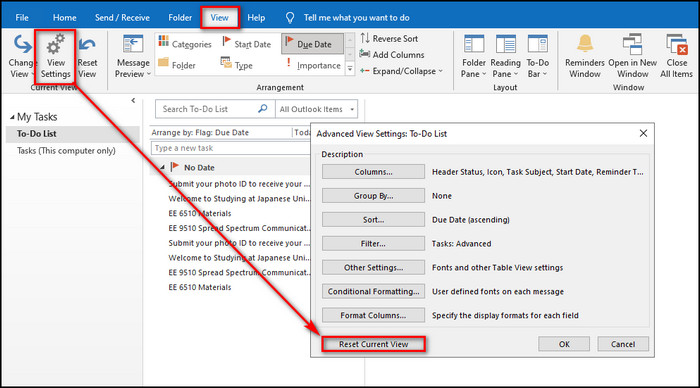
- Go to the View tab.
- Click View Settings from the toolbar, and the Advanced View Settings dialog box will appear.
- Select Reset Current View and click Yes to confirm the reset.
Using Windows Run Program
- Close the Outlook app.
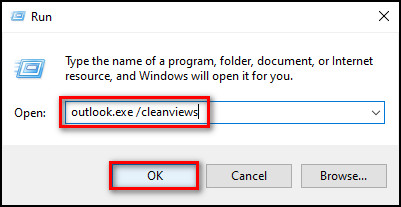
- Right-click on the Windows icon and select Run, or just press the Windows + R key to launch the Run program.
- Type outlook.exe /cleanviews and click OK.
After these steps, Outlook will launch again with the old familiar look on its face.
Related guide on how to disable Outlook deleting confirmation message.
FAQs
How do I get my outlook back to normal?
To change Outlook back to normal, press Windows+R, Type outlook.exe /cleanviews, click OK, and it will switch to the classic view.
How do I change the view of my emails in outlook?
To change the view in Outlook, select View > Change View > Manage View. Then choose the view you want and click OK.
Why has my Outlook email layout changed?
Your Outlook layout changed because you might’ve unknowingly changed something or someone else did. To change the layout back to default, press the Windows+R, Type outlook.exe /cleanviews, and click OK.
Final Thoughts
Thanks to Outlook, your customization capability is not limited to only modifying characters in video games anymore.
Outlook lets you change almost every single item and feature, from creating new views to changing the font family and size. I’ve covered everything that you can customize in this article.
Let me know if you have any questions regarding Outlook or other apps. See you in the comment section.