One of the old formats for distributing data on the Internet has remained in use, and that is ISO (International Organization for Standardization). Originally designed to hold compact discs and DVDs, it has also held onto other forms of media like flash drives.
While you need to install an application using the ISO image file, you need to mount the ISO file. You may also need to burn the ISO file to a DVD or USB flash drive. And need to unmount the file.

However, if you are looking for a complete step-by-step guide to mount, burn, create, and unmount the ISO image file in your Windows 11, you are in the right place. Here, I will round up all of these topics.
So, let’s get started without further ado.
How to Mount ISO Image File in Windows 11
Mounting is a process that converts the ISO image file to a virtual drive. Usually, an ISO file contains the application files, folders, and setup (.exe) files you need to install the application.
There are two methods you can mount the ISO files on your Windows 11. The first method is the Windows 11 built-in mounting feature, and another is using third-party tools.
But, in this section, I will also show you the Windows 11 built-in ISO image file mounting methods because there is no need to use third-party tools to mount the ISO file.
Here are the methods to mount an ISO image file on Windows 11:
1. Use Double-click
The first and the easiest method is to double-click on the ISO image file to mount the file on your Windows 11 PC.
Here are the steps to mount an ISO image file using the mouse double-click:
- Navigate to the location where your ISO image file is stored.
- Double-click on the ISO image file to mount the file.
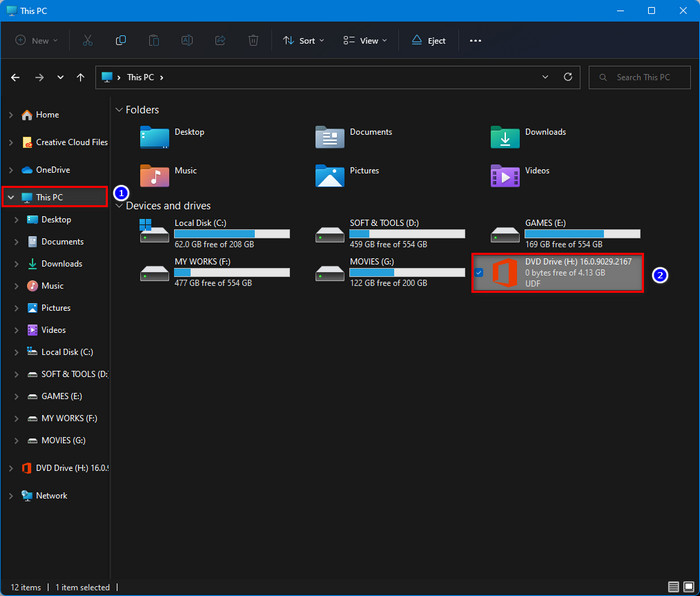
- After mounting the ISO file, a new virtual DVD drive is created based on your ISO image file name on This PC under the Devices and drives.
Also related: Delete Windows 11 File Explorer Address Bar History.
2. Use Windows Mount Feature
Using the Windows built-in Mount program on the context menu is another effective and straightforward method to mount the ISO image file.
Here are the steps to mount an ISO image file using the Mount option:
- Navigate to the location where your ISO image file is stored.
- Select and right-click on your ISO file to open the context menu.
- Choose the Mount option at the top of the context menu.

- After mounting the ISO file, a new virtual DVD drive is created based on your ISO image file name on This PC under the Devices and drives.
- Open the virtual DVD drive to get all the files and folders.
You may also like Enable or Disable Offline Files in Windows 11.
3. Use Windows File Explorer
Another most straightforward method to mount the ISO image file is using Windows Explorer on the context menu to mount the ISO image file on Windows 11.
Here are the steps to mount an ISO image file using Windows File Explorer:
- Navigate to the location where your ISO image file is stored.
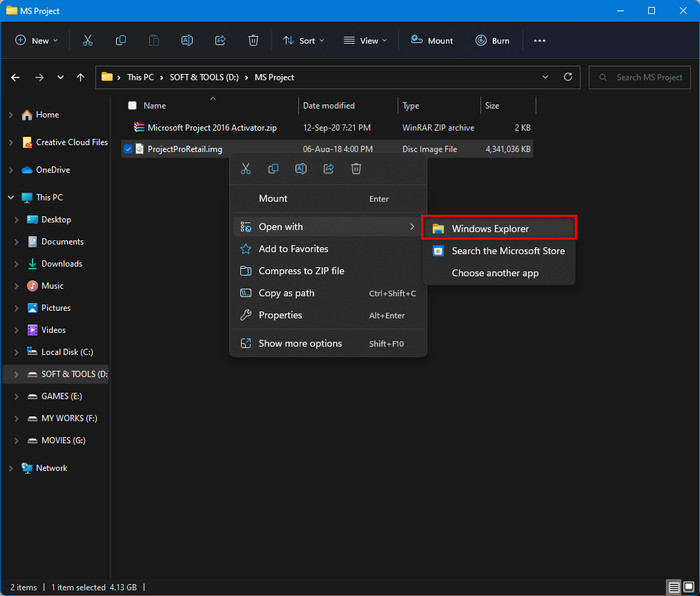
- Select and right-click on your ISO file to open the context menu.
- Navigate to Open with > Windows Explorer to mount the ISO file.
- After mounting the ISO file, a new virtual DVD drive is created based on your ISO image file name on This PC under the Devices and drives.
- Open the virtual DVD drive to get all the files and folders.
Also read, Taskbar Won’t Auto-Hide In Windows 11/10.
How to Burn ISO Image File in Windows 11
In Windows 11, you can directly burn the ISO image file on the context menu. You just need to insert a CD/DVD on your DVD drive, and you are ready to burn the ISO image file.
Burning ISO files is a straightforward process on Windows 11. Applying a few steps, you can burn your ISO image files without effort.
Here are the steps to burn an ISO image file on Windows 11:
- Navigate to the location where your IMG file is stored.
- Select and right-click on your ISO image file to open the context menu.
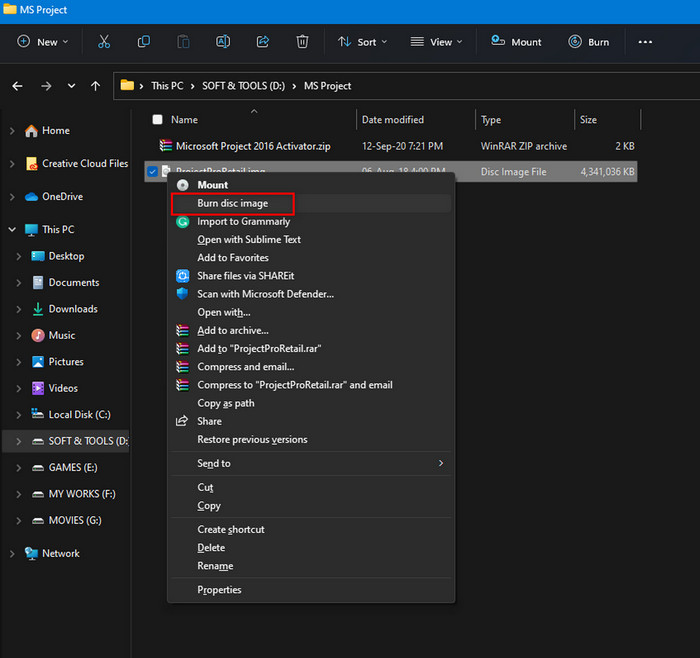
- Choose the Show more options at the bottom of the context menu to show more options in the context menu.
- Select the Burn disc image option at the top of the context menu to open the Windows Disc Image Burner window.
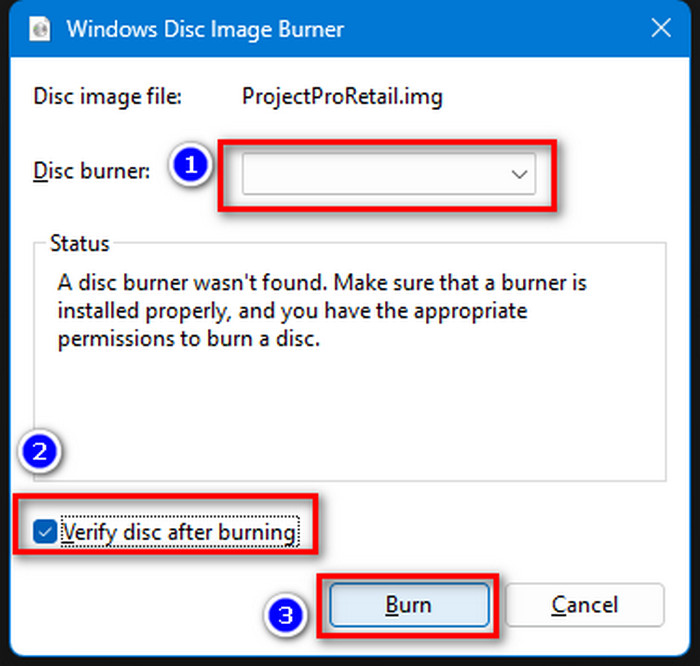
- Choose the DVD drive next to the Disc burner option where you want to burn your ISO files.
- Check Verify disc after burning checkbox (optional) and click on the Burn button to start the burning process.
- Wait until the process is finished. After completing the burning process, your selected DVD is turned into a disc image file.
Read more on how to Password Protect a File or Folder in Windows 11.
How to Burn ISO Image File to a USB Drive in Windows 11
Not only CD/DVD, but you can also burn the ISO image file to a USB drive on your Windows 11. You don’t need any third-party ISO management utility to burn ISO files to a USB drive.
Following a simple trick, you can burn your ISO files to a USB drive. Let’s see how to do this.
Here are the steps to burn an ISO image file to a USB drive on Windows 11:
- Mount the ISO image file or open the ISO file using Windows File Explorer.
- Select all the files by pressing Windows+A on your keyboard.
- Right-click on it to open the context menu.
- Select Send to and choose your USB drive to paste the copied files.
- Now your ISO file is successfully burned to a USB drive.
How to Unmount ISO Image File in Windows 11
If you don’t need the mounted ISO file after installing or using the file, then you can unmount the ISO virtual drive at any time.
Microsoft Windows allows you to unmount the drive by default on the system. So, you don’t need to download and install any third-party tool to unmount the ISO drive on your Windows 11.
Here are the steps to unmount the ISO file on Windows 11:
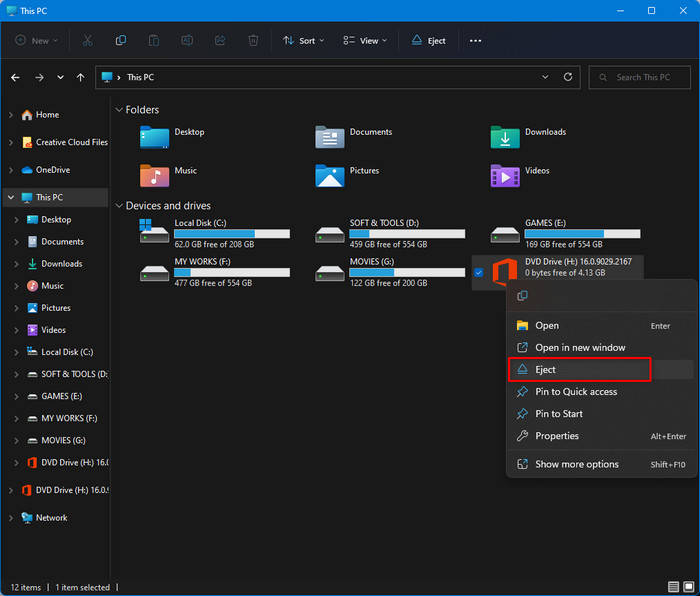
- Select your mount DVD drive.
- Right-click on it to open the context menu.
- Choose Eject to unmount the ISO file.
How to Convert Files and Folders to ISO on Windows 11/10
Converting files and folders to ISO on Windows 11/10 is easy. Using some third-party ISO management utilities, you can easily convert files and folders to ISO files.
Sadly, Microsoft does not offer any feature on Windows to convert files and folders to ISO. So, you need to use some third-party ISO management tools on your Windows 11/10. For this instance, you can use the AnyToISO ISO management tool.
AnyToISO is a free and popular ISO management tool that helps you easily create ISO files from folders or CD/DVD. The interface of this tool is simple and easy to use.
This tool supports the Windows Explorer shell extension and adds the Create ISO option in the Windows Explorer context menu. Okay, let’s see how the AnyToISO tool works.
Here are the methods to convert files and folders to ISO on Windows 11/10 using the AnyToISO tool:
1. Run & Use AnyToISO Program Itself
Here are the steps to convert files and folders to ISO using the AnyToISO tool:
- Download the AnyToISO tool from the official site.
- Install AnyToISO by following the on-screen instructions.
- Run the AnyToISO tool on your computer.
- Select the Folder to ISO tab at the top right-side screen.
- Click on the Browse for folder to select the source file or folder you want to convert to the ISO file.
- After selecting the file or folder, the AnyToISO tool will automatically fill the other fields with details. Note that you can change the destination of the ISO file and the file name.
- Click on Make ISO to start the processing and wait until the process is finished.
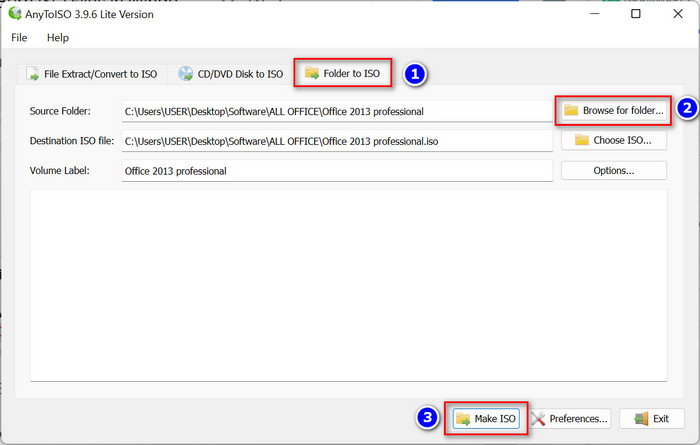
- After completing the process go to your destination folder to get the ISO file.
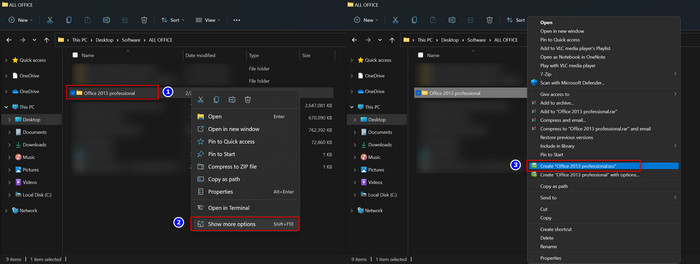
Here are the steps to convert files and folders to ISO using the context menu:
- Select and right-click on your file or folder to open the file context menu.
- Choose the Show more options at the bottom of the context menu to show more options in the context menu.
- Select the Create ISO option at the bottom of the context menu to create the ISO file.
Note that you can use other third-party ISO management tools such as ImgBurn, AnyBurn, WinCDEmu, ISO Workshop, etc., to convert files and folders to ISO on Windows 11/10.
Frequently Asked Questions (FAQs)
How do I burn an ISO in Windows 11?
To burn an ISO image file in Windows 11, select your ISO image file, press Shift+F10 on your keyboard, and choose the Burn disc image option on the file context menu. Then follow the on-screen instructions to start the ISO image file burning process.
How do I mount an ISO image file on Windows 11?
To mount an ISO image file on Windows 11, double-click on the ISO image file. Alternatively, select your ISO image file, right-click on it and choose the Mount option.
Why can’t I mount ISO on Windows 11?
If you are trying to mount a usual .iso archive file, then you can’t mount the file. You can only mount the Disk Image File (.iso/.img) on Windows 11.
How do I install IMG files on Windows 11?
To install the IMG files on your Windows 11 computer, first, you need to mount the IMG file by double-clicking on the IMG file. After mounting the IMG file, open the virtual DVD drive, and here you get all the necessary application installation setup files and folder.
How do I create ISO files on Windows 11/10?
To create the ISO files, you need to use the third-party ISO management tool, for example, AnyToISO, ImgBurn, AnyBurn, WinCDEmu, or ISO Workshop on Windows 11/10.
Final Words
All the files and programs required to run software are included in an ISO file, often known as an image. Physical disks, such as CDs and DVDs, are no longer needed to install programs; instead, ISO images take their place.
Windows 11 allows you to mount the ISO image format to a virtual disk and view all the data. So, you no longer need to download and utilize third-party apps to read an ISO image or generate installation flash drives. You can also burn the files to a DVD or USB flash drive.
For now, that is all. Until the next one, take care.