Microsoft launched a PC Health Check application alongside Windows 11 to check the compatibility of installing or upgrading with Windows 11.
But, while users try to check the Windows 11 system compatibility using the PC Health Check app, it throws a message: Your organization manages updates on this PC. This message means you are using a restricted organization account or PC.
However, if your PC is not connected with an organization account, don’t worry about that. Some quick fixes help you to solve the issue.
Here I will show you a couple of tested and proven methods you can apply to fix the issue within a few minutes. Sounds crazy, right?
Let’s get started without further ado.
Also, check out our separate post on unexpected Zip file error on windows.
Why does Your organization manage updates on this PC Error Occur?
Your organization manages updates on this PC error occurs due to using an organization, school, or work account on your system that is restricted. Your administrator rights are restricted to upgrading your PC to Windows 11 using the administrator account.
This error occurs even though you use a Microsoft Family account and parental control is set as a system administrator.
On the other hand, if you use a local or personal account and PC, you may encounter the same issue though it’s not expected.
Surprisingly, some users reported that the PC Health Check application shows an error message indicating users are using a restricted organizational account. You need permission to upgrade any changes,
In the next section, I will provide some adequate solutions to help you resolve the issue. So, let’s jump into the next section.
Also, installing Windows 11 upgrade assistant on your computer reduces the download and installation time, especially if you are updating from Windows 10.
How to Fix Your organization manages updates on this PC Error on Windows 11
Microsoft specifies some minimum system requirements to install or upgrade to Windows 11. To install Windows 11, your PC must meet these requirements. Without meeting Windows 11 hardware requirements, you can’t upgrade to Windows 11.
For this instance, you need to check the system compatibility to meet Windows 11 requirements using the PC Health Check application.
However, if you are connected to a local or personal account and get the same error on your Windows 11/10 PC while using the PC Health Check application, don’t panic. I will come up with some solutions for you to eliminate this issue.
Let’s see how the solutions work.
Check out the easiest way to Create RDP Shortcut Icon on Windows 10.
Here are the steps to fix your organization’s manages updates on this PC error:
1. Disconnect the School or Work account
If you are connected to a school or work account on your system, you need to remove the account to fix the error issue.
Here are the steps to disconnect your school or work account:
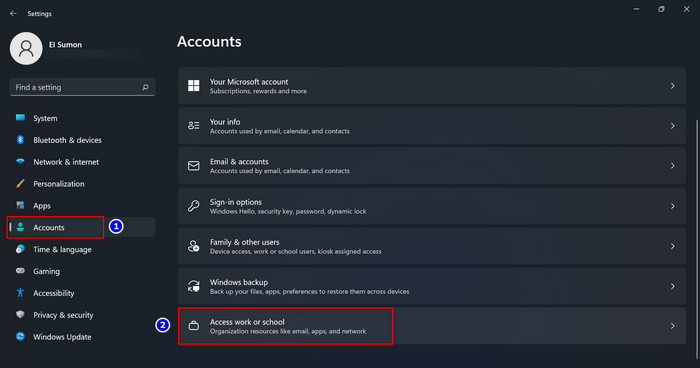
- Open the Windows Settings app by pressing Windows+I keys on your keyboard.
- Select the Account menu on the left-side pane.
- Select the Access work or school tab.
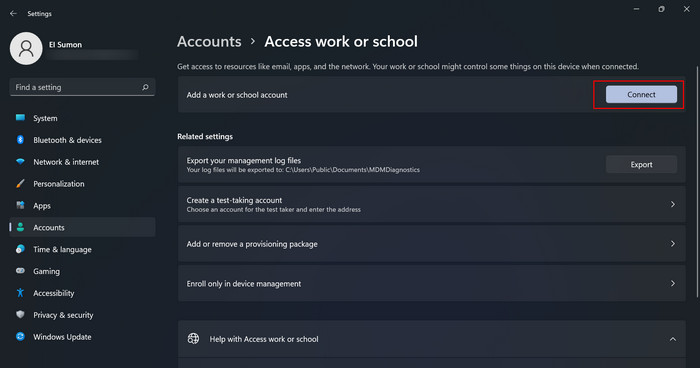
- Click the Disconnect button next to the Add work or school account to unlink the account.
- Restart your PC and open the PC Health Check app to ensure that your problem is solved. If the problem persists, follow the next solutions.
2. Use an Administrator Account
The first solution you should consider to fix the error issue is to make sure you use an Administrator account. Using an Administrator account primarily helps you to solve your problem.
Follow the steps below to check whether you are an administrator or not.
Here are the steps to check the Administrator account:
- Open the Windows Settings app by pressing Windows+I keys on your keyboard.
- Select the Account tab.
- Under your account name and email, you can see the account role on your PC. The role must mention to the Administrator.
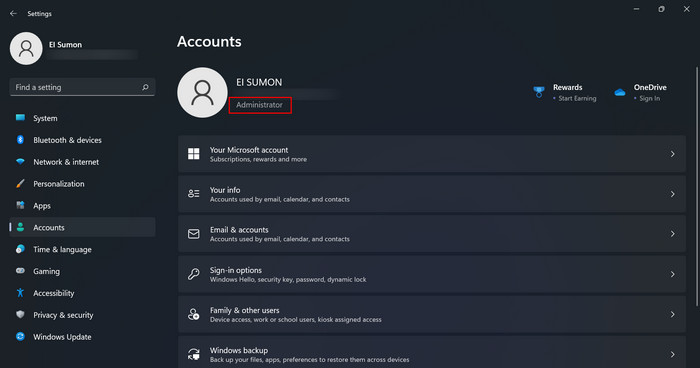
- If the role is not Administrator, contact your system administrator to get account credentials or upgrade your account to an administrator.
Check our exclusive tutorial on how to Fix Blue Screen on Windows 11.
3. Edit Windows Registry Editor
Another effective method to solve the issue is to edit the Windows Registry Editor. Editing Windows Registry Editor can help you to eliminate the error.
Here are the steps to edit the Windows Registry Editor:
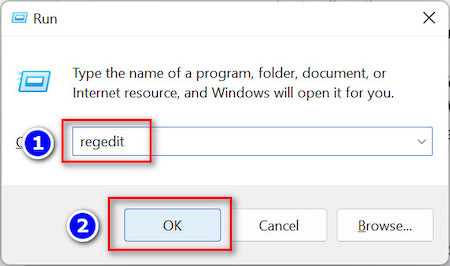
- Open the Windows Run program by pressing Win+R.
- Type regedit and hit Enter or click on OK to open the Windows Registry Editor.
- Navigate the following path. You can copy and paste the path into the address bar to navigate directly.

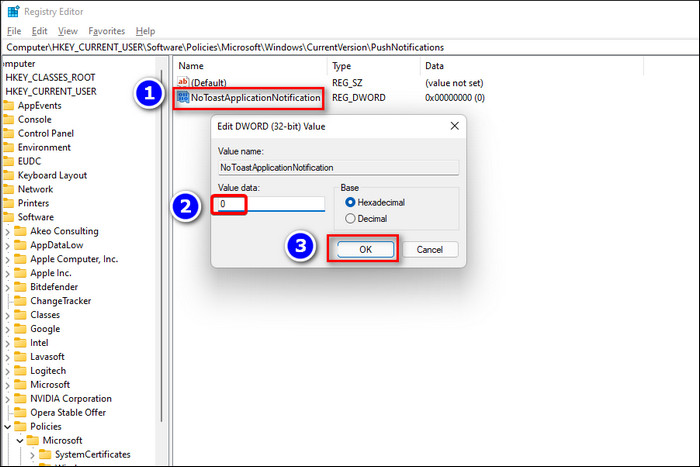
- Computer\HKEY_CURRENT_USER\Software\Policies\Microsoft\Windows\CurrentVersion\PushNotifications
- Double-click on the NoToastApplicationNotification file to open the edit window.
- Enter the value 0 in the Value data field and click OK to save the change.
- Reboot your computer and check whether your problem is solved.
4. Change Group Policy Editor Settings
You can also try to change the Group Policy Editor settings to resolve your error issue on your Windows 10/11 computer.
Here are the steps to change the Group Policy Editor settings:
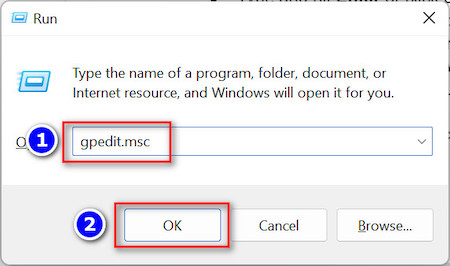
- Open the Windows Run program by pressing Win+R.
- Type gpedit.msc and hit Enter or click on OK to open the Group Policy Editor.
- Navigate the following path:

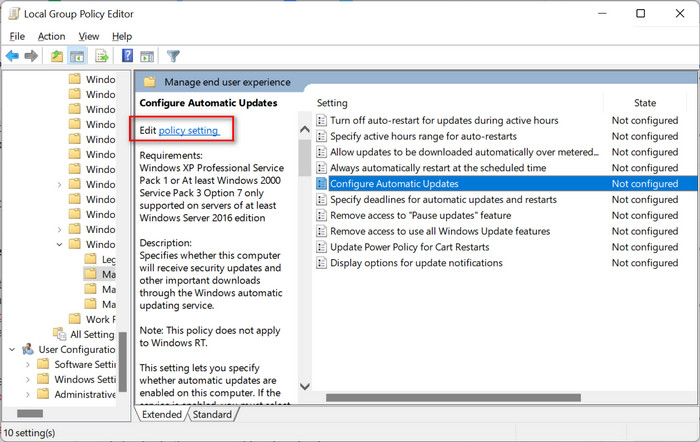
- Computer Configuration/Administrative Templates/ Windows Components/ Windows Update/ Manage end user experience
- Double-click on the Configure Automatic Updates to edit policy settings.
- Select Not Configured, click Apply, and OK to save the changes.
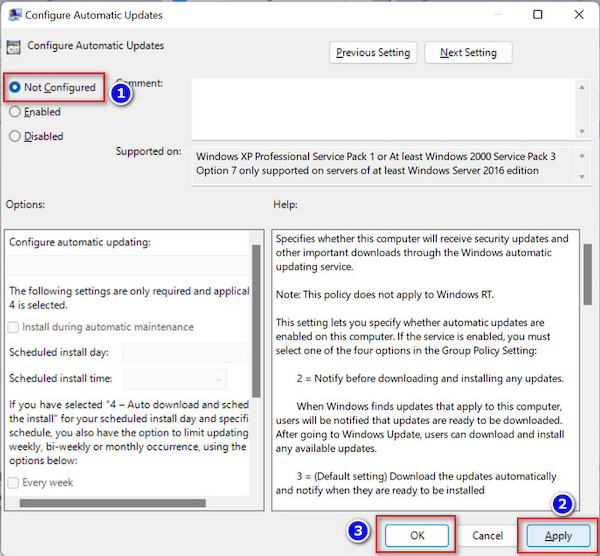
- Restart your computer and check whether your problem is solved.
Have some time to spare? Check out our latest fix for Bluetooth Toggle Missing On Windows 11.
5. Change Diagnostic Data Settings
Changing the Diagnostic Data Settings can help you to fix the error. So, try to change your Diagnostic Data Settings to see whether it works.
Here are the steps to change Diagnostic Data Settings:
- Open the Windows Settings app by pressing Windows+I keys on your keyboard.
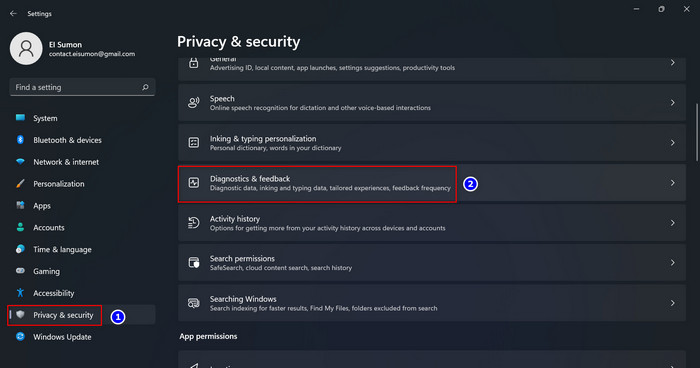
- Select the Privacy & Security menu on the left-side menu bar.
- Choose the Diagnostics & feedback option on the right-side window.
- Toggle on the switch next to the Diagnostic data.
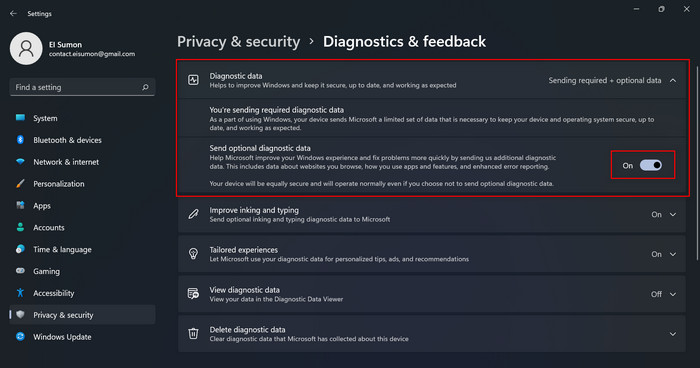
- Restart your computer and check to see if your problem is solved.
6. Enable Telemetry
You can also enable the Telemetry service on your Windows 11/10 computer. Allowing the telemetry from the Windows Services can help resolve your issue.
Here are the steps to enable the Telemetry on Windows Services:
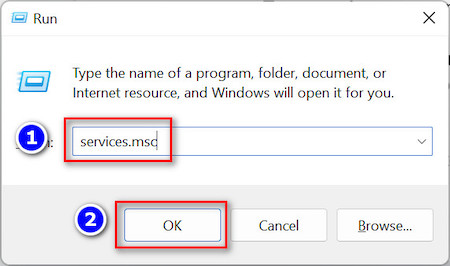
- Open the Windows Run program by pressing the Win+R keys on your keyboard.
- Type msc and hit Enter or click on OK to open the Windows Services.
- Find the Connected user experience and telemetry service and double-click on it to open the service properties window.
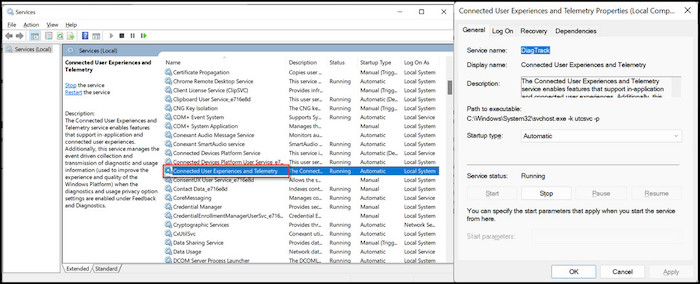
- Open the drop-down menu next to the Startup type and choose Automatic.
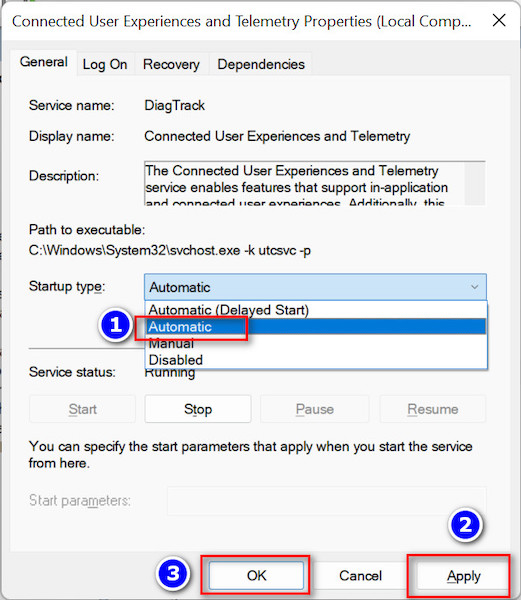
- Click Apply then OK to save the changes.
Frequently Asked Questions (FAQs)
How do I fix my Organization manages updates on this PC?
To fix your organization, manage updates on this PC issue, remove your organization account, or use a local account and set up as an administrator. You can modify some settings in the Registry Editor and Group Policy Editor. Also, change the Diagnostic Data setting from the System Settings app.
How do I turn off manage by your organization on this PC error in Windows 11/10?
To turn off your organization’s management on this PC error in Windows 11/10, you need to remove your organization account or use a local account and set up as an administrator. You can also modify some settings in the Registry Editor and Group Policy Editor.
How do I remove the Windows updates managed by my organization?
To remove the Windows updates managed by your organization, set up a personal/local account as an administrator or remove your organization account from your device.
Bottom Line
On Windows 10/11, while users check Windows health using the PC Health Check application, the application throws an error that shows you can’t update the Windows on your PC without administrator permission.
Due to restricted access, the error occurs on your system. Sometimes, the issue occurs when you use a personal or local account. If you use an organization account, remove the account to fix the issue. Also, follow the advanced methods I mentioned. Applying these effective and quick fixes lets you eliminate the problem within minutes.
Alright, that’s all for now. I hope this post helps solve your issue. As usual, check out our other articles for more information and details.
Good Bye! Until next time.