In the modern age, the internet has become a daily necessity. The Internet is deeply involved in our daily lives. The closer we get to technology, the more we use the Internet.
However, the main concern is when your Wi-Fi connection is not working on your computer. Some Windows 11 users reported that the Wi-Fi option has disappeared and is not working on Windows 11, creating a frustrating circumstance.
If you encounter the same issue, don’t worry about that. You have landed in the right place.
In this post, I will walk you through some proven and tested methods to fix your Wi-Fi not working, or the Wi-Fi option disappeared on Windows 11. I will also explain why the issue occurred on your Windows 11 computer.
So, let’s get started without further ado.
Why Does the Wi-Fi Option Not Show on Windows 11?
Windows 11 does not show the Wi-Fi option in the System Settings due to corrupted WiFi drivers, disabled WiFi adapters, or misconfigured Wi-Fi settings on your computer. Also, changes in Group Policy Editor or Outdated Windows versions are occurring.
Occurring the Wi-Fi connection not working issue is usually a common issue for Windows 11 users. Due to some technical reasons, the problem that I mentioned earlier. So, now I will discuss these reasons one by one.
Let’s check them out.
Here are the reasons for the Wi-Fi option not showing on Windows 11:
Corrupted & Outdated Wi-Fi Drivers
Corrupted and outdated Wi-Fi drivers are a primary reason for the disappearing Wi-Fi option and not working issue. When your drivers are outdated and corrupted, the drivers are not compatible with the Wi-Fi adapters, creating the problem.
Check our exclusive tutorial on Oculus Quest 2 Not Connecting to Wi-Fi.
Disabled Wi-Fi Adapters
Disabled WiFI adapters are another leading cause of the issue to your Windows 11 PC. If your WiFI adapters are disabled, the WiFi is entirely stopped from functioning.
Misconfigured Settings
If your WiFi settings are misconfigured on your Windows 11 computer, then the WiFi feature is not functioning correctly. As a result, the WiFi is not working or disappears.
Changes In Group Policy Editor
Modifying the WiFi settings from the Group Policy Editor can create the issue. If you are changing WiFI settings, the system can conflict with the Wi-Fi, resulting in your WiFi option disappearing and not functioning.
Outdated Windows
Outdated Windows is another significant reason for WiFi not working and disappearing from the Settings on Windows 11. While the system is obsolete, bugs or glitches may corrupt your system file. And the bugs/glitches conflict with the system file, which creates the issue.
Also, check out our separate post on how to Fix Discord Not Working on Wi-Fi.
How to Fix Wi-Fi Option Not Showing on Windows 11
The Internet is used everywhere in our workplace, home, and outside. In this age of modern technology, it is impossible to imagine a moment without the Internet.
On Windows 11, users encounter Wi-Fi disappearing from Windows settings and not working. You already know the reasons for the issue on your Windows 11 computer. So, now it’s time to fix the problem.
Let’s dive right in to know the solutions to WiFi disappearing and not working on your PC.
Note: If your network adapter is not working on your Windows 11 computer, you can also apply the following fixes to resolve your problem.
Here are the steps to fix the Wi-Fi option not showing on Windows 11:
1. Run the Network Adapter Troubleshooter
The first and most effective way to resolve any system issue is to troubleshoot based on your specific problem.
When you encounter the WiFI option missing and not working on your system, try running the Network Adapter Troubleshooter to fix your problem effortlessly. Running troubleshooting on your system helps you to resolve your case automatically.
Related content you should read: Fix Play Store Not Working on WiFi.
Here are the steps to run the Network Adapter Troubleshooter on Windows 11:
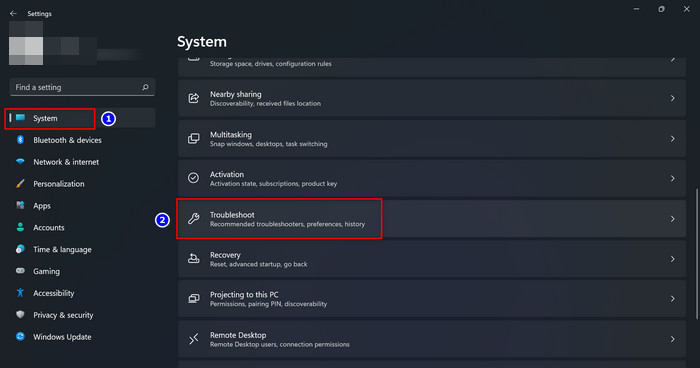
- Open the Windows System Settings app and go to System > Troubleshoot.
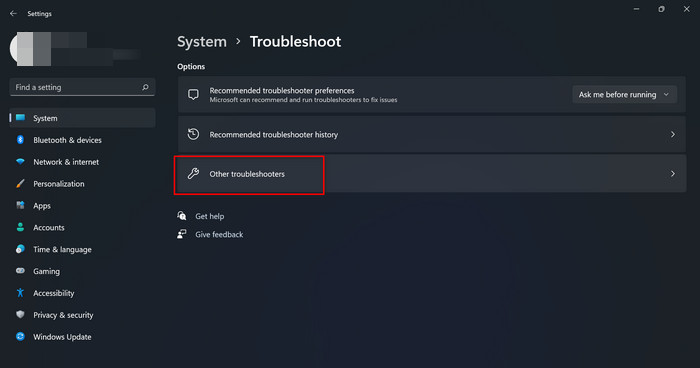
- Select the Other troubleshooters under the Options section.
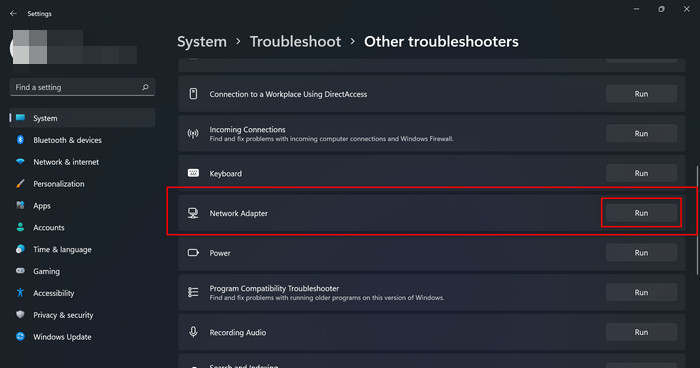
- Scroll down and find the Network Adapter troubleshooter under the Other section.
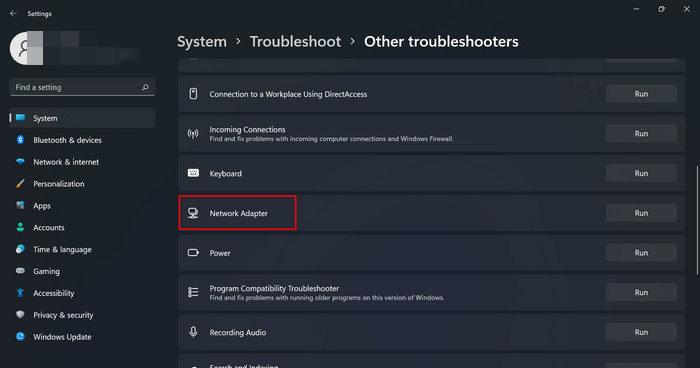
- Click on the Run next to the Network Adapter troubleshooter.
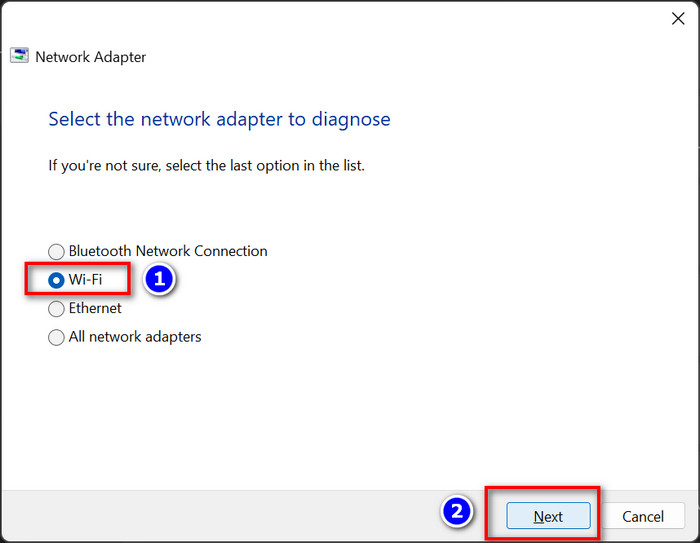
- Choose the Wi-Fi network adapter option to diagnose and click on the Next.
- Wait a few seconds to complete the diagnosis process.
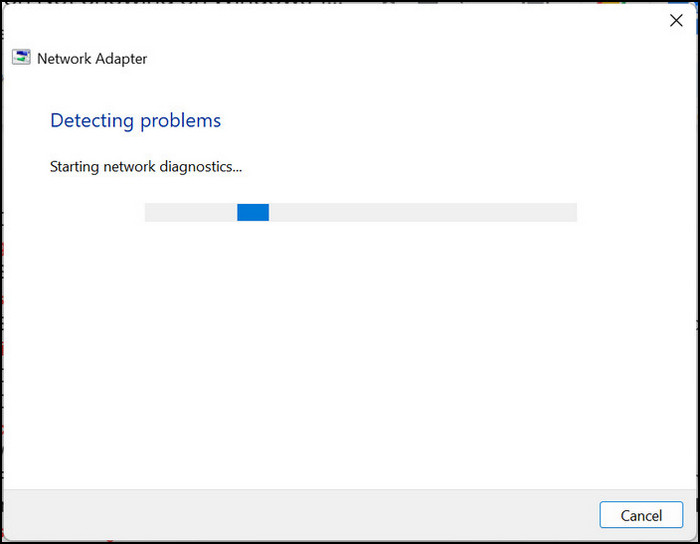
- Follow the on-screen instructions if the troubleshooter detects any problem. If not, the troubleshooter shows the message: Troubleshooter couldn’t identify the problem.
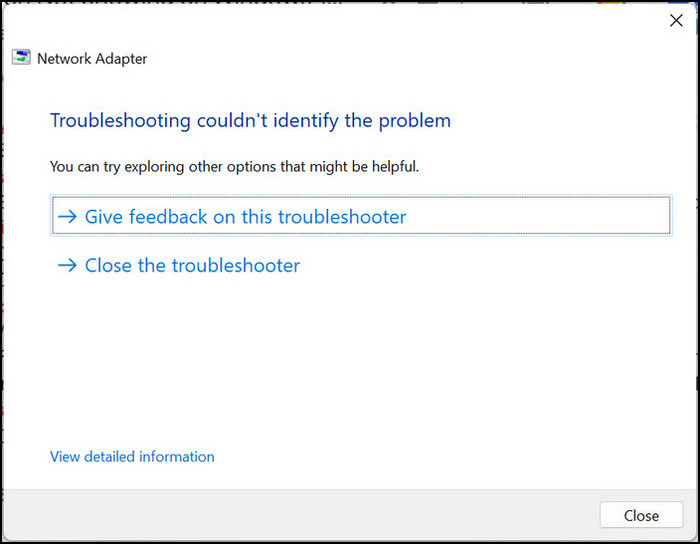
- Close the troubleshooter and check whether your WI-Fi problem is solved. If not, follow the next solutions.
Follow our guide to know Does Wifi Consume More Battery than 3G or 4G LTE.
2. Make Sure Airplane Mode is Disabled
If your Airplane Mode is enabled, the Wi-Fi option disappears, and the WiFi is not working correctly on your Windows 11 PC. So, ensure your Airplane Mode is disabled on your system.
Here are the steps to make sure Airplane Mode is disabled:
- Open Windows System Settings by pressing Win+I keys on your keyboard.
- Select the Network and Internet tab on the left-side menu panel.
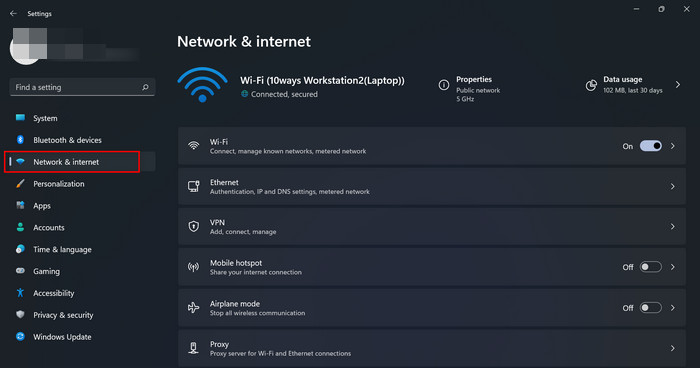
- Check whether the toggle switch is on or off next to the Airplane mode.

- If the toggle switch is on, then the Airplane mode is enabled. Turn off the toggle switch to disable the Airplane mode.
3. Make sure the Wi-Fi adapter is Enabled
Another effective method to fix the WiFi option missing from the Settings and not working on your Windows 11 computer is to enable your WiFi adapter if it is disabled.
If your WiFi adapter is disabled, your WiFi is not working and disappears from the Settings. So, enable the Wi-Fi adapter to resolve the issue. Follow the steps below to do it.
Here are the steps to make sure the WiFi adapter is enabled:
- Open the Windows Search panel by pressing the Win+S keys or clicking on the Search icon on the taskbar.
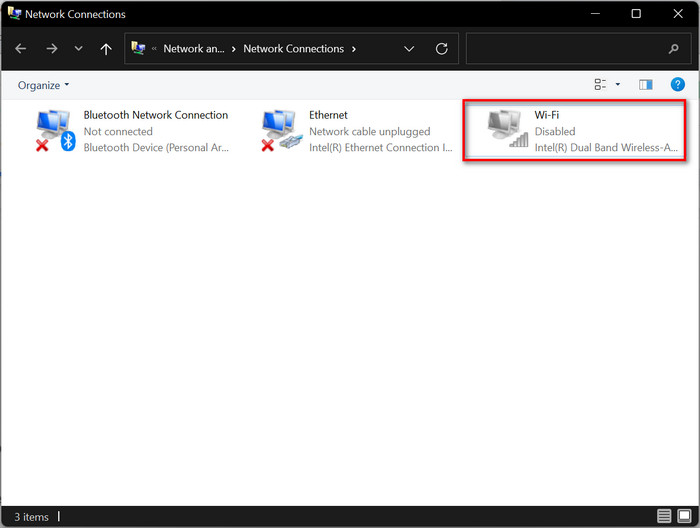
- Type View network connections and hit Enter to open the Network Connections window.

- Check whether the WiFi adapter is disabled or not. If the WiFi adapter icon is grayed out, the WiFi adapter is disabled.
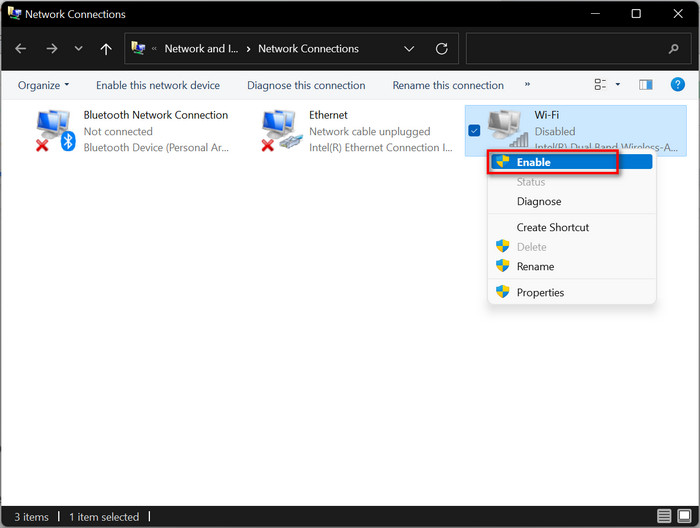
- Right-click on the Wi-Fi adapter and select Enable option to turn on the Wi-Fi adapter.
4. Update the Wi-Fi Driver
You can try to update your Wi-Fi drivers to fix your WiFi option missing and not working problem on your Windows 11 PC. Let’s see how to update the WiFi drivers.
Here are the steps to update the Wi-Fi drivers:
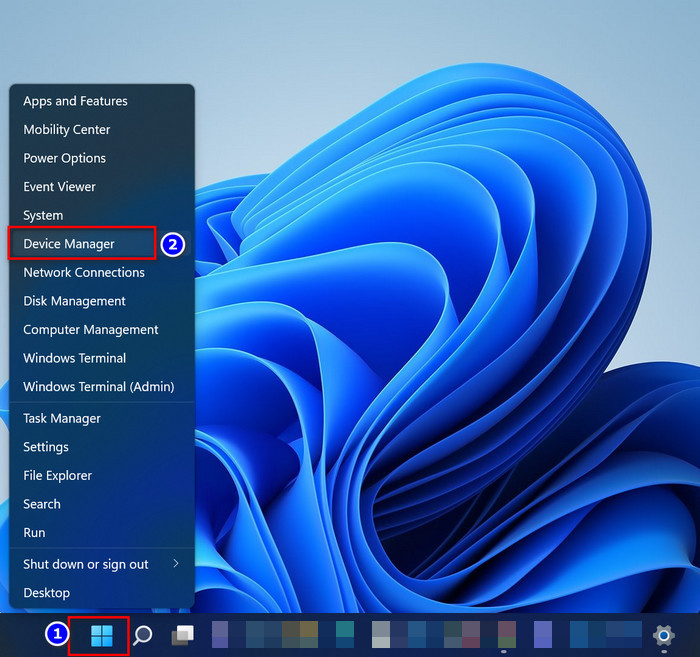
- Right–click on the Start Menu (Windows icon) on the taskbar and select the Device Manager.
- Expand the Network adapters option to view the available list of devices.
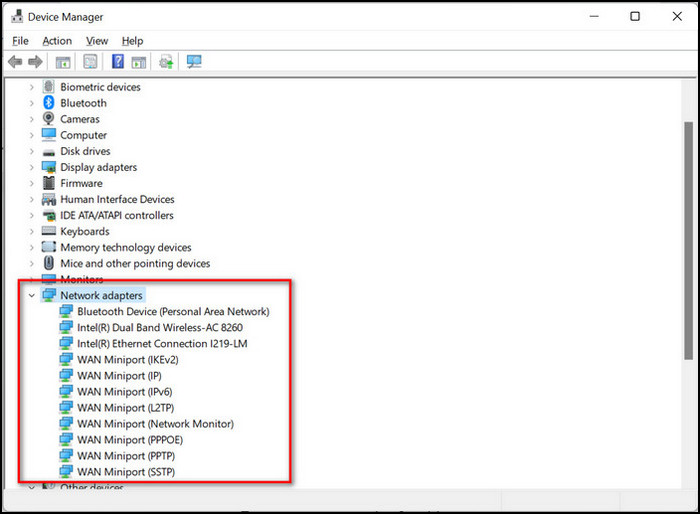
- Double click on your WiFi adapter to open the driver properties window.
- Select the Driver tab and click on the Update Driver.
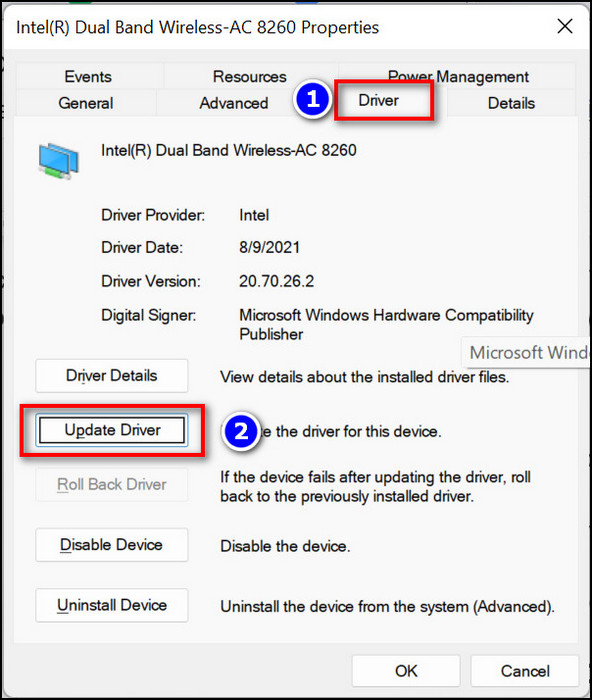
- Select one of the following options to update your WiFi driver:
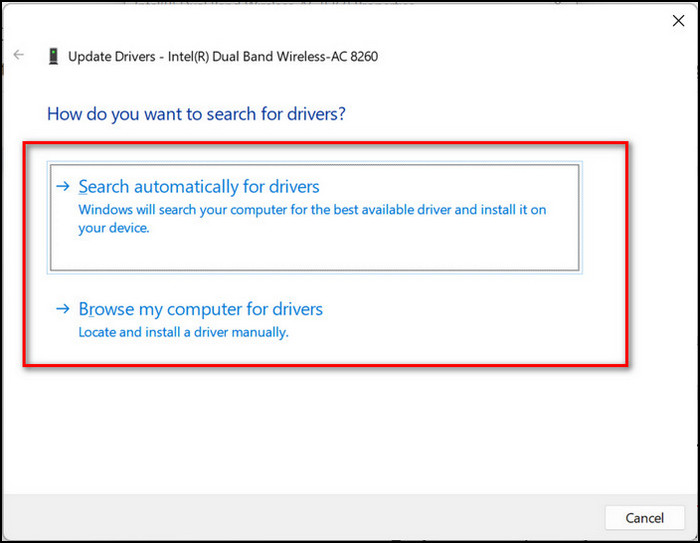
- Search automatically for drivers.
- Browse my computer for drivers.
- Follow the on-screen instructions to complete the update process.
- Check to see whether your problem is solved. If not, try to follow the next solution.
5. Reinstall the Wi-Fi Driver
If updating your Wi-Fi drivers doesn’t fix your WiFi option missing and not working on your Windows 11 PC, let’s try to reinstall the WiFi drivers.
Reinstalling the Wi-Fi drivers helps you remove the corrupted driver’s files and recreate the new fresh files that help you resolve your Wi-Fi problem.
Here are the steps to reinstall the Wi-Fi drivers:
- Right–click on the Start Menu (Windows icon) on the taskbar and select the Device Manager.
- Expand the Network adapters option to view the available list of devices.
- Double click on your WiFi adapter to open the driver properties window.
- Select the Driver tab and click on the Uninstall Device.
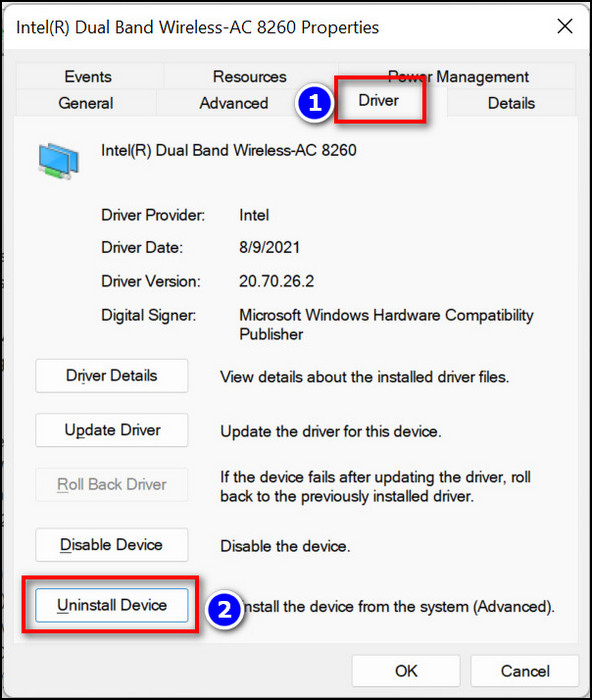
- Follow the on-screen instructions to complete the uninstallation process.
- Restart your computer to reinstall the driver automatically.
- Check to see whether your problem is solved.
6. Reset your Network
Resetting your Network is another effective and tested method to fix the Wi-Fi option missing and not working on your Windows 11 computer.
Here are the steps to reset your Network:
- Open Windows System Settings by pressing Win+I keys.
- Go to Network & Internet > Advanced network settings > Network Reset.
- Click on the Reset now next to the Network reset.
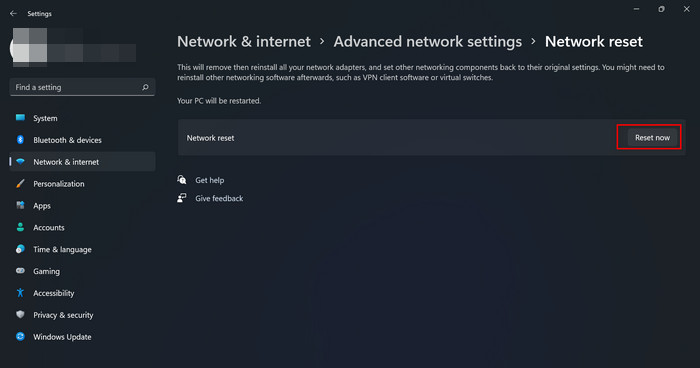
It will remove, reinstall all your network adapters, and set other networking components back to their original settings. You might need to reinstall other networking software, such as VPN clients or virtual switches.
7. Update Windows
If any method doesn’t help you solve your problem, update your current Windows version to the latest version. Updating the latest Windows version helps you fix all your Wi-FI-related issues.
Here are the steps to update your Windows 11:
- Open Windows System Settings by pressing Win+I keys.
- Select the Windows Update tab on the right-side panel and click on the Check for updates.
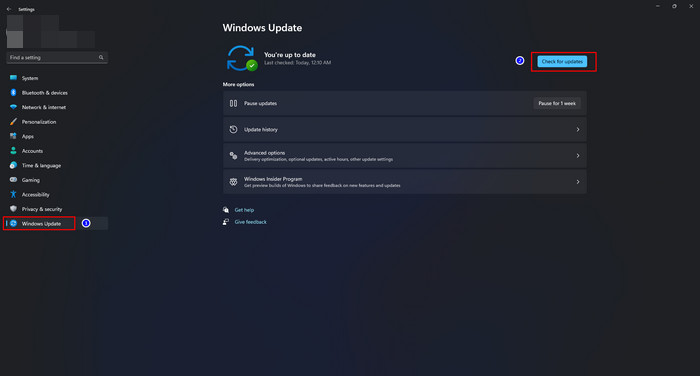
- The system starts to check whether the latest update is available or not. If available, the system will automatically begin to download the newest update.
- Click on the Install button after finishing the download. During the installation process, you may ask to restart your computer. Do it.
- Check your Wi-Fi option to ensure your problem is fixed after completing the Windows update.
Final Thoughts
Encountering the Wi-Fi option missing and not working on your Windows 11 computer is a big issue for users constantly working on the internet. But fixing the problem is not a big deal.
Following the seven proven and tested methods described in this post will help you resolve your missing and not working Wi-Fi problem within a few minutes. Apply these methods one by one until your issue is resolved.
That’s all for today, folks. I hope you enjoyed this post. If you have any questions, let me comment below.
Good Bye! Until next time.