It has been a while since Microsoft released their new Windows version, Windows 11. Since it did not require an activation key for Windows 10 users to upgrade from, many users upgraded to Windows 11. It s not surprising that the users loved the new version, unlike Windows 8.
Despite working very well, Windows 11 had some bugs, and it is to be anticipated. Throughout the course of time, Microsoft released updates for these bug fixes. But the problem many users faced is that they could not update their Windows and constantly faced updates failed, or updates got stuck at a certain point.
I had been in that place a few days ago when there was a new update for my Windows 11. SO I scoured over the internet for the best possible solutions, and in the end, I was able to fix the problem.
So if you are also in my shoes right now, don’t sweat a bit, as I will explain every workable solution in detail in this article. There are quite some fixes, so make sure you read from beginning to the end to find which one works for your PC.
Why did Windows 11 Fail to Update?
There are quite some reasons for Windows 11 to fail to update, and reasons may vary from one computer to another. But the fundamental issues for this to occur are very close to the reasons I will talk about here.
Here are the reasons why Windows 11 failed to update:
- Poor internet connection is one of the most faced problems for users around the globe as Windows does need a stable internet connection for downloading and installing the updates.
- If your computer does not have enough space to download and work on the update, then the updating may come to a pause or just fail in general.
- Corrupted download files may cause the issue to rise too. For having a poor connection, your PC may have downloaded a file, and it got corrupted or damaged, resulting in failing the update.
- Sometimes third-party antiviruses mistakenly register new update files as malware and prevent the updates from installing.
Now the reasons are out of the way, let’s get our attention towards the solutions to the problem.
Follow our guide on how to Fix Update Error Code 0x80004005 in Windows 11.
How to Fix Windows 11 Update Failed
I have gathered several working fixes for the problem at hand. So do keep patience and try one at a time to look apply fixes and look which one works for you.
Solution 1. Use Windows Update Troubleshooter
There is a built-in update troubleshooter for checking potential causes and fixing them in Windows. So starting from the easiest fix may help you save some hassle.
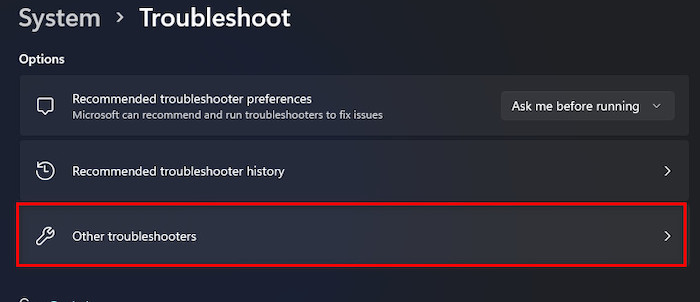
Here are the steps to use Windows update troubleshooter to fix the problem:
- Press the Windows key and click on Settings
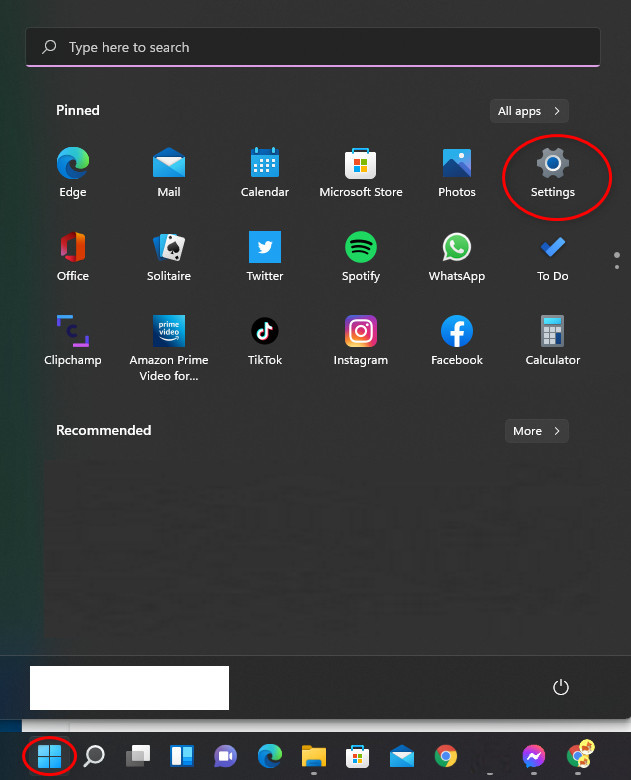
- Head over to System, then Troubleshoot.
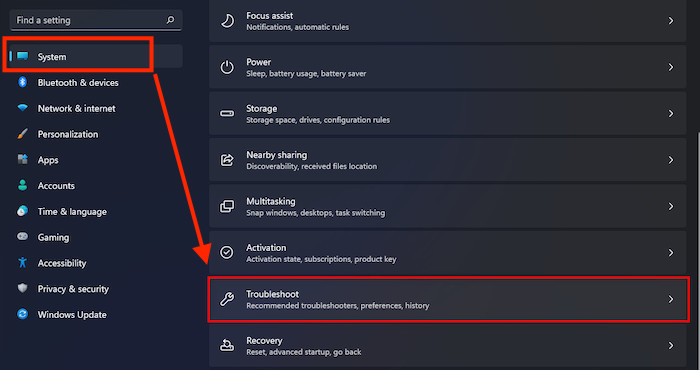
- Select Other Troubleshooters.
- Find Windows Update, among other troubleshooters.
- Hit the Run button to start the update troubleshooter.
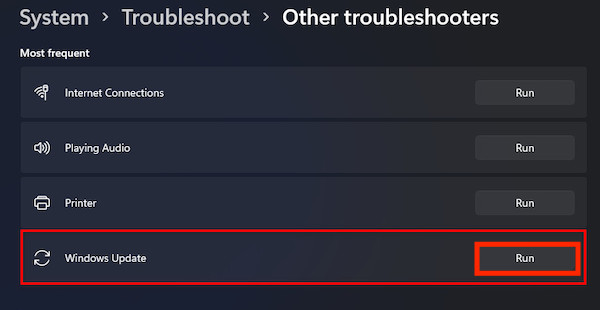
- Wait as the program will automatically scan for problems around windows update service status, corrupted update files, etc., and fix the issues.
After troubleshooting is done, it will notify you and hopefully fix the problem at hand.
Read more on how to Fix Windows 10/11 Update Error 0x80d02002.
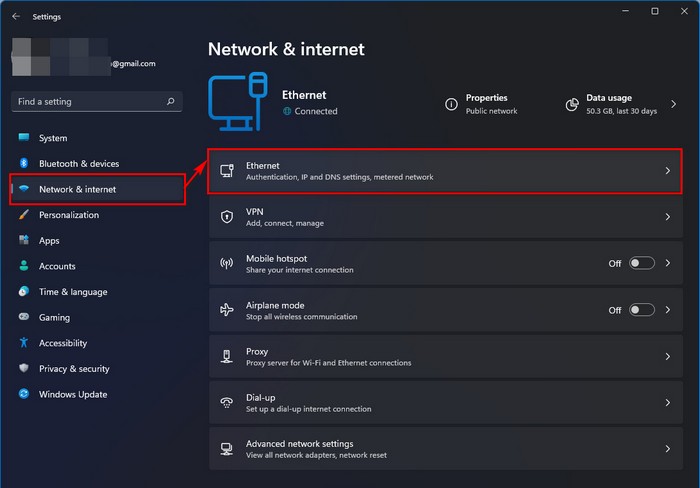
Solution 2. Check Your Internet Connection And Storage
Windows need a stable internet connection for downloading and updating the files, and on top of that, storage is most important to keep in mind as if the computer cannot store the updated files, it will not be able to apply them in the first place.
Some users did not have a stable internet connection. As a result, their update got stuck at a point. There have been reports that the update files were corrupted because of poor internet connection, and Windows could not install the updates. So make sure you have a good internet connection while updating your Windows 11.
Keep free space in your C drive as the update is at first downloaded there. If you don’t have free storage, then updates may not work correctly and get stuck, resulting in failing the update. So make sure to clean and make enough room for the updates to download and later on for installation.
Note: Sometimes, the problem may persist after fixing the internet and freeing up storage. So make sure you have restarted your computer after fixing the internet and storage issue and then updating.
Here’s a complete guide on how to use Windows 11 installation assistant.
Solution 3. Delete Windows Update Cache
Corrupted or damaged caches do interfere with the updates. So clearing the update caches will sometimes help you out. Do not get scared deleting these caches as they are automatically generated again when you update the Windows again.
Running the Update troubleshooter generally deletes the update caches, but if it does not, then you may have to delete those manually.
Here are the steps to delete Windows update caches:
- Restart the computer and launch it in Safe Mode.
- Go to your file explorer and head over to the C:\Windows\SoftwareDistribution\Download directory.
- Select all of the folders and files in the Download folder.
- Delete these folders and files in order to clear the update cache.
- Restart your computer.
- Press the Windows button and go to Settings.
- Navigate to Windows Updates and click on Check o updates.
Now, when Windows automatically checks for updates, it will restore the update cache files itself. Now you should see the updates are downloading and installing just fine.
Check out our epic guide on how to Fix Secure Boot Error to Update to Windows 11.
Solution 4. Run Windows in Clean Boot State
When running your PC in Clean Boot State, it runs only a few selected drivers and programs. If any programs or defective drivers are preventing Windows from installing new updates, then there should not be any problems installing them.
Here are the steps to run Windows in a clean boot state and run the update:
- Press the Windows key and search for System Configuration.
- Go to the General section.
- Select Selective Startup from Normal Startup.
- Uncheck the box beside Load Startup items, check the boxes beside Load system service, and use the original boot configuration.
- Go to the Service section and check the box beside hiding all Microsoft services.
- Click on Disable all and hit the Apply button.
- Restart your computer, and your computer now will run only the drivers your need to run the OS properly.
Now try updating your Windows, and hopefully, you will be able to complete the updating process successfully. After the update is done, undo all the settings mentioned above to run your computer as it used to be.
Solution 5. Run SFC
There is a built-in system files checker (SFC) utility in Windows, which you can use to scan for corrupted or damaged files and replace them with a fresh cached copy to fix the issue. For some users, this method helped a lot.
Here are the steps to run SFC:
- Press the Windows key and search cmd to open the Command Prompt
- Type DISM /Online /Cleanup-Image /restorehealth in the command prompt and hit the enter button to run DISM before running the SFC utility.
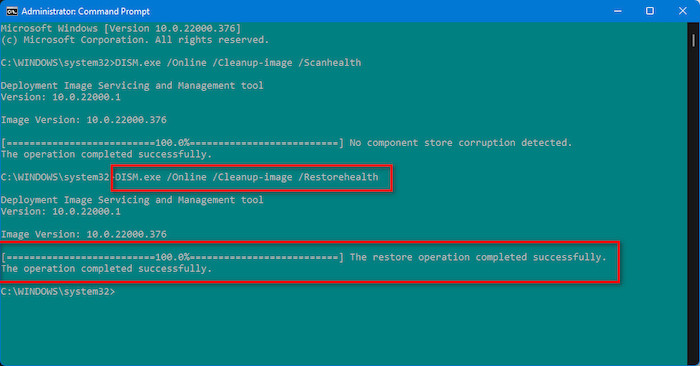
- Type sfc /scannow command after the DISM process ends and hit the enter button to start the scan.
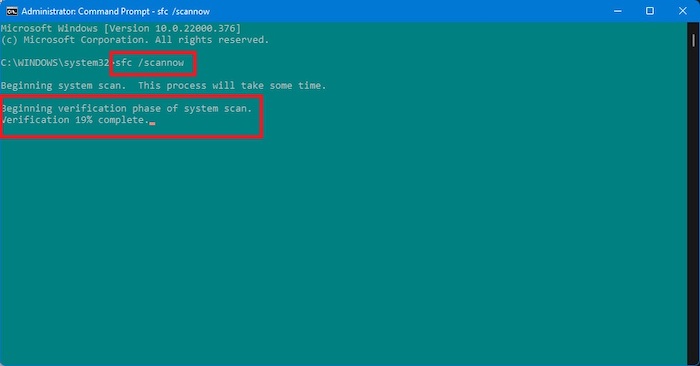
It will automatically detect any defective file and replace it with a new one to fix the problem. Now restart the computer and try reinstalling the update, and hopefully, you will succeed. If you are still unable to install updates on your Windows 11, follow the following method.
Solution 6. Apply the Updates Manually
If all of the solutions above did not work out for you, you might manually install the Windows 11 update. So you need to download the updates manually from Microsoft and install them on your computer yourself.
Here are the steps to apply updates manually on Windows 11:
- Open a web browser and search for Microsoft Update Catalog.
- Open the first result.
- Type in the KB number of the security update, which is giving you all the troubles in the search box of the page.
- Hit the search button, and you will find the updated files there.
- Download the update file to your computer.
- Run it as administrator after the download is completed to start the installation.
This time your Windows 11 will update successfully.
Final Words
If you follow the instructions accordingly, you will hopefully be able to apply the update for your Windows 11 without fail. Don’t forget to share the article with your friends if they are also facing similar problems with their Windows 11.
If you still have issues, feel free to share them with us, and we will be more than happy to help.