Have you attempted to upgrade your Windows 10 to 11 but encountered an error message: This PC must support Secure Boot.
Do not worry. Your system’s Secure Boot feature may be disabled.
I have been in a similar situation as you, and I have been able to get out of this issue with proper tests and research. So, if you are looking for an ultimate solution to solve your secure boot error issue while trying to update to Windows 11, you are in the right place then.
This post will show you some of the best proven and effective methods to solve your secure boot error issue on your Windows computer.
Keep reading and precisely follow the instructions.
Let’s dive right in and see what solutions you have for resolving your secure boot error issue.
Why does Secure Boot Error Occur when Updating Windows 11?
Microsoft announced some essential requirements to update or install Windows 11. Secure Boot is one of them.
Without enabling the Secure Boot feature, you can not upgrade or install Windows 11, and it is a primary requirement to update to Windows 11.
Another primary requirement is to enable the Trusted Platform Module (TPM) 2.0 to update Windows 11. These two features are mandatory and crucial for the Windows system and device security.
Secure Boot is one kind of safety measure that helps prevent any malware attacks when your system is turned on that may not be detected by Windows default security system or other third-party anti-malware software.
Check out our separate post: Download Boot Camp Drivers for Windows 11
Before any unwanted issue occurs, Secure Boot tries to identify the threat and block them immediately from preventing any attack.
However, you may consider it a vital component of your computer’s security, which is why enabling secure boot is suggested because it improves your security against various attacks and solves your Secure Boot error while trying to update to Windows 11.
You’ve seen the possible causes of Secure Boot error while trying to update to Windows 11 so far, and in the next part, I’ll show you several tested and proven solutions to solve the problem.
So, let’s get started to know the solutions to solve the Secure Boot error while updating to Windows 11.
How to Fix Secure Boot Error to Update to Windows 11
Secure Boot error is one of the main errors when users try to update to Windows 11. The error occurs when your system has turned off the Secure Boot feature.
You can solve the Secure Boot error and protect your system against any threat by enabling the Secure Boot feature.
In the previous section, you’ve seen the possible potential reason for the Secure Boot error while trying to update to Windows 11.
This section will show you several tested and proven solutions to solve the Secure Boot error while updating Windows 11.
So, let’s dive into the main topic to know the Windows Secure Boot issue solution.
Here’s a complete guide on how to fix can’t install Windows 11 on SSD.
Here are the steps to fix the Secure Boot error to update to Windows 11:
1. Check Secure Boot Status
At the begging of the Secure Boot error solving process, you need to ensure the Secure Boot feature’s active status on your system.
To do this, you need to open the System Information window to check the Secure Boot active status. You can do it easily without entering the BIOS mode and wasting valuable time.
Follow the steps below to check the Secure Boot active status:
- Press Win+S keys on your keyboard to open the Windows Search Panel, type system information, and click on the search result to open the System Information
- Press Win+R keys on your keyboard to open the Windows Run
- Click on the Run dialogue box and type msinfo32.
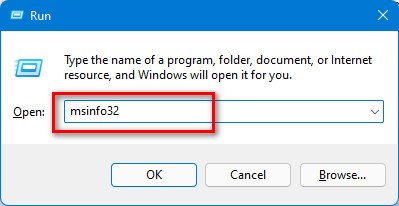
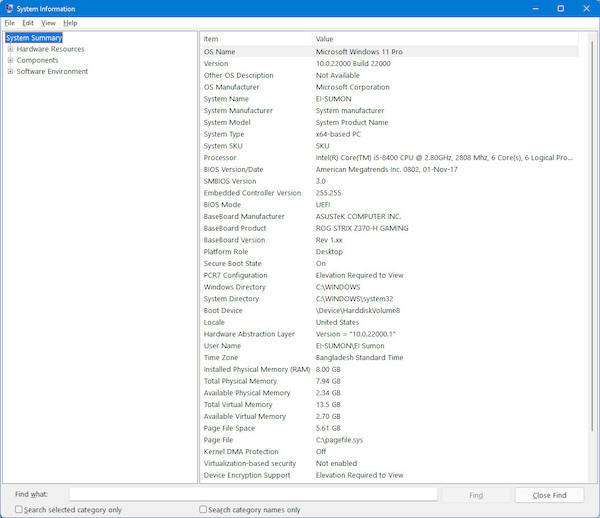
- Press the Enter key on your keyboard or click the OK button to open the System Information
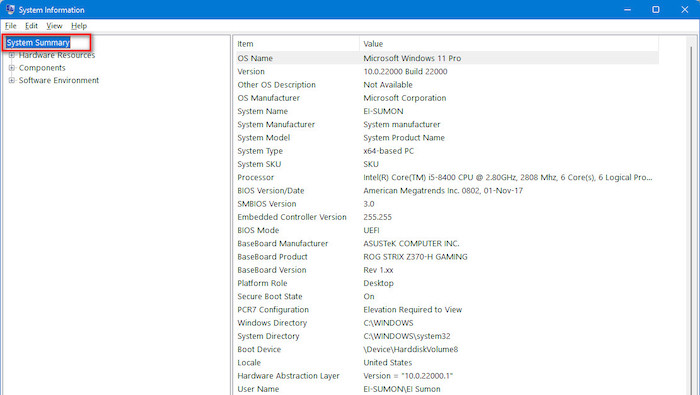
- Make sure to select the System Summary
- Find Secure Boot State to ensure your Boot State active status. In my case, Secure Boot is enabled.
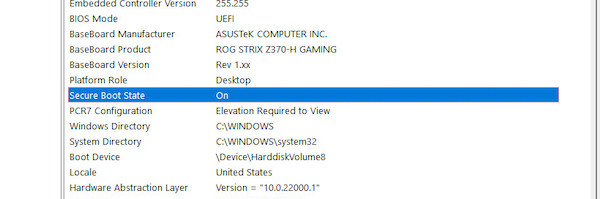
- If your Secure Boot State value is On, your Secure Boot is enabled. On the other hand, If your Secure Boot State value is Off, your Secure Boot is disabled.
Also, check out our separate post on install active directory users and computers on Windows 11.
2. Enable Secure Boot Feature
After ensuring the Secure Boot Status, you need to turn on the Secure Boot feature to solve the Secure Boot error while updating Windows 10 to 11.
In the previous section, I already mentioned without enabling the Secure Boot feature; you can not update to Windows 11.
Note: If your system has a UEFI/BIOS boot system, you can follow this method to solve your Secure Boot error issue. You can not update Windows 11 on a Legacy BIOS.
UEFI settings vary by manufacturer. Go to your PC manufacturer’s help and support page for more information on how to discover the correct UEFI settings.
Follow these steps to enable the Secure Boot feature:
- Press the Win + I keys on your keyboard to open the Windows System Settings.
- Type settings on the windows search panel and hit the Enter button to open Windows Settings.
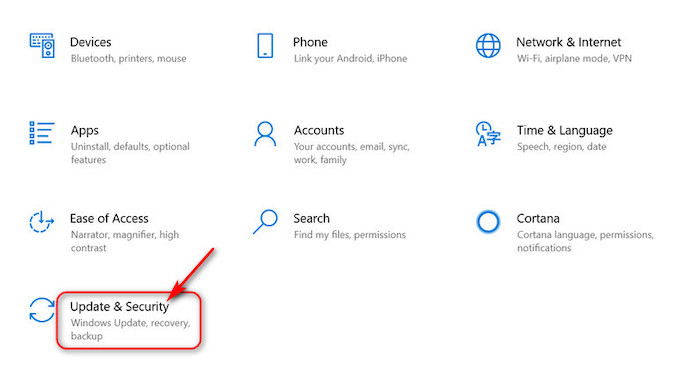
- Select the Update and Security at the bottom of the settings menu panel.
- Select the Recovery tab from the left side Update and Security settings menu panel.
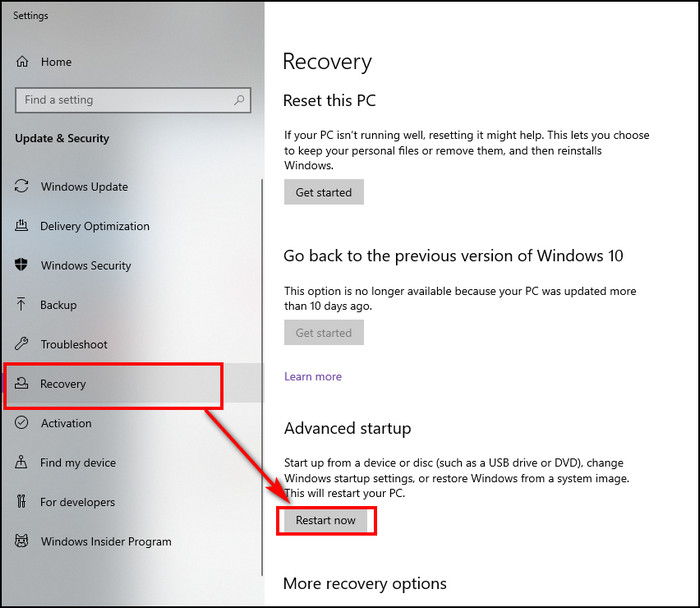
- Click on Restart now button on the right side of the screen to open the Advanced startup window under the Advanced startup section.
- Wait a few seconds to restart your computer and open the Advanced startup window.
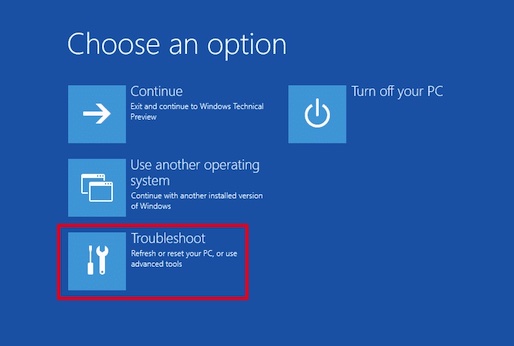
- Select Troubleshoot from the list of available items on the Advanced Startup screen.
- Click on Advanced Options from the list of items.
- Select the UEFI Firmware Settings option to change settings in your PC’s UEFI firmware.
- After selecting the UEFI Firmware Settings option, it will reboot your BIOS.
- Find the Secure Boot feature under the Security tab window.
- Turn on the toggle switch to enable the Secure Boot feature at the hardware level.
- Press the F10 key or click on the Save button to apply the changes.
- Reboot your computer and retry to update or install your Windows 11 to see whether your problem is solved.
Check out the easiest way to fix blue screen on Windows 11.
How to Check TPM 2.0 State
In some motherboards, TPM 2.0 is turned off by default. However, there’s no reason to be concerned. Before attempting to install the Windows 11 OS, you can quickly check the TPM 2.0 status on your device.
If your motherboard supports the TPM 2.0 feature, there are some techniques to check the TPM 2.0 status on your system. Using the Windows Security app is one of the simplest ways to verify the status of TMP 2.0 on your PC.
Follow the steps below to check the TMP 2.0 status on your system using the Windows Security app:
- Press the Win + I keys on your keyboard to open the Windows System Settings.
- Type settings on the windows search panel and hit the Enter button to open Windows Settings.
- Select the Update and Security at the bottom of the settings menu panel.
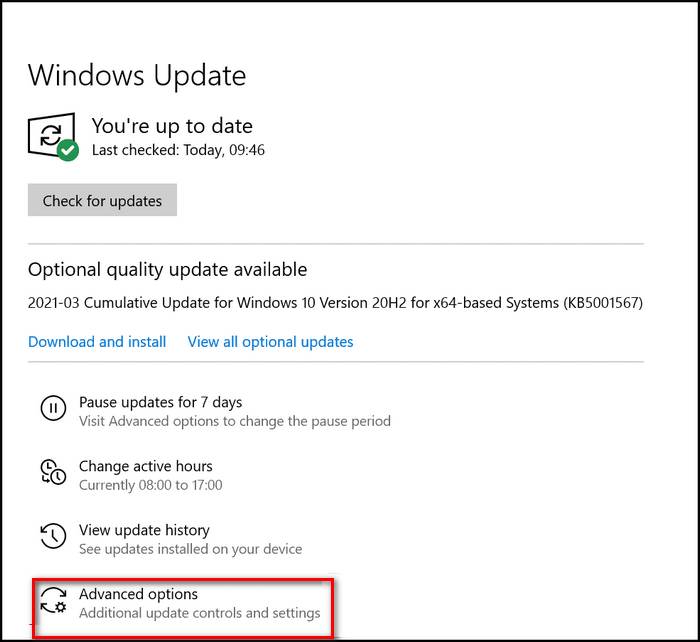
- Select the Windows Security tab from the left side Update and Security settings menu panel.
- Click on the Open Windows Security button to open the Windows Security window.
- Select the Device security tab on the left-side Windows Security menu or right-side Windows Security screen.
- You can see the Security processor section at the top of the Device security window if your TPM 2.0 is enabled. Otherwise, the Security processor section is not showing if your TPM 2.0 is disabled.
- Click on the Security processor details under Security processor to check your TPM specification details.
- Here, you can see your TPM Specification version, Status, and other information. If your TPM Specification version is less than 2.0, your device isn’t compatible with Windows 11.
How to Enable TPM 2.0 in BIOS
You must go to the UEFI/BIOS to adjust the TPM settings to enable the TPM 2.0. After authorizing the TPM security feature, you can now install Windows 11 on your machine.
Here are the steps to enable the TPM 2.0 in BIOS for Windows 11:
Follow the steps below to enable the TPM 2.0 in BIOS on your system:
- Press the Win + I keys on your keyboard to open the Windows System Settings.
- Type settings on the windows search panel and hit the Enter button to open Windows Settings.
- Select the Update and Security at the bottom of the settings menu panel.
- Select the Recovery tab from the left side Update and Security settings menu panel.
- Click on Restart now button on the right side of the screen to open the Advanced startup window under the Advanced startup
- Wait a few seconds to restart your computer and open the Advanced startup window.
- After restarting, the system shows a screen to change your startup settings.
- Select Troubleshoot from the list of available items on the Advanced Startup
- Click on Advanced Options from the list of items.
- Select the UEFI Firmware Settings option to change settings in your PC’s UEFI firmware.
- After selecting the UEFI Firmware Settings option, it will reboot your BIOS.
- Go to the Advanced, Security, or Trusted Computing labeled menu to find the TPM options.
- Check the label Security Device, Security Device Support, TPM State, AMD fTPM switch, AMD PSP fTPM, Intel PTT, or Intel Platform Trust Technology to find the TPM options.
- Toggle On the TPM option button to enable the TPM security processor.
- Press the F10 key or click on the Save and Exit button to save and apply the changes.
- Reboot your computer and retry to update or install your Windows 11 to see whether your problem is solved.
Check out our latest post for fix M.2 SSD Not Showing Up In BIOS.
Final Thoughts
Many Windows users have claimed that while they try to upgrade Windows 11, they face an error message that shows Windows 11 needs the Secure Boot feature and sometimes appears that TPM 2.0 is required.
This post describes the possible causes of Secure Boot error while updating Windows 11.
Here, I demonstrate several tested and proven solutions to solve the Secure Boot error problem. You can successfully solve your Secure Boot error using these practical methods.
I hope you found this post to be informative. If you found your solution, please let me know which method works for you.
You may also look at other posts if you’re interested in learning more about similar topics.