Are you looking for the latest procedure to install the Active Directory Users and Computers (ADUC) on Windows 11?
Then you’re on the right page.
As an experienced IT professional, I’m always working with the Windows Server and Active Directory components.
In this article, I’ll guide you through the ADUC installation process, and how to run it.
Let’s begin.
What is the Active Directory Users and Computers Tool
Active Directory Users and Computers is a Microsoft Management Console snap-in tool that creates and manages active directory objects, such as user objects and computers. It helps to build Organizational Units (OU) and also acts as a property manager. It is available for Microsoft systems and environments.
The AD (Active Directory) tool is also used to control Active Directory Group Policy, give people routine permissions, increase the domain’s functional level in Active Directory, rights management, define strong security passwords, and monitoring user configurations. Domain Controllers are the servers that administer Active Directory Domain Service (AD DS).
Active Directory has the benefit of providing a single sign-on feature. So, you don’t need to authenticate every time to use the software and proceed with your workflow.
Files are stored in a central repository which can be shared with other users to centralize the workflow using the Active Directory.
In addition to the user account, organization, and computer management, ADUC can also be used to manage objects or save and delete other network resources, attributes, and AD objects, such as printers and shared folders.
In short, the ADUC tool provides a centralized and efficient way for administrators to manage their connected network and maintain security and compliance.
In the next section, I will show you the process for ADUC installation on your Windows system.
Check out our separate post: Windows 11: An Error Occurred While Creating the Directory.
How to Install Active Directory Users and Computers on Windows 11
In your Windows 11 computer, you need to install the ADUC tool. It is not installed by default on your computer.
Note: You can only install ADUC on the Windows 11 Professional or Enterprise edition. Otherwise, you might get the “This update does not qualify for your computer” error.
All Active Directory administrative tools have been transferred to Remote Server Administration Tools (RSAT) from Microsoft. So, if you want to install the ADUC tool, you need to install Remote Server Administration Tools.
You can install ADUC using the Settings app, PowerShell, or the Command Prompt. I’m going to list all three methods.
Here are the methods to enable Active Directory Users and Computers (ADAC) on Windows 11:
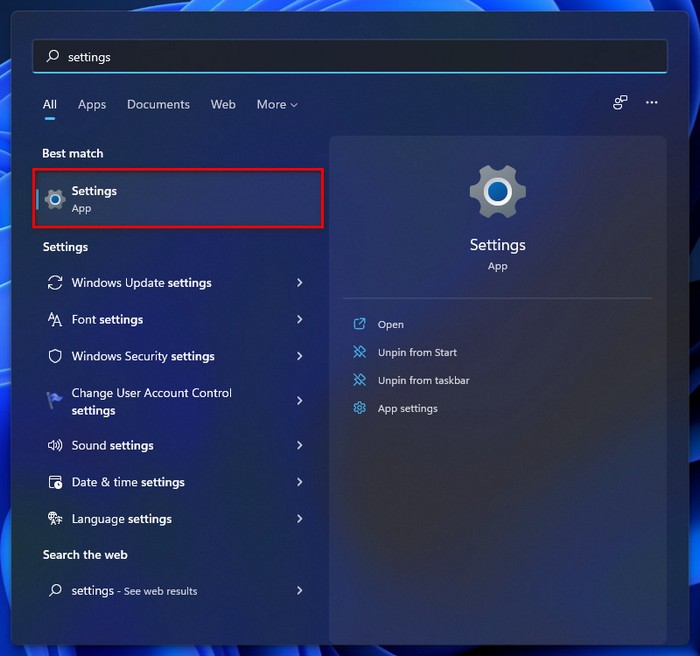
1. Use the Settings App
You can use Windows Settings to install Active Directory Users and Computers (ADUC) on Windows 11 computers.
Follow these steps to install ADUC on your Windows computer by using Windows Settings:
- Press Windows Key + I on your keyboard to open Windows Settings.
- Click on the Windows icon on your taskbar, and then click on the Settings icon under the pinned apps to open Windows Settings.
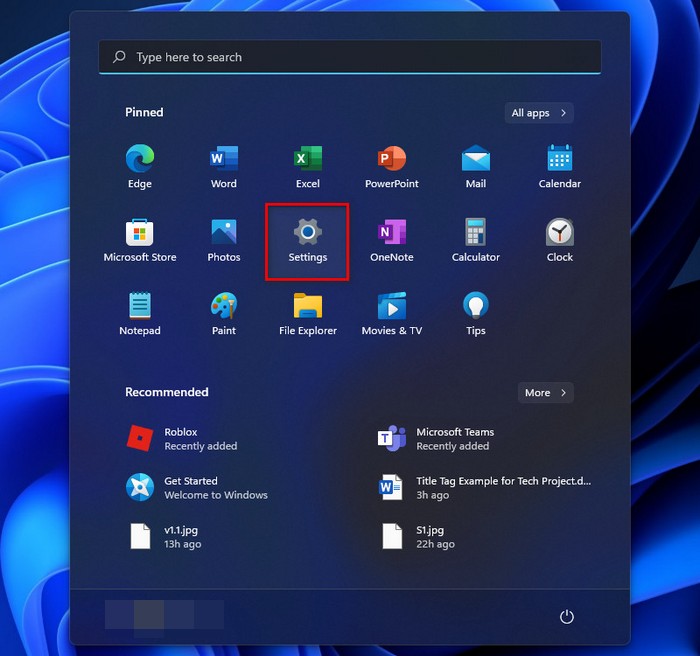
- Type settings on the windows search bar and hit the Enter button to open Windows Settings.
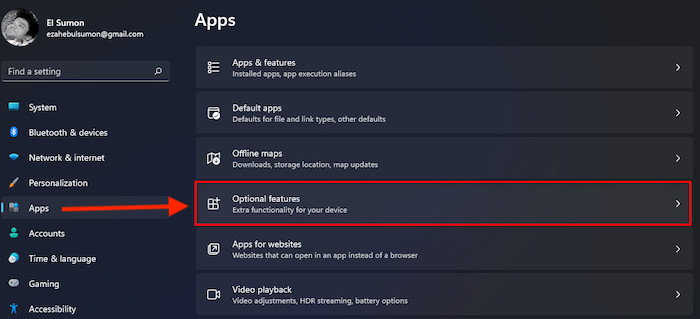
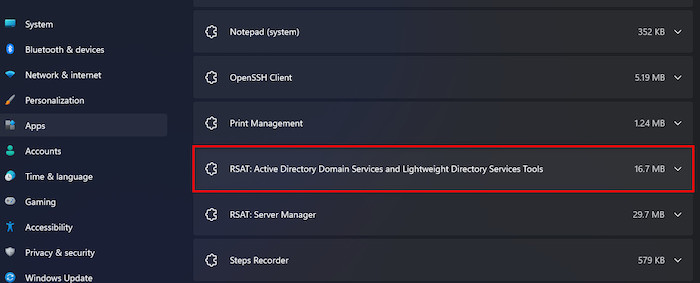
- Select the Apps tab option from the left side settings menu panel.
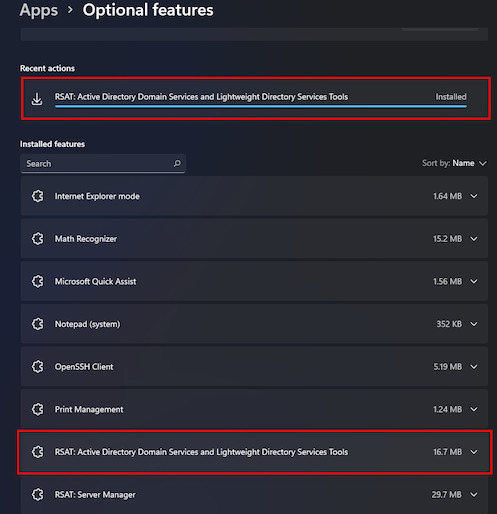
- Click on the Optional features option.
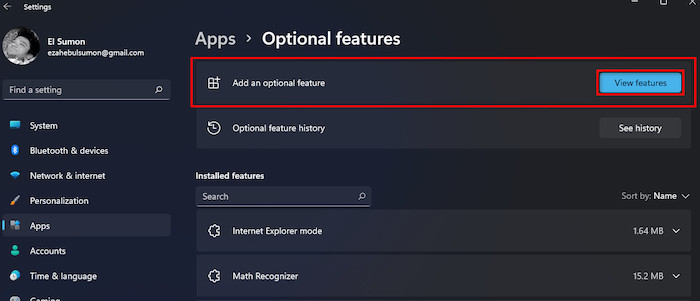
- Click on the View features button inside the Add an optional features option.
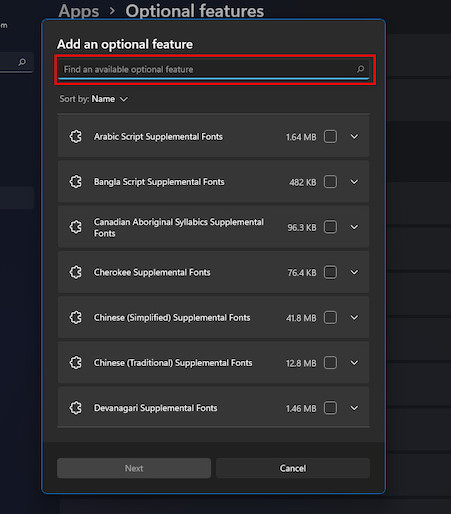
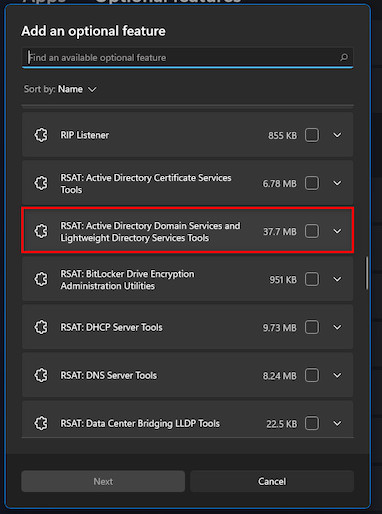
- Type “active directory domain services” in the search box.
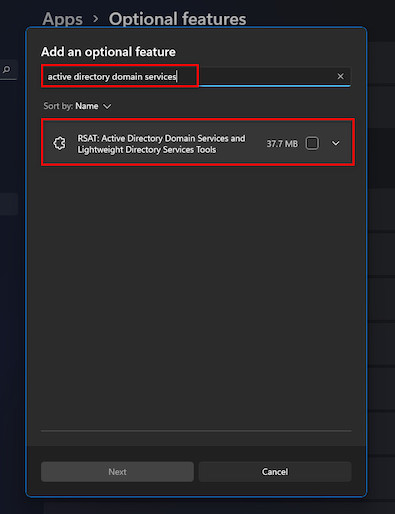
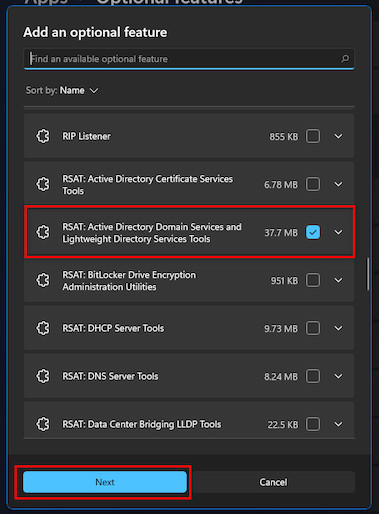
- Check the checkbox next to the RSAT: Active Directory Domain Services and Lightweight Directory Services feature.
- Click on Next.
- Click on the Install button to start the installation.
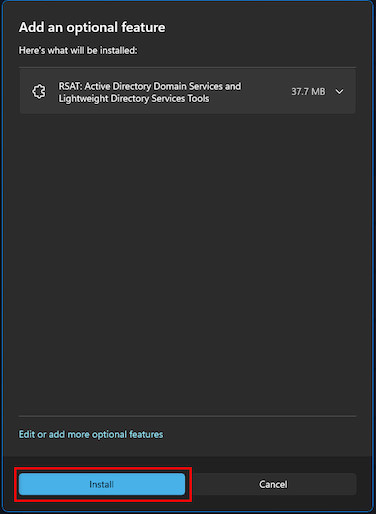
- Wait a few minutes to finish installing.
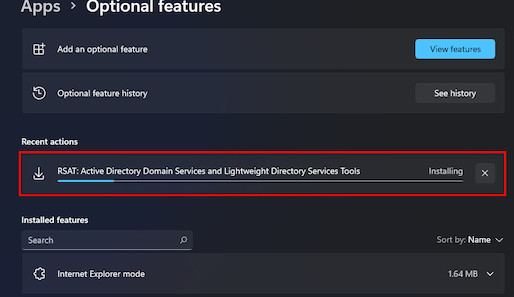
After some time, the RSAT: Active Directory Domain Services installation is completed and the feature is visible on the list of installed features.
2. Use PowerShell
To install ADUC features on different versions of Windows operating systems, using Windows PowerShell is another tested and effective method.
Follow the steps below to enable ADUC on your Windows computer using Windows PowerShell:
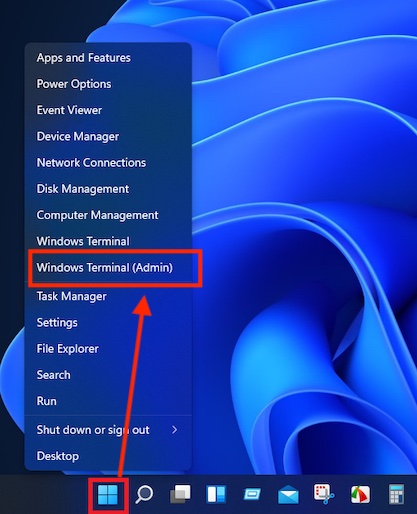
- Press Win + X on your keyboard and select Windows Terminal (Admin) to open Windows PowerShell with administrative privilege.
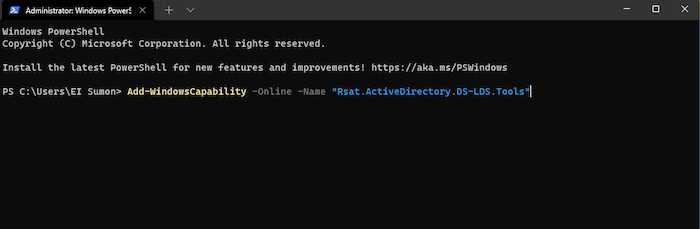
- Type the following command: Add-WindowsCapability -Online -Name “Rsat.ActiveDirectory.DS-LDS.Tools
- Press the Enter button to start the installation process of the Active Directory.
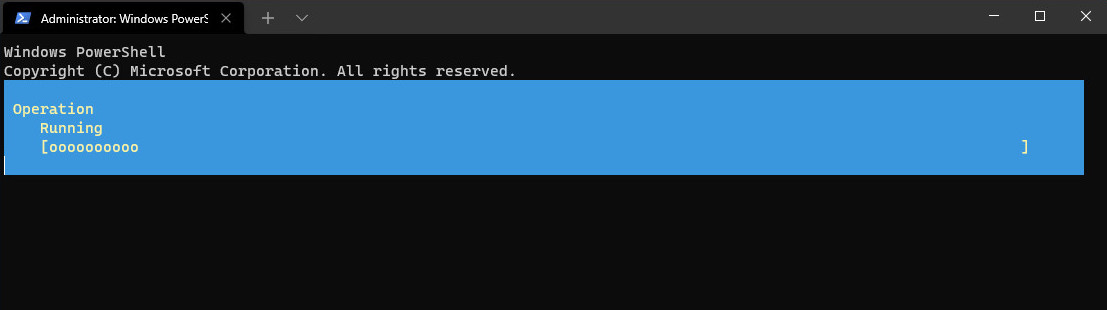
- Wait a few minutes to finish the installation process.
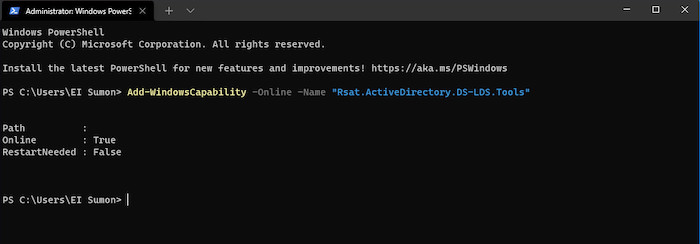
After successful installation, close the Windows PowerShell.
3. Use Command Prompt
Executing commands in the Command Prompt is another way to install the ADUC tools for Windows computers.
Follow the steps below to enable the ADUC feature on your Windows computer using the Command Prompt:
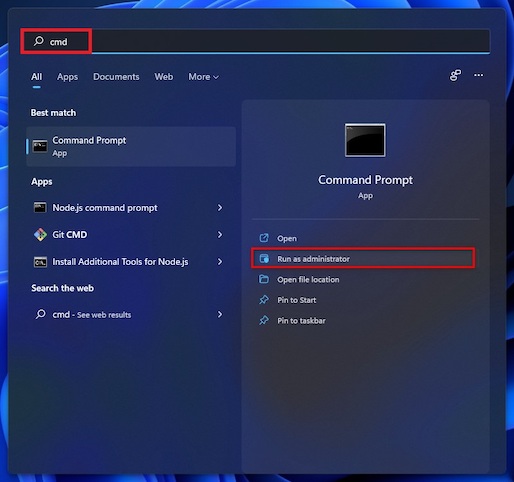
- Open the Windows Search panel and type cmd.
- Right-click on Command Prompt and select Run as administrator to open the Command Prompt with admin privileges.
- Type the following command: exe /Online /Get-CapabilityInfo /CapabilityName:Rsat.ActiveDirectory.DS-LDS.Tools~~~~0.0.1.0
- Hit the Enter button to install the ADUC tool.
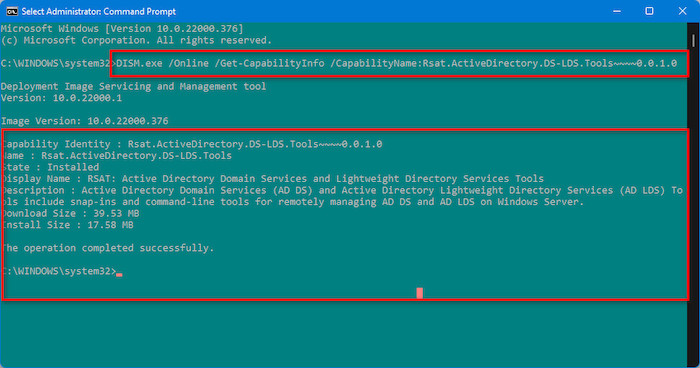
After successful installation, you can use the ADUC tool.
How to Run Active Directory Users and Computers on Windows 11
After installing the Active Directory Service on your Windows PC, you can run the program to manage resources on the network.
You can run ADUC or RSAT tools using the Windows Tools app or using the Run command.
Here are the methods to run ADUC on Windows:
1. Use Windows Tools
Using Windows Tools is one way to open the ADUC tool.
Follow the steps below to run the Active Directory Users and Computers on your Windows PC:
- Open the Windows Search panel and type “windows tools”.
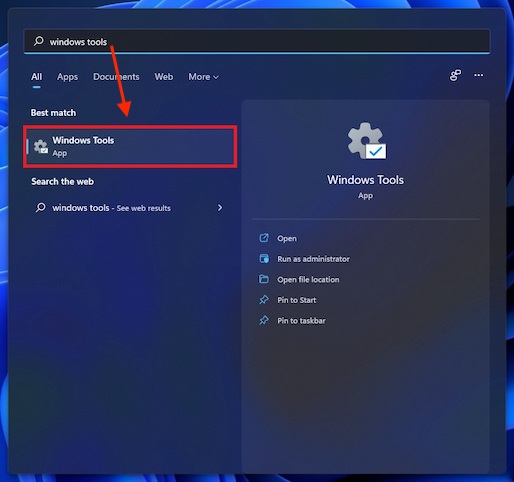
- Open the Windows Tools.
- Double-click the Active Directory Users and Computers.
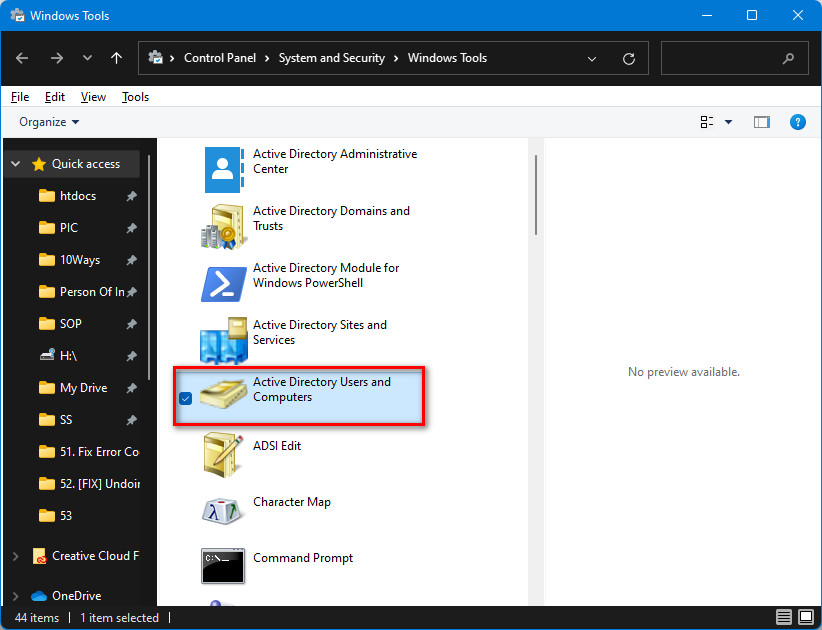
These steps will open the ADUC tools window.
2. Use Run
You can also open the ADUC tool using a simple Run command.
Here are the steps to open ADUC using the Run window:
- Press Win+R to open the Run
- Type dsa.msc
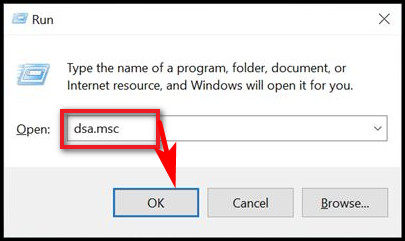
- Press Enter.
You will see the ADUC tools open.
Note: You can also run ADUC from the Control Panel > Administrative Tools.
Also read, Taskbar Won’t Auto-Hide In Windows 11/10.
How to Uninstall Active Directory Users and Computers on Windows 11
One of the most straightforward ways to uninstall ADUC is to use Windows System Settings.
To uninstall ADUC on your Windows computer, follow these steps:
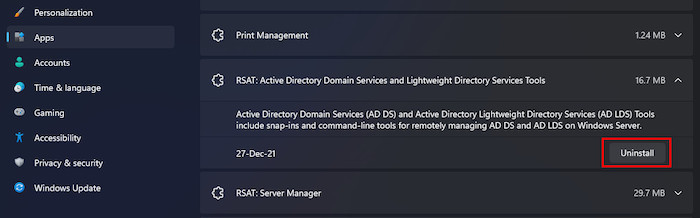
- Open the start menu and go to Windows Settings.
- Select the Apps tab from the left panel.
- Click on the Optional features option.
- Scroll down and locate the RSAT: Active Directory Domain Services.
- Select the RSAT: Active Directory Domain Services feature and click on the Uninstall button to start the uninstallation process.
Wait a few minutes to finish the uninstallation process.
Read more on how to Password Protect a File or Folder in Windows 11.
Final Thoughts
Active Directory Users and Computers (ADUC) is a great tool that helps it helps manage and execute network operations on Windows Active Directory. It helps control Windows Server Technical Preview and manage Organizational Units (OU).
Installing the ADUC tool on Windows is a straightforward process. I have discussed the step-by-step guide for installing the ADUC tool using Windows System Settings, Windows PowerShell, and Command Prompt.
I have also described how you can enable the ADUC tool and uninstall it on your windows computer.
If you find this post helpful, do share it with your friends, and see other posts to know about other related topics.