Windows 11 has so many excellent features that it has adopted from Windows 10, such as improved multitasking, Cortana on desktop, virtual desktops, and touch support for Office apps.
But sadly, it has adopted some errors as well. One of them is the infamous Error 0x80d02002.
Usually, the 0x80d02002 error occurs on Windows 10 updates, especially when installing the feature updates. But now it has crawled its way into the Windows 11 as well, like a parasite.
But not to worry. In this article, I’ve explained all the possible solutions that will fix this annoying 0x80d02002 error for good whether your machine is running on Windows 10 or 11.
Let’s do this!
How to Fix Windows 10/11 0x80d02002 Update Error
The error has to be one of the most annoying and common among all the update errors. And it’s not a big deal and can be easily fixed by deleting the update cache, running SFC, and disabling antivirus. However, some processes might require a few more steps.
But it doesn’t matter whether it’s small or big. I’ve provided all possible solutions available to fix this update error for Windows 10 and 11. Perform the solutions chronologically, and you will not face this problem again.
Here are the solutions to fix Windows 10/11 update error:
1. Check Storage Space
Before we start doing the advanced fixes, check your drive C storage.
Though the update size of Windows 11 is 40% less than Windows 10, it requires a lot more space to install. If you have more than 90% full in your C drive, you need to clean up some storage before starting to update.
Uninstall the softwares you don’t use and perform disk cleanup on the C drive to remove junk files.
Follow our guide on how to Fix Windows Update Error 0x80240023.
2. Enable Windows Update
Of course, Windows update has to be enabled to update Windows. In case you’ve disabled it and forgot or some other software or a Windows patch disabled it for security purposes, you need to check and ensure that it is enabled.
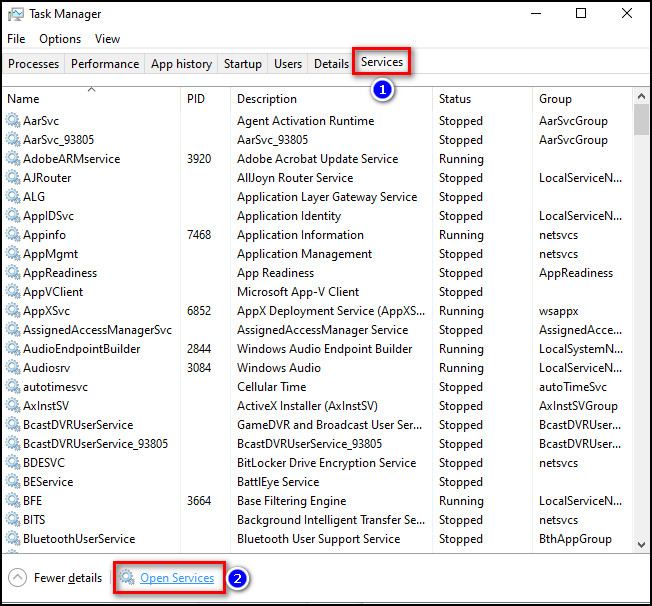
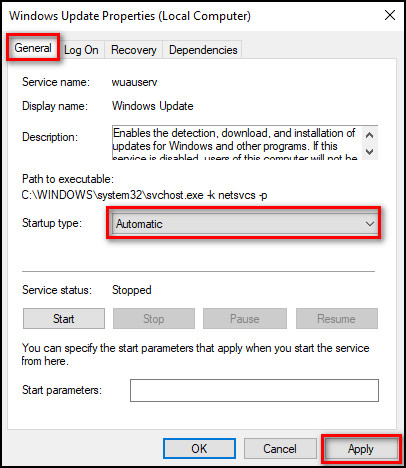
Here are the steps to enable Windows update:
- Press Ctrl + Shift + Esc to open the Task Manager.
- Go to the Services tab.
- Click Open Services.
- Double click on Windows Update.
- Choose Automatic from the dropdown menu of Startup type and apply the settings.
From now on, when you start your device, Windows will automatically search for updates.
3. Restart Your Computer
If a bug or a corrupted process runs in the background, it might cause an update error. Typically restarting the PC will fix it.
And when I say restart, you actually have to restart. Don’t shut down and turn on the PC right away. Because if you do this, not all processes stop because of the fast startup feature, and the corrupted process can still be running. So make sure you restart.
4. Run Windows Update Troubleshooter
At this point, run the built-in Windows update troubleshooter that is specifically designed to fix Windows updates installation problems.
Here’s how to run the Windows Update troubleshooter for Windows 11:
- Click the Windows icon and go to Settings.
- Choose Troubleshoot from the System tab and then Other-troubleshooters.
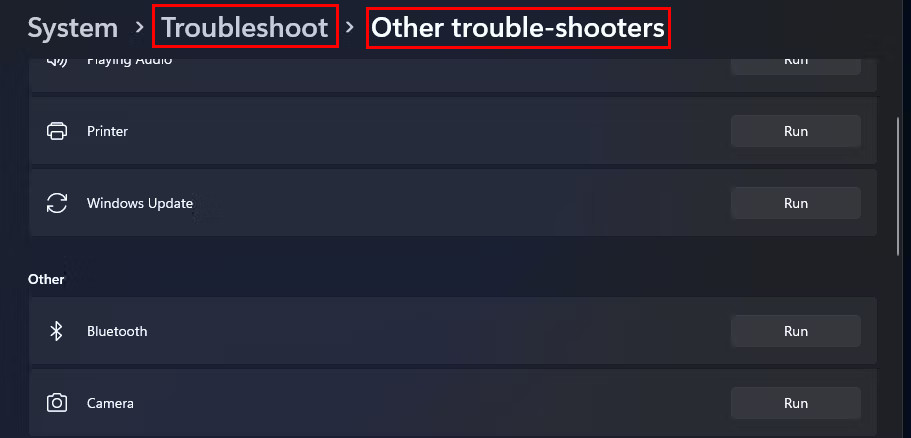
- Click Run beside Windows Update.
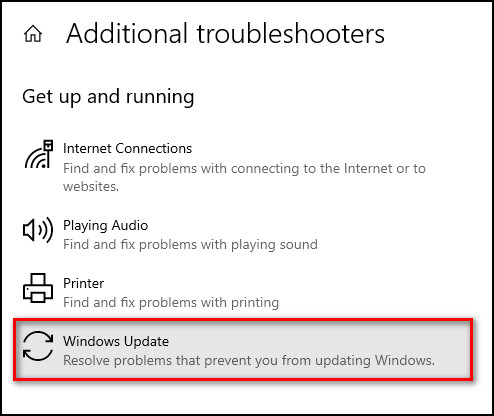
Here’s how to run the Windows Update troubleshooter for Windows 10:
- Click the Windows icon and open Settings.
- Go to Update & Security > Troubleshoot > Additional troubleshooters.
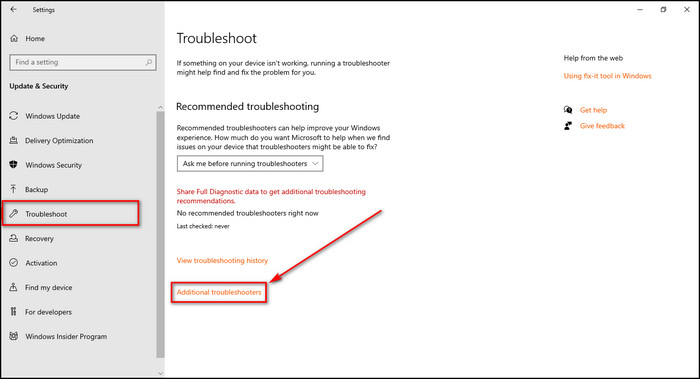
- Select Windows Update.
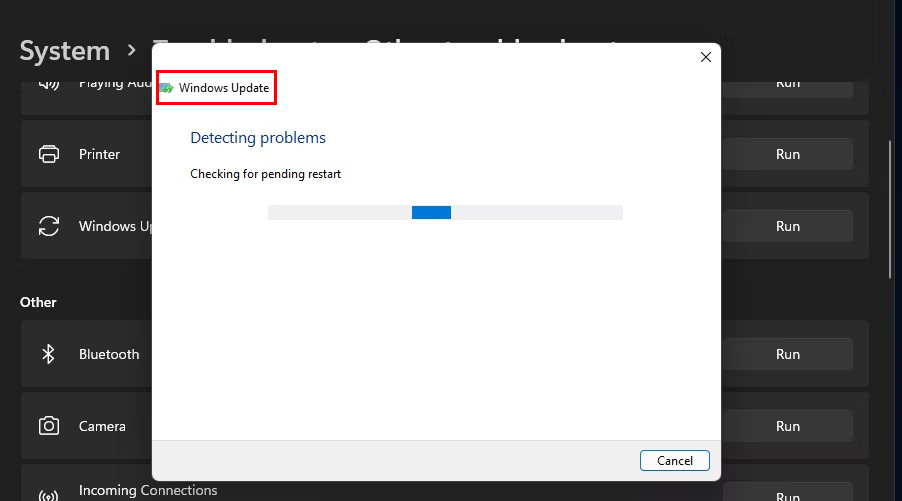
The troubleshooter will start processing and if it detects any problem, follow the instructions to fix it. If not, move to the next solution.
Follow our guide to Fix Windows 11 Update Error 0x80040154.
5. Disable VPN & Antivirus
Sometimes VPN and third-party antivirus softwares can interfere with Windows updates and cause problems. It’s a good idea to temporarily disable them while Windows is updating.
You can also uninstall your antivirus software, as the default Windows 10 and 11 security system is good enough.
6. Scan Your PC
Speaking of Windows Security, you should scan your device as a virus or malware attack can stop your windows updates from installing. And cause other problems.
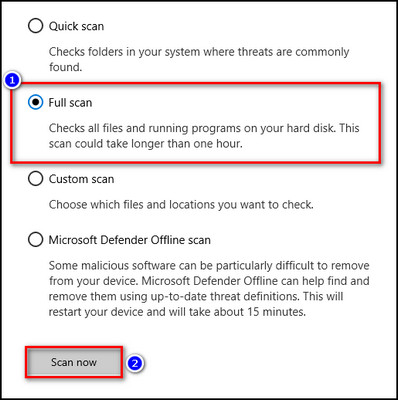
Here’s how to do a full scan of Windows 10 and 11:
- Go to Windows Security from the taskbar hidden icons.
- Select Virus & threat protection.
- Click Scan options, then Full scan.

- Select Scan now.
This process will take a while. After the scan is completed, get rid of any defects if found.
7. Run SFC
If a corrupted system file is installed, it might cause windows to update problems. You need to run System File Checker (SFC) and ensure everything works accordingly.
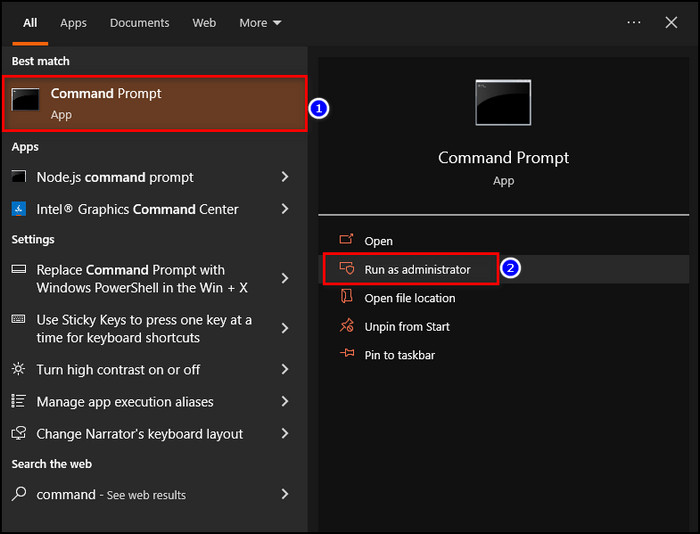
Here’s the way to run SFC:
- Search and launch Command Prompt as admin.
- Type in the Deployment Image Servicing command and press Enter.
DISM.exe /Online /Cleanup-image /Restorehealth
- Put the following SFC scan command line and press Enter.
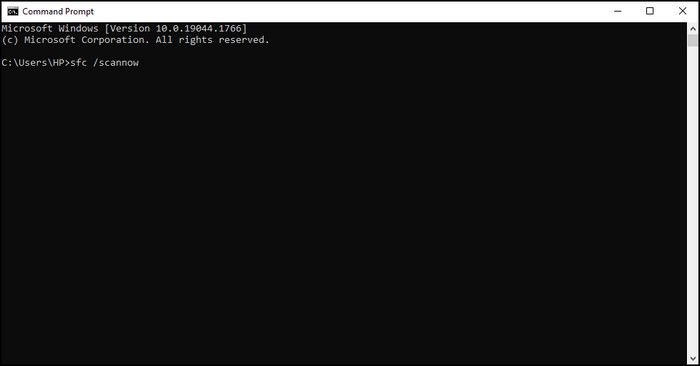
Sfc /scannow
Wait for the process to finish. The Deployment Image Servicing is used to fix images. If an image is corrupted and you don’t run this process, the SFC scan will not work.
Check out our separate post on GigaByte SIV Not Working on Windows 11.
8. Delete Update Cache
In case the Windows update has downloaded a defective file, causing the installation issue, you need to clear the cache folder and check for updates again.
Here are the steps to delete the Windows Update cache:
- Start PC on safe mode.
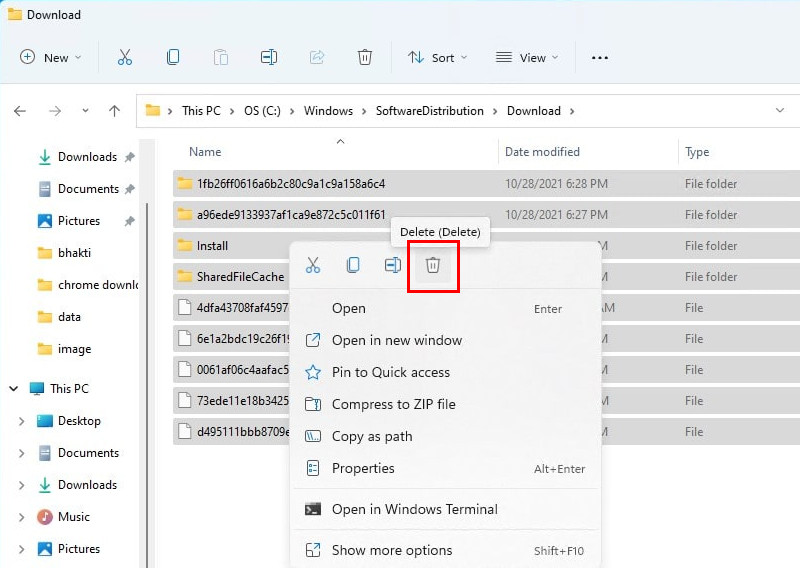
- Press Windows + E key to open explorer.
- Go to C:\Windows\SoftwareDistribution\Download.
- Delete all the files in that folder.
After these steps, restart your computer and check if the problem is fixed.
9. Reset Update Components
If a corrupted process accidentally has been downloaded during a Windows update, you need to reset that process by renaming the SoftwareDistribution and catroot2 folders.
Here’s how to rename SoftwareDistribution and catroot2 folders:
- Click the Search icon.
- Search for Command Prompt and run it as administrator.

- Type the following commands and press Enter after each line:
net stop bits
net stop wuauserv
net stop appidsvc
net stop cryptsvc
- Input the following command to rename SoftwareDistribution:
Ren %systemroot%\SoftwareDistribution SoftwareDistribution.old
- Input the following command to rename catroot2:
Ren %systemroot%\System32\catroot2 catroot2.old
- Re-run the stopped services by the following command lines. Press Enter after each line:
net start bits
net start wuauserv
net start appidsvc
net start cryptsvc
Restart your device, and Windows 11 will create a new SoftwareDistribution folder and a catroot2 folder.
10. Clean Start
Restart your device with all your third-party apps disabled. It will make sure that no other apps interfere with Windows updates.
Here’s the process to do a clean boot of your PC:
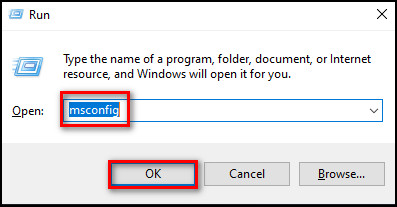
- Press Windows + R key to run Run.
- Type msconfig and click OK.
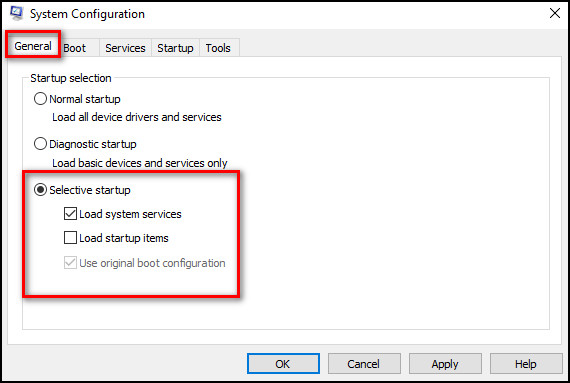
- Choose Selective startup and check Load system services and Use original boot configuration.
- Check Hide all Microsoft services in the Services tab.
- Select Disable all to stop the third-party services.
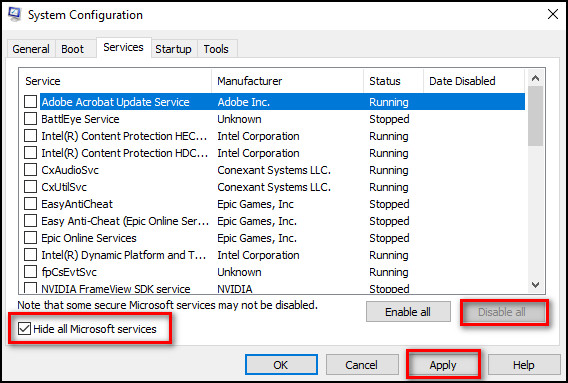
- Apply the settings and restart the PC.
After the PC boots up, check whether the problem is fixed or not.
Check out our separate post on Windows 11: Exclude Files From Windows Defender.
11. Manual Download & Install
If the error persists, you can manually download and install the Windows update.
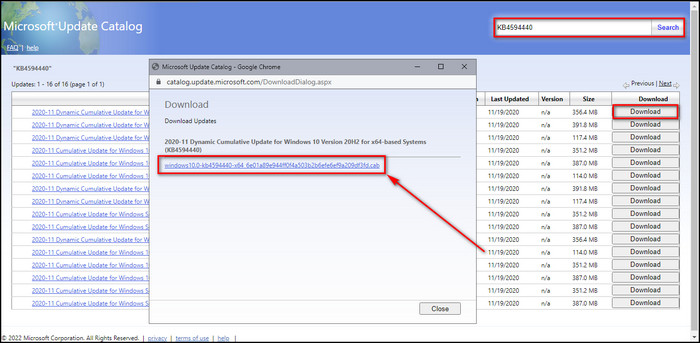
Here’s how to download and install windows update manually:
- Go to the Microsoft Catalog website.
- Type the KB code for the update you want to install.
- Select the Download option according to your system.
- Download the update setup file and install it.
The update should install without any issues.
12. Reinstall Windows
Reinstalling your Windows will eliminate all the bugs and glitches causing the Windows update issue. It’s an easy process, but it’ll take some time, so be patient.
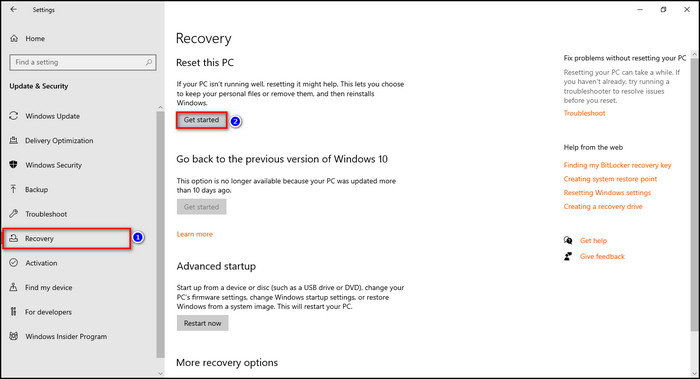
Here are the steps to reinstall Windows 10:
- Click the Windows icon and go to Settings.
- Select Update & Security.
- Move to the Recovery tab.
- Click Get started under Reset this PC and follow instructions.
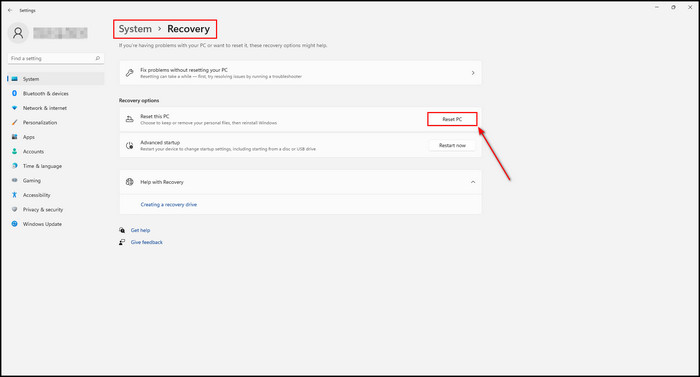
Here are the steps to reinstall Windows 11:
- Click the Windows icon.
- Go to System then Recovery.
- Select Reset PC.
- Choose Keep My Files. Or else everything will be deleted.
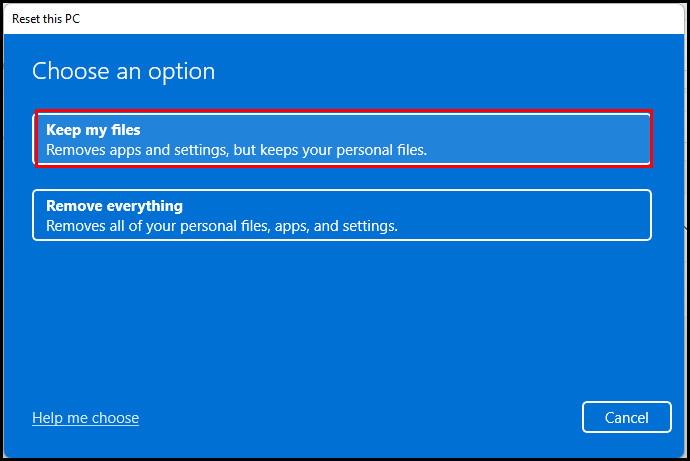
- Select Cloud install, which will install Windows 11 from the internet that wasn’t installed on your PC, or select Local, which will install Windows 11, which was already installed on your PC.
- Select Next and click Reset.
After the reinstallation is complete, you’ll still need to download and update the Windows patches. This is a time-consuming process, but it will fix the issue at hand.
Follow our guide on how to LockDown Browser for Windows 11
FAQs
Why can’t I update to Windows 11?
Your device might not meet the minimum requirements to install Windows 11. Check out Windows 11 requirements.
How do I force Windows 11 to update?
To check if Windows 11 is available on your device, click the Windows icon > Settings > Update & Security > Windows Update > Check for updates.
What will happen if I install Windows 11 on unsupported processor?
By installing Windows 11 on unsupported PC, you will face incompatibility problems. You will not receive any support from Microsoft or any future updates.
Final Thoughts
Of all the error codes I’ve seen after all these years of using Windows, I have to say Error 0x80d02002 has to be the most frequent. I was pretty surprised when this error popped on my Windows 11 after getting rid of it years ago on Windows 10. And that Microsoft hasn’t fixed it yet.
But it doesn’t matter. The solutions I’ve provided here will definitely fix it and you won’t face this error again.
Let me know if you have any other questions regarding Windows errors. See you in the comment section.