Working on a critical problem while you suddenly face the monitor malfunctions without giving you any specific reasons? It goes black every so often?
It isn’t taking much of your time as it appears for a second or so. Then you tried reconnecting your PC’s connections, and voila! The issue is gone!
But reappears after some time. Well, if this is the case, It has already diminished your momentum, and you can’t achieve the rhythm you were working on.
But why does my monitor go black randomly?
So, keep reading until you fix your problem and get back to work without wasting your time.
How to Fix Monitor Goes Black for a Second and Comes Back On?
Last month I was working on a big project related to cryptocurrency. For a couple of times, a black screen popped out for a second or two and went away. I was confused as I was doing everything perfectly.
One of the most common misconceptions about a monitor going black for a second is there might be a monitor issue. So, people try to change their monitors and do the usual checking to cope with the problem but find no improvement.
I’m not saying this can’t be responsible for a monitor going black; this obviously can, but it doesn’t happen for a faulty monitor almost all the time. There are plenty of reasons behind this problem.
I am going to explain why this problem occurs and how you can solve it in subsequent sections. Read every step and apply them individually until your issue resolves.
Check out the easiest way fixes for Motherboard can’t detect Monitor.
Here are the steps to fix the monitor goes black for a second and comes back on:
Step 1: Check the Connections between CPU and Monitor
In most cases, people face monitor gone black for somewhat a faulty connection between the monitor and CPU. Either the port or the cable has got the problem. So you need to turn off your computer and unplug all the wires connected to the CPU and monitor.
Use a soft brush to clean the ports and port connectors. If you see any of the port or port connectors are damaged, buy new parts and connect them to see if the problem is gone.
If not, that’s when the fun starts. Move to the following solutions and start applying.
Step 2: Adjust your PC’s Power Settings
Adjusting your PC’s power setting is a practical step to solving your black screen problem. If you are a Windows 10 user.
Here are the methods to adjust your computer’s power settings:
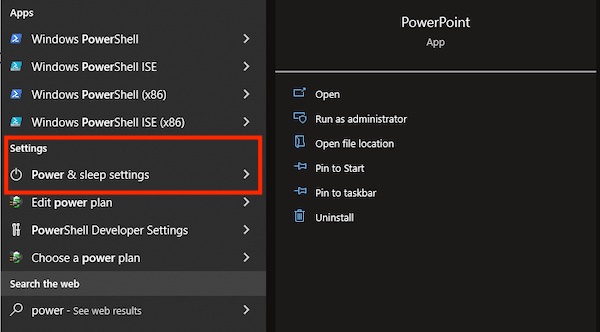
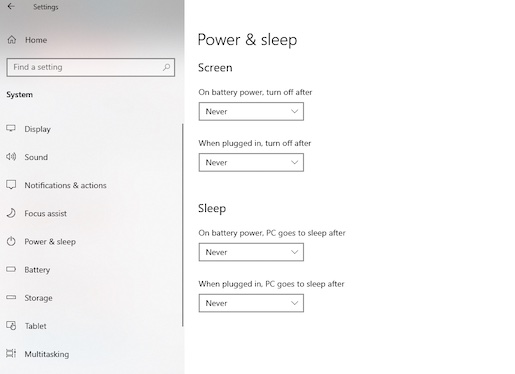
- Press the Windows key and type power. Select Power & sleep settings.
- Select Never under the Screen where it says, “When plugged in, turn off after”.
- Choose Never for the Sleep section also.
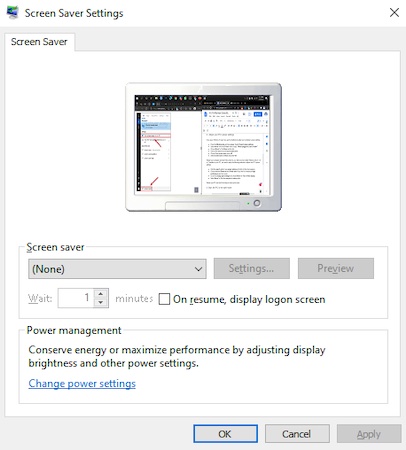
- Click on the search key and type screen saver.
- Choose Turn screen saver on or off.
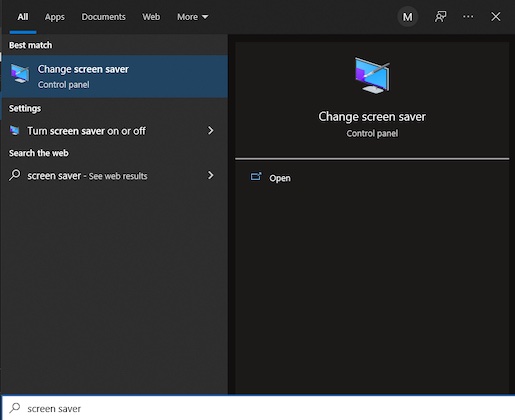
- Select Screen saver as None and press OK.
Restart your computer and find out if it works for you. But if you have older Windows, like, 8.1, 8, or 7 installed on your PC, you need to apply the following methods to adjust your PC’s power settings.
- Click the search option, type power options and click on that when it appears.
- Choose between Balanced and Power saver if you find it is selected to High performance and vice versa.
- Go to the Change plan settings and choose Never on Turn off the display
- Click the Never on Put the computer to sleep
Restart your PC and see if this helps to clear up the issue.
Step 3: Start your PC in the Safe Mode
I can’t say this technique will resolve your issue for sure. But following this technique will help you find the root of your problem.
Here’s the process how you can start your PC in the safe mode:
- Press the Windows key and go to Settings.
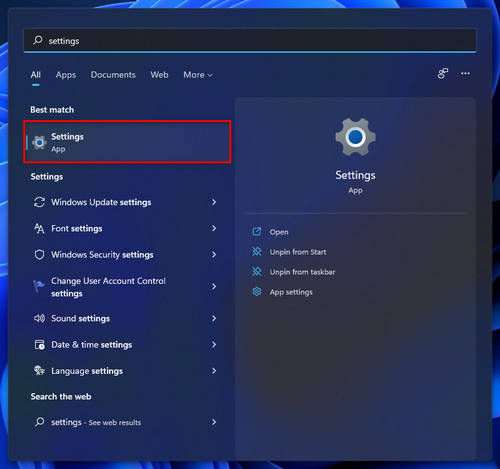
- Select Update & Security.
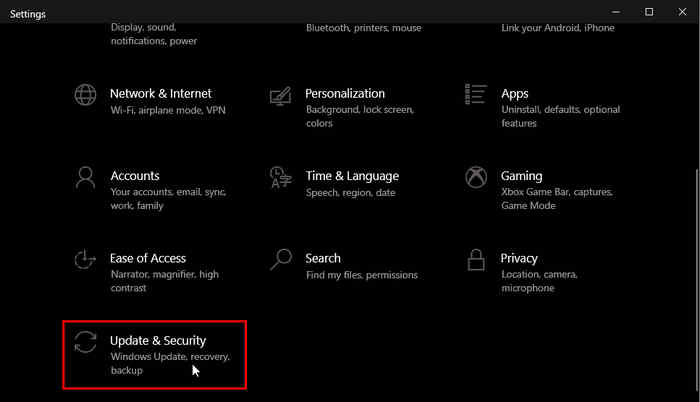
- Select Recovery and then select Restart now under the Advanced startup You might see a blue window where you have to select Startup modes.
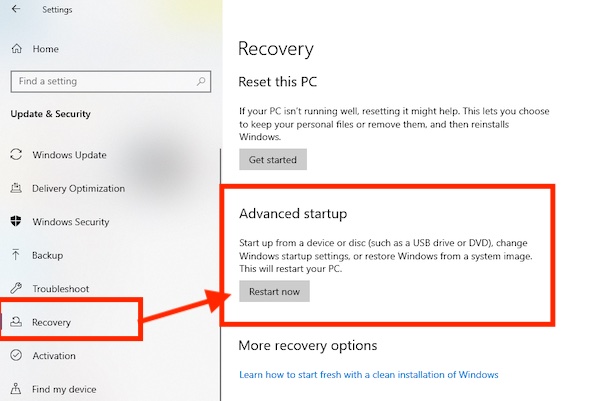
- Tap into the F4 key to select safe mode, and all you have to do is wait.
Your PC will automatically reboot itself and see if you face the monitor keeps going black then comes back problem again.
Here’s a complete guide on how to set Monitor to 144hz easily.
Step 4: Update Graphics Card’s Driver
Graphics card is one of the most common culprits of this issue. If they are not updated when an updated patch is available, you might face this miserable black screen issue. So, try the following methods to update your graphics card’s driver.
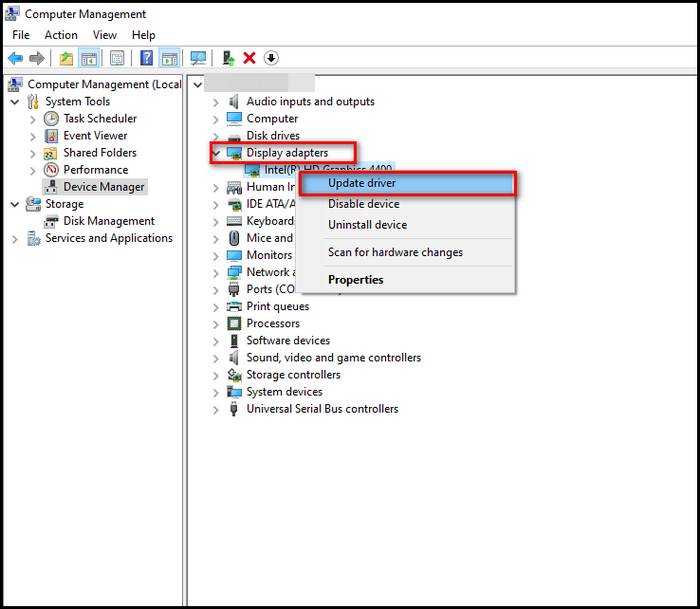
- Navigate to your cursor to the Windows logo and right-click on it.
- Select Device Manager and then double-click on the Display adaptors to see the graphics divers.
- Right-click on both of the drivers and select Update driver.
Confirm to proceed, restart your PC, and check if the problem persists afterward.
Also, check out our separate post on how to use Mouse on second Monitor while gaming.
Step 5: Overheated Components
You probably heard the ventilation word a thousand times in your life, especially, when you watched the PC building videos. If your computer’s ventilation system is not so good, there is a high chance your PC will perform poorly or even crash itself after a certain period.
Why?
Without having proper ventilation on the components inside triggers a RAM or graphics card, or both to be overheated. It then pushes the other parts on the computer to be heated. Sometimes it can make the monitor overheated, and that causes the monitor to go black for a moment.
So, you need to clean the monitor and the components inside a computer and give your machine a proper rest. Besides, check the fan is working fine inside the laptop or CPU of a desktop.
Check out the easiest way to fix Dual Monitor Lag Windows.
Step 6: Rollback GPU Driver
If you have updated your drivers just some days ago and face the issue, you need to roll back the drivers to their former state.
Here are the steps to rollback GPU driver:
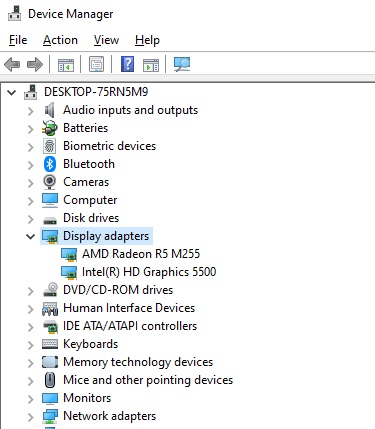
- Press Windows+X and select Device Manager.
- Click on the Display adaptors and press the right arrow to open the graphics drivers.
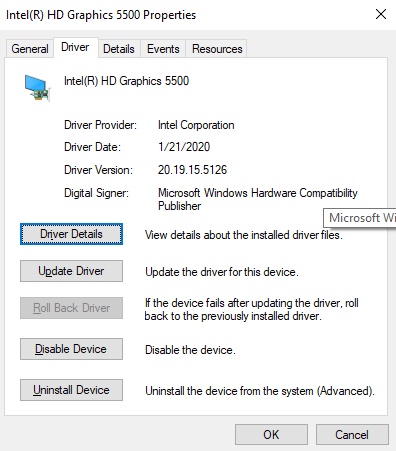
- Double-click the graphics card and move to the Driver
- Choose the Roll Back Driver and follow the command prompt.
Step 7: Clean Boot Windows 10
Configuring with original boots is a know solution process in this case. Try the following methods to clean boot Windows 10:
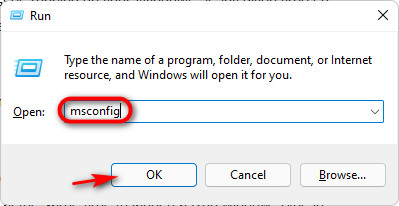
- Press Windows key+R to open up the Run command prompt.
- Type msconfig in the command box.
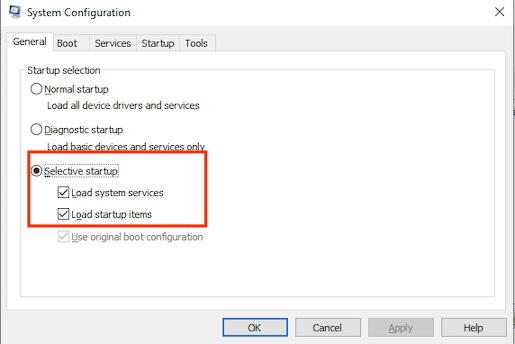
- Hit enter and choose the Selective startup on the General
- Uncheck the Load startup items
- Check the Load system services and then check the Use original boot confuguration
- Navigate to the Services tab and choose the Hide all Microsoft services
- Tap on the Disable all option and select OK.
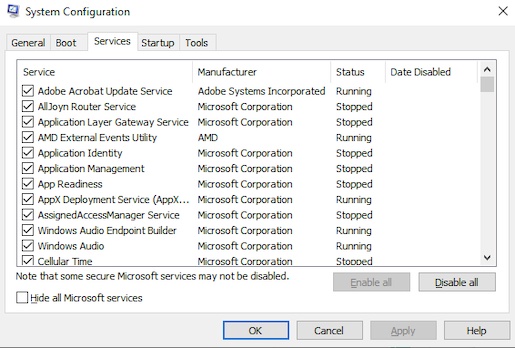
Note: It will deselect the checkboxes for all the third-party services.
- Restart your PC and have a look if the problem is gone.
Step 8: Disable some clashing apps
Sometimes a third-party app can cause unimaginable damage you can bear. So, stop some third-party apps and check if the problem remains. If it does, then you’ll know those were not the problematic ones. So, here’s how you can uninstall apps or features:
- Press the Windows key and select Settings.
- Enter Apps > Apps and Features.
- Right-click on the app you want no more and select uninstall.
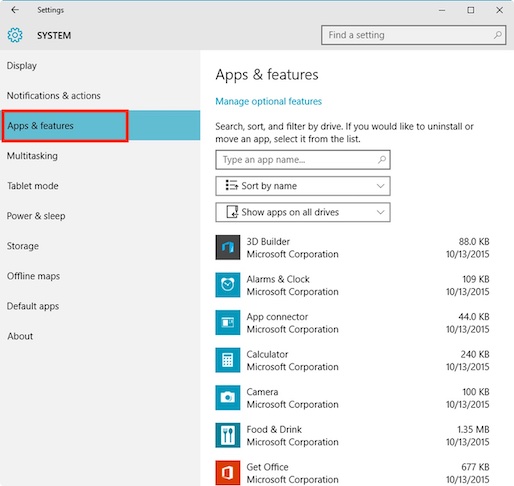
Thus, uninstall one app at a time and check when the problem vanishes.
Step 9: Stop Overclocking
Overclocking allows your device to perform tasks like rendering a video or architectural structure faster than the usual time. As it is a blessing most of the time, it can also cause some adverse effects on your machine.
So, stop overclocking as it gives excessive pressure on GPU that can cause your screen to turn black for a while.
Step 10: Attempt with the Wake-up Key
Up to this point, if none of the steps helped you, I suggest you apply the wake-up shortcut. Press Windows key+Shift+Ctrl+B altogether, and then you must hear the beep from the speaker if it works fine, I mean. Have a look at your computer and look if the problem is gone.
Step 11: Install the Latest Windows
Last night, my roommate couldn’t analyze his thesis for this pathetic black screen problem. He asked me to solve his problem within 15 mins.
I ran all the procedures perfectly, one after another, but it all went in vain. So, finally, I installed the latest update patch of Windows on his PC and thus solved his problem.
In any system, there can be hidden or newcomer bugs and errors. So try installing the latest Windows update patch to solve the bugs and errors in the system.
Here are the steps to install latest windows:
- Press the Windows key and go to Settings.
- Click Update & Security and then choose Windows Update.
- Press the Check for updates option and confirm any command prompt appears.
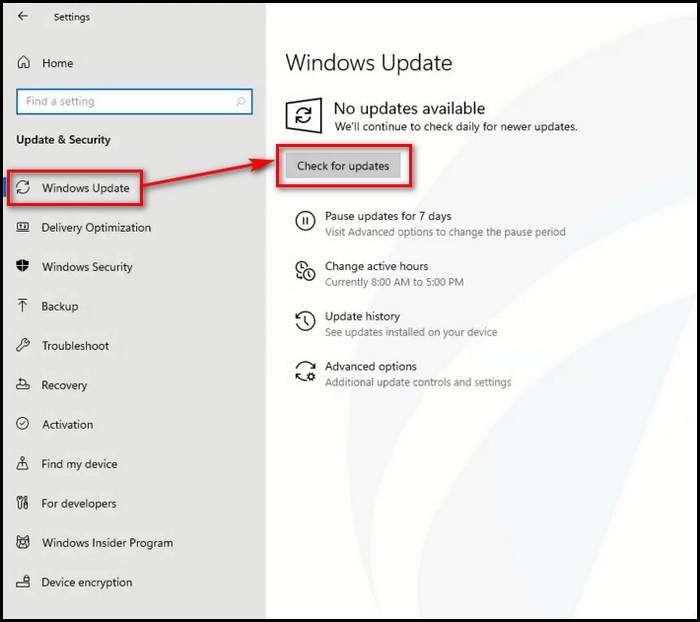
Give it some time, and your PC will update itself automatically.
Conclusion
Typically it is a case of the cables attached between the monitor and CPU. But that’s not always the case. There are several reasons for this problem occurring, but there are numerous solutions to fix the issue too.
I have mentioned almost every one of them capable of solving the case. Yet if the problem persists, let me know in the comment section, and if it’s an emergency, don’t hesitate to go to your nearest computer repair shop.