These days, some crazy gamers try to connect their computer with multiple displays. But, if Windows 10 is installed in any of the displays, most users report this sort of error message. Are you facing the same problem?
Don’t worry. I will be right there. As a technological enthusiast, I will note down all the possible solutions to help you solve the problem.
What are Display Settings?
Display settings indicate a number of customizable options to increase your viewing experience based on your activity. You can fine-tune or adjust the settings according to your utility.
Display settings have another aspect as well. Precisely, the settings give you the experience after connecting your display to other more displays.
So, let’s dive into a soulful review. Please, do not skip any portion as I will demonstrate the matter thoroughly.
How You Can Fix the Display Settings
Well. There are some immediate solutions you may try, like restarting your computer, disconnecting and reconnecting the power cable of your monitors, etc. If they work, our job is done. If they do not, we will go for other alternatives.
Here are some typical and tricky solutions to fix the display settings that could not be saved.
1. Unplug your Monitors
It is a rudimentary fix mixed with common sense. Try disconnecting and then reconnecting the power cable of your monitors. And then restart your system. I hope it will work.
2. Restart your Computer
Believe me, restarting your computer can work as a panacea for computer-related problems. I still do not know exactly how it works, but it does. Technically, it is called power cycling.
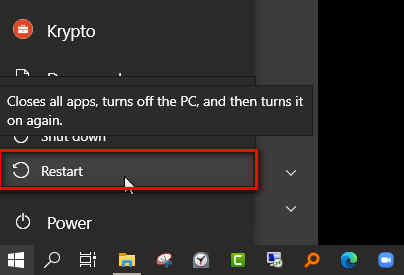
Here are the steps to restart your computer:
- Turn off your computer.
- Take off the main power supply.
- Wait a few minutes.
- Turn on your computer.
Check if the problem remains.
Also, check out our separate post on how to Monitor and Lower CPU GPU Temp.
3. Update your Drivers
It is a common phenomenon that problem arises when your drivers become outdated or corrupted. To deal with this, make sure your drivers are all updated.
 Here are the steps to update your driver.
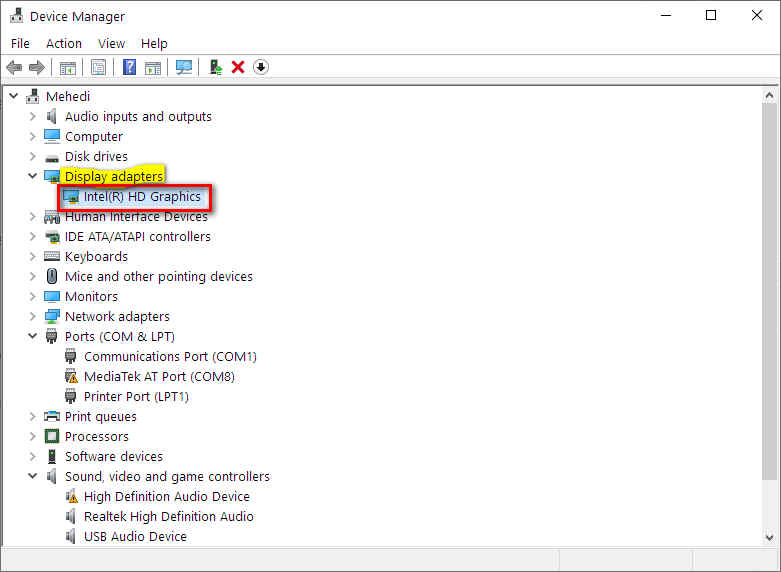
- Go to the Start menu, and write Device Manager in the search bar.
- Launch the Device Manager by clicking on it.
- Find the Display Adapters.
- Expand it by clicking on the arrow on the left.
- Right-click on your driver. A dropdown menu will appear.
- Choose Update Driver.
- Restart your computer. If the error still persists, select Uninstall device.
Your problem will indeed be solved this time.
Does PS5 have DisplayPort? Check it out.
4. Change the Monitor Resolution
If you could not solve your problem till now, change the monitor resolution.
Here are the steps to change your monitor resolution:
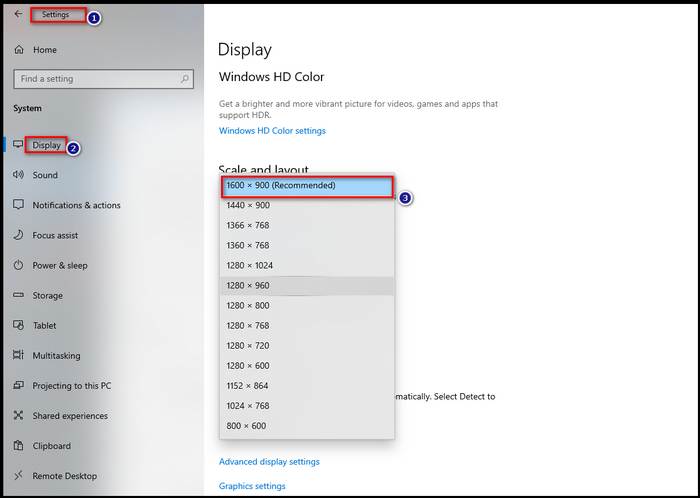
- Click on the Start menu.
- Go to Settings.
- Navigate to System and then, Display.
- Go to the Display resolution and tune the available options as required. I recommend you reduce it for the other monitors.
- Try different combinations and check which one works for you.
5. Change the Monitor Order
This may seem weird, but it worked for some users. They changed the order of their displays, and that worked for them. So, you should try.
- Go to the Start button and then Settings.
- Find out the System.
- Choose Display from the left pane.
- Click on the Identify button. Then change the order of your monitors/screens.
You are done.
6. Use NVIDIA Control Panel
If you use a different display management system, i.e., NVIDIA graphics card, you should use a NVIDIA control panel to manage all the monitors.
Let’s see the steps to manage the displays using the NVIDIA control panel.
- Right-click anywhere on your desktop.
- Select the NVIDIA control panel from the appeared dropdown.
- Click on Display from the control panel from the left navigation pane.
- Select Set up multiple displays.
- Configure the displays that you want to use.
You can consider performing a reboot if changing from the NVIDIA control panel does not fix the problem.
7. Run the Hardware and Devices Troubleshooter
If the previous fixes do not work for you, you can try this one. Hardware troubleshooter is a unique feature of Windows OS to detect the problems with the existing hardware.
Here are the steps to run the hardware and device troubleshooter:
- Go to the Start menu and type Troubleshooting in the search bar.
- Click on Troubleshooting Control Panel on the top.
- Choose View All.
- Select Hardware and Devices.
- Click Next, and the hardware and software troubleshooting will start.
Wait for a while to detect the problems.
8. Uninstall the Latest Update
If using multiple monitors is vital to you as a gamer, you should go for uninstalling the latest OS updates. Some users report this issue. And, therefore, I am considering it as a fix.
Here are the steps to uninstall the latest OS updates.
- Click on the Start button and launch the Control Panel.
- Go to Programs.
- Tap to View installed updates.
- Select the updates you lately installed on your computer.
- Remove those updates.
Now, restart the computer and check whether or not the problems exist. If not, then enjoy!
How to Change Display Connector Cable
In the case of most monitors, there are two types of connectors- one is to connect the monitor and the computer, the second one is the power cable to connect the monitor and the power outlet. Let’s see how safely we can change our display connector cable to fix the display settings, not saved problems.
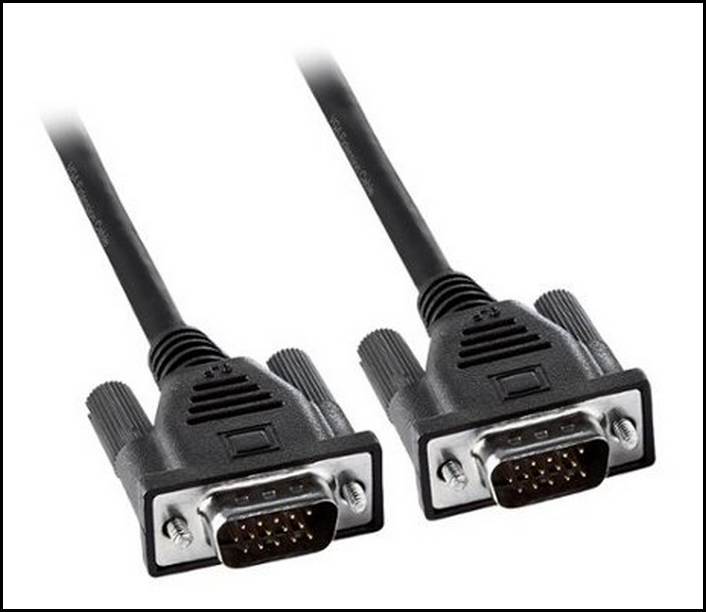
Here are the steps to change the display connector cable on your computer:
- Find your monitor’s both the connector cables.
- Match a connector with one of the video ports of the monitor.
- Plug it into the corresponding ports on both your monitor and computer.
- Find the power cord to power the monitor.
- Place one end of the power cord on the monitor and the other end with the CPU.
- Turn on the computer and the monitor.
If you are done, you have successfully changed your Display Connecting cable.
Final words
To wrap up, one of the methods I noted must work for your display error. I tested on many individuals, and it resulted in positive. Follow my instructions step-by-step and let me know if you could win over the situation.
Was this article helpful? If yes, please feel free to share it with your friends. Still, you have any queries, comment below in the box. I will reach you as early as I can.