You are accessing your internet connection like you always do, checking some game scores or working, when all of a sudden you get a ‘DNS server not responding error.
If that’s the case, you might wonder:
Why is the DNS server not responding?
You are not the only one to face this issue, however. I have seen lots of people with Windows 11 complaining about DNS servers, and I encountered this problem myself, and I only managed to fix it after spending more than three hours combing through numerous blogs and articles.
Lucky for you, I’m here to stop you from wasting time like me. All you need to do is just go through this article without skipping anything, and your DNS server issue will get resolved in no time.
How To Fix DNS Server Not Responding?
If you don’t already know, DNS servers are one of the central aspects of the internet. Without it, the internet would be completely useless. If you remember the days when landline phones were a thing, you might refer to a DNS server as a phonebook.
That’s why it’s no surprise that it can feel like the end of the world if your DNS server stops responding. Before moving forward to the fixes, I suggest you do some basic tests first, like checking if the internet cables are correctly connected or whether the router is off.
Here are the ways to fix DNS server not responding:
1. Run Multiple Troubleshooters
All versions of windows are bundled with tons of troubleshooters to fix some common bugs related to the OS quickly. I suggest trying some of them out before attempting the more complicated fixes.
Here are the steps to run multiple troubleshooters:
- Press both the Windows and R keys at the same time to launch the Run window.
- Type in Control Panel and hit enter.
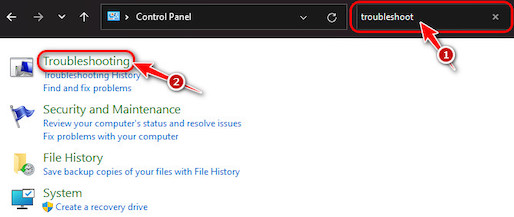
- Type ‘Troubleshoot’ in the search box and click on the Troubleshooting option.
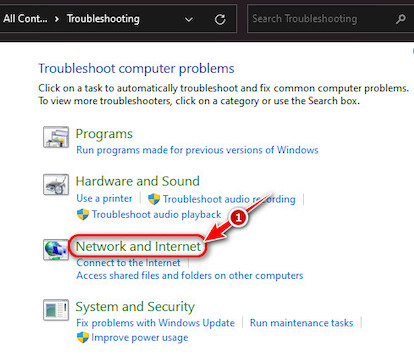
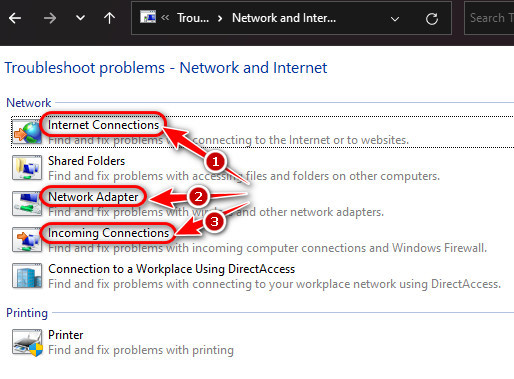
- Click on ‘Network and Internet’ on the next page.
- Run the Internet Connections troubleshooter first and follow the instructions. After that, I recommend running Network Adapter and Incoming Connections as well.
Check out our expert-recommended to fix Stop Apps Running in Background Windows 11.
2. Refresh the DNS Server
If your DNS cache is the source of the error, then a simple refresh should solve the problem without any delay.
Here’s how you can refresh the DNS server:
- Open another instance of the Run window by pressing Windows and R keys simultaneously.
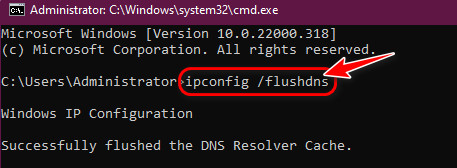
- Type ‘cmd’ in the Run window and click on OK.

- Type ‘ipconfig /flushdns’ in the Command Prompt window and press enter.
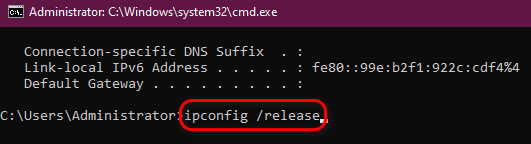
- Next, type ‘ipconfig /release’ in the window.
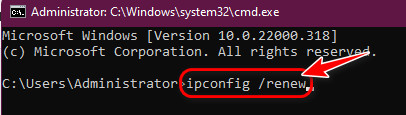
- The last command you need to type is ‘ipconfig /renew’. After that, the DNS settings will be reset.
So, the superfetch service is using a lot of CPU? Check out how to disable SuperFetch on Windows 11.
3. Modify DNS Configuration
If the previous methods didn’t work, there could be a chance that the default DNS that your network provider supplies are flawed or having issues. In that case, it is best to configure the DNS provider from your computer manually.
There are many free DNS providers out there, but here are the best two:
- Cloudflare – 1.1.1.1/1.0.0.1
- Google – 8.8.8.8/8.8.4.4
Also, check our latest post on how PC won’t go to sleep mode in Windows 11.
Here are the steps to modify DNS configuration:
- Click on the Start menu, type Control Panel, and hit enter.
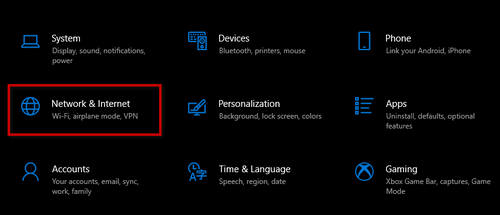
- Look for the Network and Internet option and click on it.
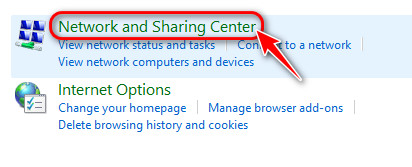
- Select the Network and Sharing option at the top.
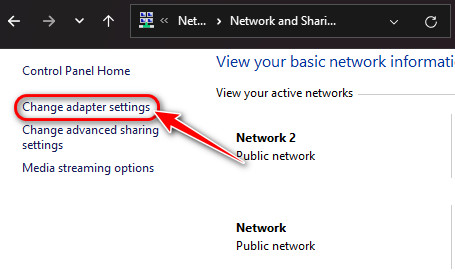
- After that, locate the ‘Change adapter settings’ option on the top-left corner and click on it.
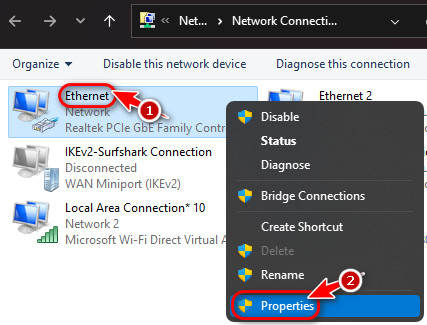
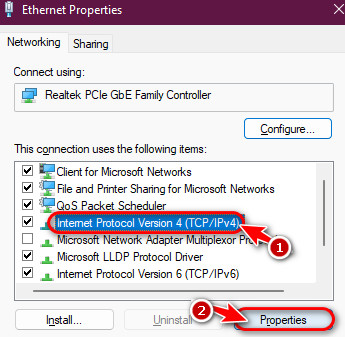
- You should see a list of all the networks connected to your computer. If you are using Wi-Fi for the internet, select that or choose ethernet. After selecting, do a right-click on it and click on Properties.
- Select Internet Protocol Version 4 (TCP/IPv4) and click on Properties.
- Next, click on ‘Use the following DNS server addresses’ radio button. Then type the following, based on your preference:
If you choose CloudFare:
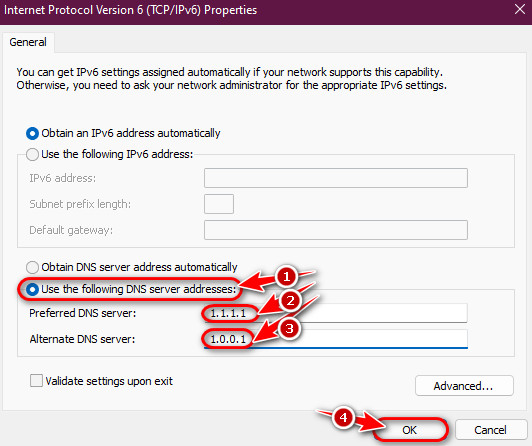
Preferred DNS Server – 1.1.1.1
Alternate DNS Server – 1.0.0.1
If you choose Google:
Preferred DNS Server – 8.8.8.8
Alternate DNS Server – 8.8.4.4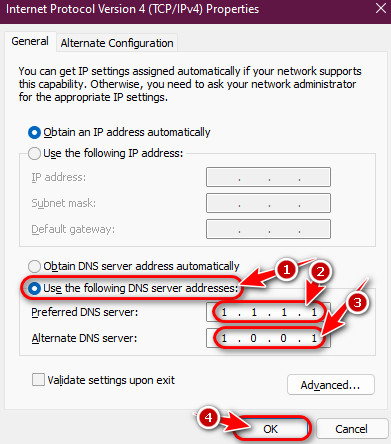
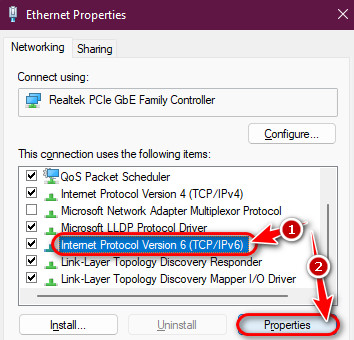
- Click on OK to save the changes, select Internet Protocol Version 6 (TCP/IPv6), and click on Properties. Repeat the same tasks as the previous step.
Follow our guide on How to Boot to Safe Mode in Windows 11.
4. Reboot DNS
If some third-party software was interfering with your DNS server, rebooting a few DNS-related services should eliminate any issues.
Here are the steps to reboot DNS related services:
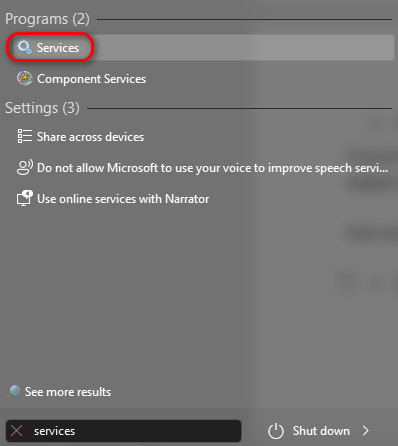
- Click on your Start menu, search for ‘services’ and click on the first result.
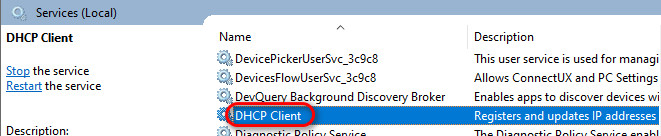
- To avoid scrolling for a long time, just select any service, press ‘D’ on your keyboard, and double-click ‘DHCP Client’.
- Switch the startup type to Automatic and click OK.
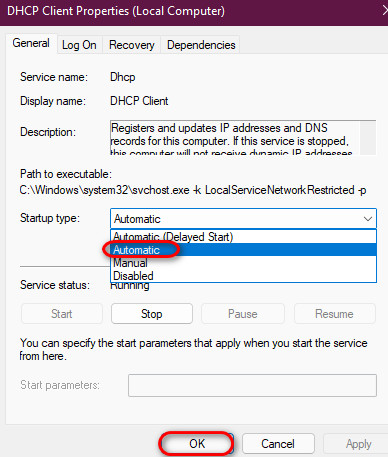
- After that, right-click on DHCP client and DNS client one by one and select Restart.

5. Turn Off Proxy Servers
Proxy servers are great for enhanced privacy and network performance but they have the potential to cause DNS problems.
Here’s how you can turn off proxy servers:
- Open up the Settings app on Windows by pressing both the Windows and I key at the same time.
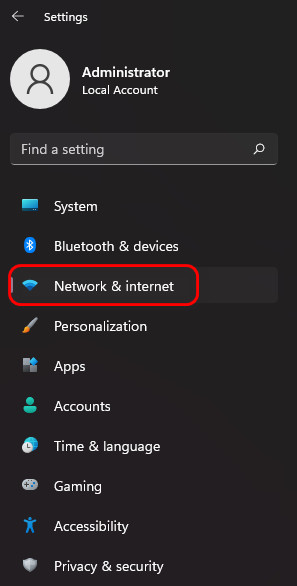
- Click on Network and Internet on the left pane.
- Scroll down and click on the Proxy option on the right pane.
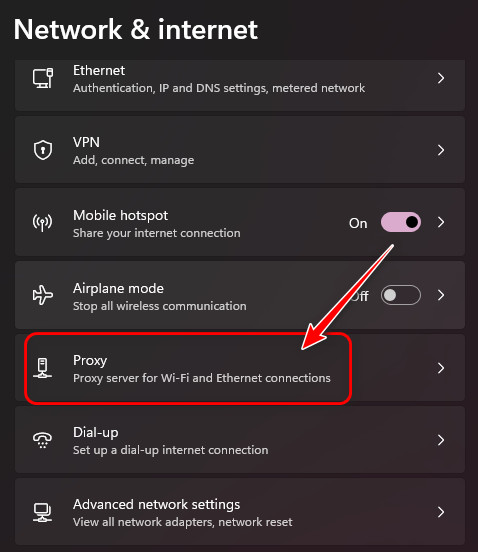
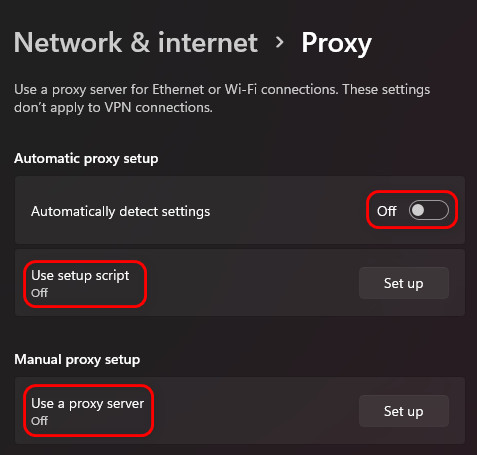
- Under ‘Automatic proxy setup’, turn off the toggle for Automatically detect settings and make sure ‘Use setup script’ and ‘Use a proxy server’ are turned off.
Follow our guide to fix Windows Can’t Access Network Drive On Windows 11.
6. Perform a Network Reset
Since the DNS server is deeply integrated into the Network, restoring network settings to default should solve all network-related problems, including DNS issues.
Here are the steps to perform a network reset:
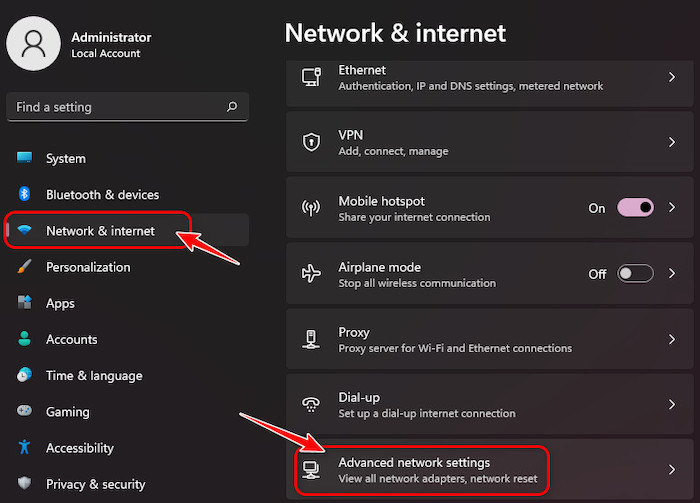
- Press the Windows, and I key simultaneously to launch Settings.
- From the left pane, click on Network and Internet and then scroll down on the right pane and click on Advanced network settings.
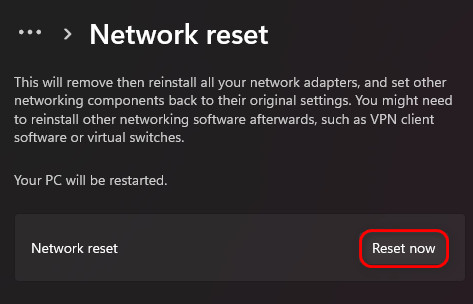
- Scroll down on the next page and click on Network Reset.
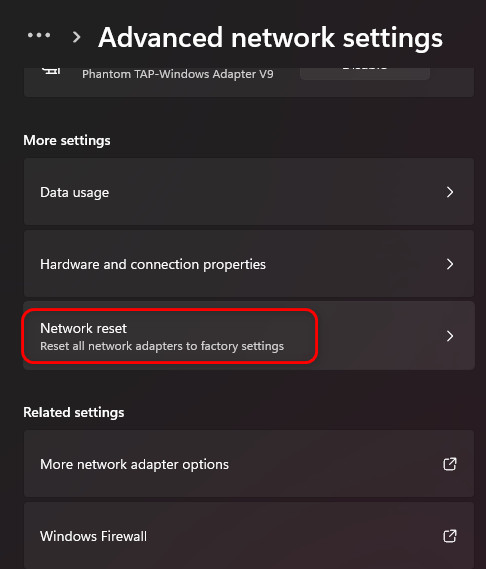
- Click on Reset Now to restore to Factory Settings.
- If you are still having issues, search for cmd in the Start menu and launch it.
- Type ‘netsh winsock reset’ and press enter.

7. Last Steps
Most of you should have already solved the issue from one of the previous fixes, but if it didn’t work, I believe something else is interfering with your network.
If you installed or enabled any third-party software to monitor network traffic, you need to disable them immediately as that is known to cause issues with DNS servers.
You can also perform a soft reset on your router by rebooting it to clear any network cache. One more thing you can try is temporarily disabling antivirus and checking if the problem gets resolved.
If it does, I suggest disabling antivirus permanently or installing another one that doesn’t interfere with the network.
FAQ
What DNS server should I use?
You can use any DNS server based on what you are using it for, and Cloudflare is an excellent option for improved security. However, I suggest using OpenDNS if you want better reliability and speed.
Is flushing DNS safe?
Yes, flushing DNS is safe. It is responsible for contacting the DNS server to resolve some things and store them in the cache, and there is no security risk involved in the process. Plus, you don’t need to do this manually most of the time since it happens automatically.
How do I find my DNS server Windows 11?
You can find your DNS server on Windows 11 by launching a command prompt window, typing ‘ipconfig /all’, and pressing Enter. Scroll down a little bit and look for the DNS Servers field. You should see both your primary and secondary DNS servers here.
Final Thoughts
DNS servers are to a network what a CPU is to a computer. So, it’s no surprise that the side effects can be huge if something goes wrong with DNS. Despite that, it is pretty simple to fix any DNS-related problems if you did all the steps exactly as I wrote them.
I hope you found this article helpful, and you are welcome to reach us for any queries.