Do you want to turn on TPM 2.0 so that you can install Windows 11 on your Windows system machine but cannot find a way out?
If this is the point, don’t worry. You have come to the right place, then.
If you are looking for a step-by-step guide to turn on the TPM 2.0 security processor on your Windows system, here is the best-proven guide for you.
As a tech specialist, I will know the best possible way to turn on the TPM 2.0 security processor. This article will show you the practical way to turn the TPM 2.0 security processor on your Windows computer, which helps you install Windows 11 easily.

Keep reading the whole post and follow the instructions.
So, let’s get started without further delay.
Why Do you Need to Enable TPM 2.0?
You need to enable the TPM 2.0 because the new windows 11 OS needs a TPM 2.0 security processor on your system to install the new OS. Without the TPM 2.0 security processor, you can not install the latest Windows 11 OS on your system. To enable the TPM 2.0, you need to go to the UEFI/BIOS.
The TPM 2.0 stands for Trusted Platform Module version 2.0. It is a crucial security-related chip that helps maintain and protect system security.
Also, check out our separate post on how to fix motherboard HDMI no signal.
The Trusted Platform Module version 2.0 is supported by most PCs released in the last five years. TPM 2.0 is an essential security-related feature in Windows 11 that is required to install and run the operating system smoothly.
The TPM 2.0 module is used to store information such as passwords, critical data, encryption keys, credentials, and more. It is also utilized in Windows 11 for Windows Hello for identity security and BitLocker for data security.
To enable the TPM security processor, you must first ensure your motherboard supports the TPM 2.0 feature and the TPM status on your system.
In the following sections, I will show you the various methods to know the TPM status and the process to enable the TPM 2.0 security processor on your TPM-supported system computer.
How do I know if TPM 2.0 is Enabled?
In some cases, TPM 2.0 is disabled by default in the motherboard. But you don’t need to worry about it. You can quickly check any time to ensure the TPM 2.0 status on your system before trying to install the Windows 11 OS.
There are some methods to check the TPM 2.0 status on your system if you ensure your motherboard supports the TPM 2.0 feature.
Have some time to spare? Check out our latest fix for Bluetooth Toggle Missing On Windows 11.
Here are some steps to know your TPM 2.0 is enabled or not:
1. Use the Windows Security app
One of the easiest ways to check the TMP 2.0 status on your system is using the Windows Security app.
Follow the steps below to check the TMP 2.0 status on your system using the Windows Security app:
- Press Win + I keys on your keyboard to open the Windows System Settings.
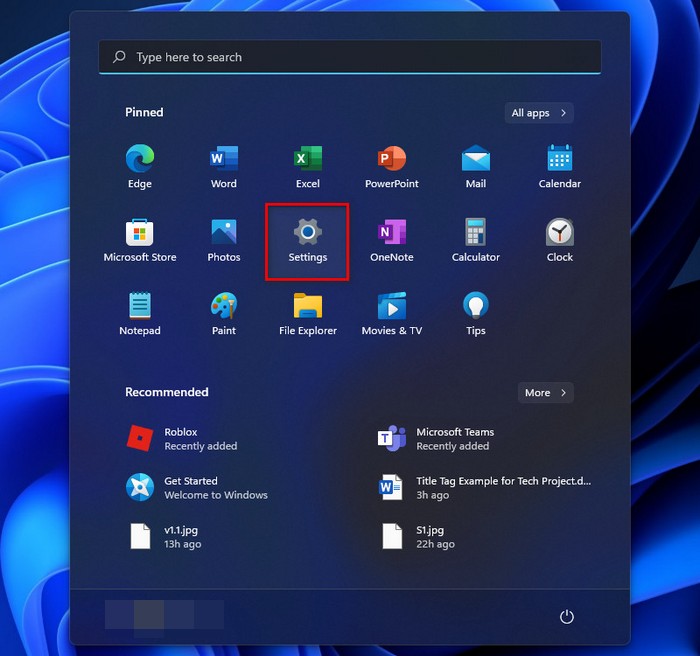
- Click on the Start menu icon on the left-side corner of the taskbar and select the Settings app under the Pinned apps to open the Windows System Settings.
- Select the Privacy & Security tab on the left-side system settings menu.
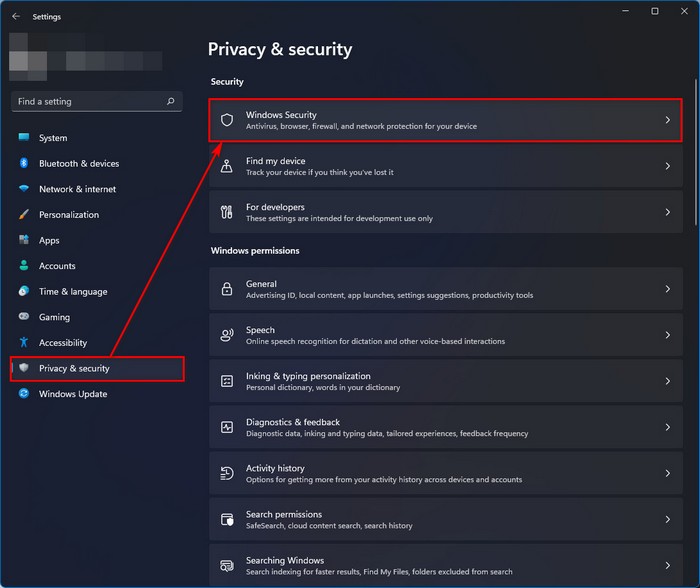
- Click on the Windows Security tab at the top of the window under the Security section.
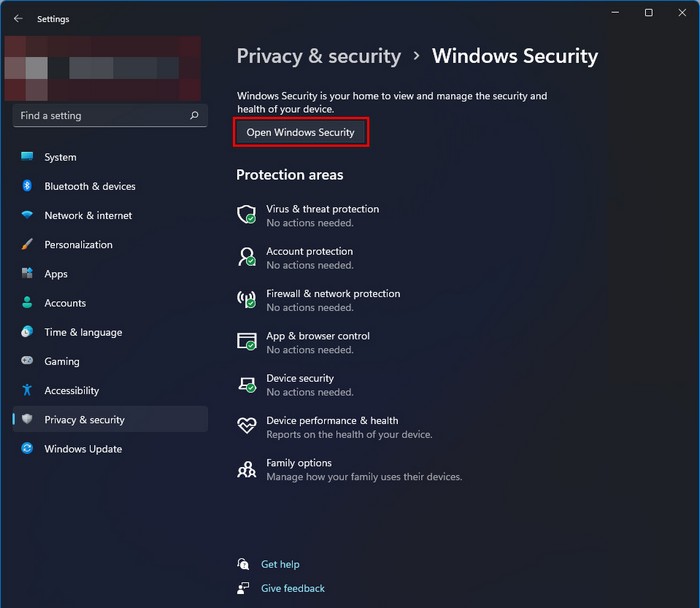
- Click on the Open Windows Security button to open the Windows Security window.
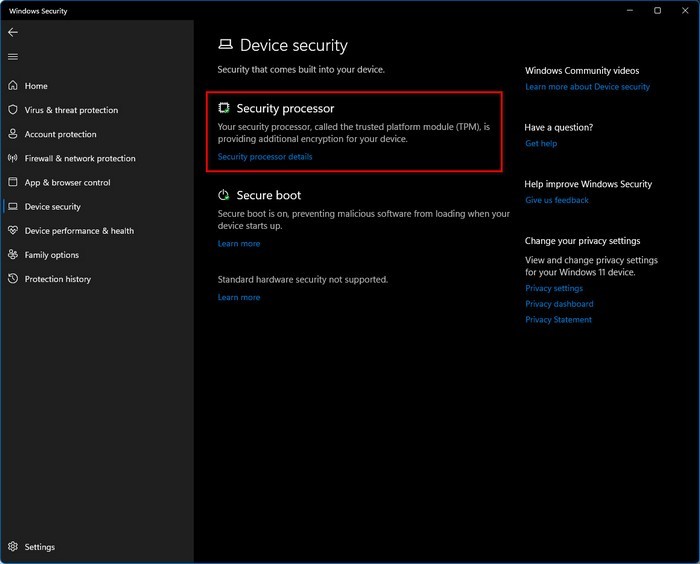
- Select the Device security tab on the left-side Windows Security menu or right-side Windows Security screen.
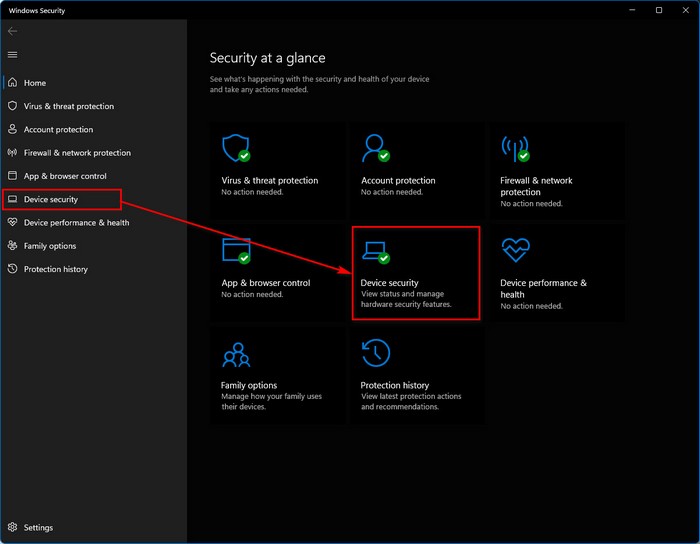
- You can see the Security processor section at the top of the Device security window if your TPM 2.0 is enabled. Otherwise, the Security processor section is not showing if your TPM 2.0 is disabled.
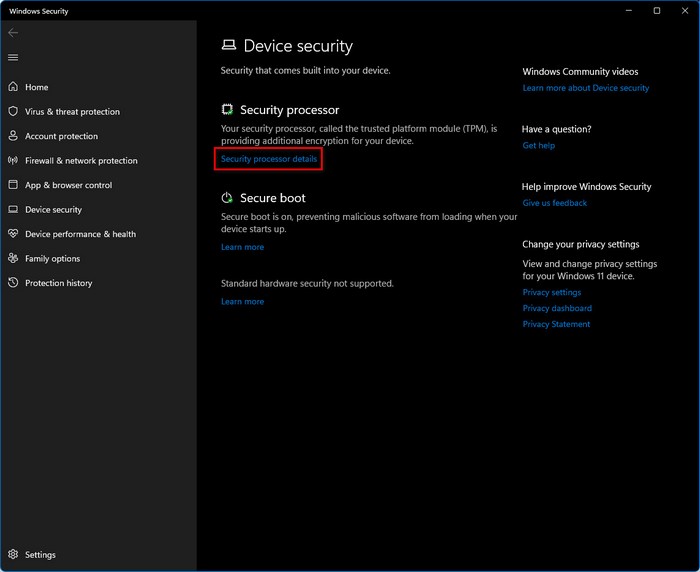
- Click on the Security processor details under Security processor to check your TPM specification details.
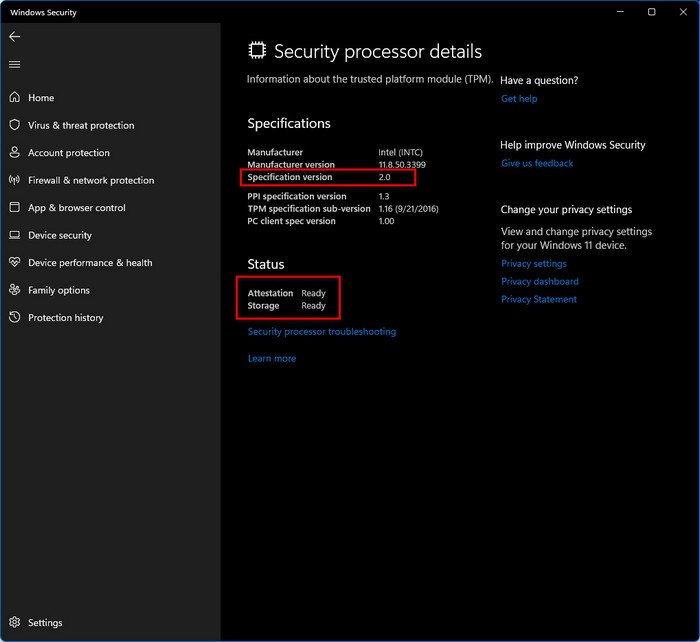
- Here, you can see your TPM Specification version, Status, and other information. If your TPM Specification version is less than 2.0, your device isn’t compatible with Windows 11.
2. Use the Microsoft Management Console
Another effective way to check the TMP 2.0 status on your system is using the Microsoft Management Console.
Check out my new post on Is SSD Affected by Magnets.
Follow these steps to check the TMP 2.0 status on your system using the Microsoft Management Console:
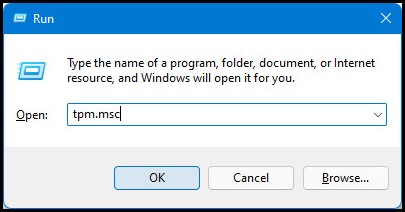
- Press Win + R keys on your keyboard or click on the Windows Search icon on the left-side corner of the taskbar and type run, and hit the Enter button to open the Windows Run program.
- Type tpm.msc and press the Enter button or click the OK button.
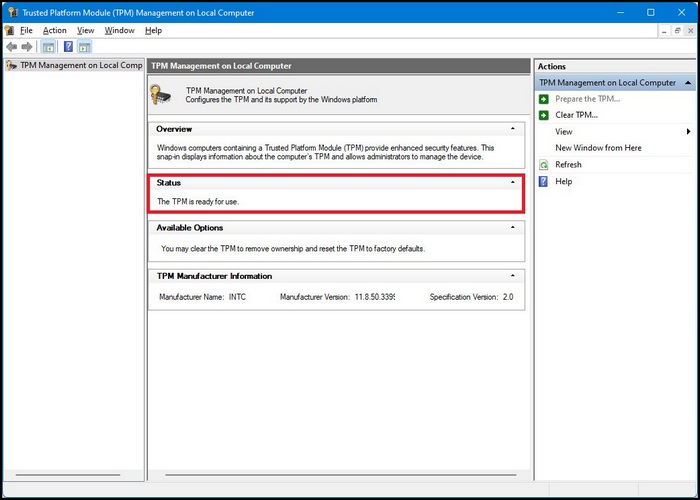
- If you see a message: Compatible TPM cannot be found under the Status section, then the TPM is disabled on your computer. In my case, the TPM is enabled.
- If you see a message: The TPM is ready to use under the Status section, then the TPM is enabled on your computer.
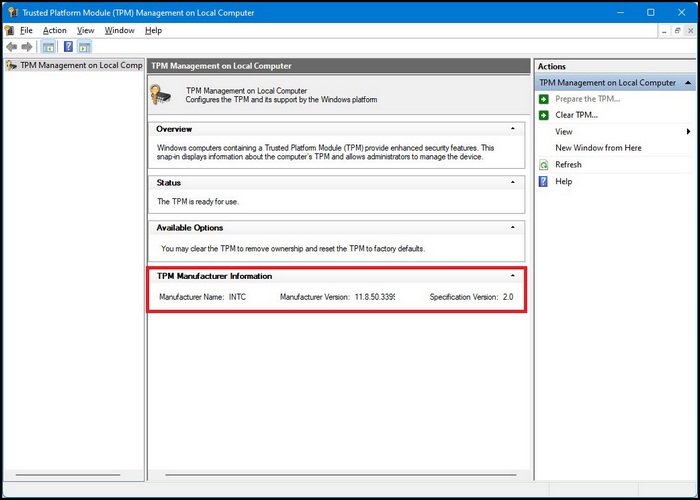
- You can also see all the TPM details under the TPM Manufacturer Information section at the bottom of the window.
How to Enable TPM 2.0 in BIOS for Windows 11
If you ensure your motherboard supports TPM 2.0 features and the TPM 2.0 security processor is disabled on your system, you need to enable it to install Windows 11.
To enable the TPM 2.0, you need to go to the UEFI/BIOS to manage the TPM settings. After allowing the TPM security feature, you can install the Windows 11 OS on your computer.
Check out our post on will motherboard boot without CMOS battery.
Here are the steps to enable the TPM 2.0 in BIOS for Windows 11 on your system:
Follow the steps below to enable the TPM 2.0 in BIOS on your system:
- Press Win + I keys on your keyboard to open the Windows System Settings.
- Click on the Start menu icon on the left-side corner of the taskbar and select the Settings app under the Pinned apps to open the Windows System Settings.
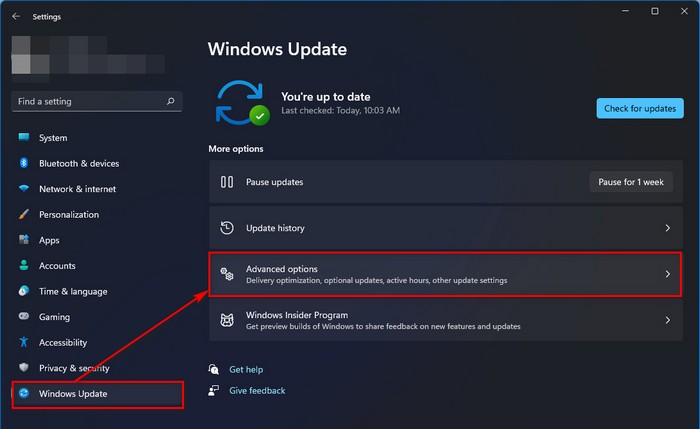
- Select the Windows Update tab on the left-side system settings menu.
- Click on the Advanced options tab under the More options at the right-side bottom of the window.
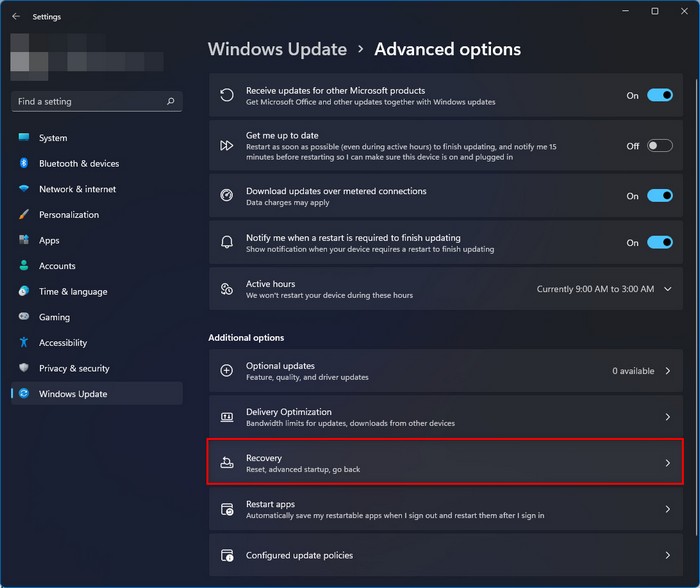
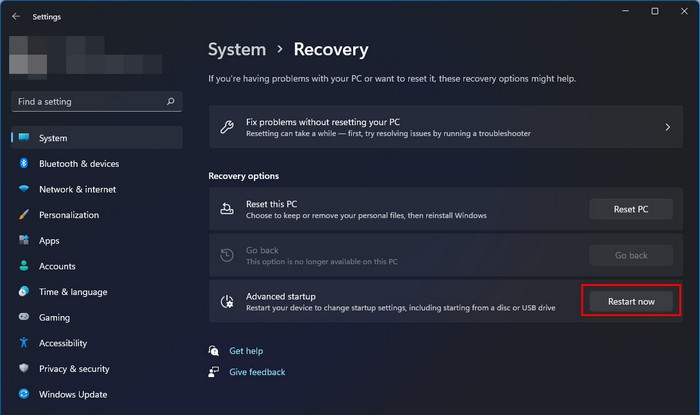
- Select the Recovery tab under the Additional options to open the Windows Security window.
- Under the Recovery options section, click on the Restart now button at the bottom of the window.
- Click on the Restart now button again to confirm you want to restart your computer.
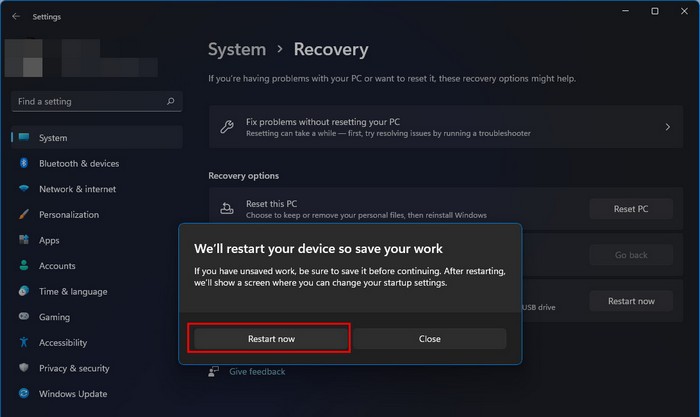
- After restarting, the system shows a screen to change your startup settings.
- Navigate to Troubleshoot > Advanced options > UEFI Firmware Settings > Restart to get to the BIOS menu.
- Go to the Advanced, Security, or Trusted Computing labeled menu to find the TPM options.
- Check the label Security Device, Security Device Support, TPM State, AMD fTPM switch, AMD PSP fTPM, Intel PTT, or Intel Platform Trust Technology to find the TPM options.
- Toggle On the TPM option button to enable the TPM security processor.
- Press the F10 key or click on the Save and Exit button to save and apply the changes.
So, the superfetch service is using a lot of CPU? Check out how to disable SuperFetch on Windows 11.
FAQs
What is a TPM 2.0 device?
The TPM 2.0 device is a crucial security-related chip that helps maintain and protect system security, and it stands for Trusted Platform Module version 2.0.
How do I Enable TPM 2.0 in Asus BIOS?
For an Intel motherboard, follow these steps to enable the TPM 2.0 in Asus BIOS:
- Press the F2 or DEL key on your keyboard when the ROG logo appears on the screen to open the ASUS BIOS.
- Select Advanced\PCH-FW Configuration option.
- Choose Enable on the PTT option and click on OK to apply the change.
- Press the F10 key or click on the Save and Exit button to save and apply the changes.
For an AMD motherboard, follow these steps to enable the TPM 2.0 in Asus BIOS:
- Press the F2 or DEL key on your keyboard when the ROG logo appears on the screen to open the ASUS BIOS.
- Select Advanced\AMD fTPM configuration option.
- Choose Firmware TPM on the TPM Device Selection option to enable the TPM device.
- Press the F10 key or click on the Save and Exit button to save and apply the changes.
Final Thoughts
TPM 2.0 is a security component in Windows 11 required for the operating system to install and run properly. The TPM 2.0 module is used to store data and is also utilized in Windows 11 for Windows Hello and BitLocker data security.
You must first ensure your motherboard supports the TPM 2.0 feature and the TPM status on your system. After confirming it, you can enable the TPM security processor.
Here, I describe the necessity of the TPM device and some effective methods to know the TPM activity status. I also explain the process you can use to enable the TPM 2.0 in BIOS for Windows 11 on your system.
I hope you found this post to be informative. If you found this post helpful, please let me know which method works for you.
You may also look at other posts if you’re interested in learning more about similar topics.