You might be using OneDrive to save your files & photos in the personal cloud storage. But recently, you noticed everything becomes sluggish after starting the PC.
In most cases, running a low-configured PC where OneDrive is set to run at startup could trigger the issue. To solve it, buying a high-end PC seems like a costly solution! Disabling and enabling it again may solve it. To know how to do that, read thoroughly till the end.
So, get a cup of coffee and start reading. Let’s begin!
Check out our separate post: OneDrive: we couldn’t merge the changes in an Office file.
How to Disable OneDrive in Windows 11
You can disable OneDrive from its Settings by turning off the auto-launch at the startup. Moreover, go to Group Policy or Registry Editor and do some changes to disable it. Plus, there is an unlink account option in the OneDrive settings, so you can stop syncing your files further.
So, if you are having trouble with OneDrive, you must disable it by the following methods.
Here are the methods to disable OneDrive in Windows 11:
1. Disable OneDrive from Launching at Startup
There is an option in OneDrive’s Settings to prevent the app from launching at startup. You can stop OneDrive from there, and it’ll do the work for you.
Here are the steps to disable OneDrive from launching at startup:
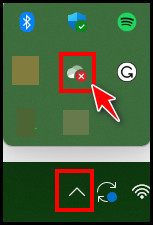
- Go to Taskbar and click on the arrow icon.
- Right-click on the OneDrive icon.
- Select the gear icon and choose Settings.
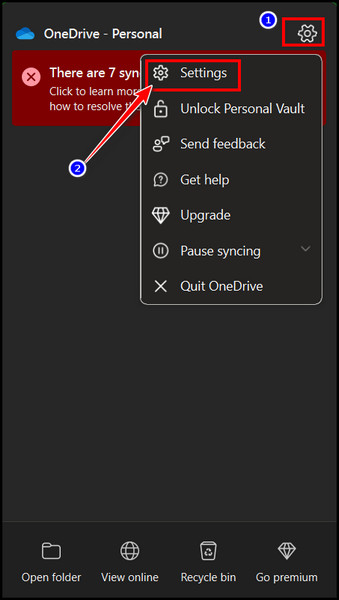
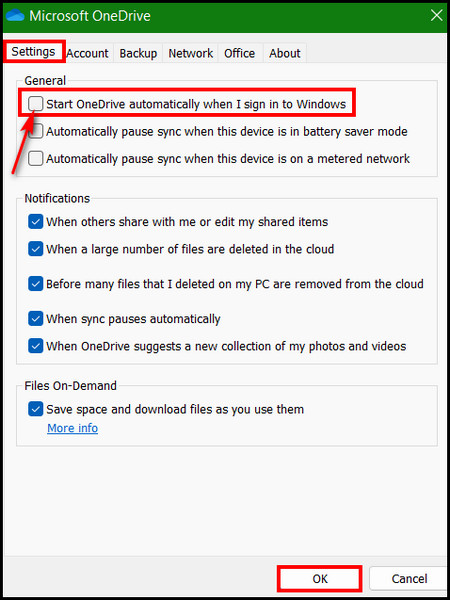
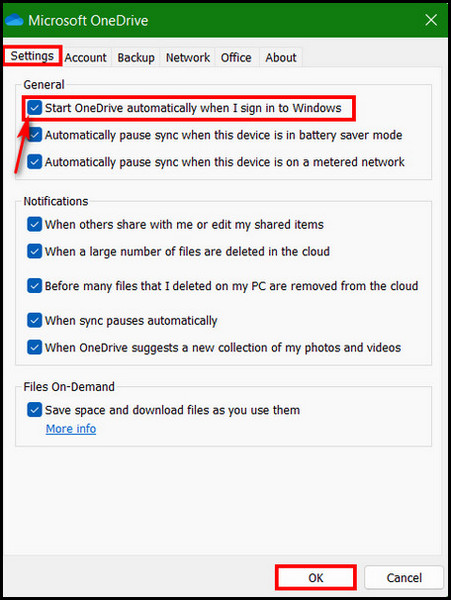
- Go to the Settings tab and uncheck the Start OneDrive automatically when I sign in to the Windows option under the General section:
- Hit the OK button.
Pro Tip: If you want to pause the syncing, go to OneDrive from the taskbar and click on the gear icon again. Choose Pause syncing and select 24 hours.
From now, you won’t face lag while starting up the PC because you have disabled the launch at the startup option for OneDrive.
2. Unlink OneDrive Account
Unlinking the OneDrive account can turn off the syncing process. It can’t start the backup process without a linked account. When OneDrive isn’t doing anything, it can’t use the system power. That’s when the PC gets out of the laggy state.
Let’s see how to unlink your OneDrive account.
Here are the steps to unlink your OneDrive account:
- Go to Taskbar and click on the upper arrow icon.
- Right-click on the OneDrive icon.
- Select the cog icon and choose Settings.
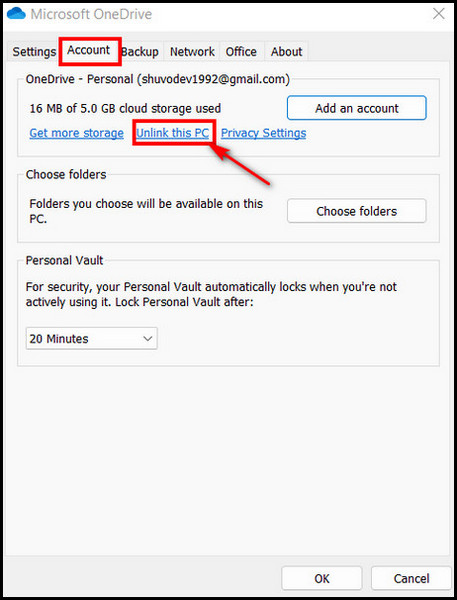
- Click on the Account tab and select the Unlink this PC button.
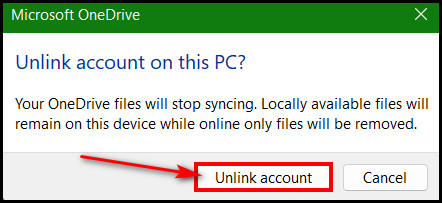
- Select the Unlink account from the prompt.
Unlinking the account from Settings will help the PC run faster by halting all the OneDrive tasks.
Read more on how to use Tablet Mode on Windows 11.
3. Disable OneDrive from Registry Editor
From the Windows Registry Editor, one can change any internal system settings. So, you can go to the Windows Registry Editor to disable OneDrive. To do so, you must change a value for a DWORD file of OneDrive.
Here are the steps to disable OneDrive from Registry Editor:
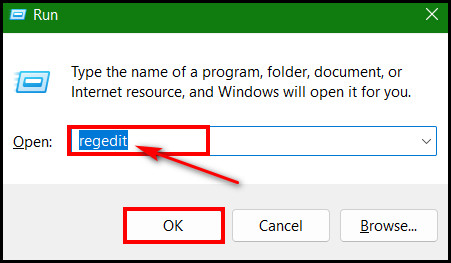
- Launch the Run console by pressing the Windows key + R.
- Type regedit and press Enter or click OK.
- Navigate to the OneDrive location by pasting the following path in the address bar:
Computer\HKEY_CURRENT_USER\Software\Microsoft\OneDrive - Double-click on the DisableFileSyncNGSC key and change the value to 1. If you don’t find this key, do the following:
- Right-click the blank space on the right panel.
- Choose New > DWORD (32-bit) Value.
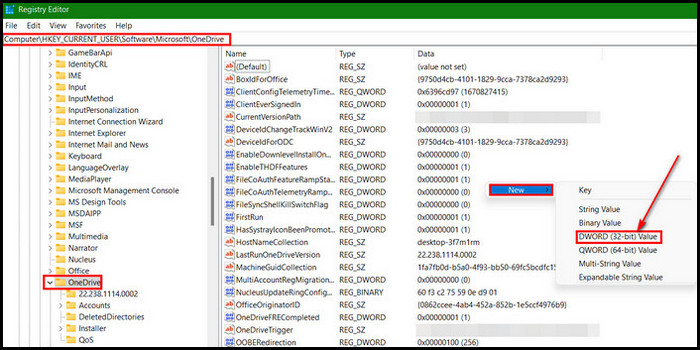
- Rename it to DisableFileSyncNGSC.
- Double-click on it and change its Value data to 1.
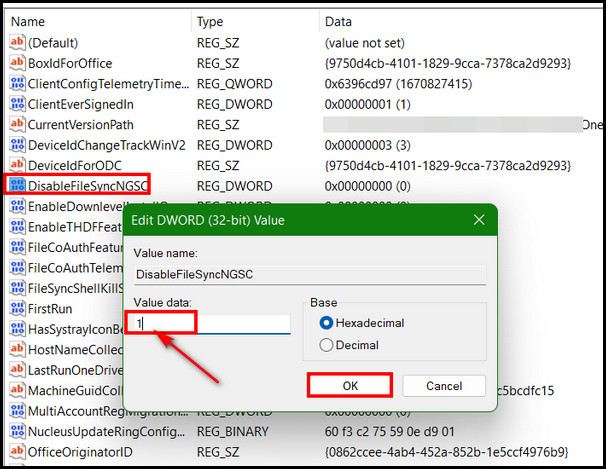
- Click OK and close all the expanded paths in the left pane.
- Exit from the Registry Editor.
- Restart the PC for the changes to take effect.
After the restart, you’ll find OneDrive is disabled.
4. Disable OneDrive from Group Policy Editor
You can also use the Group Policy Editor to disable it. From the Group Policy Editor, you can prevent OneDrive from using the file storage. Preventing it from accessing the files will halt the entire OneDrive task.
It’s enough to get your PC out of the laggy situation because OneDrive won’t use the system resources anymore.
Here are the steps to disable OneDrive from Group Policy Editor:
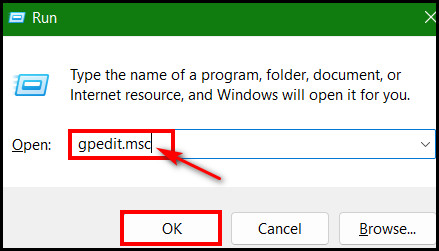
- Press the Windows key + R and type gpedit.msc in the Run console.
- Hit Enter or click OK to launch Group Policy Editor.
- Go to Computer Configuration > Administrative Templates > Windows Components > OneDrive this path.
- Find the Prevent the usage of OneDrive for file storage policy and double-click on it.
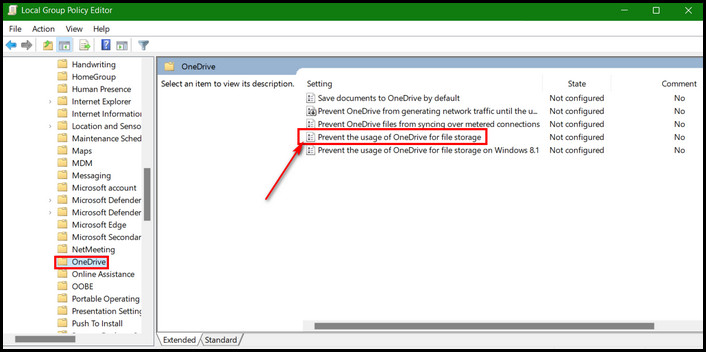
- Click the Enabled radio button.
- Hit Apply > OK.
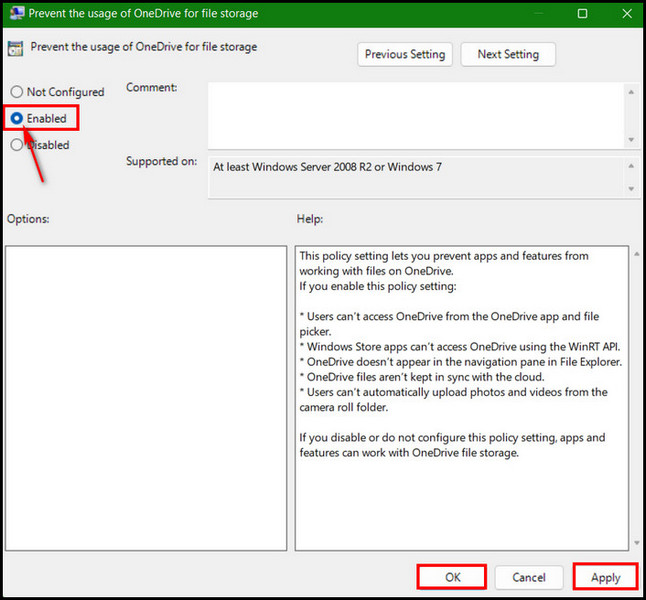
Now, exit the Group Policy Editor. Enabling the Prevent the usage of OneDrive for file storage policy will disable the OneDrive by preventing it from accessing files.
Also, check out our separate post on how to fix Windows can’t access network drive on Windows 11.
How to Uninstall OneDrive in Windows 11
Uninstalling OneDrive is another option. To uninstall it, use the Windows Settings app. In Addition, run some command lines from the CMD or PowerShell to uninstall OneDrive. So, it’s your call which method you should go for uninstalling OneDrive.
Here are the methods to uninstall OneDrive in Windows 11:
1. Uninstall OneDrive Using Windows 11 Settings App
Uninstalling the OneDrive app using the Windows 11 Settings app is the last piece of the puzzle you should go for. It’s a straightforward process and won’t take less than a minute. Just go to the Windows Settings app and navigate to the Apps section. From there, you can uninstall OneDrive.
Here are the steps to uninstall OneDrive from Windows 11 Settings App:
- Press Windows Key + I to launch the Settings app.
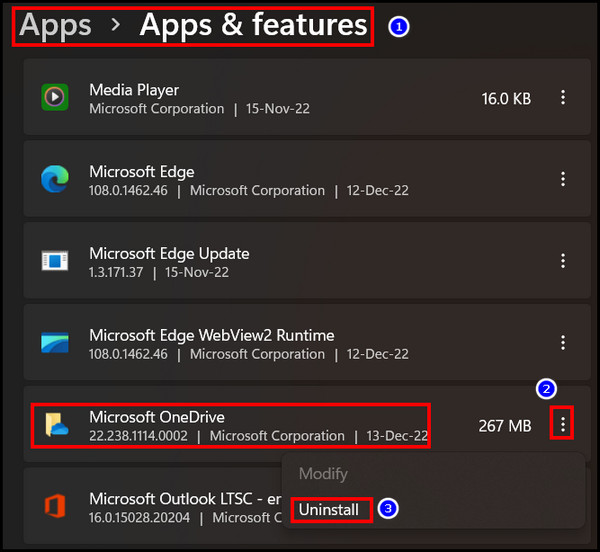
- Navigate to Apps > Apps & features.
- Scroll down and look for Microsoft OneDrive.
- Click on the three dots from the right side.
- Choose the Uninstall option from the list.
- Click on the Uninstall button again.
- Select Yes on the prompted Window.
- Follow the on-screen instruction to complete the uninstall process.
Now, you have successfully uninstalled OneDrive from the system.
2. Uninstall OneDrive Using CMD
Command prompt or CMD is a great option for uninstalling OneDrive. To uninstall, write command lines in CMD and execute. Like CMD, PowerShell can uninstall OneDrive by command lines.
So, let’s look at the command lines of CMD & PowerShell and how to execute them to uninstall OneDrive.
Here are the steps to uninstall OneDrive using CMD:
- Search CMD using Windows search and choose the Run as administrator option.
- Hit Enter after each following command lines:
TASKKILL /f /im OneDrive.exe
%systemroot%\SysWOW64\OneDriveSetup.exe /uninstall
Remember, CMD won’t show you anything while uninstalling OneDrive.  So, wait for a few minutes until the execution is done. Now, exit from the CMD, and you won’t find OneDrive anymore.
Here’s a complete guide on how to restore files from File History on Windows 11.
3. Uninstall OneDrive Using PowerShell
PowerShell works similarly to the CMD. It not only executes command lines but also executes batch commands. It is also possible to automate tasks with scripting through PowerShell. With it, one can easily uninstall OneDrive. So, let’s take a look at how to do that.
Here are the steps to Uninstall OneDrive using PowerShell:
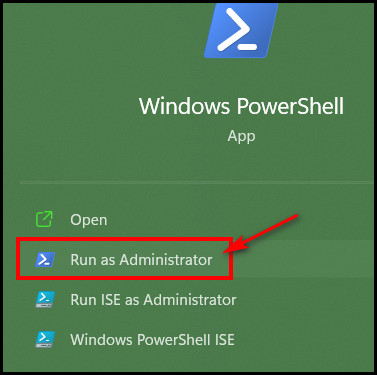
- Press the Windows key and search for PowerShell in the search bar.
- Select the Run as administrator option for PowerShell.
- Run the following command line and hit Enter to execute it:
winget uninstall onedrive
- Press Y from the keyboard to agree on the terms.
After pressing Y, you’ll see the Successfully uninstalled message after executing the command line. Now, exit from PowerShell.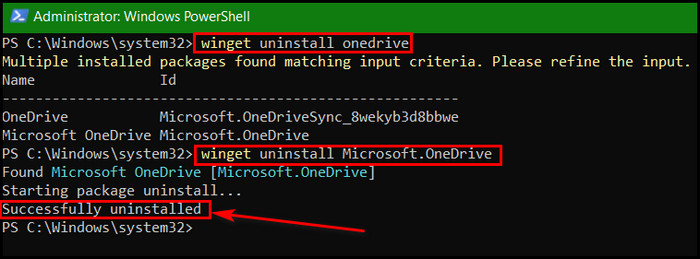
How to Enable OneDrive from Windows 11
You can enable OneDrive to sync all your files and photos to the cloud storage. If you have disabled it from OneDrive Settings, you can always enable it. Just check the box for OneDrive to launch at startup, and you’re good to go.
Note: You can enable it in the Settings form where you disabled it. Moreover, if you have disabled it from the Group Policy or Registry Editor, you must revert the changes you have made to enable OneDrive.
Here are the steps to enable OneDrive from Windows 11:
- Launch Onedrive and go to the Taskbar.
- Click on the arrow icon and right-click on OneDrive.
- Select the cog icon and choose Settings from the context menu.
- Check the box for Start OneDrive automatically when I sign in to theWindows.
- Click OK.
Moreover, you can link the OneDrive account if you have unlinked the account from it. Once you have successfully followed all the steps, you have enabled OneDrive for sure.
Should You Disable OneDrive?
Disabling OneDrive might change the situation and make your PC faster while starting up. Due to the low-configured PC, your PC might run slow because OneDrive uses CPU processing power to back up all your files. While starting up, it uses both the system power and network resources.
That’s why a PC with a weak processor can’t provide all the startup processing power. Along with OneDrive, there might be other startup apps to suck up all the processing power. So, a weak system can’t keep up with all the startup apps.
You must eliminate all the heavy impactful startup apps to prevent your PC from slowing down. OneDrive is one of the impactful startup apps. If you’re using a low-end PC, you must disable or uninstall OneDrive.
Also, check out our separate post: create a Keyboard shortcut for any program in Windows 11.
FAQs
Do I have to use OneDrive on Windows 11?
OneDrive is a built-in application that comes with Windows 11. But you don’t have to use it to save files and photos in OneDrive’s cloud storage. Uninstall or disable it if you don’t use or need it.
Can you disable OneDrive?
Disable OneDrive from its Settings by unchecking the auto startup option. Go to Group Policy or Registry Editor and modify some changes to disable OneDrive.
How to Quit the OneDrive app?
Click on the arrow icon from the Taskbar and right-click on the OneDrive icon. Select the cog or gear icon and click the Quit OneDrive option from the context menu.
Bottom Line
OneDrive is a cloud-based file hosting service that stores your precious photos and important files. You have to keep it running all the time to sync all the files and keep everything up to date.
If you are using a high-end PC, you must keep using OneDrive. But disabling it becomes crucial when a low-end PC is someone’s daily driver. I hope you understand all the methods and steps to enable or disable OneDrive in Windows 11.
Let me know for further assistance in the comment box below. See you at the next one.