Is your multicore processor not delivering enough performance as it should? Maybe a few cores are activated and performing all the tasks.
If that’s the problem and you want to enable all the cores of your CPU, it’s possible from the BIOS and Windows System Configuration. Read this article to the bottom to get the complete guideline for enabling all CPU cores in Windows 11. So, without further ado, let’s begin.
Check out our separate post on can you return a CPU with bent pins.
How to Enable All CPU Cores from BIOS in Windows 11
You can enable all physical CPU cores from the BIOS settings. Suppose you have an 8-core CPU, and only 4 cores are working. Go to your mobo’s BIOS and enable all 8 cores from the Multicore Support settings. You can also enable hyperthreading from BIOS.
Note: BIOS settings and interface differ from one motherboard brand to another. All you need to do is find out multicore settings and enable all the cores from there.
Let me show you the steps to enable all the physical CPU cores from BIOS.
Here are the steps to enable all the physical CPU cores from BIOS:
- Turn off the PC and restart it.
- Keep pressing Del or F2 key to get into the BIOS settings.(BIOS key differs from one brand’s mobo to another)
- Go to the Performance tab and look for Multicore Support or relevant settings.
- Click on Multicore Support and select the radio button for the All option.
You can also activate hyperthreading from the BIOS too. Hyperthreading will execute and handle all the tasks better than a non-hyperthreaded process. If your processor supports hyperthreading, you must enable it for improvement performance.
Here are the steps to enable hyperthreading from BIOS:
- Go to the Performance tab and look for HyperThread Control.
- Click on HyperThread Control.
- Select the radio button to turn on the Enabled option.
After activating all the CPU cores and hyperthreading, choose the Save & Exit option. Your PC will restart and boot to Windows. Now check whether all the CPU cores are activated by throwing heavy tasks to the CPU.
I hope the CPU can handle all the tasks easily because of all the activated cores.
Here’s a complete guide on how to fix CPU temperature jumping up and down.
How to Enable All Logical CPU Cores in Windows 11
Along with the physical cores, you can also enable all logical CPU cores in Windows 11. Go to the System Configuration and select the highest number of processors. The number of processors represents the number of logical cores of the CPU. After that, a restart is required.
Here are the steps to enable all logical CPU cores in Windows 11:
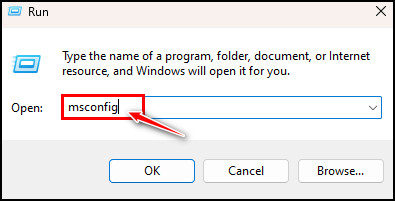
- Press Windows + R key and type msconfig in the Run.
- Hit Enter to launch System Configuration.
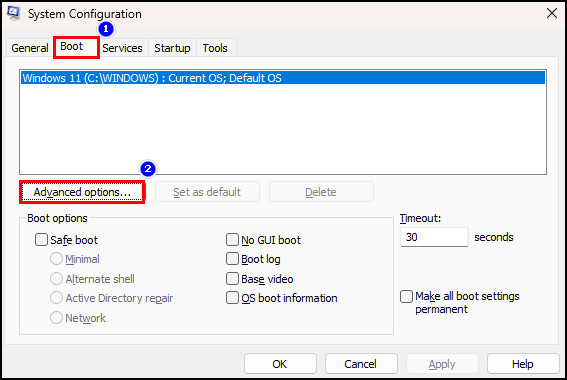
- Select the Boot tab and click on Advanced options.
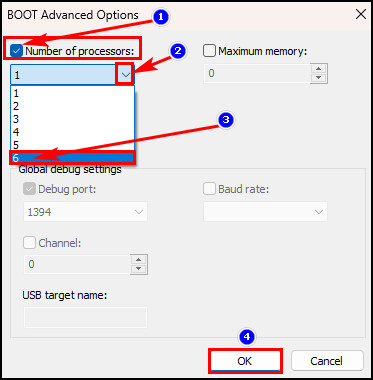
- Check the box beside the Number of processors.
- Click on the drop-down button below and select the highest number from the list.
- Hit the OK button.
- Click Apply > OK from the System Configuration main Window.
Now, a prompt by System Configuration will ask for a restart for the changes to occur. Click the Restart button from the prompt dialog box. The system will restart, and you can check all the logical cores are enabled from the task manager.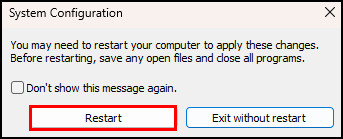
Here’s a complete guide on how to fix CPU temperature jumping up and down.
How to Check Cores & Logical Processors Numbers in Windows 11
After enabling hyperthreading or all the logical cores, you may want to check it. You can check whether you have successfully enabled all the physical or logical cores from the Task Manager. From the Task Manager, you can see the total number of physical and logical cores.
Here are the steps to check the number of cores & logical processor numbers in Windows 11:
- Press Ctrl + Shift + Esc to launch Task Manager in Windows 11.
- Click on the three flat bars icon.
- Click on the Performance tab and select CPU from the left panel.
You’ll find a CPU utilization graph in the right panel and look for Cores and Logical processors below the graph. You’ll find both of them with numbers. The number represents the total core count and logical processor count. 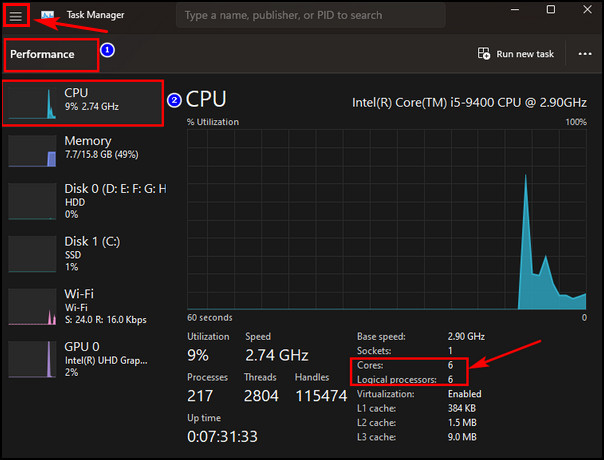
If you have 6 cores with 12 hyperthreaded processors, you will see numbers 6 & 12 beside Cores and Logical processors, respectively. That means you have successfully activated all cores and HyperThreading in the CPU.
How to Show All Logical Processors in Task Manager
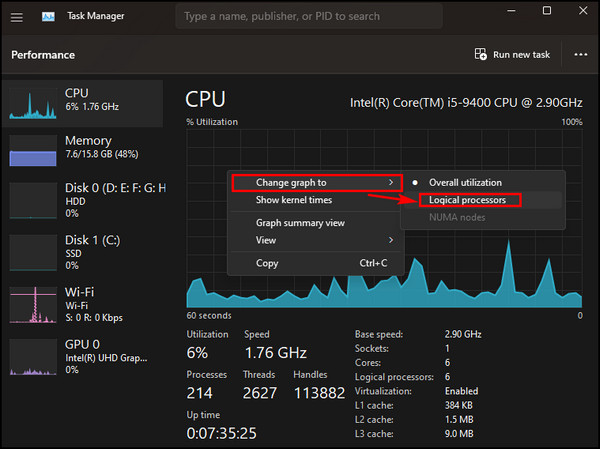
By default, the processor utilization graph is set to overall utilization in the Task Manager under the CPU section. But you can change that graph to logical processors to view all the logical processor’s utilization from the Task Manager.
With the graph, you can see whether all the cores are working perfectly or not while performing heavy tasks. You must launch the Task Manager and see the graph chart for the logical cores for monitoring CPU performance.
Here are the steps to show all logical processors in Task Manager:
- Press Ctrl + Shift + Esc to initiate Task Manager.
- Go to the Performance tab and Select CPU from the left.
- Click anywhere over the CPU Utilization graph.
- Choose Change graph to > Logical processors.
Now, the graph is split into several portions depending on the number of logical cores. If you have 6 logical cores, you will see 6 separate graphs.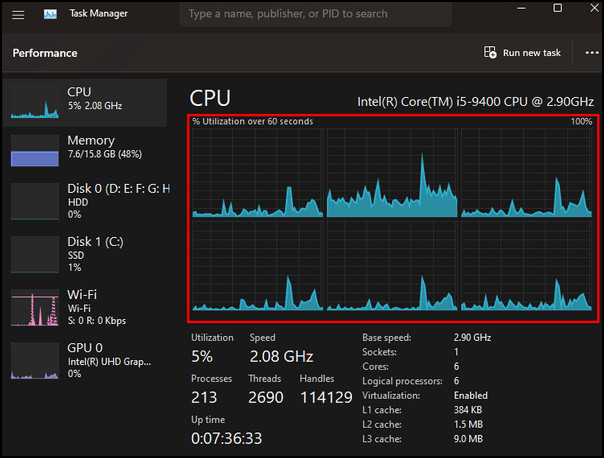
Related contents you should read: remove bloatware from Windows 11/10, 4 Ways to disable or enable microphone in Windows 11.
FAQs
How can I enable all cores on my CPU?
To enable all cores on your CPU, follow the steps beneath:
- Search for System Configuration from Windows Search.
- Click on the Boot tab.
- Select Advanced options.
- Tick mark the Number of processors box.
- Click the drop-down icon and choose the highest number.
- Click OK & restart the PC.
Is it OK to enable all the cores?
The OS and the programs you run on the machine will use as many cores as required, and the same goes for processing power. Windows 11 is designed in such a way that it will use all the cores if the program can run on all cores.
Why can’t I use all CPU cores?
Maybe the program you are running isn’t coded to run on all the cores, and that could be the main reason. The Processor doesn’t decide whether to run on full cores for apps. It depends on the app.
Final Words
If you are desperate and need to run the CPU with full cores for heavy applications, it’s fine. Otherwise, you really shouldn’t meddle with the CPU cores.
Windows 10 management system can manage the cores for you to run all the apps. It will activate all the cores for an app when needed; else, it won’t. I hope you understand the main concern here.
Please let me know in the comment box if you need further help regarding CPUs. Peace out!