Privacy and security is the biggest concern on a device to protect your data and information from hackers. Using the microphone on your device, hackers can steal your personal information.
So, to protect your data and information from being lost, turning off your device’s microphone is a good and effective choice. On the other hand, users may need to turn on or stop the microphone from fixing the various microphone issues.
But, in the new Windows 11, Microsoft changed various features and the Settings app design. However, with the changes in features and settings, users may find it challenging to turn off or on Microphone access on their PCs.
To ease the challenging situation, I will show you some easy and quick, effective methods to turn on or stop the microphone on Windows 11.
Let’s get started without further delay.
How to Disable or Enable Microphone in Windows 11
Enabling or disabling the microphone on Windows 11 is a straightforward process. On Windows 11, there are four proven and tested ways to control your microphone without facing any difficulty.
Following these four methods, you can efficiently and effectively turn on or off the microphone within a few minutes. So, follow the steps below carefully to know how to turn on or off the microphone on your Windows 11.
Here are the steps to disable or enable the microphone in Windows 11:
1. Use Sound Settings
Another proven and tested method to turn on or turn off your microphone on Windows 11 is through the Sound Settings on Windows Settings app.
Here are the steps to turn off or on the microphone using the Sound Settings:
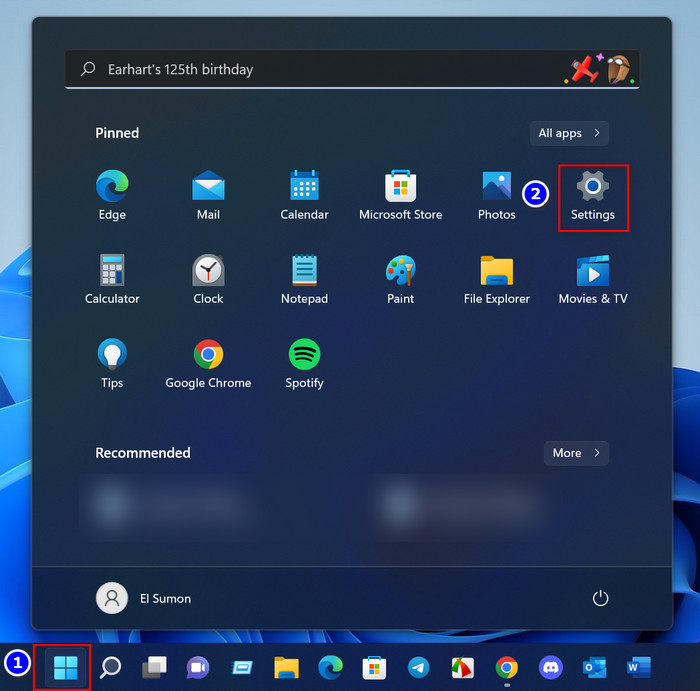
- Open the Windows Settings app by pressing the Windows+I keys on your keyboard or click the Settings app under the Pinned app section on Start Menu.
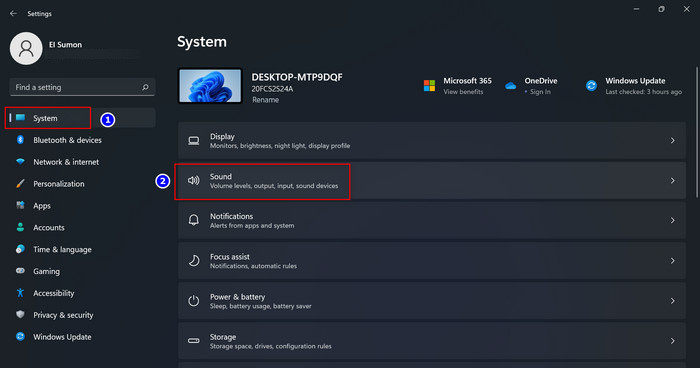
- Select the System tab on the left-side menu pane.
- Select the Sound option on the right-side window.
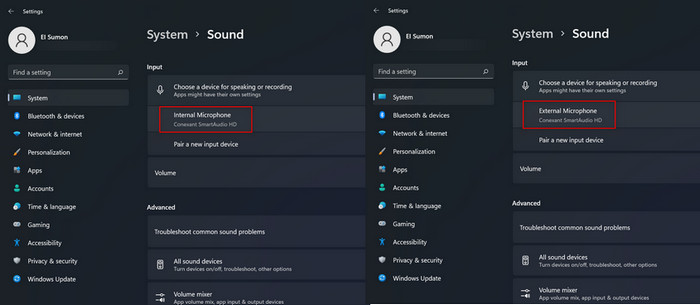
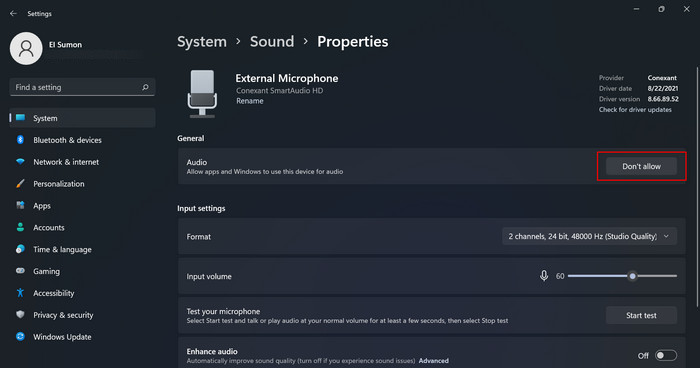
- Click on the Internal/External Microphone option under the Input If your device has only an internal microphone, this option shows Internal Microphone. Alternatively, if your device is connected to an external microphone, this option shows External Microphone.
- Click on Don’t Allow next to the Audio option under the General section to disable the microphone.

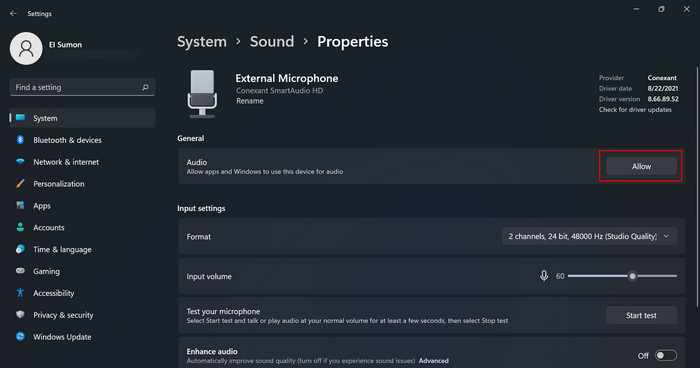
- Click on Allow next to the Audio option under the General section to enable the microphone.

2. Use Microphone Access Settings
The first effective and practical way to turn on or turn off your microphone on Windows 11 is through the Microphone Access settings on Windows Settings app.
Here are the steps to turn off or turn on the microphone using the Microphone Access settings:
- Open the Windows Settings app by pressing the Windows+I keys on your keyboard or click the Settings app under the Pinned app section on Start Menu.
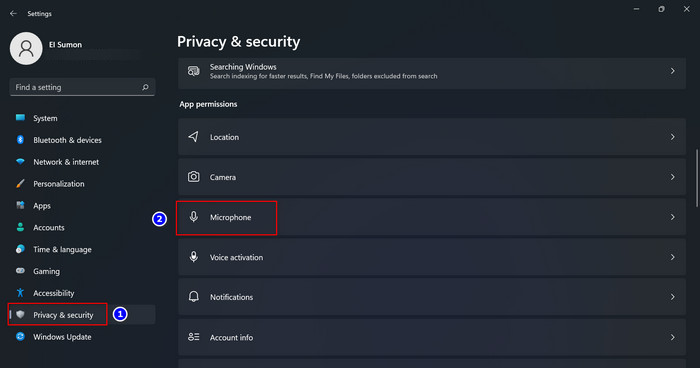
- Select the Privacy & Security tab on the left-side menu pane.
- Scroll down and click on the Microphone under the App Permissions section on the left-side window.
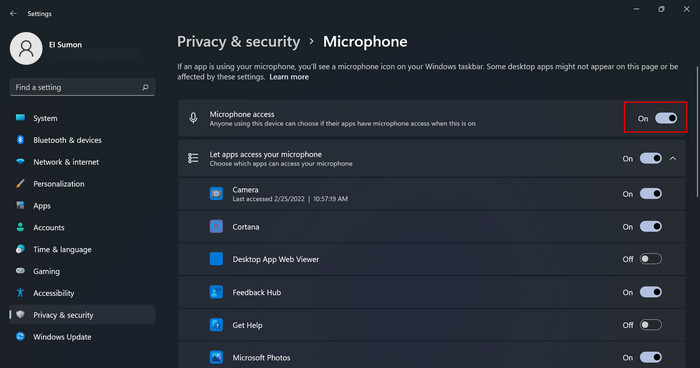
- Toggle on the button next to the Microphone access option to enable the microphone at the top of the window.
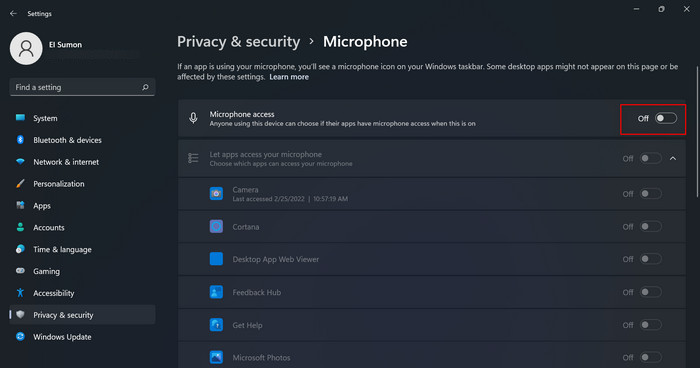
- Toggle off the button next to the Microphone access option to disable the microphone at the top of the window.
Also related: Windows 11 Webcam is Out of Focus.
3. Use Device Manager
You can also use the Device Manager to turn off or turn on the microphone. On Windows 11, the system allows you to control the microphone accessibility easily and quickly.
Here are the steps to turn on or stop the microphone using the Device Manager:
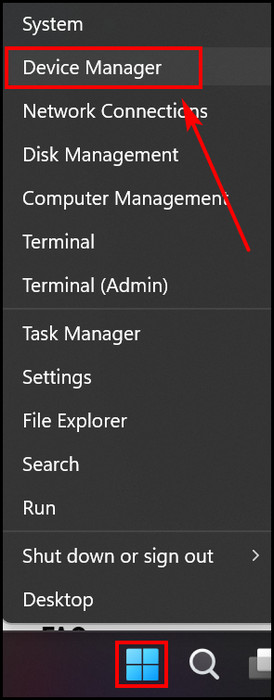
- Right-click the Start Menu and choose Device Manager to open the Device Manager Alternatively, Open the windows Search pane, type device manager, and click on the search result to open the Device Manager.
- Click on the little arrow icon or double-click on the Audio inputs and outputs options to expand the option.
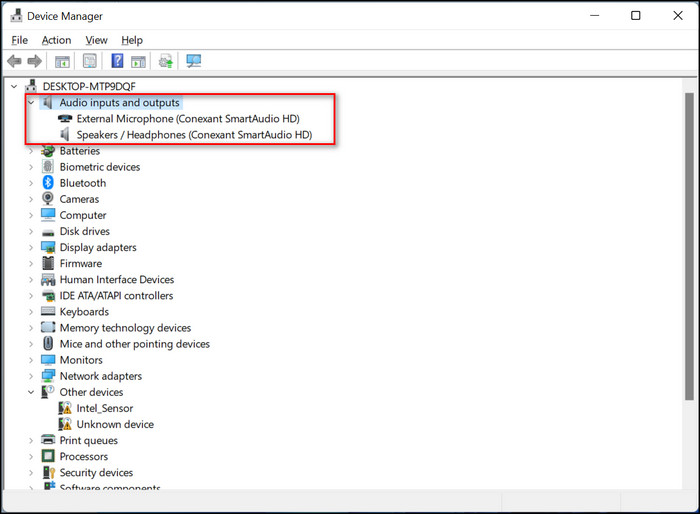
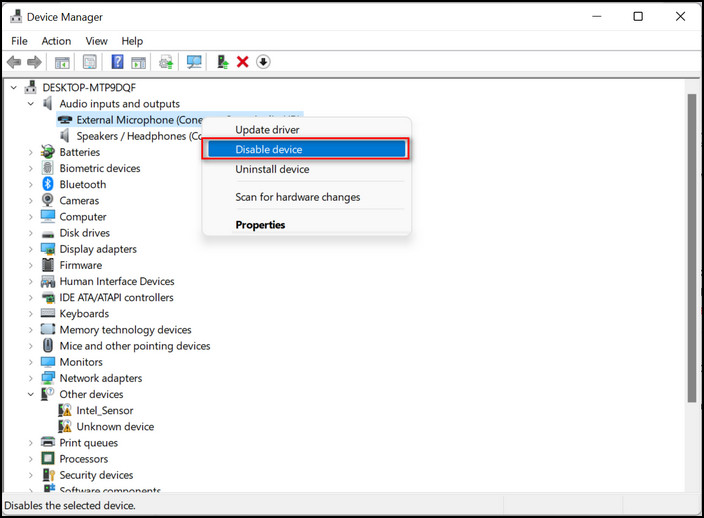
- Right-click on your External Microphone device and select the Disable device option to disable your microphone.
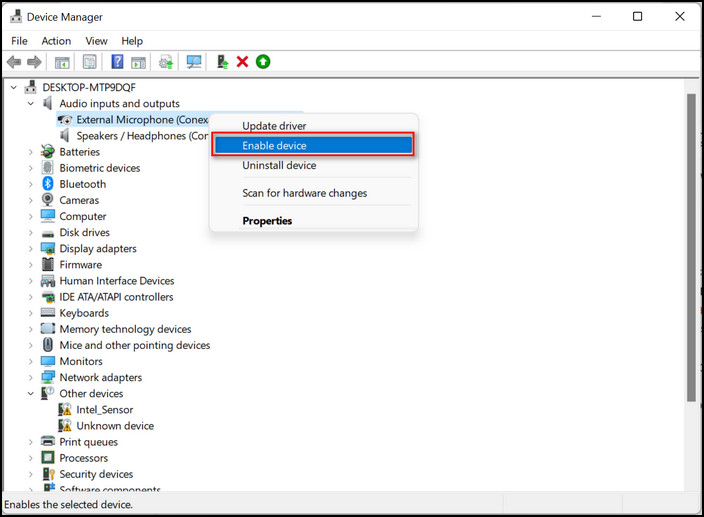
- Right-click on your External Microphone device and select Enable device option to enable your microphone.
You may also like to read: Enter Network Credentials Error on Windows 11/10 Fixed.
4. Use Control Panel
The last but not least effective method to turn off or on your device microphone on your Windows 11 is using the Control Panel. You can easily control your microphone access through the Control Panel.
Here are the steps to turn off or on the microphone through the Control Panel:
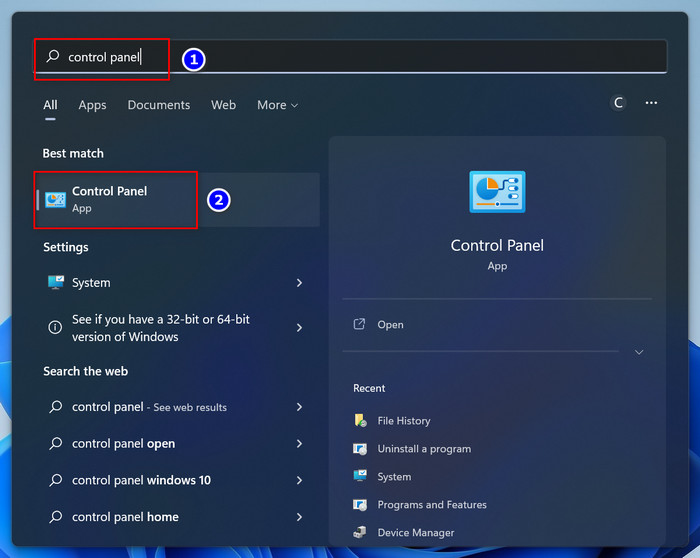
- Open the Windows Search pane by pressing Windows+S on your keyboard.
- Type control panel and click on the search result or hit the Enter key to open the Control Panel.
- Make sure the Control Panel is set by Category.
- Click on the Hardware and Sound option.
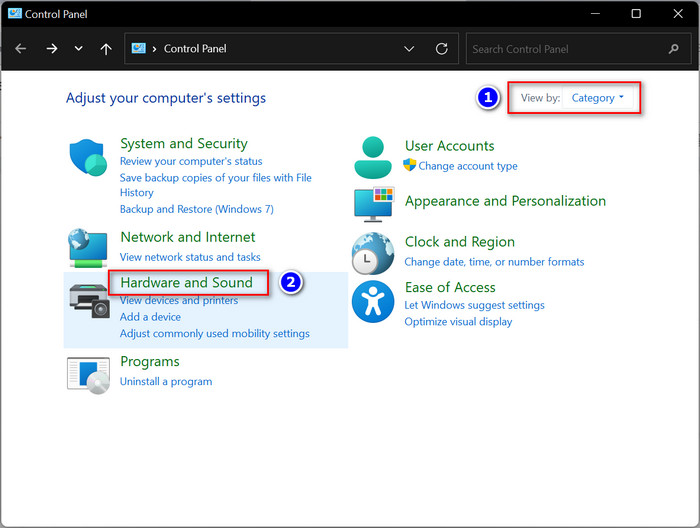
- Click on the Sound option.

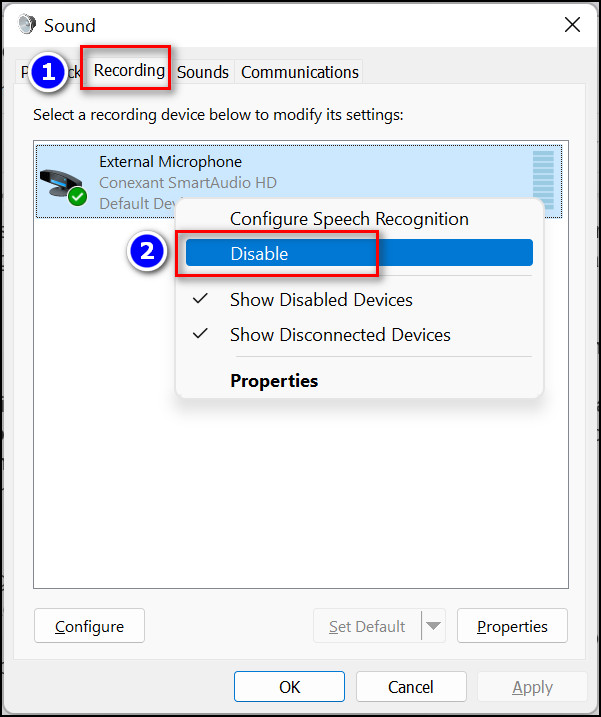
- After clicking the Sound option, a new window appears on the screen.
- Select the Recording tab.
- Right-click on the Internal/External Microphone option and select Disable to turn off the microphone.
- Right-click on the Internal/External Microphone option and select Enable to turn on the microphone.
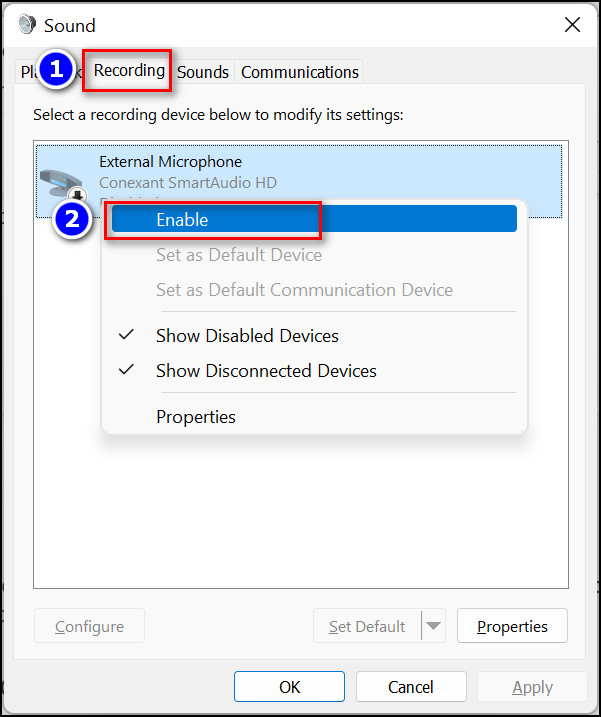
- Click on OK to exit the window.
Also read, Fix Reset this PC Stuck in Windows 11/10.
How to Mute or Unmute Microphone in Windows 11
If you need to know how to mute or unmute the microphone on your Windows 11, you are in the right place. On Windows 11, Microsoft allows you to mute or unmute your microphone whenever you need.
Follow the methods below step-by-step to mute or unmute your microphone on your Windows 11 computer. With that said, let’s dive in.
Here are the steps to mute or unmute your microphone on your Windows 11:
1. Use Keyboard Hotkey
The keyboard hotkey is one of the simple and quick methods to mute or unmute the microphone on your device. Usually, you can get the keyboard hotkey only on your laptop keyboard.
Most laptop manufacturers provide the microphone control hotkey on the top of the keyboard to control the microphone quickly. So, check your laptop device keyboard to get the microphone control hotkey.
Press the microphone hotkey on your keyboard to mute your laptop device’s internal or external microphone. A little red light shows on the microphone hotkey, which indicates the microphone is mute. On the other hand, press the microphone hotkey again to unmute your microphone.
2. Use Windows Settings App
You can also mute or unmute your microphone using the Windows Settings app on your Windows 11 PC.
The Windows Settings app helps you to mute or unmute your microphone easily and effortlessly whether you are using the desktop or laptop. This method works on both types of devices.
Here are the steps to mute or unmute the microphone using Windows Settings app:
- Open the Windows Settings app by pressing the Windows+I keys on your keyboard or click the Settings app under the Pinned app section on Start Menu.
- Select the System tab on the left-side menu pane.
- Choose the Sound option on the right-side window.
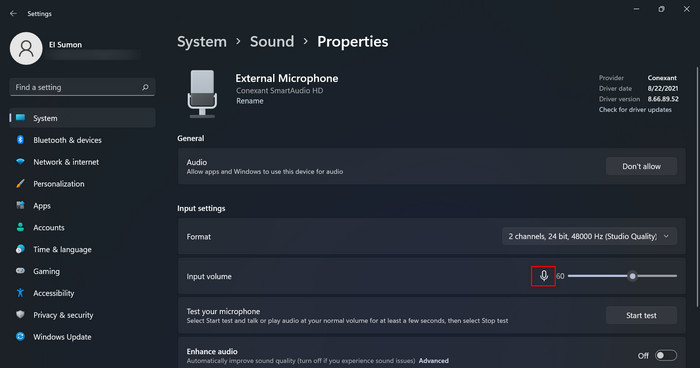
- Select the Internal/External Microphone option under the Input section.

- Click on the Microphone icon next to the Input volume to mute the microphone.
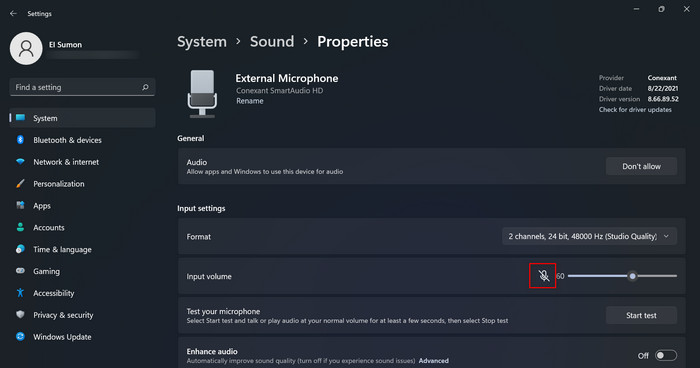
- Click on the Microphone icon again next to the Input volume to unmute the microphone.
Related content you should read: Fix cFosSpeed Driver Preventing Windows 11 Installation.
How to Enable or Disable Microphone for All Apps on Windows 11
Do you want to enable or disable the microphone for your all app with one click on Windows 11?
Surprisingly, Microsoft Windows 11 allows users to control the microphone of all windows apps with just one click. Sounds cool, right?
Like the sound, you can stop or turn on your microphone with one click on your Windows 11 whenever you need it through the Privacy settings on the Windows Settings app. Let’s see how to do it.
Here are the steps to enable or disable the microphone for all apps on Windows 11:
- Open the Windows Settings app by pressing the Windows+I keys on your keyboard.
- Select the Privacy & Security option.
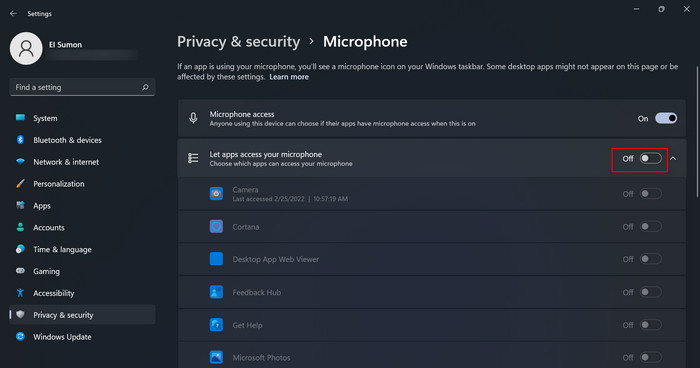
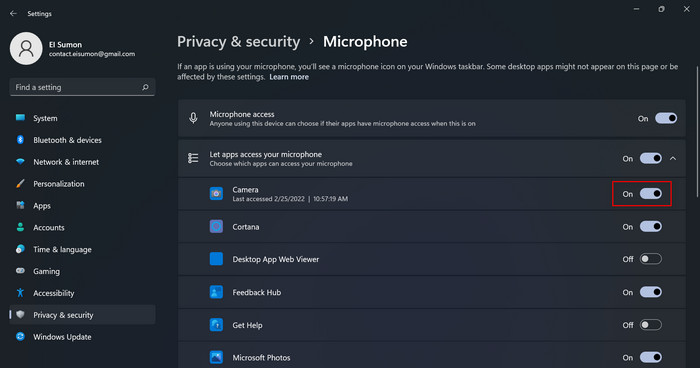
- Scroll down and click on the Microphone under the App Permissions section.
- Toggle off the button next to the Let app access your microphone option to disable the microphone for all apps.
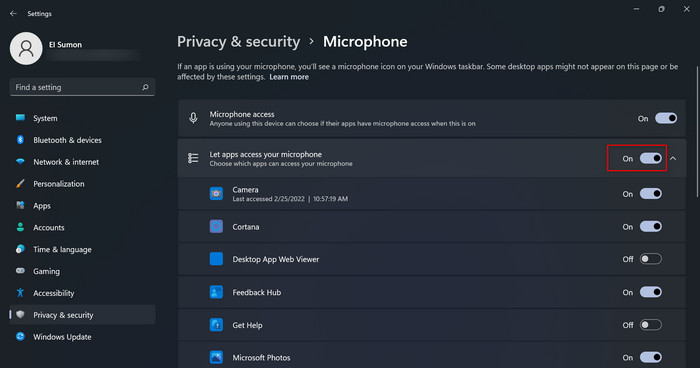
- Toggle on the button next to the Let app access your microphone option to enable the microphone for all apps.
How to Enable or Disable Microphone for Specific Apps on Windows 11
On Windows 11, you can easily turn on or off your microphone for specific apps if you need. Microsoft allows users to control microphone access to particular apps only.
Here are the steps to enable or disable the microphone for specific apps on Windows 11:
- Open the Windows Settings app by pressing the Windows+I keys on your keyboard.
- Select the Privacy & Security option.
- Scroll down and click on the Microphone under the App Permissions section.
- Under the Let app access your microphone section, you can see the list of Windows apps that need to access your microphone.
- Toggle switch the button to Off next to the specific app to disable the microphone for the app.
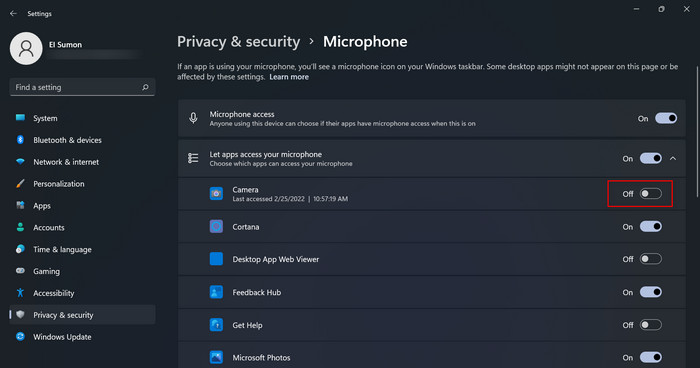
- Toggle switch the button to On next to the specific app to enable the microphone for the app.
Follow our guide on how to Access iMessage on Windows 11/10.
How to Enable or Disable Microphone for Specific Device Only in Windows 11
You can enable or stop the microphone for a specific device only on your Windows 11 PC. If you need to turn off or on your microphone for a particular device, follow the steps below to do it.
Here are the steps to enable or disable the microphone for specific devices only on Windows 11:
- Open the Windows Settings app by pressing the Windows+I keys on your keyboard or click the Settings app under the Pinned app section on Start Menu.
- Navigate to the System > Sound option.
- Click on the Internal/External Microphone option under the Input If your device has only an internal microphone, this option shows Internal Microphone. Alternatively, if your device is connected to an external microphone, this option shows External Microphone.
- Click on Don’t Allow next to the Audio option under the General section to disable the microphone for your selected device.
- Click on Allow next to the Audio option under the General section to enable the microphone for your selected device.
Frequently Asked Questions
Where are the microphone settings in Windows 11?
To get the microphone settings on Windows 11, go to Settings > System > Sound. Click on your Internal/External Microphone device under the Input section in this window. Then, click on Don’t Allow next to the Audio option under the General section to disable the microphone for your selected device.
How do I mute the microphone in Windows 11?
To mute the microphone on Windows 11, follow the steps below:
- Navigate to the Settings > System > Sound.
- Click on your Internal/External Microphone device under the Input section in this window.
- Click on the Microphone icon next to the Input volume to mute the microphone.
How do I completely disable my microphone on Windows 11?
To completely disable your microphone on Windows 11, follow the steps below:
- Right-click on the volume icon on the taskbar and select the Sound settings
- Click on your Internal/External Microphone device under the Input
- Click on Don’t Allow next to the Audio option under the General section to disable the microphone.
How do I turn off the microphone in Windows 11?
To turn off the microphone in Windows 11, open the Device Manager, expand the Audio input and output section, right-click on your microphone device and select the Disable device option to turn off the microphone.
Final Words
The Microphone is one of the most helpful audio input devices that helps users to communicate with others through various voice-calling apps in real-time. It also helps to record sound on your Windows device.
However, while your microphone input device is not used for a specific time, you need to disable the microphone for privacy and security reasons.
On Windows 11, users struggle to find the microphone access settings to control the microphone. Here, I describe four effective and tested ways to turn on or stop the microphone from getting rid of this problem.
Here, I also described how you quickly mute or unmute your microphone and how to stop or turn on the microphone for specific or all apps on your Windows 11 PC.
I hope this post is helpful for you to learn everything about controlling the microphone on your Windows 11. That’s all for now.


How do disable/enable access to specific “DESKTOP apps”? Win 11 shows one on/off setting for all such apps, and shows no option of on/off for individual apps like for Chrome, for Firefox, for fmedia, etc.
If you want to manage access to specific desktop apps, you might need to explore third-party applications or security tools that offer more fine-grained control over app permissions and access.