The new Windows 11 comes with plenty of different popular and most common styles of fonts that impressed users without any doubt. Surprisingly, Microsoft Windows allows users to install the fonts as much as they need. Sounds cool, right?
However, some users need more different styles of fonts for their work, for example, graphic design, creating documents or presentations, etc. For this instance, users need to install single or multiple fonts on their Windows 11 PC and if you want to install the fonts on your Windows 11 computer and look for a complete step-by-step guide, you are in the right place.
In this post, I will show you some effective and proven methods to install single or multiple files at once on your Windows 11. I will also show you how to uninstall the fonts and where you get the fonts.
Let’s get started without further ado.
Where to Find Windows Fonts
To install the fonts on your Windows 11, you need to download the font file from popular websites. You can get the files from popular fonts provider websites, for example, Google Fonts, DaFont, or other sites that offer a variety of free fonts.
Usually, the font file extension must be TrueType, OpenType, or PostScript. Without these font files, you can’t install the fonts on your Windows 11.
Before downloading any font files from any third-party website, make sure not to download any malicious files. To prevent any unpleasant incident, download the font files from trusted websites.
Read more on how to Download & Install Steam on Windows 11.
How to Install Font on Windows 11
Installing the font on Windows 11 is a straightforward process. Installing the font is as simple as cutting a cake with a knife. Sounds cool and funny, right?
There are five effective and tested ways to install the fonts on your Windows 11 PC. Following one of the methods, you can install the fonts within a few seconds.
So, why are we late? Let’s start to see the methods one by one. Keep reading and follow the instructions carefully.
Note: Follow the same methods on your Windows 10 to install the fonts.
Here are the steps to install the font on Windows 11:
1. Install Font via Double-click
The first and the easiest method to install the font on your Windows 11 is to just double-click on the font file to install the font.
Let’s see how to install the font in Windows 11.
Here are the steps to download and install the font via double-click:
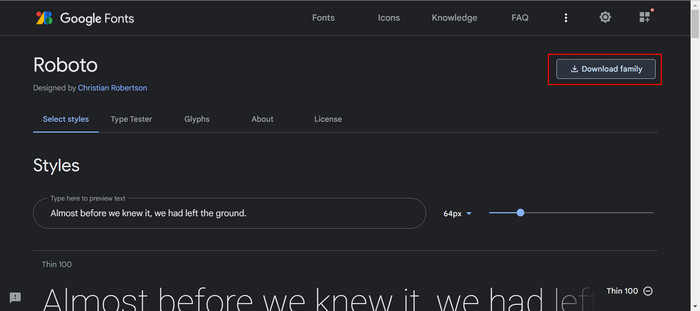
- Go to any font website, for example, Google Fonts, to download the font file.
- Select a font style you want to download and click on the Download family button to download the font file.
- Open your download folder after completing the download process.
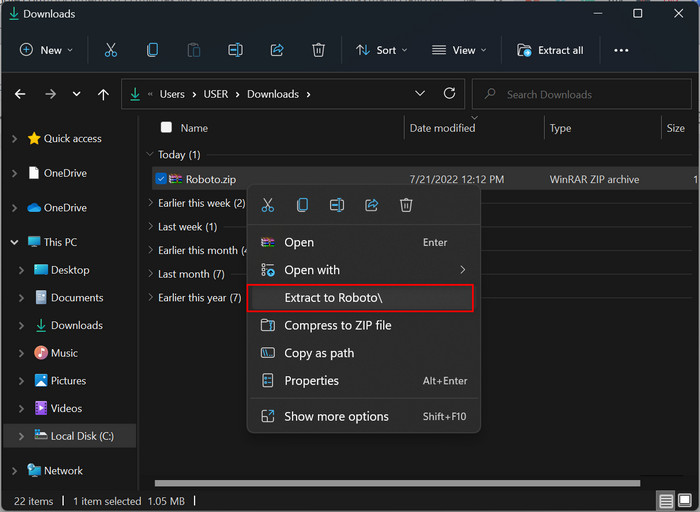
- In most cases, the download file is a ZIP file. So, you need to extract the file.
- Select and right-click on the file and choose Extract to… to extract the file.
- Open the extracted folder to get the font files.
- Select a font style file and double-click on it to open the installation window.
- A new window appears on the screen. Here, you will see the installation button and the preview of the font style you want to install.
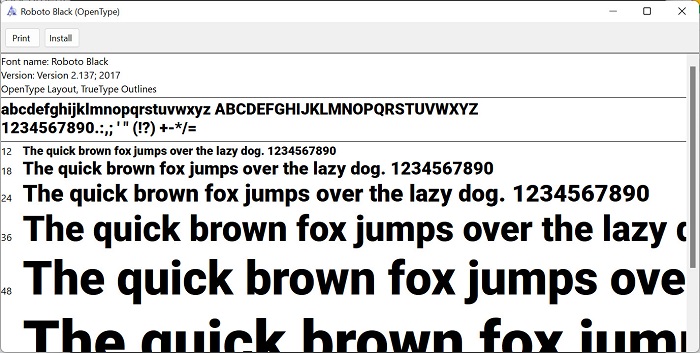
- Click the Install button at the top of the window to install the font style.
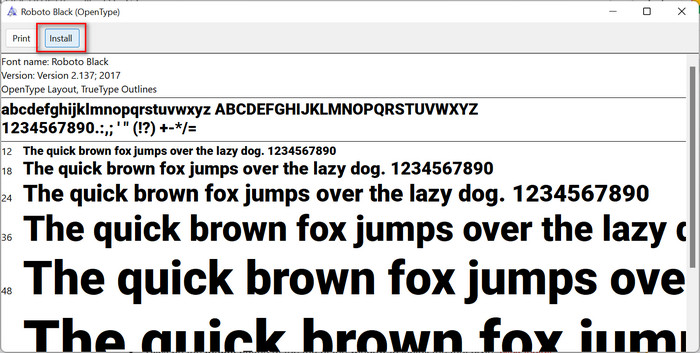
- An installation progress bar is shown on the screen. After completing the installation, the window is closed automatically, and the font installation is successfully done.
You may also like to read: Fix When Windows 11 Won’t Install
Another effective and quick way to install the font on your Windows 11 is using the context menu. You can easily install the font you want on your PC from the context menu.
Here are the steps to download and install the font in Windows 11 via double-click:
- Go to any font website, for example, Google Fonts, to download the font file.
- Select a font style you want to download and click on the Download family button to download the font file.
- Open your download folder after completing the download process.
- In most cases, the download file is a ZIP file. So, you need to extract the file.
- Select and right-click on the file and choose Extract to… to extract the file.
- Open the extracted folder to get the font files.
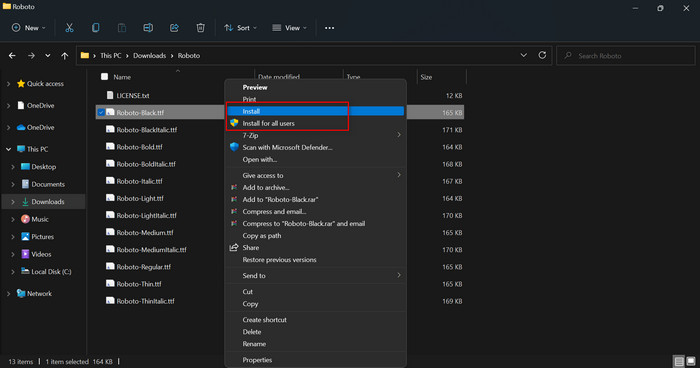
- Select a font style file, right-click on it to open the context menu, and choose the Show more options or press Shift+F10 on your keyboard to open the context menu more options directly.
- Select the Install or Install for all users option.
- An installation progress bar is shown on the screen. After completing the installation, the window is closed automatically, and the font installation is successfully done.
Note: The Install option means the font is only installed on the current user account. And the Install for all users option means the font is installed on all the user’s accounts on the system.
Check out our separate post: Install Amazon Appstore on Windows 11
3. Install Font using the Microsoft Store
The Microsoft Store is another effective and straightforward approach to installing the new font on Windows 11. Using the Microsoft Store, you can install the font effortlessly without downloading any malicious files.
Here are the steps to install the font using the Microsoft Store:
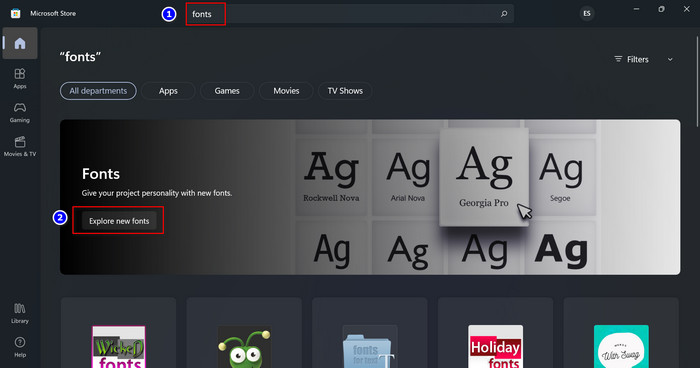
- Open the Microsoft Store by clicking the MS Store icon on the taskbar or Start Menu.

- Type font in the search bar and hit the Enter key to see the search result.
- Click on the Explore new fonts under the Fonts section.
- Select a font style on available font lists you want to download and install.
- Click on the Get button to download and install the font.
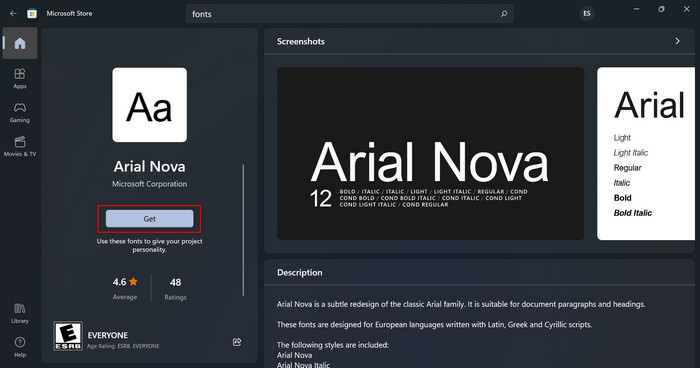
- Wait a minute or more to complete the download and install process.
- Once the download and install process is finished, you can see the Open button replaces the Get button.

- Click on the Open button to see the installed font under the Available fonts section in the Fonts Settings windows.
Related content you should read: Fix cFosSpeed Driver Preventing Windows 11 Installation
4. Install Font using Settings
You can also use the Windows Settings app to install the font on your Windows 11 PC. This process is valuable and practical to install the font easily whenever you want.
Here are the steps to install the font using the Windows Settings:
- Open the Windows Settings app by pressing the Windows+I on your keyboard or click on the Settings under the Pinned app section on the Start Menu.
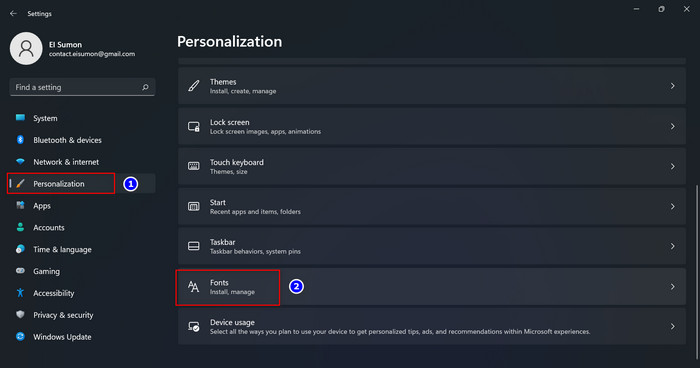
- Select the Personalization tab, scroll down a little bit and choose the Fonts section on the right-side window.
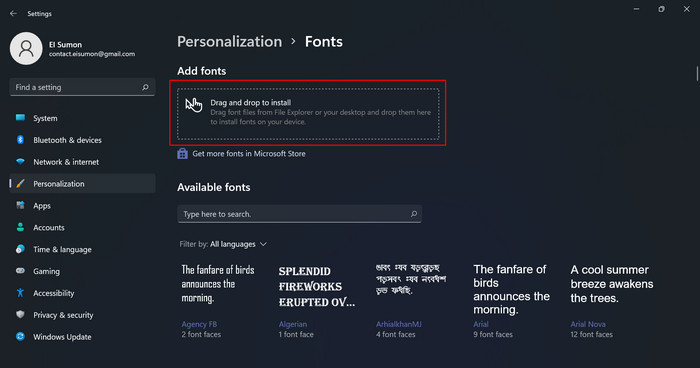
- Drag the font file from File Explorer or your desktop where the font file is stored, and drop the file in the drag and drop area to install the font on your device.
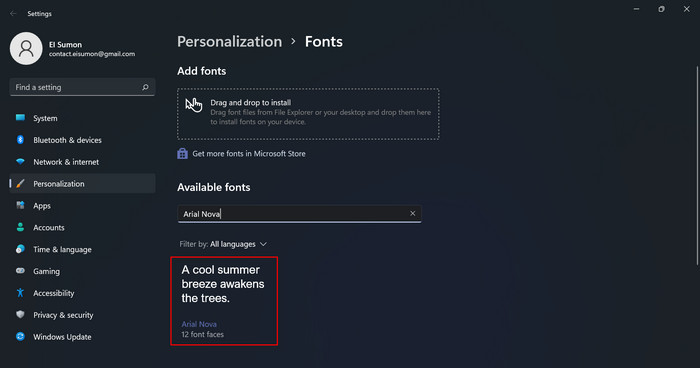
- After completing the installation, you can see the installed font under the Available fonts section.

Also read, Install Active Directory Users and Computers on Windows 11
5. Install Font using the Fonts Folder
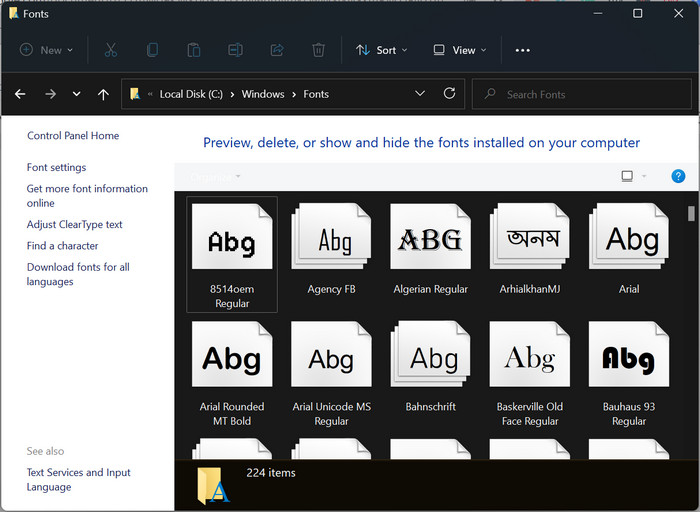
The last method to install the font on your Windows 11 PC is using the Fonts Folder. You can simply install the font by opening the system Fonts folder using File Explorer and pasting the font files you want to install.
Here are the steps to install the font using the Fonts Folder:
- Download the font files and extract the ZIP files.
- Open the extracted folder to get the font files.
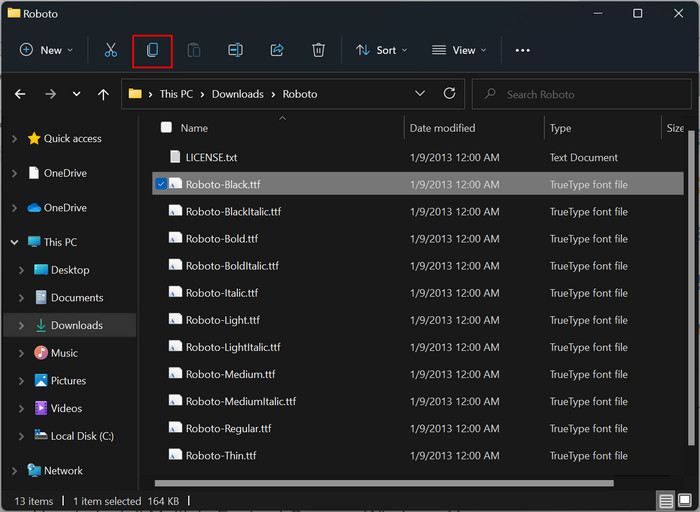
- Select and copy the font files that you want to install.
- Go to the following path to open the system Fonts folder:
- C:\Windows\Fonts
- C:\Windows\Fonts
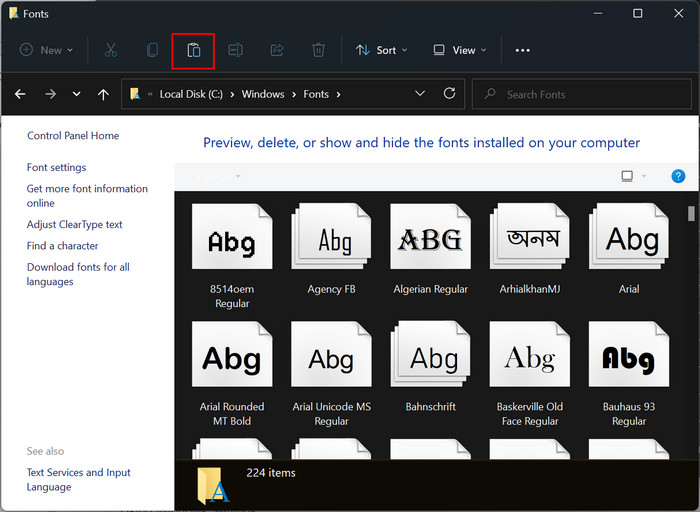
- Paste the copied font files into the Fonts folder to install the fonts.
- Now, your font is installed and ready to use.
How to Install Multiple Fonts at Once on Windows 11
On Windows 11, you can also install multiple fonts at once. You can do it without any problem if you want to install different font styles on a particular font family or at once. Windows allows users to install multiple fonts at any time.
Let’s see how you can install multiple fonts on your Windows 11 computer.
Here are the steps to install multiple fonts at once on Windows 11:
The first practical and quick way to install multiple fonts on your Windows 11 is using the context menu. You can easily install multiple fonts at once on your PC from the context menu.
Here are the steps to install multiple fonts at once using the Context Menu:
- Download the font files and extract the ZIP files.
- Open the extracted folder to get the font files.
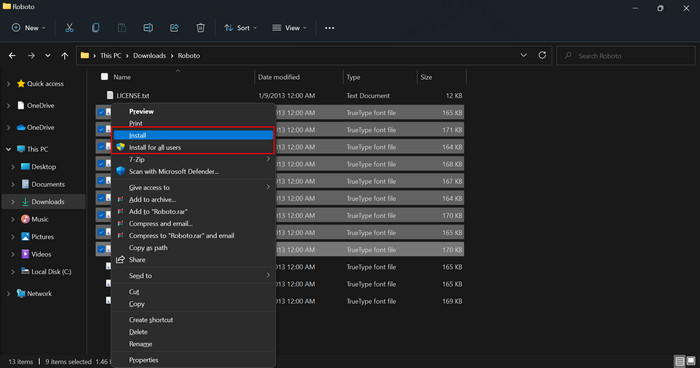
- Select multiple font style files, right-click on them to open the context menu, and choose Show more options or press Shift+F10 on your keyboard to open the context menu more options directly.
- Select the Install or Install for all users option.
- An installation progress bar is shown on the screen. After completing the installation, the window is closed automatically, and the font installation is successfully done.
2. Use Windows Settings App
You can also use the Windows Settings app to install multiple fonts at once on your Windows 11 PC. This process is valuable and practical to install multiple fonts quickly and within a minute.
Here are the steps to install multiple fonts at once using the Windows Settings:
- Open the Windows Settings app by pressing the Windows+I on your keyboard.
- Select the Personalization tab, scroll down a little bit and choose the Fonts section on the right-side window.

- Drag font files from File Explorer or your desktop where the font files are stored and drop them in the drag and drop area to install the font on your device.

- After completing the installation, you can see the installed font under the Available fonts section.

3. Use the Fonts Folder
The last method to install multiple fonts at once on your Windows 11 PC is using the Fonts Folder. You can simply install multiple fonts by opening the system Fonts folder using File Explorer and pasting the font files you want to install.
Here are the steps to install multiple fonts at once using the Fonts Folder:
- Download the font files and extract the ZIP files.
- Open the extracted folder to get the font files.
- Select and copy the font files that you want to install.
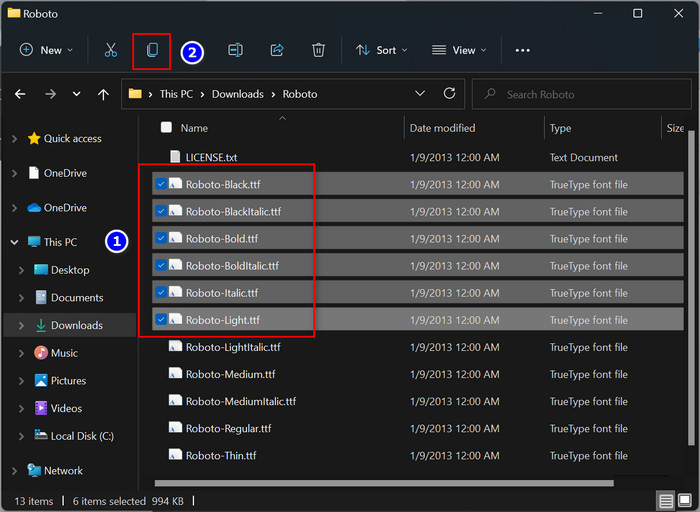
- Go to the following path to open the system Fonts folder:
- C:\Windows\Fonts
- C:\Windows\Fonts
- Paste the copied font files into the Fonts folder to install the fonts.
- Now, your font is installed and ready to use.
How to Uninstall / Delete Fonts in Windows 11
Uninstalling or deleting fonts is an easy process on Windows 11. On Windows 11, the system allows users to remove or delete the fonts that are installed on the computer. Following some easy steps, you can delete or uninstall the fonts.
Here are the steps to uninstall or delete the fonts on Windows 11:
1. Use Windows Settings App
The first method to uninstall the fonts from your Windows 11 computer is the Windows Settings app.
Here are the steps to uninstall fonts from the Windows Settings:
- Open the Windows Settings app by pressing the Windows+I on your keyboard.
- Select the Personalization tab, scroll down a little bit and choose the Fonts section on the right-side window.
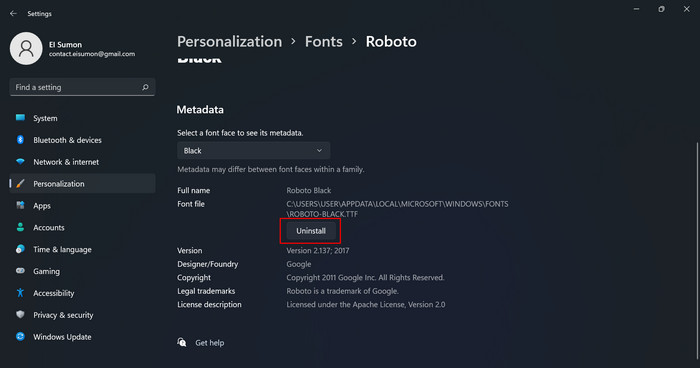
- Select the font that you want to remove or delete.
- Click on Uninstall to delete the font.
2. Use Fonts Folder
Another practical method to remove the fonts is using the Fonts folder on Windows 11. This process allows you to delete multiple fonts at once.
Here are the steps to uninstall fonts using the Fonts Folder:
- Open the Windows File Explorer by pressing Windows+E on your keyboard.
- Go to the following path to open the system Fonts folder:
- C:\Windows\Fonts
- C:\Windows\Fonts
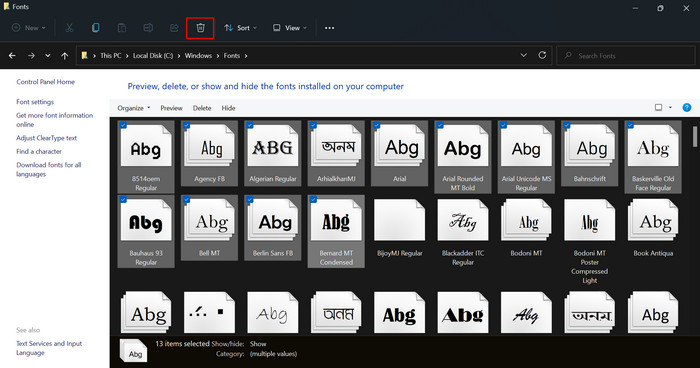
- Select the fonts that you want to remove.
- Click on the Delete button to remove the fonts.
Frequently Asked Questions (FAQs)
How do I install TrueType Fonts on Windows 11?
To install TrueType Fonts on your Windows 11, download and extract the font file from ZIP to the standard or regular folder, double-click on the file and click on the Install button to install the fonts.
Alternatively, to install multiple fonts at once, select the fonts files, right-click on them, select Show more options and choose Install or Install for all users.
How do I add a TrueType font to Windows?
To add a TrueType font to Windows, double-click on the font file and click on the Install button to install the fonts.
Where are TTF files stored in Windows 11?
The TrueType Fonts (TTF) are stored on Windows Fonts Folder on Windows 11. To access the Fonts Folder, go to the C:\Windows\Fonts path.
Do TTF fonts work on PC?
Yes, the TrueType Fonts (TTF) work on PC. You need to download and install the font to install the TTF fonts on your Windows 11/10 PC.
Final Words
The fonts are amazing. You can create outstanding and creative artwork using fonts on your computer. But, to create something unique and special, you need to know to use different font styles.
Usually, more than hundreds of fonts are preloaded in Windows 11. But, you may need to add more fonts for your working purpose. For this instance, you need to install fonts on your system. To ease this process, I describe five processes of installing fonts effortlessly.
I also describe where you get the various fonts and three tested and practical methods to uninstall or remove the fonts from your Windows 11 computer. Try all of the methods to know everything about installing and uninstalling fonts.