Several users rely on the Quick Access feature to navigate their everyday folders or apps quickly. But, sometimes, it becomes essential to erase its history for privacy concerns.
As a tech consultant, I have seen that cleaning the access history is a practical measure to secure your device.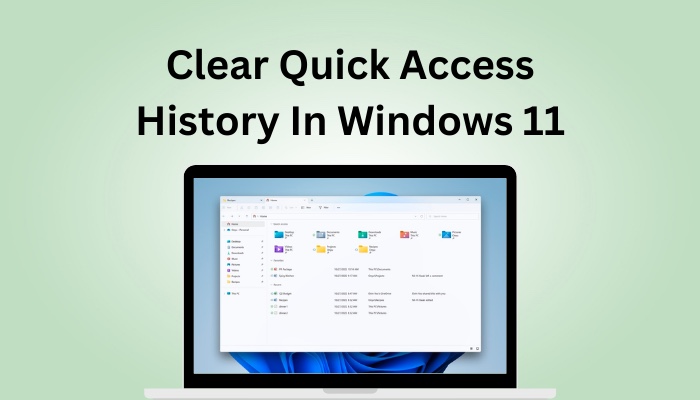
This article provides 3 working methods to help you immediately clear your quick access history.
Let’s dive in!
How to Clear Quick Access History on Windows 11
The folders or apps you visit regularly store in the Quick Access destination. Clearing them is extremely easy. Open the Folder Options dialog box via File Explorer or Control Panel and hit Clear. You can also complete the operation using the Run program and Command Prompt.
All three procedures are displayed below so that you understand the process clearly.
Here are the methods to clear your Quick Access history on Windows 11:
1. Use the File Explorer
To browse from one folder to another, we use File Explorer, and with its help, you can clear Quick access history. Let’s move out and see how to accomplish that.
Here’s the process to use File Explorer to clean quick access history:
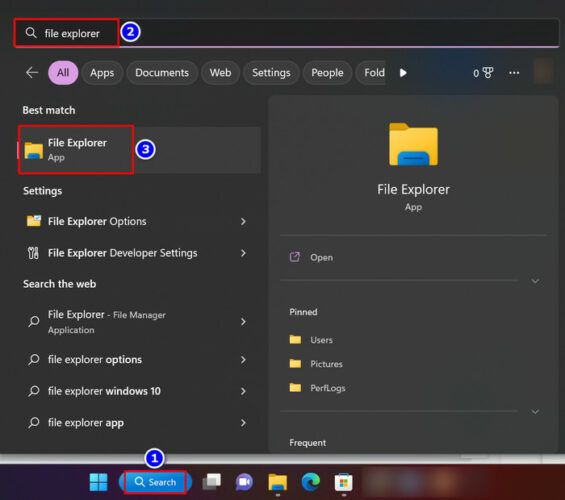
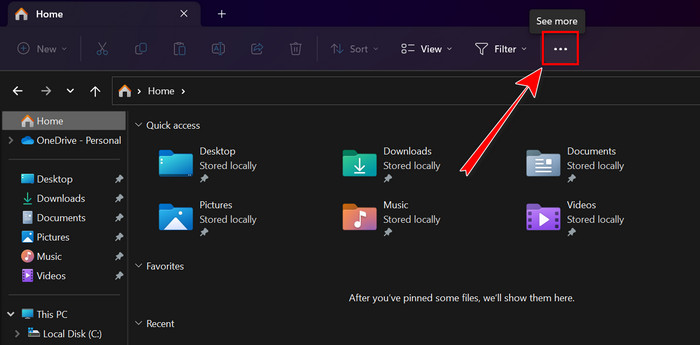
- Move into the Search box, type file explorer, and click on it.
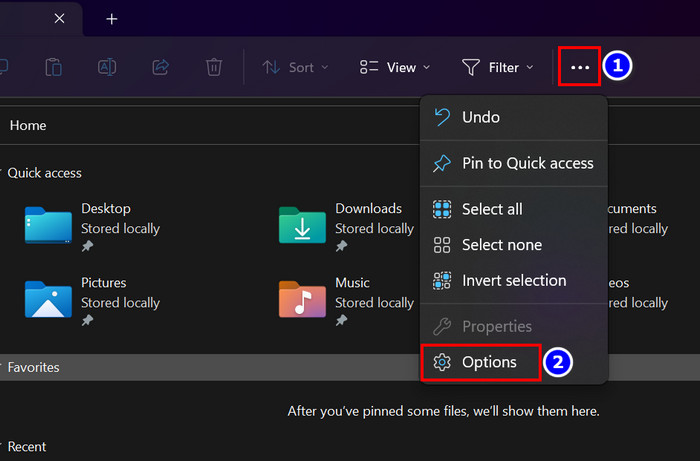
- Click on the Three dots (See more) option.
- Choose Options.
- Hit the Clear button beside Clear File Explorer history.
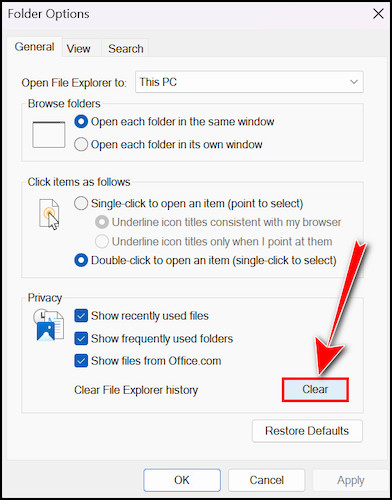
- Press the OK button to close the tab.
That’s it. Your quick-access folders are now deleted from your device.
Read more on how to boot to safe mode in Windows 11.
Do you want another simple workaround to complete the same operation with the Control Panel? Follow the instructions to do that.
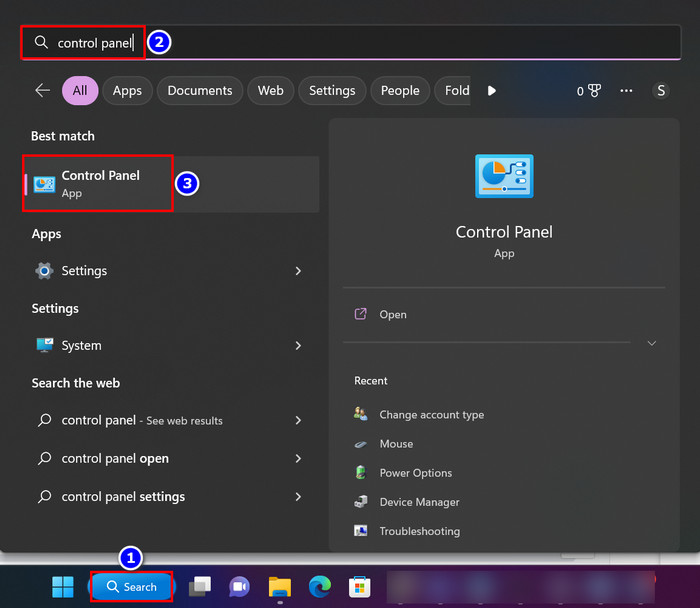
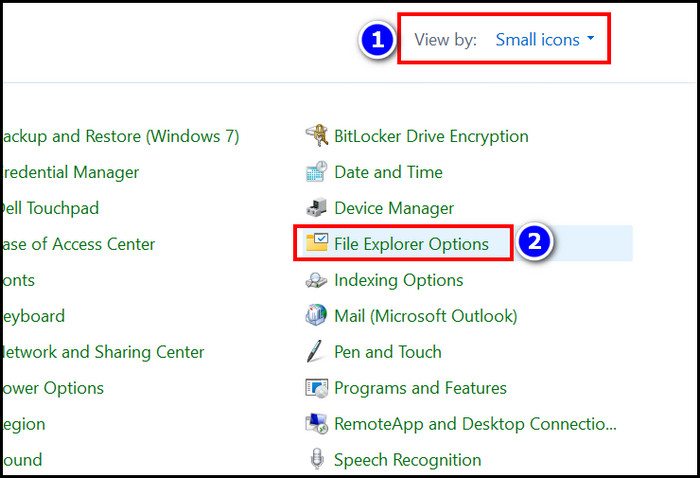
- Open the Search bar and type control panel, and select it.
- Change the View by section to Small icons.
- Select the File Explorer Options.
- Press the Clear button from the Privacy section.
- Uncheck the Privacy checkboxes when you don’t want recently used folders to show.
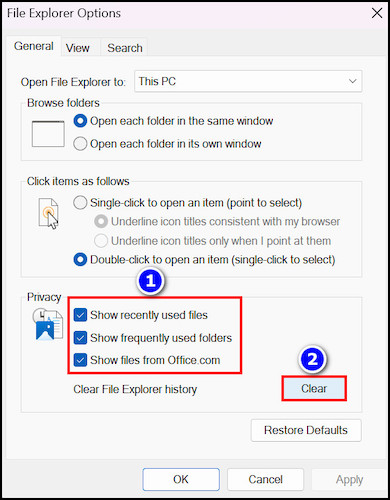
- Hit Apply & OK to complete the process.
After completing all the mentioned steps, your access history is effectively cleared.
Check out the easiest way to fix blue screen on Windows 11.
2. Utilize File Explorer and Delete a Specific File
You can clear your quick access history by deleting an automatic destination file. It may sound tricky, but it’s not. Read and apply the below instructions to complete that method effortlessly.
Here are the steps to utilize File Explorer and delete quick access history:
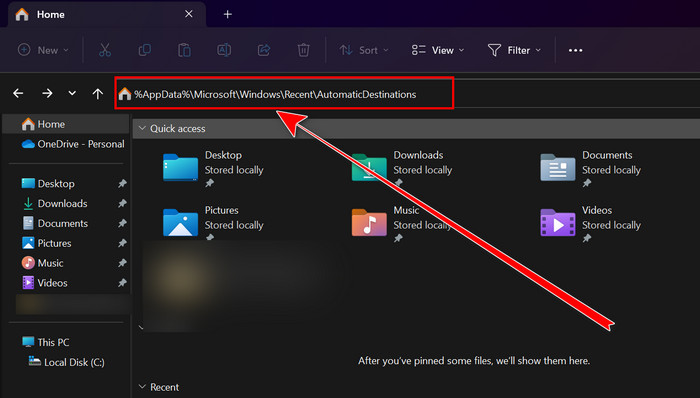
- Press the Windows + E buttons to launch File Explorer.
- Copy %AppData%\Microsoft\Windows\Recent\AutomaticDestinations into the left search bar and hit Enter.
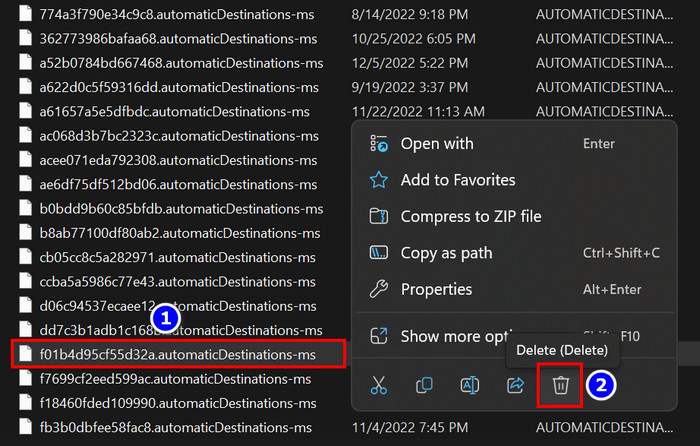
- Scroll down and find the f01b4d95cf55d32a.automaticDestinations-ms file.
- Right-click and Delete the file.
Check the Quick Access folders, and you will see it’s clean.
Also, check out our separate post on how to fix Windows can’t access network drive on Windows 11.
3. Apply the Command Prompt
Suppose you are an enthusiast and want to complete some operation with a simple command. Then you can use that expertise by cleaning quick access history with Command Prompt. The process of doing so is stated below.
Here are the ways to clear your quick access history via Command Prompt:
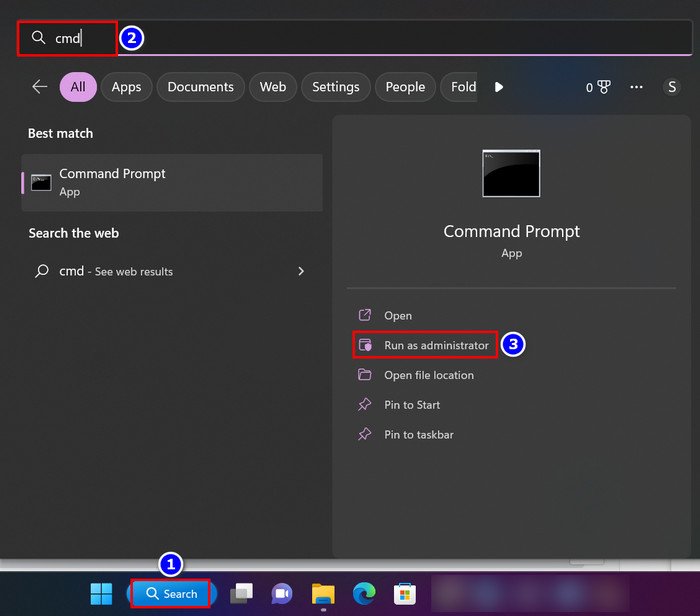
- Navigate to the Search box and type cmd.
- Choose the Run as administrator option for Command Prompt.
- Copy & paste the following command and hit Enter.
- del /f /s /q /a “%AppData%\Microsoft\Windows\Recent\AutomaticDestinations\f01b4d95cf55d32a.automaticDestinations-ms”
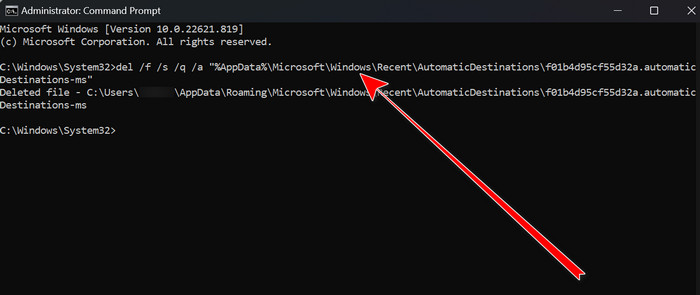
- del /f /s /q /a “%AppData%\Microsoft\Windows\Recent\AutomaticDestinations\f01b4d95cf55d32a.automaticDestinations-ms”
- Close the Command Prompt window.
After finishing the steps, move into the Quick Access toolbar, and you’ll find it’s become clearer than a shiny day.
Check our latest post on how PC won’t go to sleep mode in Windows 11.
FAQs
Can I delete quick access history from Windows 11?
Yes, you can delete quick access history on Windows 11. To do that, click on the Three dots option from File Explorer and choose Options. Then press the Clear button from the Privacy section.
How do I clear the quick access list in Windows 11?
Follow the instructions to clear your quick access list on Windows 11:
- Open File Explorer.
- Search for %AppData%\Microsoft\Windows\Recent\AutomaticDestinations.
- Delete the f01b4d95cf55d32a.automaticDestinations-ms file.
Where is quick access on Windows 11?
The quick access is located on the Start menu. Plus, you can find it on the top-left navigation panel of the File Explorer app.
Final Thoughts
Windows developers first introduced the Quick Access feature in Windows 10, and as a successor, Windows 11 also got this function.
Throughout this article, I have displayed three quickest and most effective ways with which you can delete your quick access history. Apply them accordingly to gain the maximum outcome.
If any questions arise in your mind related to this topic, ask away in the comment.