Updated your BIOS, made some changes, and saved it, but when you restarted your PC, you got a black screen! So, you’re freaking out, murmuring, “What have I done?” “What will I do now?”
Don’t worry! This is not an uncommon issue at all. Being in the tech industry for a long time, I often listen to people facing this issue.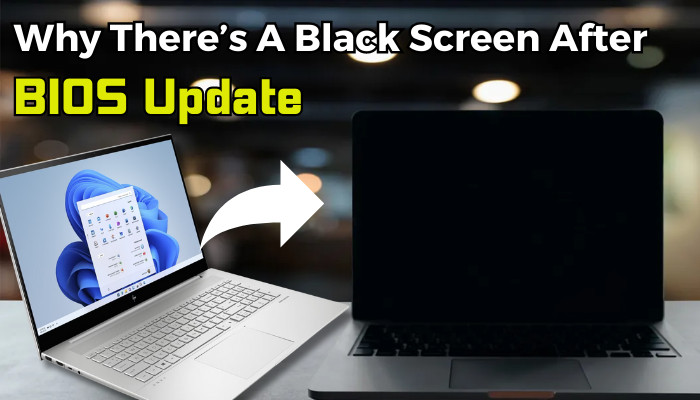
However, I will explain the reasons and demonstrate the proven solutions in this article. Let’s fix this!
Why is There a Black Screen After BIOS Update?
If the BIOS updating process gets interrupted, then the screen might get black after a restart. Sometimes corrupted graphics driver or faulty GPU could lead to this issue. Other reasons like failing CMOS memory, corrupted Windows, or faulty storage might be responsible for the black screen.
Besides these, there are other factors that might be involved behind the black screen after updating the BIOS, and such reasons are:
- Corrupted hardware or peripherals.
- Faulty graphics driver or GPU.
- Corrupted hard drive.
- Failing CMOS memory.
- Corrupted or incompatible BIOS.
- Overheated motherboard.
While updating the BIOS, you shouldn’t change anything to the BIOS. If you make some changes during the BIOS upgradation, you might face a black screen.
How to Fix Black Screen After BIOS Update
First, to fix the black screen after a BIOS update, ensure all the cables and the monitor are properly connected. Then unplug all the external peripherals as those might interrupt the PC from booting up. Unmount the graphics card and connect the monitor with MOBO’s display output port.
So, after bios update black screen might pop up, and besides the above, there are other methods that can fix the problem. Not only the black screen problem, sometimes PC won’t boot to BIOS and that is also a major problem.
Let’s say you want to enter the BIOS from your Windows 11 to make some changes in your BIOS for gaming, rendering, or working on something vital to you. As the motherboard or computer manufacturer has the update on the website, you updated your BIOS this way.
But, this is risky because it is seen that sometimes after updating BIOS, when people restart their computer, they find a black screen pops up. So, if something similar happens to you, follow the instructions and solve your problem.
Here are the steps to fix a black screen after the BIOS update:
1. Ensure Cables & Monitors Properly Connected
Sometimes monitor cable connection gets loose; all you get is a black screen. So, that’s a hardware issue. To sort this out, follow the below steps to ensure monitors & cables are properly connected.
- Switch off the monitor.
- Ensure the connection ports & cables port are connected properly.
- Replace the cables if there is a defect in the cables.
- Attach the cables correctly and switch on the monitor.
If there was a problem with the monitor connection, the black screen issue would be resolved by now.
2. Unplug External Devices
If faulty USB storage devices or peripherals like a mouse, keyboard, or printer are attached to the USB ports, these can negatively affect the BIOS startup and cause a black screen. That’s why you must turn on the PC by unplugging all the external devices.
- Force shut down the PC by pressing & holding the power button for 5 seconds.
- Wait till the system is completely turned off.
- Unmount all the USB external devices from the PC.
- Turn on the PC by pressing the power button.
If the screen isn’t black and the PC is turned on with the Windows logo, your problem is solved. After that, you can attach those peripherals back again.
3. Check for a Faulty GPU
Due to faulty graphics card screen might go black without giving any symptoms. If you’re using a GPU for a long time it is highly possible that it got degraded over time, and that’s why it becomes a faulty one.
Well, it’s an uncommon scenario, but coincidently the GPU might get crashed after you update the BIOS. So, check whether the GPU is working okay or not. If not, then connect the monitor cable directly to the MOBO’s display output port.
4. Resume the Interrupted BIOS Update
If the BIOS update process gets interrupted, a black screen issue might strike suddenly. That’s why you must resume the interrupted BIOS update to resolve the black screen problem. For that, you must turn off the PC and then remove the CMOS battery.
Then install it later and turn on the PC.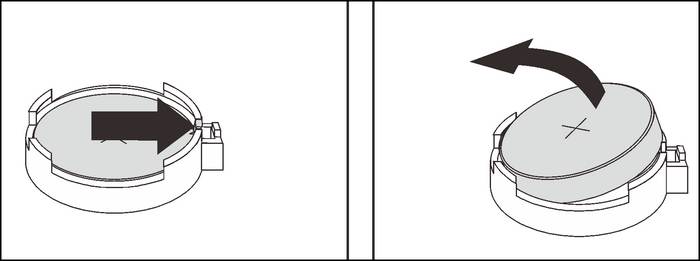
So, if you are using a desktop, then follow this:
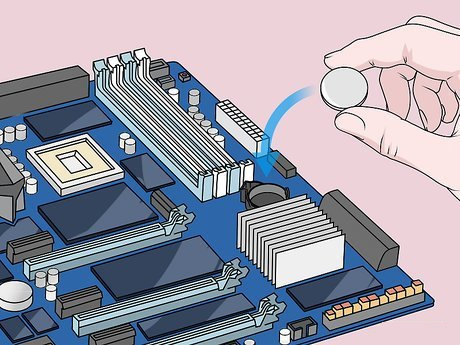
- Slide the side panel off.
- Track down the motherboard. It is a shiny, round metal, bigger than a watch battery.
- Remove the battery from the motherboard. Wait for 5-10 minutes.
- Replace the battery with a new one in the same place with the same orientation.
- Power up your PC.
After that, the BIOS update should resume automatically. But if you are a laptop user, you have to:
- Flip your laptop over and remove the screws one by one.
- Track down the motherboard and remove the shiny and round CMOS battery from the motherboard. Generally, it is placed within a small holding socket.
- Insert a new battery in the exact location with the same orientation.
- Rescrew every casing in the laptop and reinstall the battery.
- Reconnect the AC power and turn on your laptop.
Within a minute or two, the BIOS updating process should resume automatically.
If this process solves your problem, you don’t need to follow the fifth one. But if it doesn’t, don’t hesitate to follow the third method. Besides this, are you wondering what will happen if you turn on the PC without installing the CMOS battery?
Well, the PC will still boot up, but the BIOS settings will get reset, and the time & date will be inaccurate.
5. Short CMOS Jumper
Find the CMOS battery after powering off the PC, unplugging the power cord, and removing the screw. Here’s how:
- Use a jumper cap to short the CMOS pins. You can use any screwdriver or conductive material as a jumper cap.
- Press and hold the jumper cap for 10 seconds, and then remove it.
- Plug the power cord and power it up. See if the problem resolves.
As almost every laptop does not have a jumper, you can’t perform this operation on your laptop.
You might be wondering about jumpers right now if you don’t know what it is and what the work of a jumper is.
So, what do Jumpers do?
In your A levels, you might be familiar with the shunt. Well, these jumpers work like shunts, or you can consider them as a shunt. Even it is also called jumper shunt sometimes.
So, here are all three solutions that have been stated. Follow this, and I believe you can fix your problem. In case you are an intel user and can’t solve the problem, keep reading.
How to Solve Computer Doesn’t Boot After BIOS Update for Intel
If your desktop board is from Intel and while updating your BIOS, your computer doesn’t boot right after the update; you can solve your problem by following the methods below.
Method 1: Clear the CMOS
Clearing the CMOS memory can solve the BIOS corruption. But make sure to note down the existing settings, as all of your customized settings in the BIOS will be lost when you clear the CMOS memory. Here’s how:
- Turn off all the peripheral devices and disconnect the computer power cord from the AC power source.
- Slide the side panel after removing the screws.
- Move the configuration jumper from pins 1-2 to pins 2-3.
- Plug the power back in and turn on your computer.
- Your computer will boot into BIOS Set Up Maintenance Mode automatically.
- Press F9. It’ll help restore the BIOS factory default values.
- Press F10 to save and exit.
- Turn off your PC and disconnect the computer power cord from the AC power source again.
- Move the configuration jumper from pins 2-3 to 1-2.
- Slide the panel and re-screw it.
- Reconnect the AC power source and turn your computer on.
See if your computer boots or not. I hope it does. But if it doesn’t, follow the next one.
Method 2: Remove the CMOS battery
You can boot up your PC by removing the CMOS battery, as it is one of the proven methods of bringing back the ability for a PC to boot after updating BIOS. To remove the CMOS battery:
- Turn off all the peripheral devices and disconnect the power cord from the AC power source.
- Find the CMOS battery on the motherboard and remove it.
- Wait 10 minutes for the CMOS battery to lose the settings.
- Reconnect the CMOS battery as in the previous orientation.
- Plug the battery wires back into the connectors.
- Reconnect the AC power source and turn your computer on.
Thus following this process, your computer will definitely be able to boot up after the BIOS update for Intel. Speaking of updating the BIOS, all the latest motherboards, like B550 and X570, support updating the BIOS without the CPU. But you must know how to do that properly.
Fix ASUS Notebook Black Screen No BIOS After BIOS Update
Some ASUS Notebook users complained recently about having a black screen on their Notebook after the BIOS update. So, different methods are being applied regarding this. But the process I’m going to tell you is the most straightforward and most working of all. All you have to do is:
- Press & hold the power button for at least 40 seconds to force shutdown it.
- Unplug your charger, i.e., AC power source.
- Wait for 2-3 minutes and then replug the AC adapter.
- Press the power button again. It’ll help resume the BIOS update.
- Don’t interrupt by doing something stupid. Wait for your BIOS update to complete.
- Restart your laptop and press and hold F2 to enter the BIOS utility while booting up.
- Press F9 to load the Default Settings. Press Enter.
- Press F10 to save and exit. Then, press Enter.
Your laptop will restart automatically and thus resolve your problem. Yet if the issue remains, you should undoubtedly go to your nearest ASUS customer service center for technical support.
Apart from this, if you’re using an HP laptop you can also access HP’s advance BIOS just like in ASUS.
FAQs
How can you fix the black screen after BIOS update?
Hold the power button for 40 seconds to turn off the computer, then unplug the power cord or remove the battery. Then connect the power cord or Ac adapter again and the battery. Then turn on the PC, and it should resume updating the BIOS.
Why is your BIOS screen black after the update?
A black screen after a BIOS update is a common problem, and this phenomenon happens due to the BIOS update failing halfway through. Besides this, other reasons like faulty graphics driver or GPU might give a black screen.
Can you recover from a failed BIOS update?
Just in case your motherboard lacks a dual BIOs feature, recovery jumper, or switch, you can still able to recover from a failed BIOS update by using a bootable USB or CD. For that, you must need another PC to flash the exact BIOS file into the thumb drive.
Conclusion
Updating your BIOS can be tricky, but you decided to go for it. Congratulations! While doing so, facing an issue like a black screen after the BIOS update is absolutely fine. I hope the methods I mentioned above solved the issue already. For further queries, comment below.


Where exactly is the BIOS battery on a ASUS Notebook PC X553S motherboard.
you’ll need to carefully disassemble the laptop by removing the back or bottom panels and locating the coin-cell battery, usually a CR2032, on the motherboard.