Content is currency. It’s the most powerful and popular strategy behind every successful industry.
Nowadays, it’s becoming difficult for businesses and companies to keep pace with the creative and innovative world of content. However, using the adaptive cards, you can improve user engagement and go ahead of everyone.
Adaptive Cards—a JSON-based scheme—is a flexible and attractive format allowing users to embed any content in an Outlook mail. It is beautiful by default, and huge customization helps you make it even better and impress the recipients.
In this article, I’ll provide the step-by-step procedure to set up the adaptive cards and send them to an Outlook user. So, let’s begin.
How to Send Adaptive Cards in Microsoft Outlook
Sending adaptive cards sounds like quick and simple work. But, it’s a combined task, containing adaptive card designing, creating the capture response flow, and setting adaptive card settings. The user must follow an order to send adaptive cards via Outlook clients.
Note: This process is only applicable for the Outlook Web, Outlook 365, desktop and mobile clients. Other email clients don’t support the adaptive cards feature.
Read the instructions carefully and follow the methods step-by-step to send beautiful and innovative adaptive cards to your office, colleagues, or an individual.
Here are the steps to send adaptive cards in Microsoft Outlook 365 and clients:
Design Adaptive Card
To send an adaptive card, you need to design it first. Adaptivecards is powered by Microsoft and used to sketch your actionable message.
Follow the process below to create and design an adaptive card using various elements.
Here are the procedures for designing an adaptive card:
- Visit the Adaptive Card website using a browser.
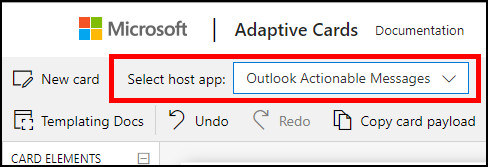
- Use the template or create a New card.
- Choose Outlook Actionable Messages from the Select host app.
- Add Elements to design your adaptive card.
After finishing the design, your adaptive card is ready to capture an HTTP Response. You must create a response flow to get the HTTP URL.
Continue reading the following steps to create a flow for capturing responses.
Also, check out our separate post on Outlook not marking emails as replied.
Create Flow to Capture Response
Adaptive cards require a response flow to send and receive the user action. Power Automate—a Microsoft workflow creator—is there to design your HTTP response flow.
Here are the steps to create a capture response flow:
- Go to the Power Automate website.
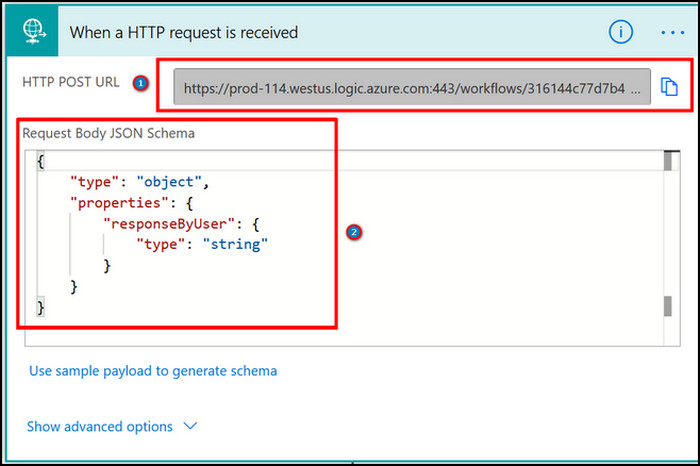
- Create a flow that accepts an HTTP request.
- Copy the HTTP POST URL for future use.
- Click on Request Body JSON Schema and paste the following.
{
“type”: “object”,
“properties”: {
“comments”: {
“type”: “string”
},
“outcome”: {
“type”: “string”
}
}
}
Create a response for the adaptive card to show an output when the user submits a response.
- Go to Response.
- Enter 200 at Status Code and type CARD-UPDATE-IN-BODY as true in Headers.

Once you’ve completed finishing the HTTP response, head back to your design in adaptivecards.
Check out the easiest way to how to recall an email in Outlook.
Complete Adaptive Card Setup
You’ll receive an HTTP URL after creating the workflow. It’s required to complete the adaptive card setup. There are additional settings to tweak and find out the steps below.
Here is the way to complete the adaptive card setup:
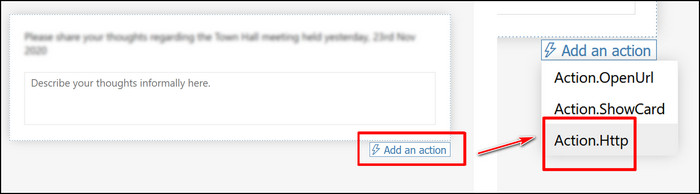
- Click on the card body.
- Press on Add an action button at the bottom.
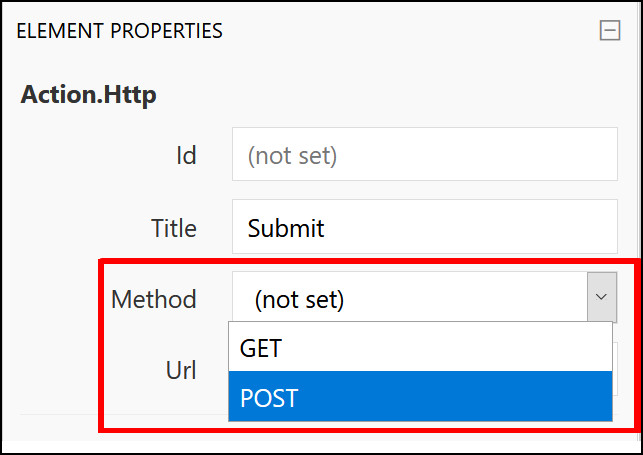
- Select Action.Http.
- Click on ELEMENT PROPERTIES.
- Paste the HTTP URL from the response flow in the url field.
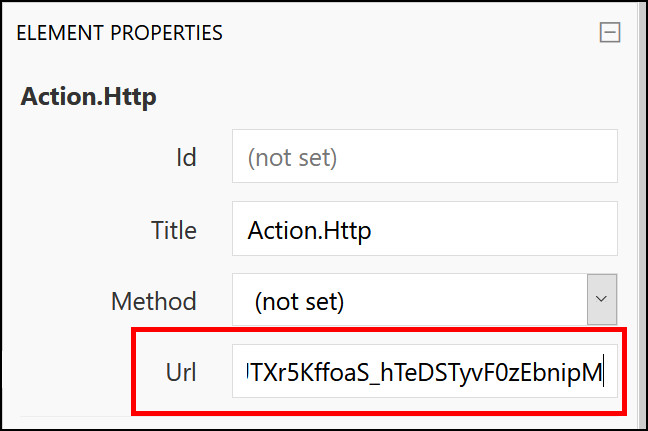
- Choose POST from the Method.
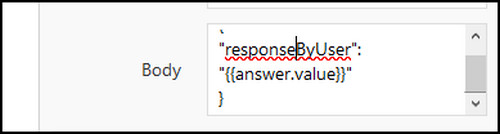
- Press on Body and paste the following.
{
“responseByUser”:
“{{answer.value}}”
}
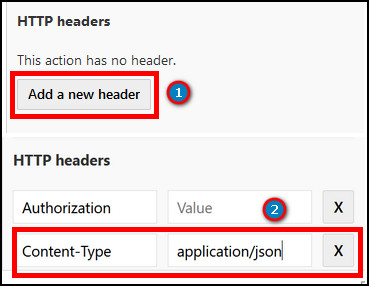
- Click on Add new header.
- Write Content-Type in Name and application/json as Value.
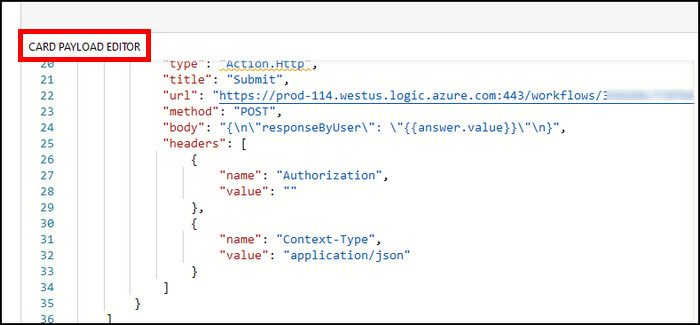
- Copy the full payload from the CARD PAYLOAD EDITOR.
Now, you need to go to Power Automate again and finalize the sending process.
Follow our guide on how to view message headers in Outlook.
Send Adaptive Card in Outlook Email
After getting the payload, you’re just one step away from sending an adaptive card via Outlook.
But before sending the card, make sure everything is going smoothly. You need to include the Actionable Message Debugger add-ins to your account in order to avoid any debugging issues.
Consider reading the following process to enable the Actionable Message Debugger.
Here are the steps to enable the Actionable Messages Debugger:
- Open Outlook.
- Click on Get Add-ins from the Home tab.
- Type Actionable Messages Debugger in the search box.
- Press Add to enable the add-ins.

Check out the easiest way to enable read receipts in Outlook.
It will enable the adaptive card add-ins for your Outlook. Now, let’s proceed to our final task before sending the email. The following steps will describe the way to insert email action and how to set it.
Here is the method to send the adaptive card in Outlook:
- Navigate to Power Automate and open your flow.
- Click on Compose.
- Paste the payload in the compose box.
- Add a Send an email (V2) action.
- Switch to code mode.
- Put the Compose outcome enclosed in
<script type=”application/adaptivecard+json”>
</script>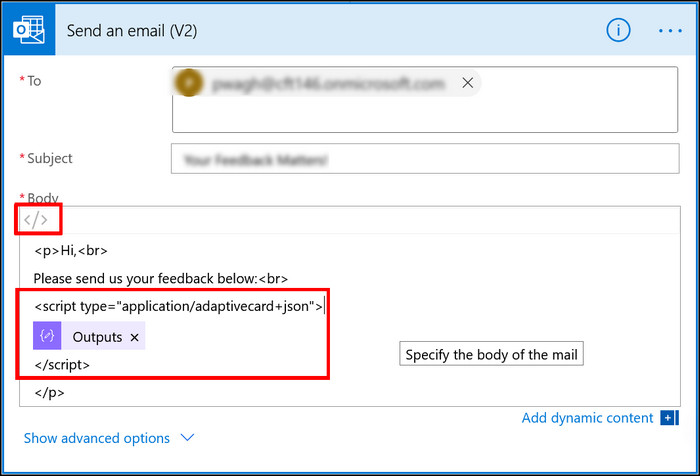
- Run the flow and send emails to a recipient.
That’s it! You’ve successfully sent an Outlook email with adaptive cards. Use the process again to send emails to other individuals or groups.
Here’s a complete guide on how to add email signature in Outlook.
Frequently Asked Questions
What is the adaptive card in Outlook?
The adaptive card is a format designed for Outlook Actionable Messages to provide flexibility and a rich visual presence in an Outlook email.
Which client supports adaptive cards?
The adaptive card is supported by Outlook 365, Outlook on the Web, and Outlook desktop/mobile clients.
How can I design adaptive cards for Outlook?
You can design adaptive cards for Outlook from Adaptivecards and Azure Website.
Conclusions
The adaptive card is a modern system to increase productivity and creatively spread your name.
This article has explained the process of designing your adaptive card and sending it to an Outlook email.
I hope it has helped you to become innovative while sending an email, and if you have any questions, don’t forget to comment.
Goodbye.