You messed up a setting or you don’t own a VR headset anymore so you are hoping to find a way to completely wipe Steam VR and its data from your computer.
How to uninstall Steam VR?
If you are worried about how you can completely remove all of SteamVR data and uninstall it properly, just don’t. I am going to explain everything step-by-step using a method that I used myself when I uninstalled SteamVR.
So, let’s just get right into the main content without wasting any more time. I suggest you get a coffee while you read as this might take some time. Also, please don’t skip ahead of any part because then you will only have more doubts.
How To Uninstall And Reinstall SteamVR?
You can uninstall and reinstall SteamVR by clearing the local data from Steam first and then removing advanced SteamVR settings. After this, when you uninstall SteamVR from the Control Panel and then reinstall, you can start from scratch.
I have occasionally changed the SteamVR settings to the wrong configuration and while it improved my experience at times, it also caused performance issues and various other problems. To fix that, I needed a fresh reinstall to start from scratch just like you do now.
If you uninstall SteamVR normally, by going to Programs and Features or Control Panel, then the reinstall won’t have the desired effect because all your Settings will still be there. Therefore, you need to get rid of all these Settings before you uninstall.
You have to do a few things in Steam first and if you have ever cleared one of your Steam game’s app data from Steam before, this should be a piece of cake for you.
Here are the steps to Uninstall And Reinstall SteamVR:
- Launch the Steam application and click on the Library option at the top.

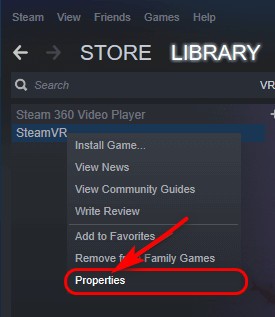
- Look for SteamVR under Library and right-click on it and select Properties.
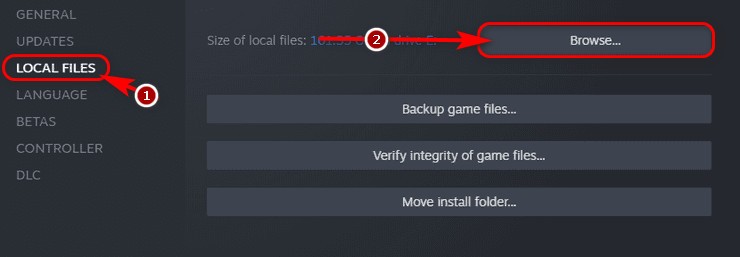
- Switch to the Local Files tab and click on the option that says Browse. Delete all the files and folders in the new window.
Quickly check out our epic guide on how long do PS5 Controllers last.
Once you have deleted the Steam local data, follow these steps to get rid of the leftovers:
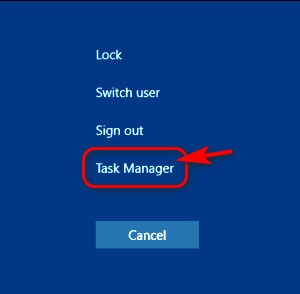
- Press the Ctrl, Alt, and Del keys on your keyboard at the same time and select Task Manager from the page.
- Look for any processes related to Steam or Steam VR and End them one by one.
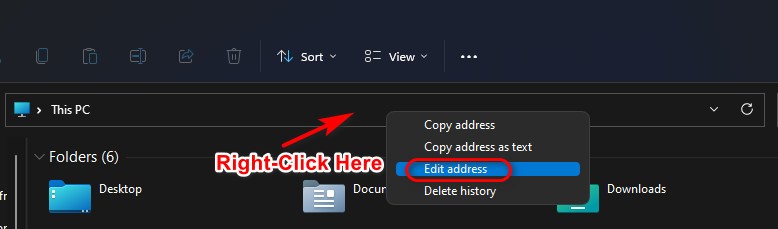
- Copy and paste this address on the address bar on This PC by right-clicking and selecting Edit address.
C:\Program Files (x86)\Steam\steamapps\common
- Once you press enter on your keyboard, you should see a few folders. Delete the folder named SteamVR.
- Copy and paste this address as you did earlier.
C:\Program Files (x86)\Steam\config
- You need to delete the file named steamvr.vrsettings in this folder.
- Similarly, delete the folder named lighthouse.
Alright, now that you have successfully deleted all the temporary files and settings related to SteamVR, you need to simply uninstall Steam VR exactly how you uninstall Steam games. Just keep in mind that you will also lose all your Steam VR games as well.
Follow our guide on how to Fix VR Headset Not Working.
Here are the steps:
- Launch Steam and go to the Library section just like you did earlier.
- Do a right-click on SteamVR and select the Uninstall option.

- Follow the instructions displayed on the screen to complete the uninstallation.
You must be thinking that that’s a lot of files you just deleted so it’s definitely safe to go ahead and reinstall now. Well, that is not quite true.
There’s one last thing you need to do before you can safely reinstall Steam VR.
- Just like you did previously, copy and paste the following address to your This PC address bar.
%ProgramFiles(x86)%\Steam\steamapps\common
- If you see a SteamVR folder in this folder, delete it.
That’s it. You have finally uninstalled Steam VR the proper way and there shouldn’t be any residual files left. This means that all your previous games and settings no longer exist.
I recommend you reboot your computer before installing Steam VR but it’s not necessary.
Here’s how you can reinstall Steam VR:
- Launch Steam and navigate to the Library. All you need to do is click on the install button next to Steam VR.
- In some cases, you might not see the install button. When this happens, just re-select the SteamVR tool from the Steam library and you should see the install button now.
This should solve any unexpected problems you might be having or if you just wanted to wipe all existence of Steam VR from your computer.
This rarely ever happens, but if your issue is still repeating even after following the steps I listed above, then my suggestion is to completely uninstall Steam and any other VR-related applications from your PC.
This may sound extreme but it has a very good chance of working so it’s definitely worth trying.
Here’s a complete guide on how to Fix VR Black Screen.
How Do I Uninstall Steam From Windows?
You can uninstall Steam from Windows using the same steps you need to delete any Windows program by going to the Uninstall Programs section in the Control panel and clicking on Uninstall. This is because Steam doesn’t store any residual files like Steam VR.
Here are the steps to uninstall Steam from Windows:
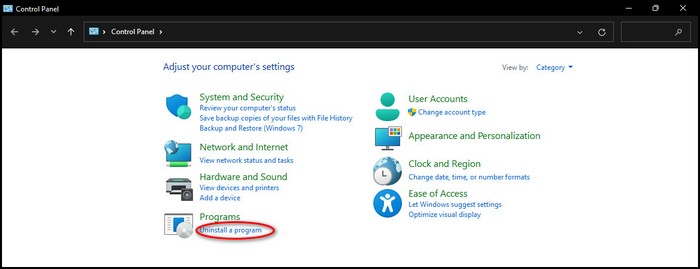
- Search for Control Panel and select the top result.
- Click on Uninstall a program under Programs.
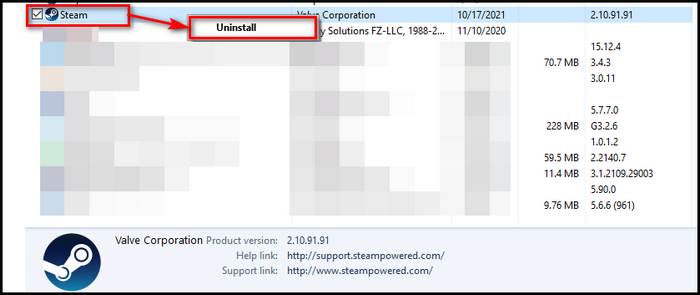
- Look for Steam in the list of programs and select it. After that, click on the Uninstall/Change button in the top left corner of the window.
- Click on Automatic on the new window and click next.
- Follow the instructions on the screen and Steam should be fully removed from your PC in a few seconds.
What you need to keep in mind before doing this is that it will not only delete Steam but also remove all the downloaded content, including games and any saved data.
The good news is that Steam has provided an option for you to backup all your games and data. You can access that by following these steps:
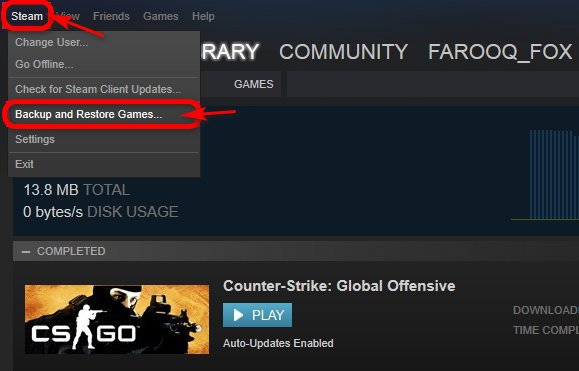
- Launch Steam and then click on the Steam menu on the top right corner of the window.
- Look for the option named Backup and Restore Games from the list and click on it.
- On the Backup and Restore Programs window, Steam will let you choose which games you want to backup, and then you need to select the destination where the data will be backed up. I recommend you choose a folder on your hard drive.
- Click on Next to begin the backup process and once that’s done, you can safely restore your games whenever you reinstall Steam again, whether it’s five minutes later or five years later.
FAQ
Question: How do I repair Steam VR?
Answer: You can repair Steam VR by either reinstalling it from scratch or by disabling Steam VR addons. You should also try disabling all your Steam VR add-ons and adjusting graphics card settings or updating graphics card drivers.
Question: Why did Steam VR uninstall itself?
Answer: Steam VR uninstalled itself because an antivirus installed in your system either edited or deleted the appmanifest files present in the Steam folder. This happens because the file has information regarding the SteamVR location so you must edit it manually to fix it.
Question: How do I exit Steam VR beta?
Answer: You can exit Steam VR beta by going to the Betas tab in SteamVR properties and choosing None in the drop-down menu available to opt-out of Beta.
Final Thoughts
The steps to uninstall Steam VR might seem a little complicated if you are just reading it but when you actually do the steps yourself, you will see how simple it actually is. So, don’t get overwhelmed for no reason.
If you enjoyed reading this article, follow our website for more ultimate guides like these and you can always reach us if you have any issues.