Excel is a widely accepted application for sorting, accumulating, and keeping track of essential data. And for that reason, often, you need to share specific data within the workplace.
That could be sending the excel file via email or printing a copy. The problem occurs while printing the data. By default, Excel tends to print out the entire sheet. That’s not what you want if you don’t intend to share every little detail with others.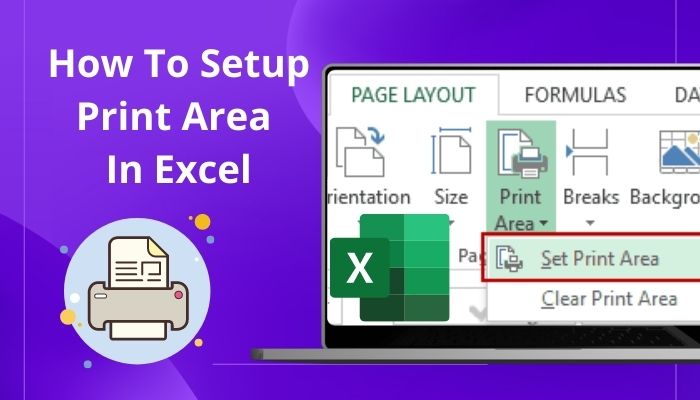
To avoid those irregularities, specify the area in a sheet to print.
In this article, I’ll describe how you can set that specified area in an Excel sheet for printing.
Let’s begin.
Set a Print Area in Excel with Easy Steps
A print area is the range of cells you want for the final printout. Let’s say you are an accountant of a multinational company. You’re currently working on the entire sales report that is recorded in an Excel sheet. One day, your manager asks for the August 2022 sales report.
Clearly, you don’t want to print the entire sales report of the company (from 1992-2022). And not even the sales report for every month of the year 2022.
So, what you can do is, Select the cells that contain the August 2022 report and only print that data. Sounds fair, right? Let’s see how you can do that.
Here are the steps to set a specific print area in Microsoft Excel:
- Select the range of cells that you want to print.
- Move to the Page Layout tab from the ribbon.
- Click Print Area in the Page Setup group.
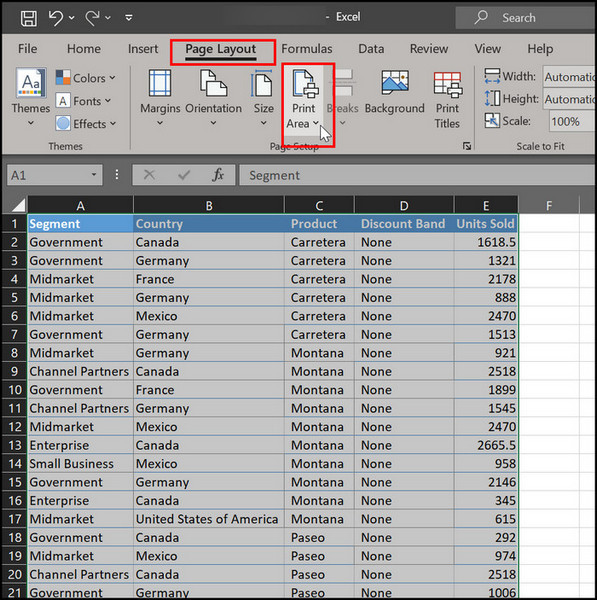
- Click Set Print Area.
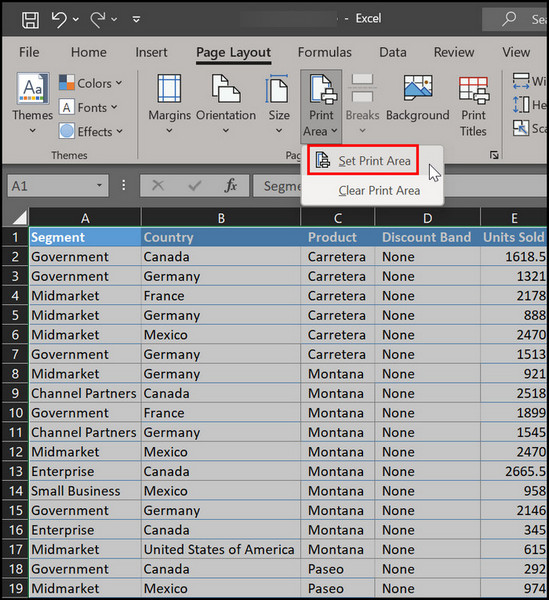
- Go to the File tab, and click Print.
You’ll notice only the selected print area is available on the Print preview page. Now, you can print a copy with those specific cells.
Once you set up the print area, you might want to review whether the selected cells are correct or not. For that, Excel offers a feature named Page break preview.
Though page break can be used for other purposes, you can use it to view Excel print areas.
Check out our separate post on how to MS Excel Lock a Cell.
Here are the steps to view a print area in Excel:
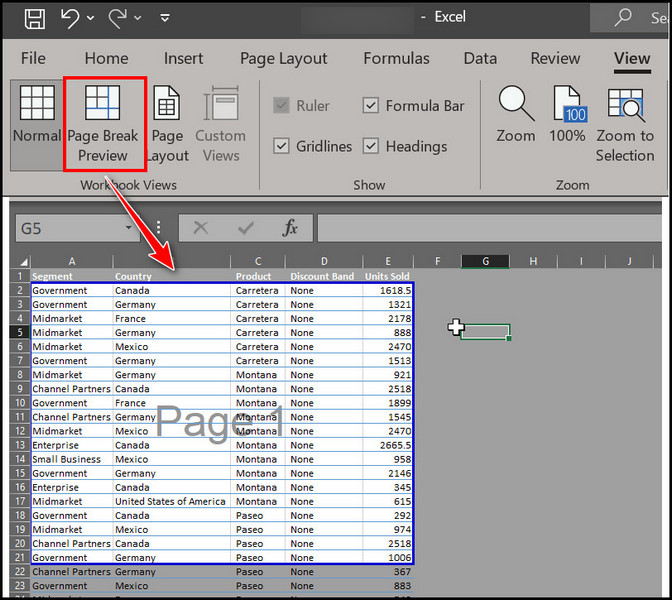
- Go to the View tab on your Excel sheet.
- Click on Page Break Preview. You’ll notice the selected print area in a box.
Switch back to normal mode once you make sure the selected cells are correct. Then you can print the sheet.
Usually, verifying is necessary when you’re setting multiple cells to merge for printing. But you don’t know how to set up multiple print areas from a sheet? No worries, check out the following section.
Here’s a complete guide on how to Lock and Unlock Cells in Excel.
How to Set Multiple Print Areas in Microsoft Excel
The quickest method to set multiple print areas is using a keyboard and mouse. Press and hold the Ctrl key and select the cells you want to print out. Then, move to the Page Layout tab and navigate to Print area > Print area. You’ll set multiple areas for print in a moment.
But, as you are working with thousands of data cells, this method might not be suitable for you. There’s an even better solution available for you.
Here’s the procedure to setup multiple ranges to print in Excel:
- Open the Excel sheet and switch to the Page Layout tab.
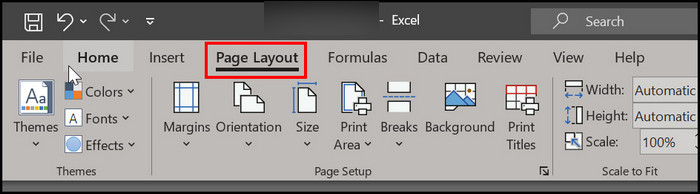
- Click the dialog launcher in the Page Setup group. Page Setup dialog box will open.
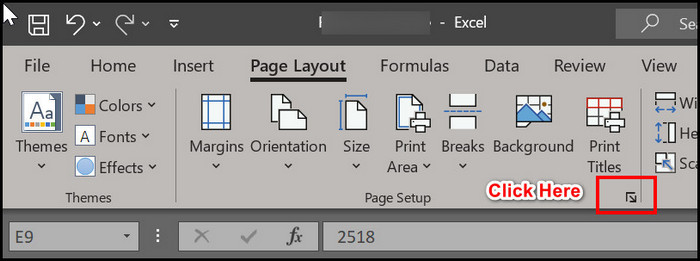
- Go to the Sheet tab, and put the cursor in the Print area field.
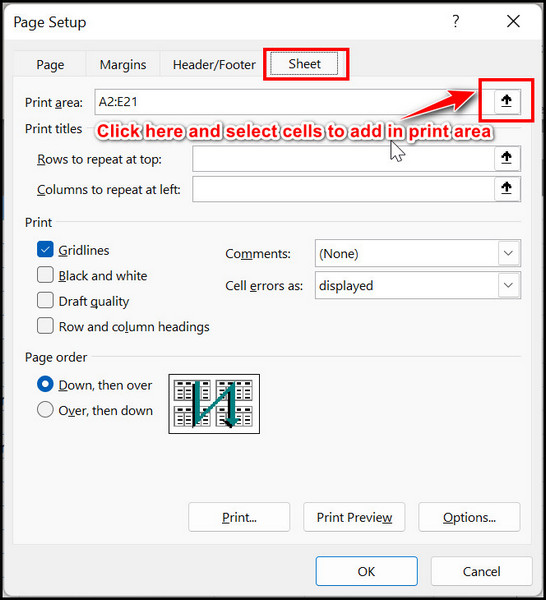
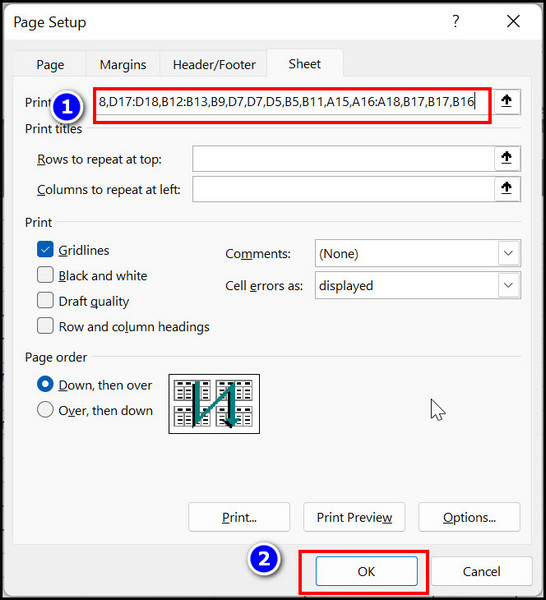
- Select multiple ranges by holding the Ctrl key and clicking on the cells.
- Click OK when you select all the cells.
That’s it. After following these steps, you can set up multiple cells from different ranges on your spreadsheet and include them in the print area.
Follow our guide on how to Mail Merge in Outlook with Excel & Word.
Edit Print Area in Excel
After setting up a print area, it’s mandatory that you’ll need to include other cells. Even you might need clear the printing area to remove the existing cells.
Here are the methods to change print area in Excel:
Expand Print Area
If you want to add cells to an existing print area, the subsequent steps will help you.
Here’s the procedure to expand the print area in a worksheet:
- Select the cells that you want to include in the existing print area.
- Go to the Print Layout tab.
- Click Print Area from the Page Setup group.
- Select Add to Print Area.
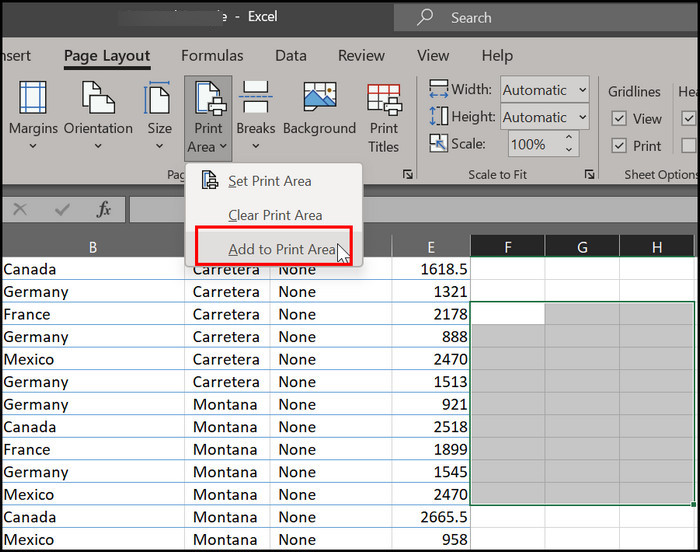
Press Ctrl + S to save the changes. The cells that you selected later will be added to the existing print area.
Clear Print Area in Excel
Clearing print areas will be appropriate when your worksheet contains multiple print areas. That way, you’ll be able to replace it with a fresh print area.
Here are the steps to clear a print area in Excel:
- Open the worksheet where you added multiple print areas.
- Navigate to Page Layout tab > Clear Print Area.

Save the document to apply the changes. Remember, you need available cells in the print area section to clear them off.
Having any trouble setting up cells in the print area? Follow further instructions.
Here’s a complete guide on how to Copy Values Without Formulas on Excel.
Why Can’t I Set Print Area in Excel?
Mostly, due to faulty printer settings, you can’t assign cells in the print area. Other than that, when the column size exceeds the paper size, you’ll not be able to set the print area in MS Excel. Apply the subsequent troubleshooting tips to avoid the issue.
First, you need to clear the print area to solve those issues. Then, you need to adjust the column size. You can merge two columns into one to reduce the size.
Also, verify that only the necessary cells are set to print when you’re in print preview mode.
After following those instructions, you’ll be able to set up the print area without any problem.
Frequently Asked Questions
Can I include additional cells after setting up the print area?
Yes, just highlight the additional cells and go to print area > Add print area.
How to View print area in Microsoft Excel?
Go to the View tab on your Excel sheet > Click on Page Break Preview.
What happens when I clear the print area cells from Excel?
Your sheet will be in the default mode. After clearing the cells from the print area, you’ll have to print the entire document.
Conclusion
Creating a print area in Excel lets you print specific document parts. Throughout the article, I’ve discussed different ways to set up that feature.
If you have any queries regarding this matter, feel free to ask in the comment section. A team of Excel experts will be delighted to answer your questions.